1
2

Delete article

Deleted articles cannot be recovered.

Draft of this article would be also deleted.

Are you sure you want to delete this article?

More than 3 years have passed since last update.

VSCode+dockerで開発環境をサクッとつくる基本手順

Posted at

はじめに

Node.js,Vue.js,Vuetifyの環境を例に手順を記載します。
使用する言語により開発環境にインストールするパッケージや、Dockerのイメージは変更してください。

事前準備

Docker desktopをインストールしておく
VSCodeにRemote-Containers Pluginを入れておく
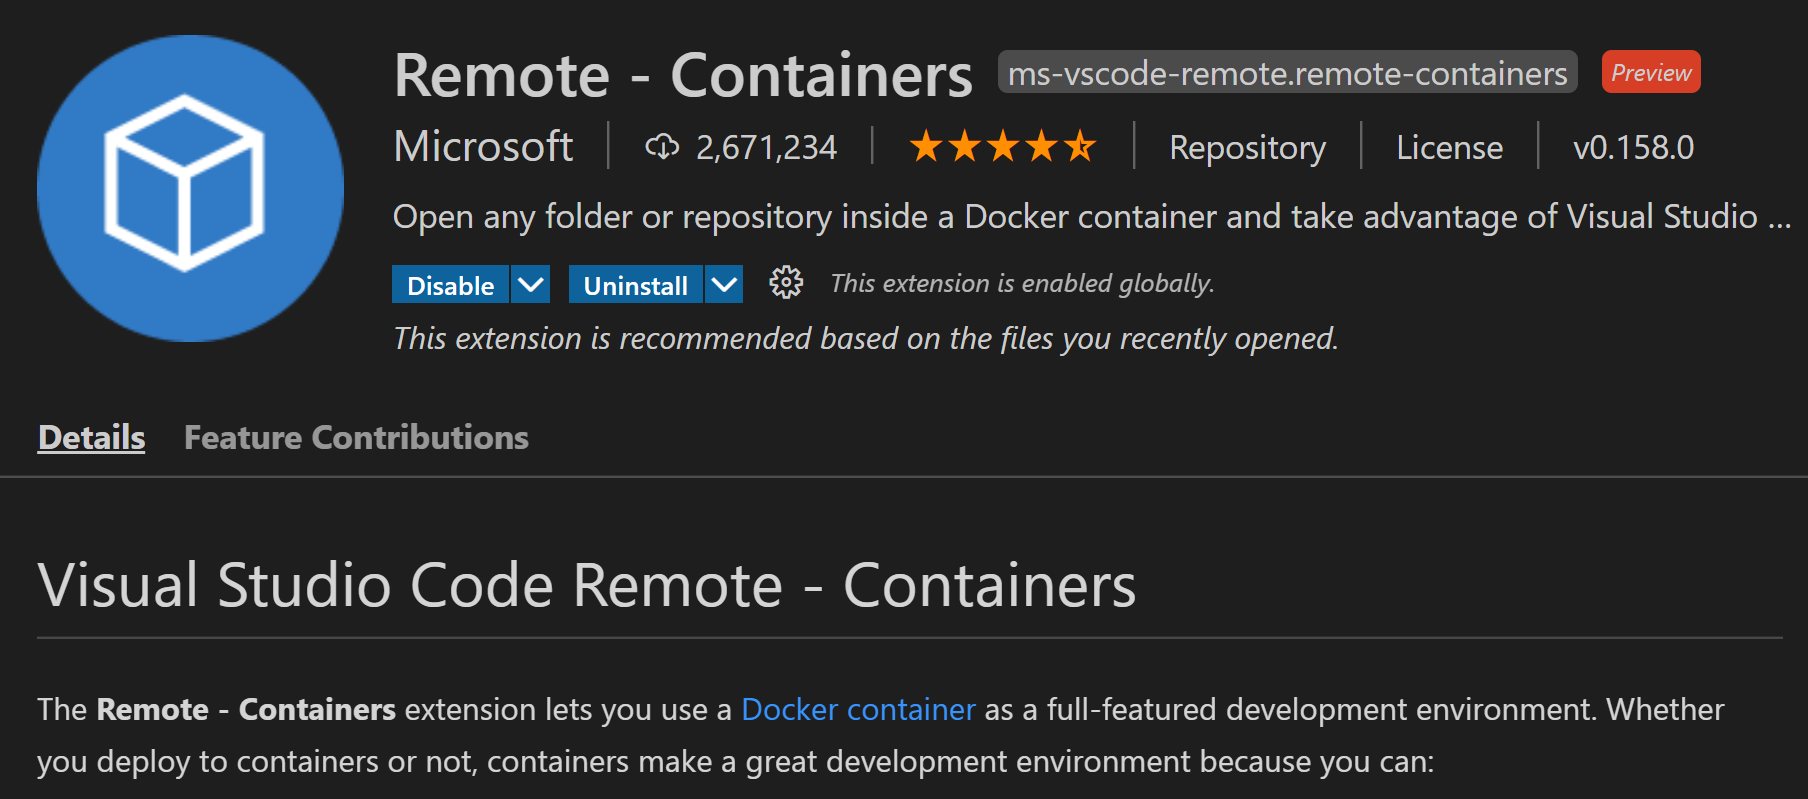
image.png

Windowsのファイルシステムにコンテンツおいて、コンテナで参照すると速度がかなり遅くなるらしいです。WSL2内にファイルを置いた方よいそうです。
このため、WSL2も使えるようにして、います。

手順

  1. ソースを作成するフォルダを作成
    work/vuetify01

  2. VSCodeでこのフォルダを開く

  3. Ctrl+Shift P でコマンドパレットを開いて、Add Development Container Cinfiguration Filesを開く
    image.png

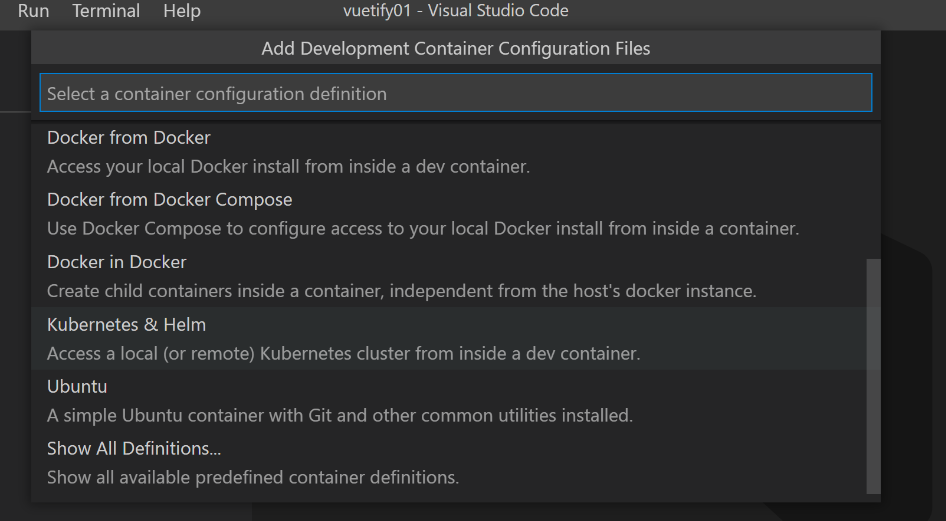
  4. Show All Definitionsを選択
    image.png

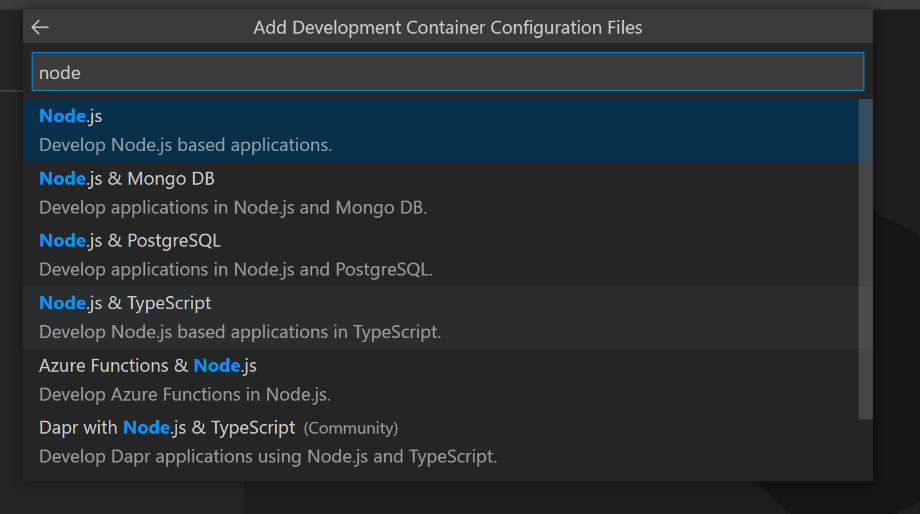
  5. コンテナを選ぶ。今回はNode.js & TypeScriptにしてみます。
    image.png

  6. バージョンを選択
    image.png

  7. devcontainer.jsonファイルに"postCreateCommand": "yarn global add @vue/cli && yarn install",を追加
    こんな感じ
    image.png

  8. コマンドパレットで、Rebuild and Reopen in Containerを実行
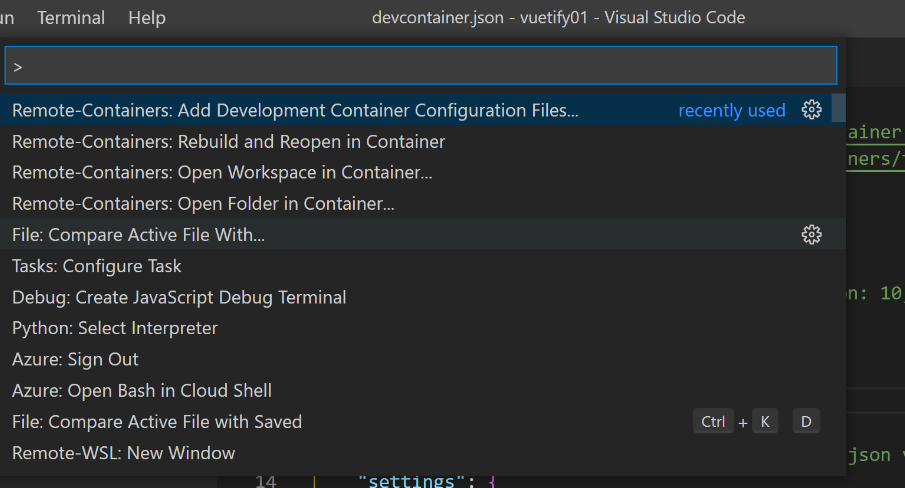
    image.png
    VSCodeが再起動して、Containerが起動し接続した状態になります。
    ターミナルを開くと、コマンドプロンプトがコンテナ内になっていることが分かります。nodeも使える状態になっています。
    image.png

  9. vueプロジェクトの作成や、追加パッケージのインストール

$ cd ..
$ vue create vuetify01
$ cd vuetify01/
$ yarn serve
$ vue add vuetify

以上
1
2
0

Register as a new user and use Qiita more conveniently

  1. You get articles that match your needs
  2. You can efficiently read back useful information
  3. You can use dark theme
What you can do with signing up
1
2

Delete article

Deleted articles cannot be recovered.

Draft of this article would be also deleted.

Are you sure you want to delete this article?