今年の夏にEFSがついに東京リージョンで使用可能になりました。
EFSを使用することでJenkinsサーバのストレージを外部に持たせることができ、
ステートレスな構成にすることができます。
つまりJenkinsサーバは停止してもストレージはEFSで永続化されているので
オートスケーリンググループで Jenkins EC2 を管理できます。
スポットインスタンスが使用できそうです。今回は次のような構成にしてみようと思います。

JenkinsをインストールしたAMIを用意する
まずはJenkinsをインストールしたAMIを作成していきましょう。
任意のVPC、サブネットを指定してEC2を起動してください。
VPC、サブネットの構築はこちらのテンプレート
---
AWSTemplateFormatVersion: "2010-09-09"
Description: jenkins

Parameters:
  Env:
    Description: An environment name that will be prefixed to resource names
    Type: String

Resources:

  # See. https://github.com/cmatsuoka/figlet
  #  _   _ _____ _______        _____  ____  _  __
  # | \ | | ____|_   _\ \      / / _ \|  _ \| |/ /
  # |  \| |  _|   | |  \ \ /\ / / | | | |_) | ' /
  # | |\  | |___  | |   \ V  V /| |_| |  _ <| . \
  # |_| \_|_____| |_|    \_/\_/  \___/|_| \_\_|\_\

  # VPCを作成するとデフォルトでセキュリティグループ、ネットワークACL、
  # ルートテーブルができますが、名前の指定を含む、各種設定をすることができません。
  VPC:
    Type: AWS::EC2::VPC
    Properties:
      CidrBlock: 10.192.0.0/16
      EnableDnsSupport: true
      EnableDnsHostnames: true
      Tags:
        - Key: Name
          Value: !Sub ${Env}-vpc

  VPCFlowLogs:
    Type: "AWS::EC2::FlowLog"
    Properties:
      LogGroupName: !Sub ${Env}-vpcflowlogs
      DeliverLogsPermissionArn: !GetAtt VPCFlowLogsRole.Arn
      ResourceId: !Ref VPC
      ResourceType: "VPC"
      TrafficType: ALL # ALL | ACCEPT | REJECT から選択

  # VPCFlowlogsがCloudwatch Logにログを書き込むためのロール
  VPCFlowLogsRole:
    Type: AWS::IAM::Role
    Properties:
      RoleName: !Sub ${Env}-vpc-flow-logs-role
      AssumeRolePolicyDocument:
        Version: '2012-10-17'
        Statement:
          - Effect: "Allow"
            Principal:
              Service:
                - "ec2.amazonaws.com"
            Action:
              - "sts:AssumeRole"
      Path: "/"
  VPCFlowLogsPolicy:
    Type: 'AWS::IAM::ManagedPolicy'
    Properties:
      Path: "/"
      Description: "VPCFlowLogsPolicy"
      ManagedPolicyName: !Sub ${Env}-vpc-flow-logs-policy
      PolicyDocument:
        Version: "2012-10-17"
        Statement:
          - Effect: "Allow"
            Action:
              - "logs:CreateLogGroup"
              - "logs:CreateLogStream"
              - "logs:DescribeLogGroups"
              - "logs:DescribeLogStreams"
              - "logs:PutLogEvents"
            Resource:
              - "*"
      Roles:
        - !Ref VPCFlowLogsRole

  #  ___ _   _ _____ _____ ____  _   _ _____ _____
  # |_ _| \ | |_   _| ____|  _ \| \ | | ____|_   _|
  #  | ||  \| | | | |  _| | |_) |  \| |  _|   | |
  #  | || |\  | | | | |___|  _ <| |\  | |___  | |
  # |___|_| \_| |_| |_____|_| \_\_| \_|_____| |_|
  #
  #   ____    _  _____ _______        ___ __   __
  #  / ___|  / \|_   _| ____\ \      / / \\ \ / /
  # | |  _  / _ \ | | |  _|  \ \ /\ / / _ \\ V /
  # | |_| |/ ___ \| | | |___  \ V  V / ___ \| |
  #  \____/_/   \_\_| |_____|  \_/\_/_/   \_\_|

  InternetGateway:
    Type: AWS::EC2::InternetGateway
    Properties:
      Tags:
        - Key: Name
          Value: !Sub ${Env}-igw

  InternetGatewayAttachment:
    Type: AWS::EC2::VPCGatewayAttachment
    Properties:
      InternetGatewayId: !Ref InternetGateway
      VpcId: !Ref VPC

  #  ____  _   _ ____  _   _ _____ _____
  # / ___|| | | | __ )| \ | | ____|_   _|
  # \___ \| | | |  _ \|  \| |  _|   | |
  #  ___) | |_| | |_) | |\  | |___  | |
  # |____/ \___/|____/|_| \_|_____| |_|

  PublicSubnet1:
    Type: AWS::EC2::Subnet
    Properties:
      VpcId: !Ref VPC
      AvailabilityZone: !Select [ 0, !GetAZs '' ]
      CidrBlock: 10.192.10.0/24
      MapPublicIpOnLaunch: true
      Tags:
        - Key: Name
          Value: !Sub ${Env}-az1-public-subnet

  PublicSubnet2:
    Type: AWS::EC2::Subnet
    Properties:
      VpcId: !Ref VPC
      AvailabilityZone: !Select [ 1, !GetAZs '' ]
      CidrBlock: 10.192.11.0/24
      MapPublicIpOnLaunch: true
      Tags:
        - Key: Name
          Value: !Sub ${Env}-az2-public-subnet

  PrivateSubnet1:
    Type: AWS::EC2::Subnet
    Properties:
      VpcId: !Ref VPC
      AvailabilityZone: !Select [ 0, !GetAZs '' ]
      CidrBlock: 10.192.30.0/24
      MapPublicIpOnLaunch: false
      Tags:
        - Key: Name
          Value: !Sub ${Env}-az1-private-subnet

  #  _   _ _____ _______        _____  ____  _  __     _    ____ _
  # | \ | | ____|_   _\ \      / / _ \|  _ \| |/ /    / \  / ___| |
  # |  \| |  _|   | |  \ \ /\ / / | | | |_) | ' /    / _ \| |   | |
  # | |\  | |___  | |   \ V  V /| |_| |  _ <| . \   / ___ \ |___| |___
  # |_| \_|_____| |_|    \_/\_/  \___/|_| \_\_|\_\ /_/   \_\____|_____|

  # PublicSubnet1に付与するネットワークACL
  # サブネット単位でネットワーク制御をしたい場合はこちらを編集してください。
  PublicNetworkAcl1:
    Type: "AWS::EC2::NetworkAcl"
    Properties:
      VpcId: !Ref VPC
      Tags:
        - Key: Name
          Value: !Sub ${Env}-az1-public-subnet-network-acl
  InboundHTTPPublicNetworkAcl1Entry:
    Type: "AWS::EC2::NetworkAclEntry"
    Properties:
      NetworkAclId: !Ref PublicNetworkAcl1
      RuleNumber: 100
      Protocol: -1
      RuleAction: "allow"
      Egress: false
      CidrBlock: "0.0.0.0/0"
      PortRange:
        From: 0
        To: 65535
  OutboundPublicNetworkAcl1Entry:
    Type: "AWS::EC2::NetworkAclEntry"
    Properties:
      NetworkAclId: !Ref PublicNetworkAcl1
      RuleNumber: 100
      Protocol: -1
      RuleAction: "allow"
      Egress: true
      CidrBlock: "0.0.0.0/0"
      PortRange:
        From: 0
        To: 65535
  PublicSubnet1NetworkAclAssociation:
    Type: "AWS::EC2::SubnetNetworkAclAssociation"
    Properties:
      SubnetId: !Ref PublicSubnet1
      NetworkAclId: !Ref PublicNetworkAcl1

  # PublicSubnet2に付与するネットワークACL
  # サブネット単位でネットワーク制御をしたい場合はこちらを編集してください。
  PublicNetworkAcl2:
    Type: "AWS::EC2::NetworkAcl"
    Properties:
      VpcId: !Ref VPC
      Tags:
        - Key: Name
          Value: !Sub ${Env}-az2-public-subnet-network-acl
  InboundHTTPPublicNetworkAcl2Entry:
    Type: "AWS::EC2::NetworkAclEntry"
    Properties:
      NetworkAclId: !Ref PublicNetworkAcl2
      RuleNumber: 100
      Protocol: -1
      RuleAction: "allow"
      Egress: false
      CidrBlock: "0.0.0.0/0"
      PortRange:
        From: 0
        To: 65535
  OutboundPublicNetworkAcl2Entry:
    Type: "AWS::EC2::NetworkAclEntry"
    Properties:
      NetworkAclId: !Ref PublicNetworkAcl2
      RuleNumber: 100
      Protocol: -1
      RuleAction: "allow"
      Egress: true
      CidrBlock: "0.0.0.0/0"
      PortRange:
        From: 0
        To: 65535
  PublicSubnet2NetworkAclAssociation:
    Type: "AWS::EC2::SubnetNetworkAclAssociation"
    Properties:
      SubnetId: !Ref PublicSubnet2
      NetworkAclId: !Ref PublicNetworkAcl2

  # PrivateSubnet1に付与するネットワークACL
  # サブネット単位でネットワーク制御をしたい場合はこちらを編集してください。
  PrivateNetworkAcl1:
    Type: "AWS::EC2::NetworkAcl"
    Properties:
      VpcId: !Ref VPC
      Tags:
        - Key: Name
          Value: !Sub ${Env}-az1-private-subnet-network-acl
  InboundHTTPPrivateNetworkAcl1Entry:
    Type: "AWS::EC2::NetworkAclEntry"
    Properties:
      NetworkAclId: !Ref PrivateNetworkAcl1
      RuleNumber: 100
      Protocol: -1
      RuleAction: "allow"
      Egress: false
      CidrBlock: "0.0.0.0/0"
      PortRange:
        From: 0
        To: 65535
  OutboundPrivateNetworkAcl1Entry:
    Type: "AWS::EC2::NetworkAclEntry"
    Properties:
      NetworkAclId: !Ref PrivateNetworkAcl1
      RuleNumber: 100
      Protocol: -1
      RuleAction: "allow"
      Egress: true
      CidrBlock: "0.0.0.0/0"
      PortRange:
        From: 0
        To: 65535
  PrivateSubnet1NetworkAclAssociation:
    Type: "AWS::EC2::SubnetNetworkAclAssociation"
    Properties:
      SubnetId: !Ref PrivateSubnet1
      NetworkAclId: !Ref PrivateNetworkAcl1

  #  _   _    _  _____    ____    _  _____ _______        ___ __   __
  # | \ | |  / \|_   _|  / ___|  / \|_   _| ____\ \      / / \\ \ / /
  # |  \| | / _ \ | |   | |  _  / _ \ | | |  _|  \ \ /\ / / _ \\ V /
  # | |\  |/ ___ \| |   | |_| |/ ___ \| | | |___  \ V  V / ___ \| |
  # |_| \_/_/   \_\_|    \____/_/   \_\_| |_____|  \_/\_/_/   \_\_|

  NatGateway1EIP:
    Type: AWS::EC2::EIP
    DependsOn: InternetGatewayAttachment
    Properties:
      Domain: vpc

  NatGateway1:
    Type: AWS::EC2::NatGateway
    Properties:
      AllocationId: !GetAtt NatGateway1EIP.AllocationId
      SubnetId: !Ref PublicSubnet1
      Tags:
        - Key: Name
          Value: !Sub ${Env}-az1-natgw
        - Key: Environment
          Value: !Sub ${Env}

  #  ____   ___  _   _ _____ _____   _____  _    ____  _     _____
  # |  _ \ / _ \| | | |_   _| ____| |_   _|/ \  | __ )| |   | ____|
  # | |_) | | | | | | | | | |  _|     | | / _ \ |  _ \| |   |  _|
  # |  _ <| |_| | |_| | | | | |___    | |/ ___ \| |_) | |___| |___
  # |_| \_\\___/ \___/  |_| |_____|   |_/_/   \_\____/|_____|_____|

  PublicRouteTable:
    Type: AWS::EC2::RouteTable
    Properties:
      VpcId: !Ref VPC
      Tags:
        - Key: Name
          Value: !Sub ${Env}-public-route-table

  DefaultPublicRoute:
    Type: AWS::EC2::Route
    DependsOn: InternetGatewayAttachment
    Properties:
      RouteTableId: !Ref PublicRouteTable
      DestinationCidrBlock: 0.0.0.0/0
      GatewayId: !Ref InternetGateway

  PublicSubnet1RouteTableAssociation:
    Type: AWS::EC2::SubnetRouteTableAssociation
    Properties:
      RouteTableId: !Ref PublicRouteTable
      SubnetId: !Ref PublicSubnet1

  PrivateRouteTable1:
    Type: AWS::EC2::RouteTable
    Properties:
      VpcId: !Ref VPC
      Tags:
        - Key: Name
          Value: !Sub ${Env}-az1-private-route-table

  DefaultPrivateRoute1:
    Type: AWS::EC2::Route
    Properties:
      RouteTableId: !Ref PrivateRouteTable1
      DestinationCidrBlock: 0.0.0.0/0
      NatGatewayId: !Ref NatGateway1

  PrivateSubnet1RouteTableAssociation:
    Type: AWS::EC2::SubnetRouteTableAssociation
    Properties:
      RouteTableId: !Ref PrivateRouteTable1
      SubnetId: !Ref PrivateSubnet1
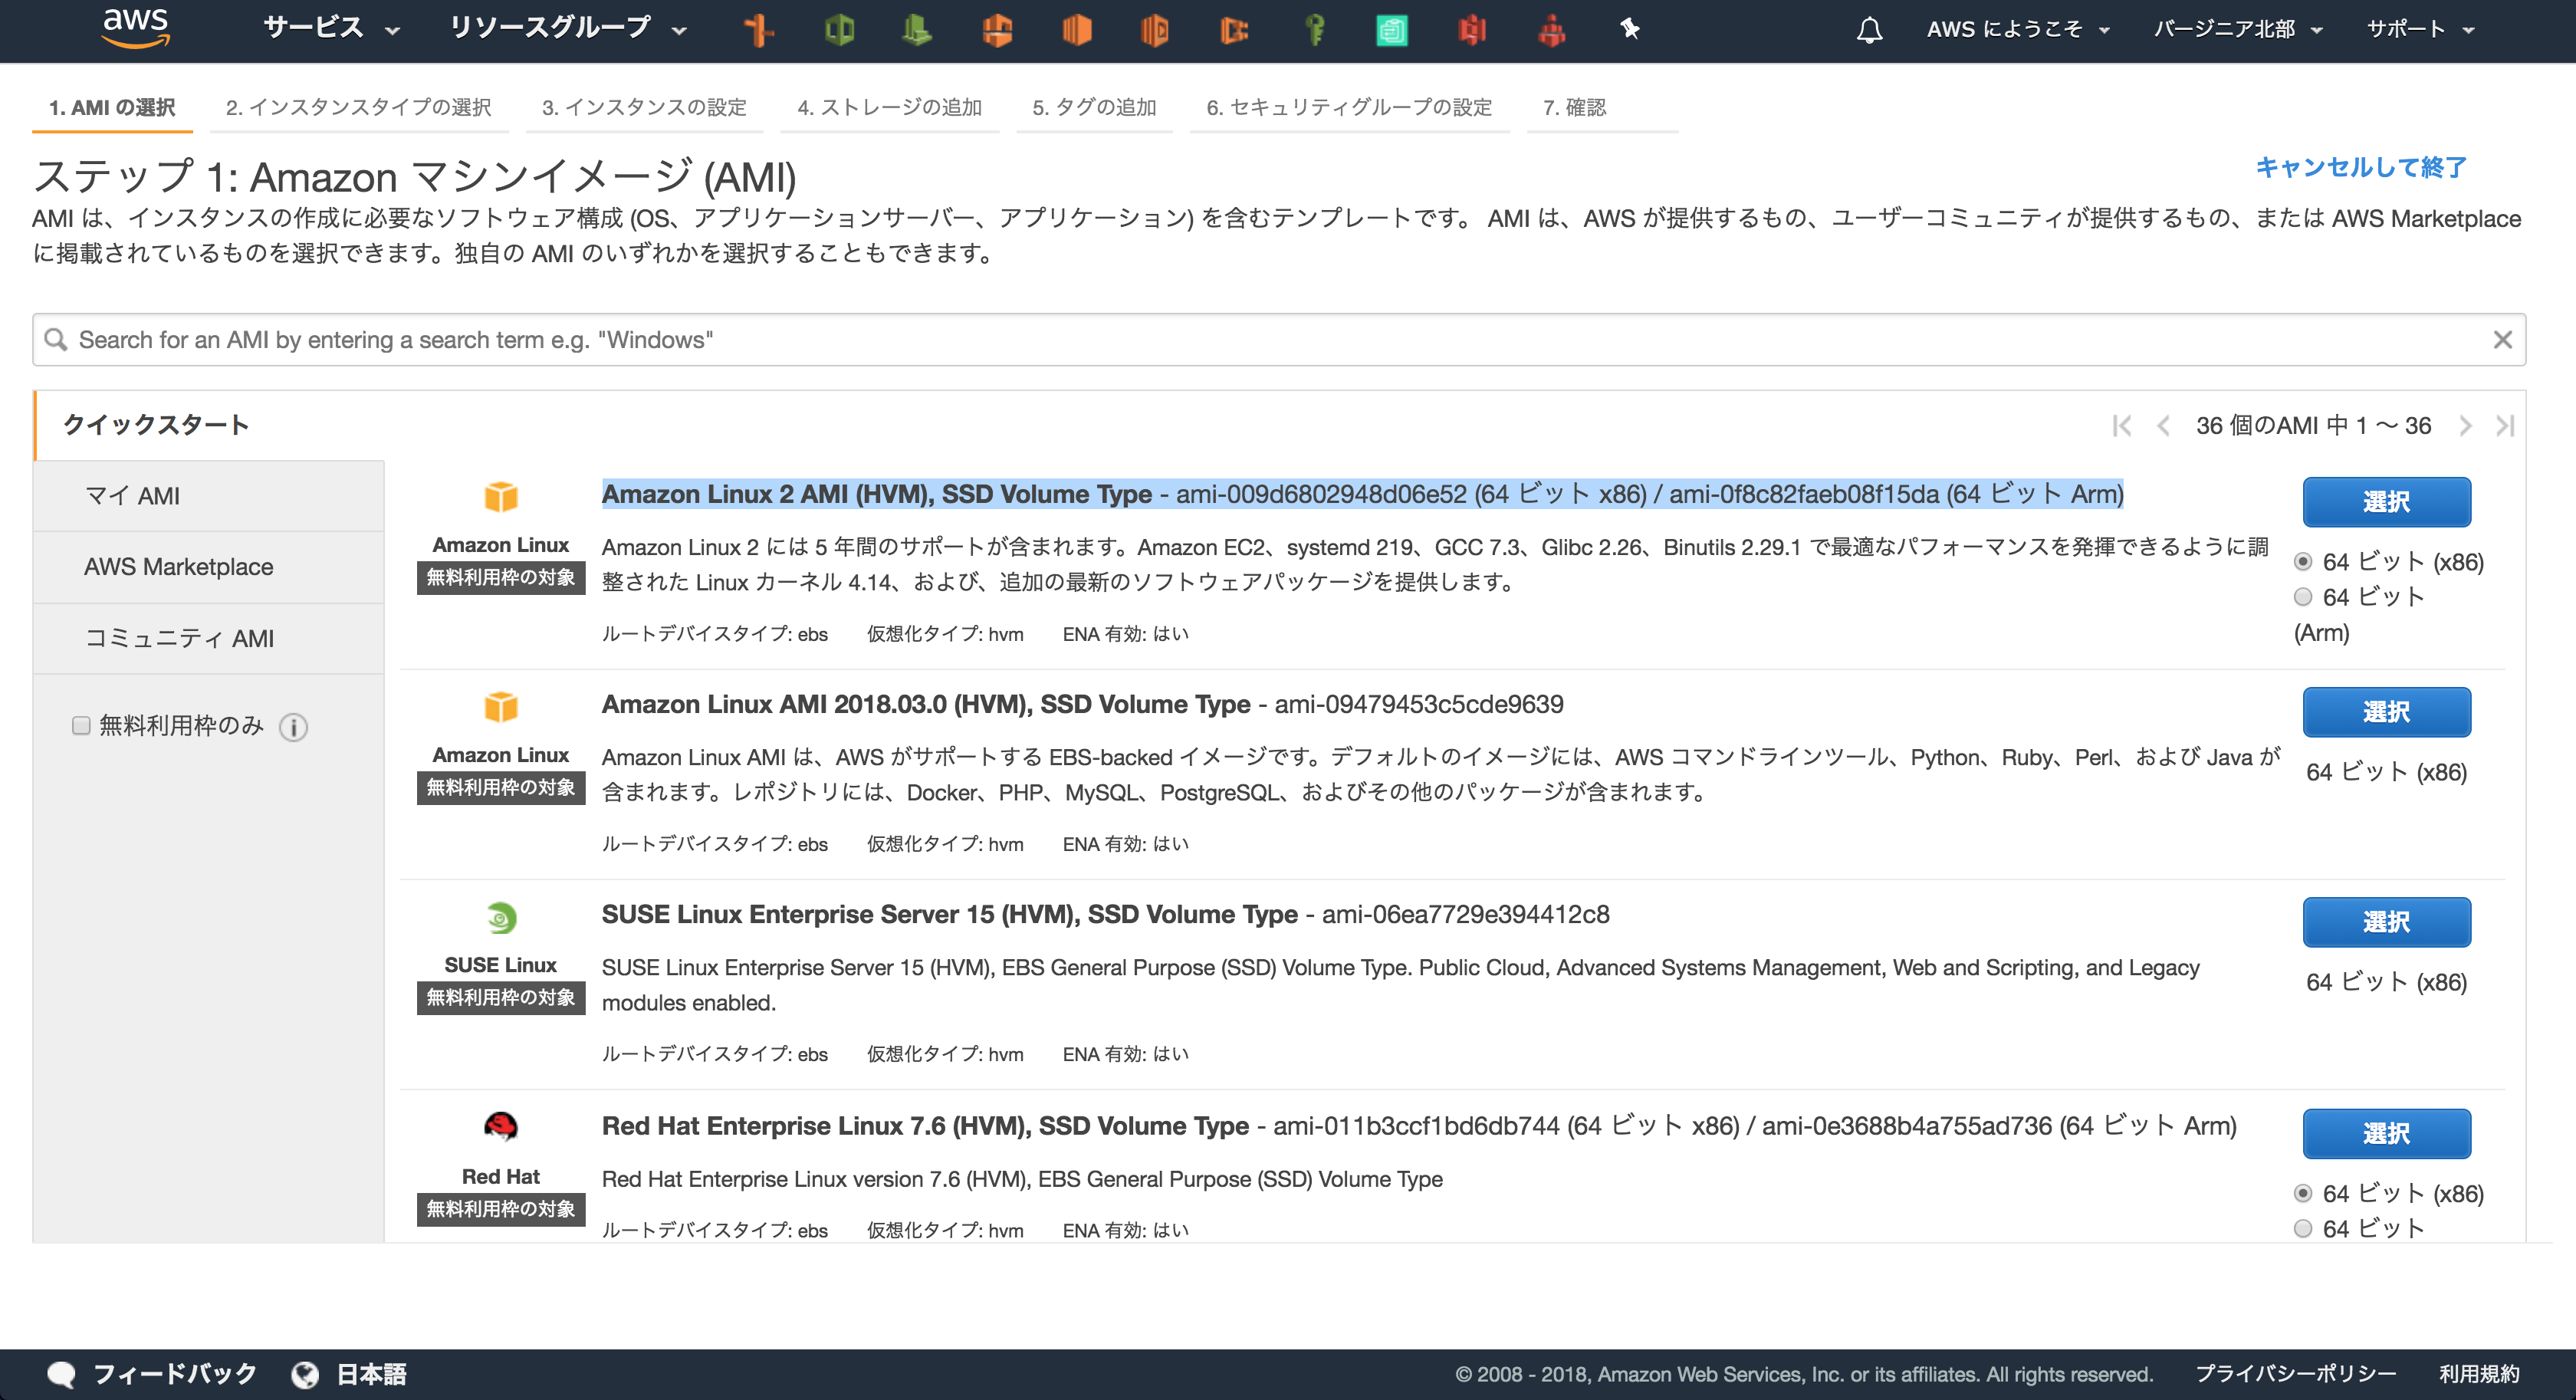
今回はスポットインスタンス+Autoscalingの構成を目指すのでイメージはAmazonLinux2を使用します。
インスタンスが起動したらログインしてM/Wをインストールしていきましょう。
# javaインストール
yum install -y java-1.8.0-openjdk-devel
# javaの使用設定 alternativesでJava 1.8にセットします。
alternatives --config java
# java version
java -version

# Jenkinsをローカルにダウンロードします。
wget -O /etc/yum.repos.d/jenkins.repo http://pkg.jenkins-ci.org/redhat/jenkins.repo
# パッケージ署名チェック用のキーをインポートします
rpm --import https://jenkins-ci.org/redhat/jenkins-ci.org.key

# jenkins インストール
yum -y install jenkins
# jenkins service スタート
service jenkins start

# chkconfig コマンドを使用して、システムがブートするたびに Jenkinsが起動するように設定します。
chkconfig jenkins on
# 起動設定を確認します。
chkconfig --list jenkins
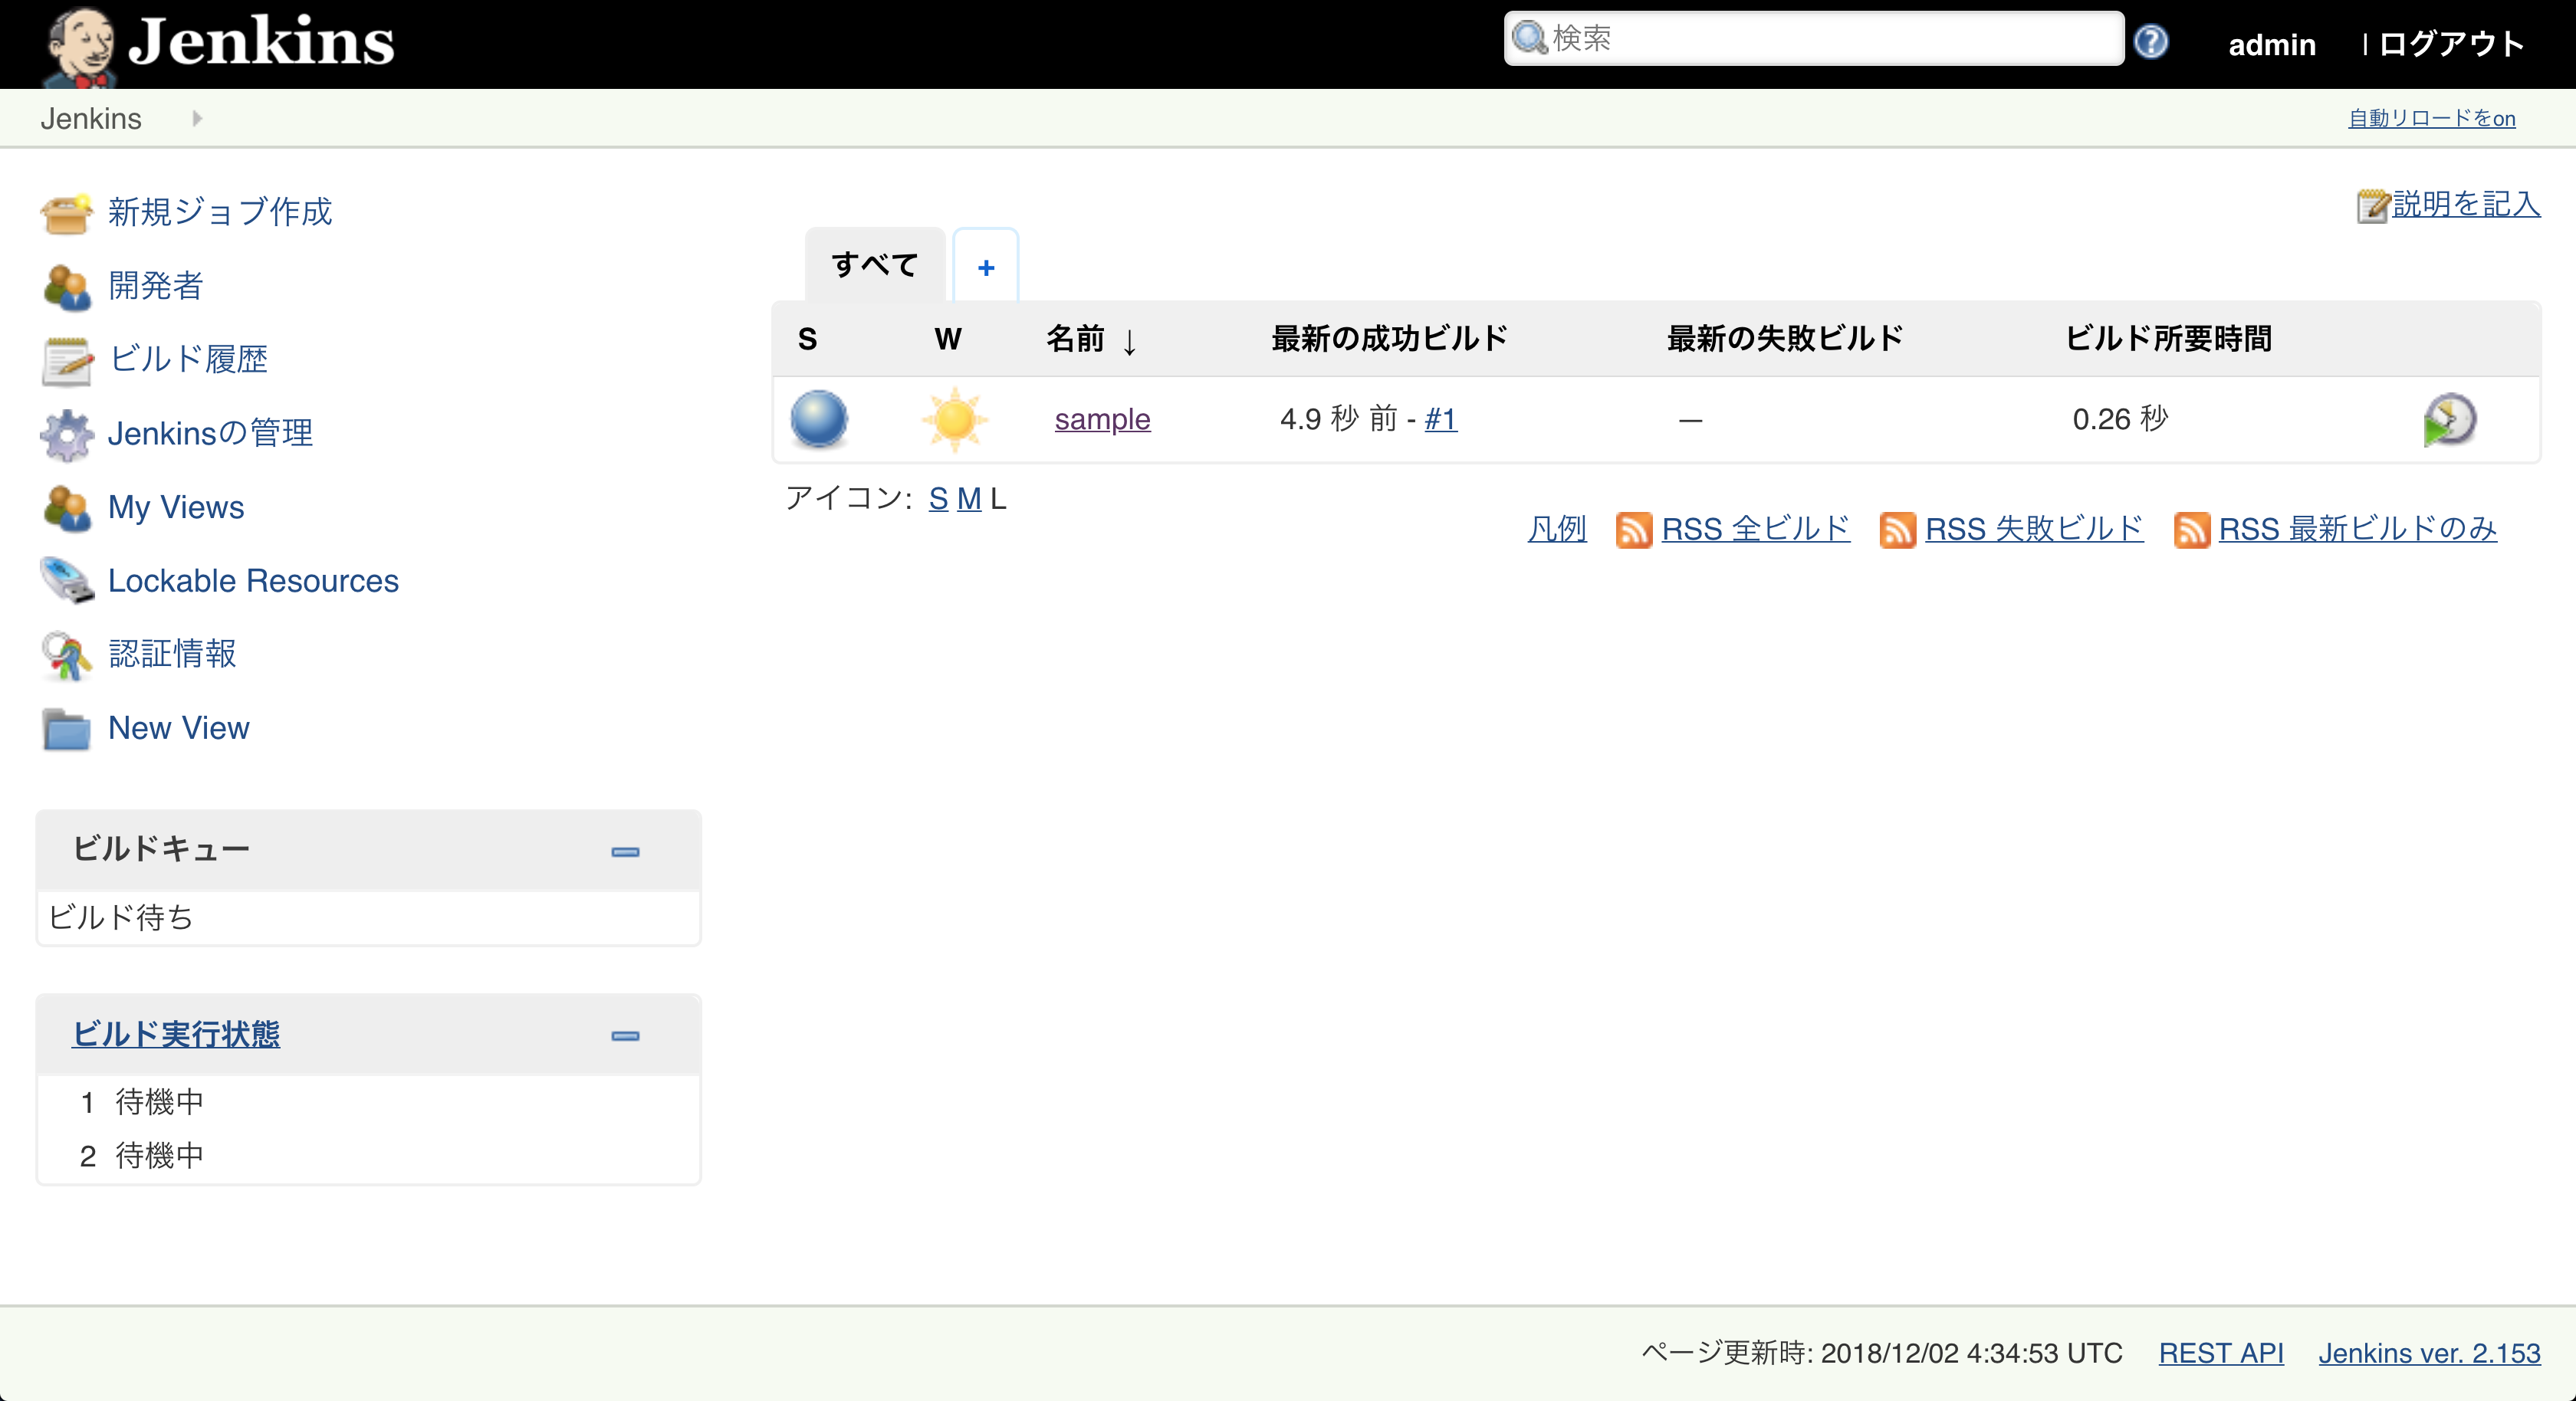
あとはJenkinsをブラウザから開き、初期設定を行ってください。
この画面まで表示できればとりあえず事前準備は完了です。
インスタンスを選択して、
アクション>イメージ>イメージの作成からAMIを作っておきましょう。
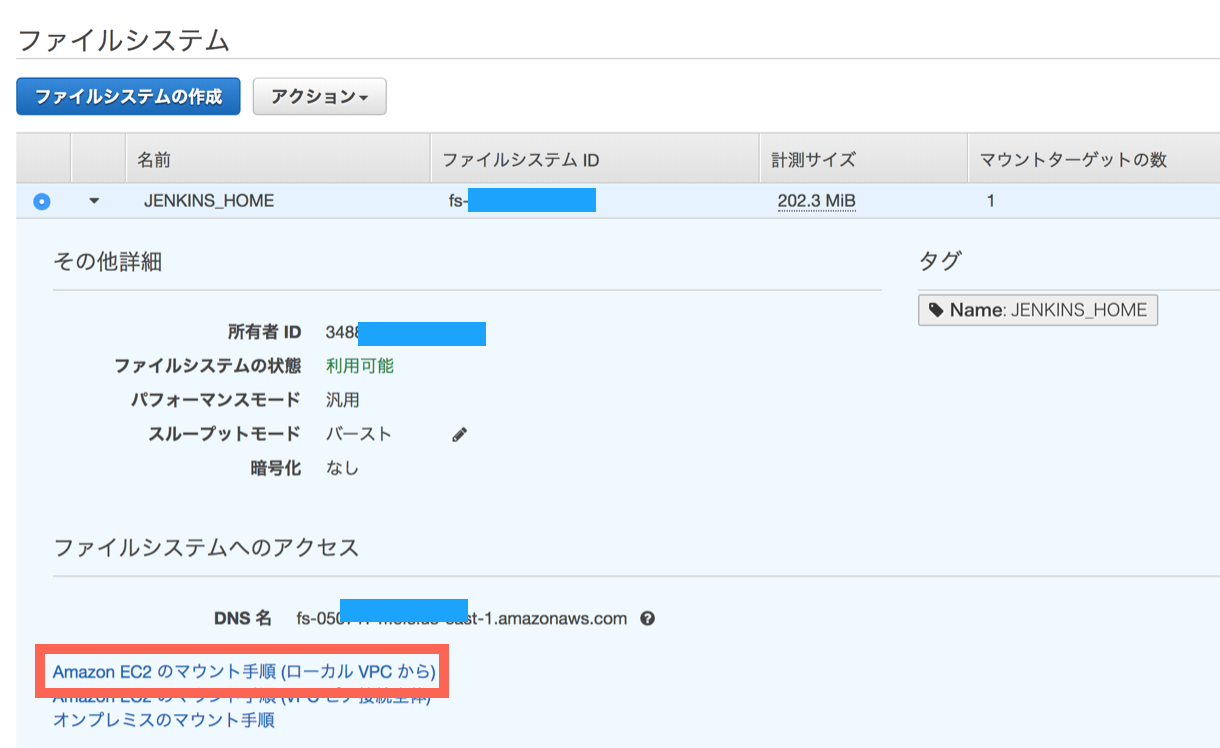
EFSを作成する
最初にEFSを作成しましょう。マウントターゲットにセキュリティグループを付与します。
TCP 2049番ポートを許可しなければいけないので注意してください。
  #  _____ _ _      ____            _
  # |  ___(_) | ___/ ___| _   _ ___| |_ ___ _ __ ___
  # | |_  | | |/ _ \___ \| | | / __| __/ _ \ '_ ` _ \
  # |  _| | | |  __/___) | |_| \__ \ ||  __/ | | | | |
  # |_|   |_|_|\___|____/ \__, |___/\__\___|_| |_| |_|
  #                       |___/

  EFS:
    Type: AWS::EFS::FileSystem
    Properties:
      FileSystemTags:
        - Key: 'Name'
          Value: 'JENKINS_HOME'

  MountTarget:
    Type: AWS::EFS::MountTarget
    Properties:
      FileSystemId: !Ref EFS
      SecurityGroups:
        - !Ref MountTargetSecurityGroup
      SubnetId: !Ref PrivateSubnet1

  MountTargetSecurityGroup:
    Type: 'AWS::EC2::SecurityGroup'
    Properties:
      GroupDescription: !Sub ${Env}-mount-target-security-group
      VpcId: !Ref VPC
      SecurityGroupIngress:
        - IpProtocol: "TCP"
          FromPort: 2049
          ToPort: 2049
          SourceSecurityGroupId: !Ref CIJenkinsSecurityGroup
          Description: "jenkins to mount targer"
      Tags:
        - Key: Name
          Value: !Sub ${Env}-mount-target-security-group
オートスケーリングでJenkinsサーバを起動する
AMIができたらこれを元にしてオートスケーリングでJenkinsを立ち上げましょう。
まずはJenkinsサーバが使用するInstanceProfileを作っていきます。
必要となるポリシーは各種要件に応じて書き換えましょう。
  # _____ ____ ____
  # | ____/ ___|___ \
  # |  _|| |     __) |
  # | |__| |___ / __/
  # |_____\____|_____|

  JenkinsRoleInstanceProfile:
    Type: 'AWS::IAM::InstanceProfile'
    Properties:
      InstanceProfileName: !Sub ${Env}-jenkins-instace-profile
      Path: "/"
      Roles:
        - !Ref JenkinsRole
  JenkinsRole:
    Type: AWS::IAM::Role
    Properties:
      RoleName: !Sub ${Env}-jenkins-role
      AssumeRolePolicyDocument:
        Version: '2012-10-17'
        Statement:
          - Effect: "Allow"
            Principal:
              Service:
                - "ec2.amazonaws.com"
            Action:
              - "sts:AssumeRole"
      Path: "/"
  JenkinsPolicy:
    Type: 'AWS::IAM::ManagedPolicy'
    Properties:
      Path: "/"
      Roles:
        - !Ref JenkinsRole
      Description: !Sub ${Env}-jenkins-policy
      ManagedPolicyName: !Sub ${Env}-jenkins-policy
      PolicyDocument:
        Version: '2012-10-17'
        Statement:
          - Effect: Allow
            Action:
              - ssm:*
              - ssmmessages:*
              - iam:*
              - cloudwatch:*
              - cloudformation:*
              - ec2:*
              - ec2messages:*
              - batch:*
              - ds:*
              - logs:*
              - s3:*
              - ecr:*
              - lambda:*
              - codedeploy:*
              - apigateway:*
            Resource: "*"
セキュリティグループはALBに付与するセキュリティグループからの8080ポート通信を許可しておけばいいでしょう。
ALBは後から作成します。
  CIJenkinsSecurityGroup:
    Type: 'AWS::EC2::SecurityGroup'
    Properties:
      GroupDescription: !Sub ${Env}-jenkins-security-group
      VpcId: !Ref VPC
      SecurityGroupIngress:
        - IpProtocol: "TCP"
          FromPort: 8080
          ToPort: 8080
          SourceSecurityGroupId: !Ref ApplicationLoadBalancerSecurityGroup
          Description: "myip"
      Tags:
        - Key: Name
          Value: !Sub ${Env}-jenkins-security-group
あとはスポットインスタンスで起動するオートスケーリンググループと起動設定を作ればOKです。
  SpotInstanceWebServerGroup:
    Type: AWS::AutoScaling::AutoScalingGroup
    Properties:
      VPCZoneIdentifier:
        - !Ref PrivateSubnet1
      LaunchConfigurationName: !Ref SpotInstanceLaunchConfig
      MinSize: '1'
      MaxSize: '1'
      DesiredCapacity: '1'
      TargetGroupARNs:
        - !Ref ALBTargetGroup
      HealthCheckType: ELB
      HealthCheckGracePeriod: 60
      MetricsCollection:
        -
          Granularity: 1Minute
      Tags:
        - Key: Name
          Value: !Sub ${Env}-jenkins
          PropagateAtLaunch: true
  SpotInstanceLaunchConfig:
    Type: AWS::AutoScaling::LaunchConfiguration
    Properties:
      ImageId: ami-0c313410f51310f83 # <-- JenkinsをインストールしたAMIを指定します。
      IamInstanceProfile: !Ref JenkinsRoleInstanceProfile
      SecurityGroups:
        - !Ref CIJenkinsSecurityGroup
      InstanceType: t2.large
      SpotPrice: '0.06'
      BlockDeviceMappings:
        - DeviceName: "/dev/xvda"
          Ebs:
            VolumeSize: 50
            VolumeType: 'gp2'
      UserData:
        "Fn::Base64":
          !Sub |
            #!/bin/bash
            sudo chwon jenkins:jenkins /var/lib/jenkins;
            sudo mount -t nfs4 -o nfsvers=4.1,rsize=1048576,wsize=1048576,hard,timeo=600,retrans=2 $(curl -s http://169.254.169.254/latest/meta-data/placement/availability-zone).${EFS}.efs.${AWS::Region}.amazonaws.com:/ /var/lib/jenkins;
            while sleep 5; do
              # スポットインスタンスの価格が高騰時に中断されてしまう問題の対応
              # スポットインスタンスの停止判定
              if [ -z $(curl -Isf http://169.254.169.254/latest/meta-data/spot/instance-action) ];
              then
                echo "[INFO] Spotinstance can be operated normally.";
              else
                # AWSによってスポットインスタンスが強制終了される場合
                echo "[WARNING] Spot instance interruption notice detected.";
                echo "[WARNING] Disconnect the EC2 instance from the load balancer target group.";
                # ALBのターゲットグループから自身のインスタンスを切り離す
                INSTANCE_ID=$(curl -s http://169.254.169.254/latest/meta-data/instance-id);
                /usr/bin/aws elbv2 deregister-targets --target-group-arn ${ALBTargetGroup} --targets Id=$INSTANCE_ID --region ${AWS::Region};
                sleep 120;
              fi
            done
EC2起動時にEFSとマウントする
オートスケーリングとして起動するインスタンスはEFSとマウントする必要があります。
起動時にUserDataでスクリプトを実行しましょう。
マウントの方法は各種ありますが、EFSのコンソール画面から確認ができます。
sudo chwon jenkins:jenkins /var/lib/jenkins;
sudo mount -t nfs4 \
           -o nfsvers=4.1,rsize=1048576,wsize=1048576,hard,timeo=600,retrans=2 \
           $(curl -s http://169.254.169.254/latest/meta-data/placement/availability-zone).${EFS}.efs.${AWS::Region}.amazonaws.com:/ \
           /var/lib/jenkins;
スポットインスタンス終了のハンドリング
スポット価格が入札価格を上回った場合、そのインスタンスは自動的に終了されてしまいます。
そこでスポットインスタンスの終了通知機能を利用しましょう。
スポットインスタンスは終了する2分前に警告を提供してくれます。
この警告はインスタンスメタデータ内の項目を使用して、スポットインスタンス上で確認します。
スポットインスタンス終了通知はUserDataに以下のようなスクリプトを仕込んでおけばよいでしょう。
      UserData:
        "Fn::Base64":
          !Sub |
            #!/bin/bash
            while sleep 5; do
              # スポットインスタンスの停止判定
              if [ -z $(curl -Isf http://169.254.169.254/latest/meta-data/spot/instance-action) ];
              then
                echo "[INFO] Spotinstance can be operated normally.";
              else
                # AWSによってスポットインスタンスが強制終了される場合
                echo "[WARNING] Spot instance interruption notice detected.";
                echo "[WARNING] Disconnect the EC2 instance from the load balancer target group.";
                # ALBのターゲットグループから自身のインスタンスを切り離す
                INSTANCE_ID=$(curl -s http://169.254.169.254/latest/meta-data/instance-id);
                /usr/bin/aws elbv2 deregister-targets --target-group-arn ${ALBTargetGroup} --targets Id=$INSTANCE_ID --region ${AWS::Region};
                sleep 120;
              fi
            done
ロードバランサー(ALB)を作成する
最後にブラウザから80番ポートでアクセスできるようにロードバランサーを作成します。
ロードバランサーでは80番ポートで受けて、EC2の8080番ポートにトラフィックを流す設定にしましょう。
  #  _                    _ ____        _
  # | |    ___   __ _  __| | __ )  __ _| | __ _ _ __   ___ ___ _ __
  # | |   / _ \ / _` |/ _` |  _ \ / _` | |/ _` | '_ \ / __/ _ \ '__|
  # | |__| (_) | (_| | (_| | |_) | (_| | | (_| | | | | (_|  __/ |
  # |_____\___/ \__,_|\__,_|____/ \__,_|_|\__,_|_| |_|\___\___|_|

  ApplicationLoadBalancerSecurityGroup:
    Type: 'AWS::EC2::SecurityGroup'
    Properties:
      GroupDescription: !Sub ${Env}-alb-security-group
      VpcId: !Ref VPC
      SecurityGroupIngress:
        - IpProtocol: "TCP"
          FromPort: 80
          ToPort: 80
          CidrIp: 60.113.105.39/32
          Description: "myip"
      Tags:
        - Key: Name
          Value: !Sub ${Env}-alb-security-group

  ApplicationLoadBalancer:
    Type: AWS::ElasticLoadBalancingV2::LoadBalancer
    Properties:
      Name: !Sub ${Env}-jenkins-alb-autoscaling
      Subnets:
        - !Ref PublicSubnet1
        - !Ref PublicSubnet2
      SecurityGroups:
        - !Ref ApplicationLoadBalancerSecurityGroup
  ALBListener:
    Type: AWS::ElasticLoadBalancingV2::Listener
    Properties:
      DefaultActions:
        - Type: forward
          TargetGroupArn: !Ref ALBTargetGroup
      LoadBalancerArn: !Ref ApplicationLoadBalancer
      Port: 80
      Protocol: HTTP
  ALBTargetGroup:
    Type: AWS::ElasticLoadBalancingV2::TargetGroup
    Properties:
      Name: !Sub ${Env}-jenkins-alb-tg
      VpcId: !Ref VPC
      Port: 8080
      Protocol: HTTP
      Matcher:
        HttpCode: '200'
      HealthCheckIntervalSeconds: 30
      HealthCheckPath: '/login'
      HealthCheckProtocol: HTTP
      HealthCheckTimeoutSeconds: 5
      # 非正常なターゲットが正常であると見なされるまでに必要なヘルスチェックの連続成功回数
      HealthyThresholdCount: 2
      # ターゲットが非正常であると見なされるまでに必要なヘルスチェックの連続失敗回数
      UnhealthyThresholdCount: 2
      TargetGroupAttributes:
          # ALBから登録抹消されるまでの時間 (Default:300)
        - Key: deregistration_delay.timeout_seconds
          Value: '300'
          # スティッキセッションが有効かどうか (Default:false)
        - Key: stickiness.enabled
          Value: 'false'
          # スティッキセッションのタイプ。可能な値はlb_cookieのみ
        - Key: stickiness.type
          Value: lb_cookie
          # クライアントからの要求を同じターゲットにルーティングする必要がある時間(秒単位)。
          # この期間が経過すると、ロードバランサによって生成されたクッキーは無効とみなされます。
          # 範囲は1秒-1週間(604800秒)です。デフォルト値は1日(86400秒)です。
        - Key: stickiness.lb_cookie.duration_seconds
          Value: '86400'
      Tags:
        - Key: Name
          Value: !Sub ${Env}-jenkins-alb
ECS Fargateを使用してJenkinsのジョブを実行する
ここまでできればもう少し踏み込んだ構成にトライしましょう。
Jenkinsサーバ(master)はすでにEFSにストレージを外出ししてステートレスにできましたので
今度はジョブ自体も「必要なときに必要なだけ実行する」方法に転換していきましょう。
この方法を取ることで、masterインスタンスは不必要に高いインスタンスタイプを選ぶ必要がなくなりコスト削減に繋がります。
またジョブの種類に応じてインスタンスタイプなども変更できるので拡張性があります。
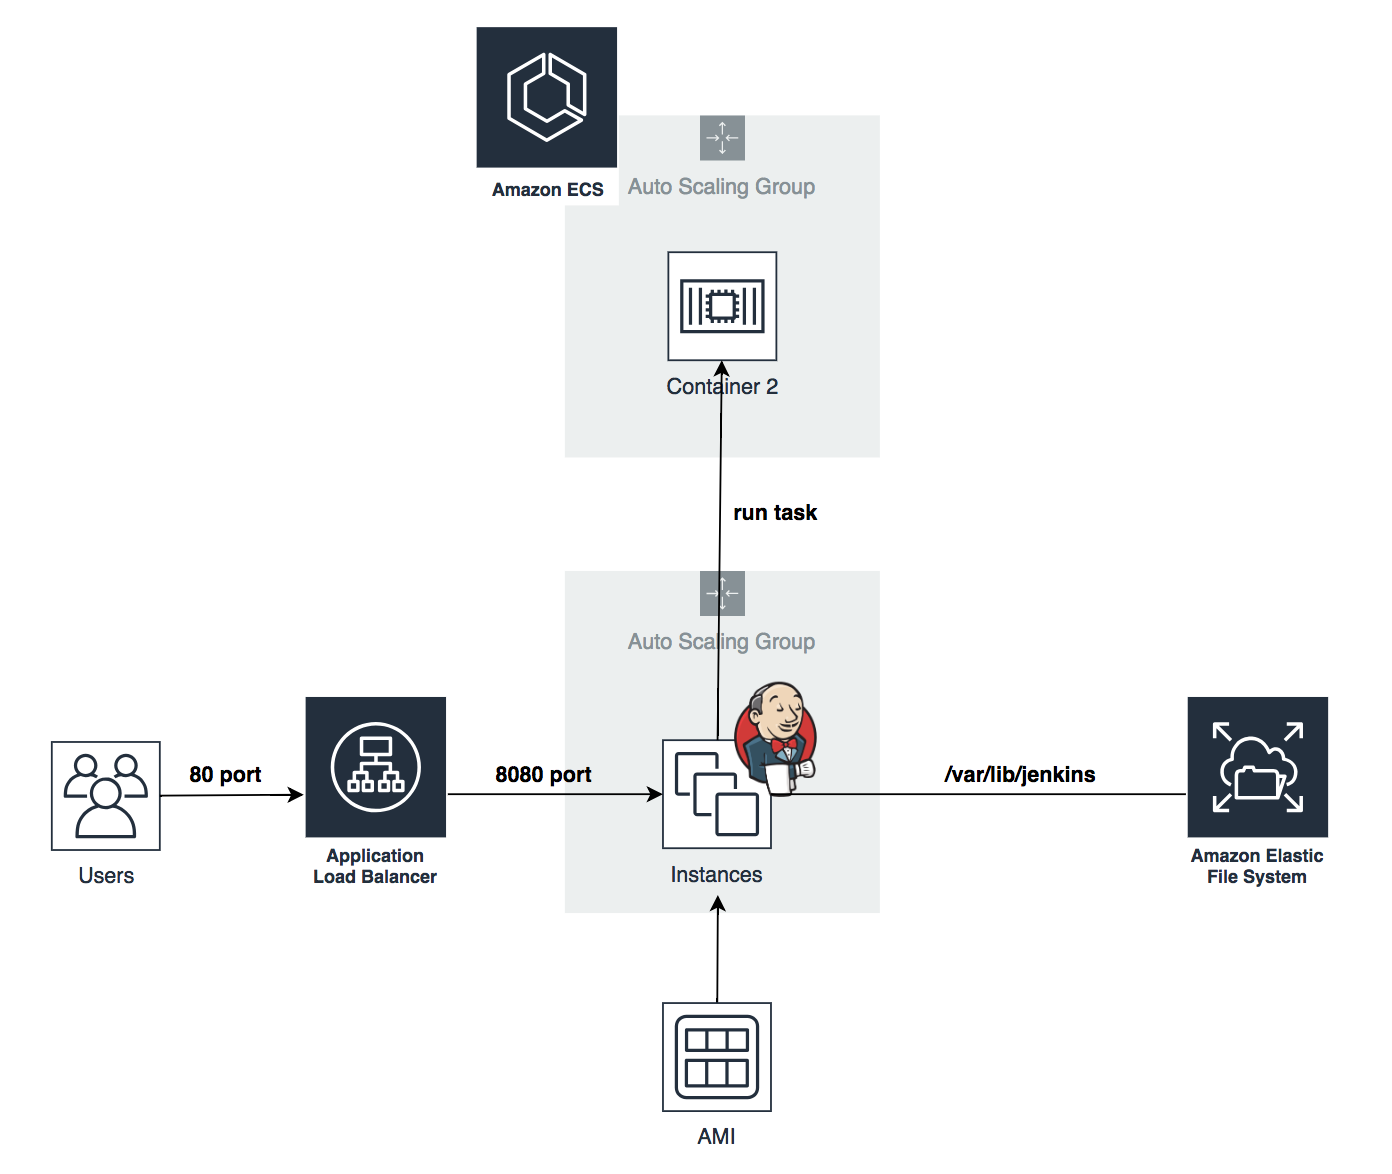
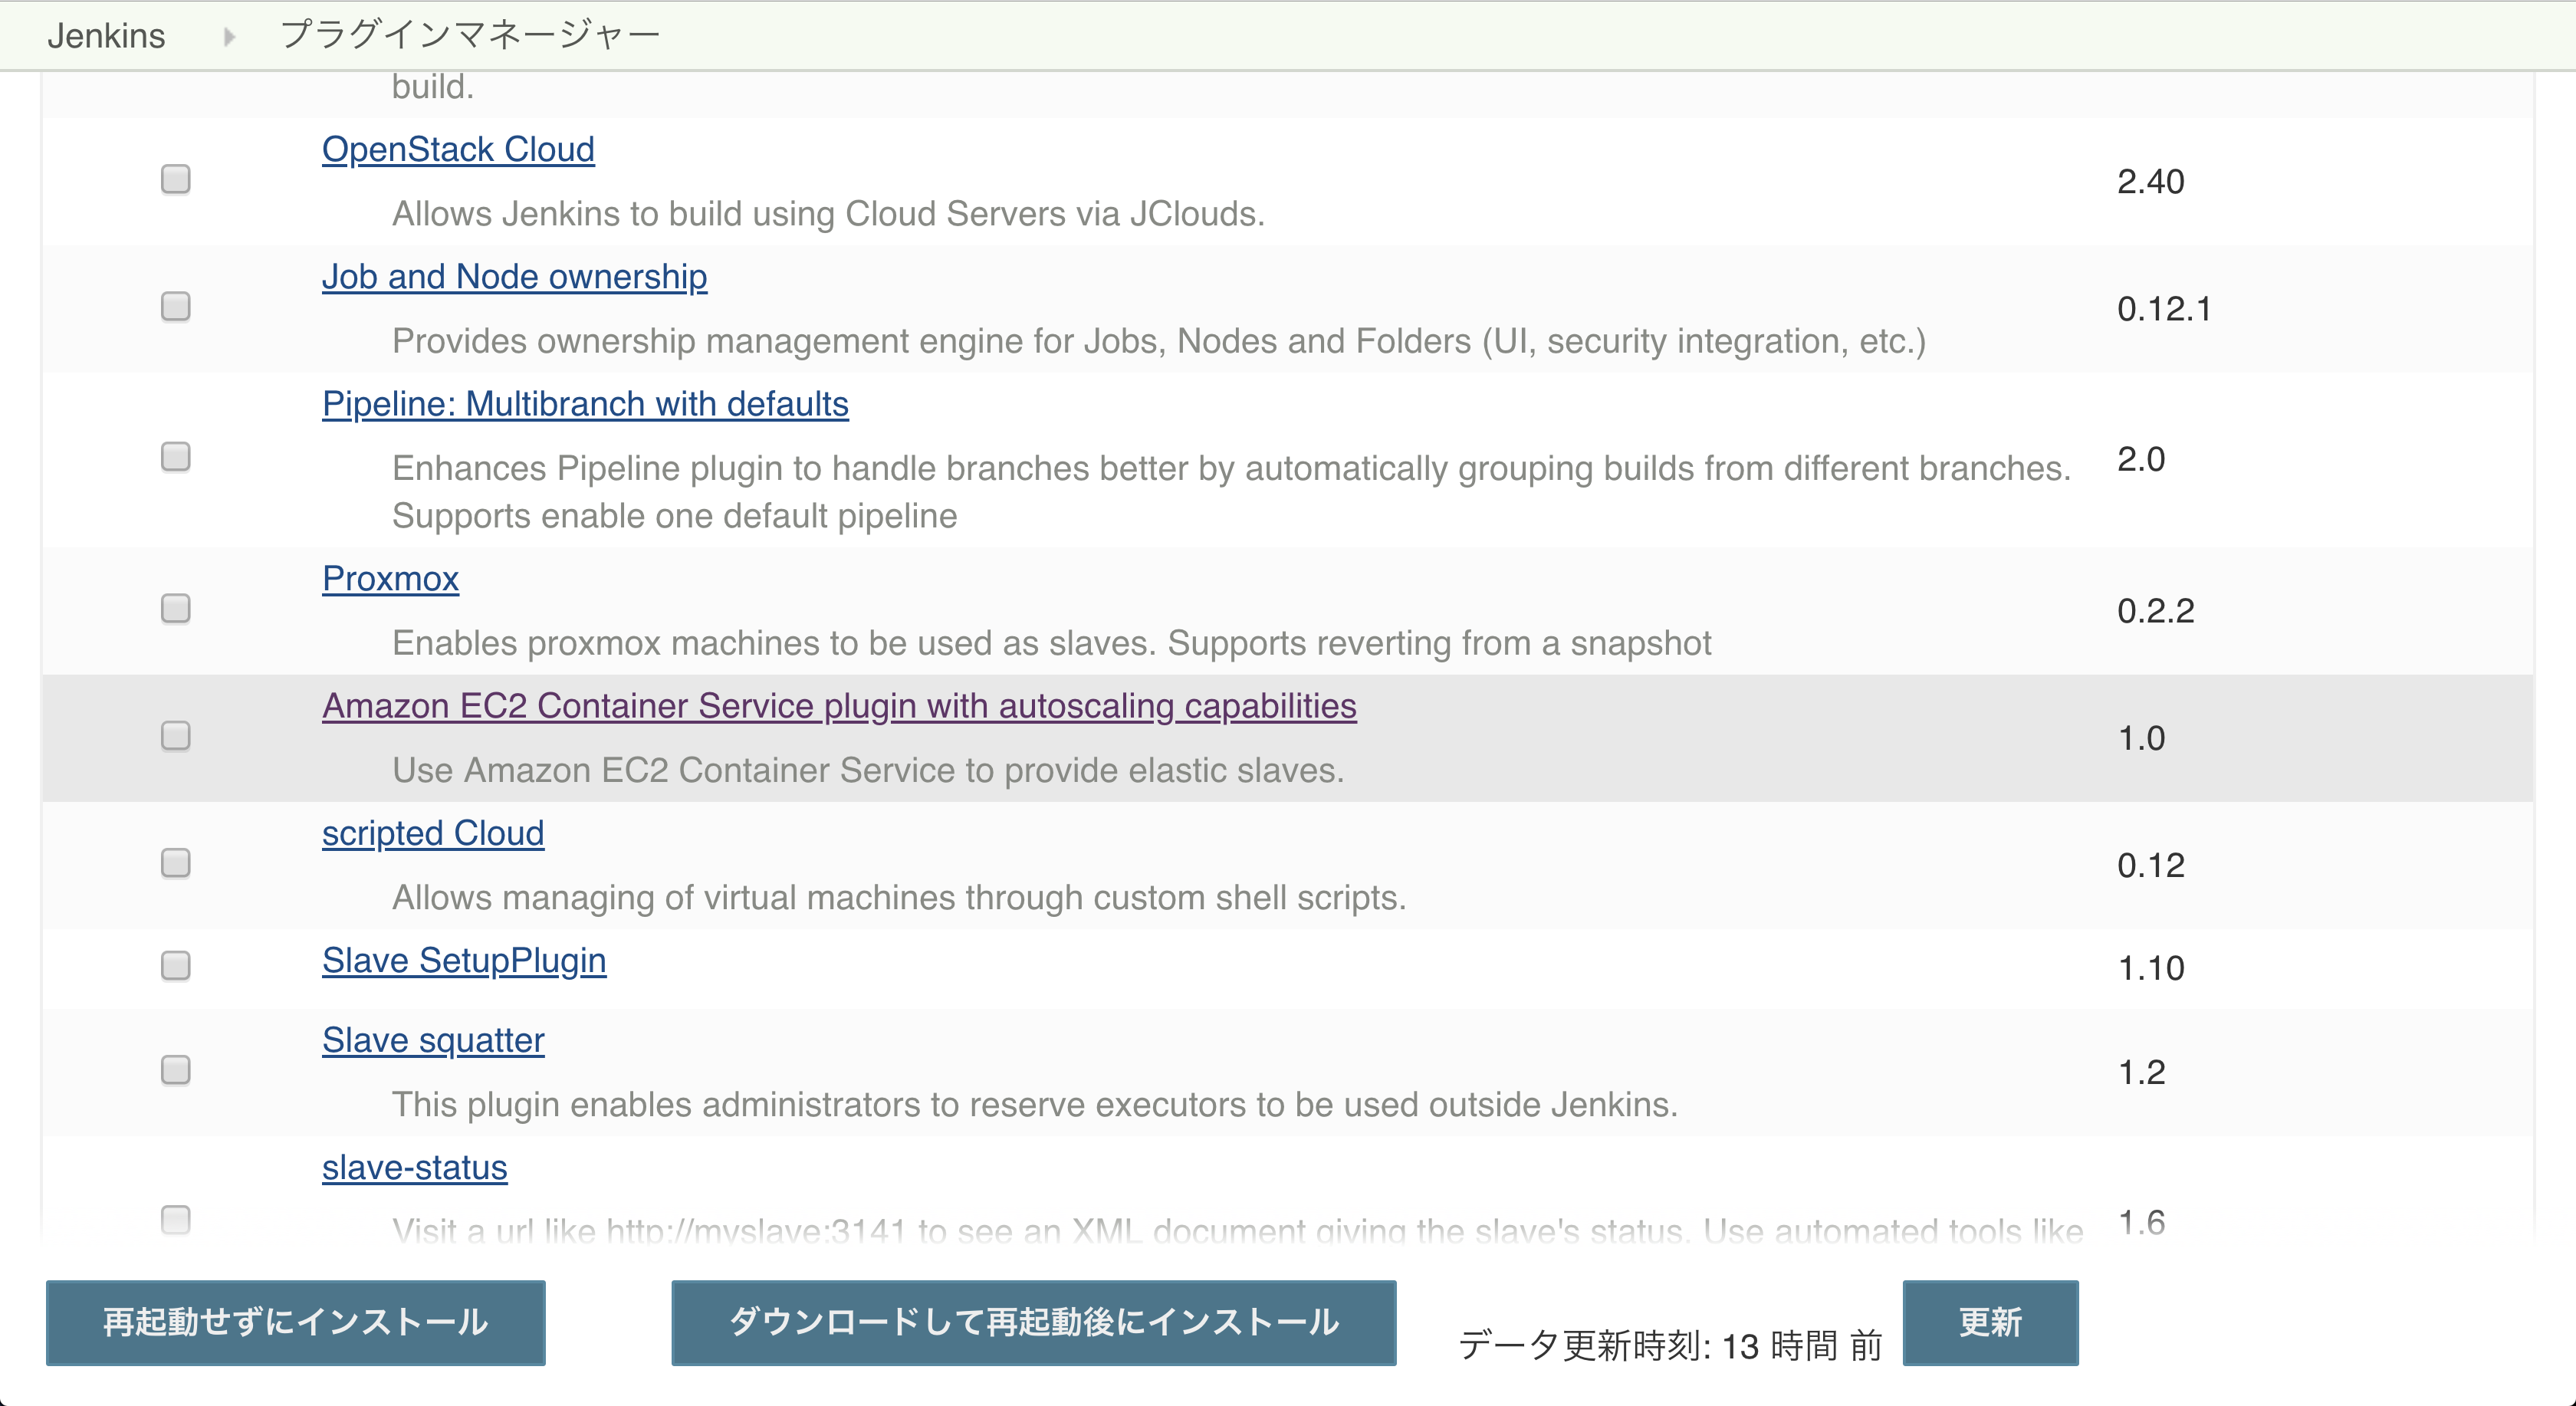
AmazonEC2ContainerServicePluginをプラグインをインストールして使用しましょう。
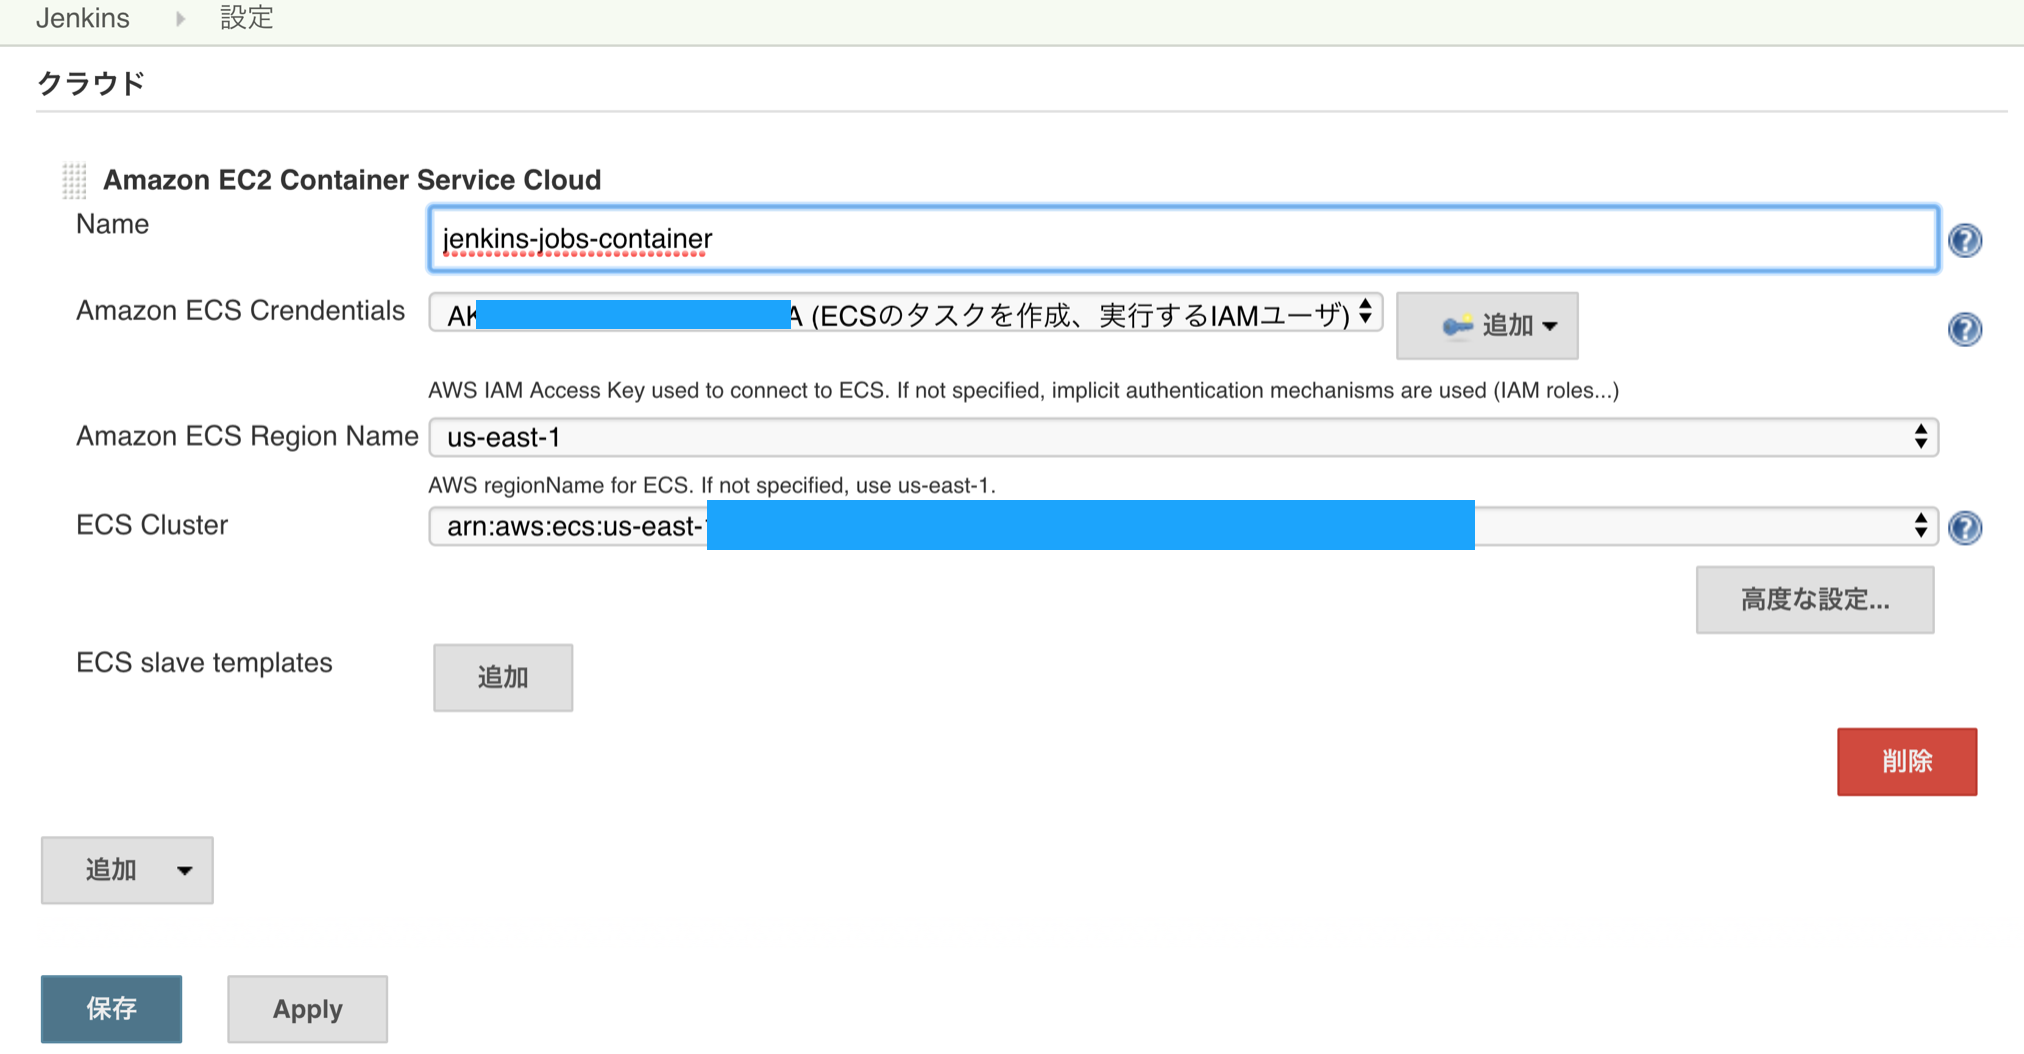
ECSのクラスターをあらかじめ作成しておき、
クラスターを操作できるIAMユーザからAccessKeyとSecretKeyを発行しておきます。
Jenkinsの管理>システムの設定からクラウドの項目を追加しましょう。
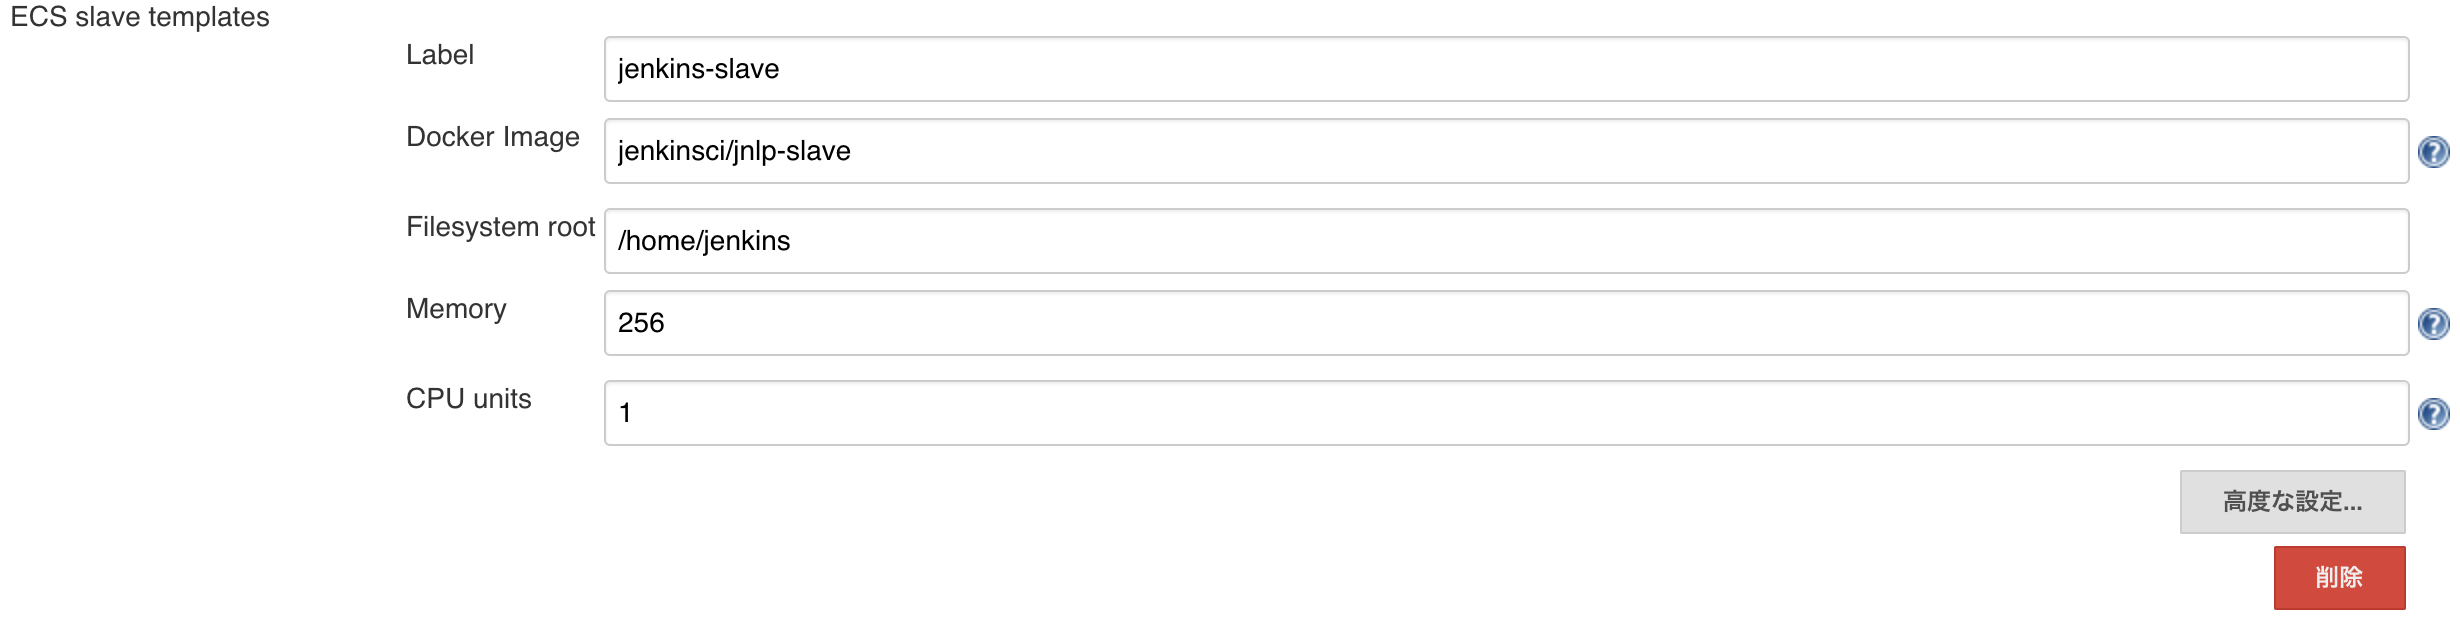
スレーブテンプレートを作成すれば設定は完了です。
これで24/365で高いインスタンスタイプ、大きめのEBSのストレージサイズを使って運用していた時代とは比べ物にならないくらい節約できるのではないでしょうか?
EFSはとても便利ですね。どんどん活用していこうと思います。