Railsを使って15分でブログアプリを作り上げる動画が一斉を風靡したのはもう何年前でしょうか。
私はまだその頃Developerですらいなかったですが、いまその動画を見ても感動してしまいますね。
Webのアーキテクチャは進化し、API非同期通信、フロントエンドとバックエンドの分離、仮想DOMによるフロントエンド描画、GraphQLバックエンドの台頭といった具合に圧倒的な進化を遂げてきました。
では、この技術スタックを使ってRailsを使ってブログアプリを作り上げることと同様のことがどれだけの開発効率で実装できるのでしょうか?
今回はAmplifyCLIとReactを使って、掲示板アプリを爆速で構築してみようと思います。
完成するアプリケーションは以下のようなpub/sub型の通信をする掲示板アプリです。
目指せ15分!!
使用する環境は以下の通りです。
$ create-react-app --version
2.0.3
$ node -v
v10.9.0
$ npm -v
6.5.0
$ amplify --version
0.1.27
Reactアプリの雛形を作る(0〜1分)
boadappという名前で作っていきましょう。create-react-appに関してはこちらの記事が参考になります。
公式GitHubはこちら
$ create-react-app boardapp
~ 中略 ~
$ cd boardapp/
$ yarn start
localhost:3000で以下の画面が立ち上がれば準備OKです。

amplify initで最初の第一歩(1〜3分)
それでは早速AmplifyCLIを使用してAWS上にAppSyncバックエンドを作っていきましょう。
まずはamplify initコマンドでAmplifyプロジェクトを開始します。
エディタを選択するように言われますのでお好きなエディタを選んでください。
ここではVSCodeを使用します。
$ amplify init
Note: It is recommended to run this command from the root of your app directory
? Choose your default editor:
  Sublime Text
❯ Visual Studio Code
  Atom Editor
  IDEA 14 CE
  Vim (via Terminal, Mac OS only)
  Emacs (via Terminal, Mac OS only)
  None
つぎに言語
今回はReactを使用するのでjavascriptにしておきましょう。
 Choose the type of app that you're building
  android
  ios
❯ javascript
Reactを選択します。
Please tell us about your project
? What javascript framework are you using
❯ react
  react-native
  angular
  ionic
  vue
  none
以下の項目は変更せずそのままEnterで良いと思います。
? Source Directory Path:  src
? Distribution Directory Path: build
? Build Command:  npm run-script build
? Start Command: npm run-script start
Using default provider awscloudformation
AWS profieを使うか?と聞いてきますので Y [Yes]を選択し、profileを選択します。
? Do you want to use an AWS profile? Yes
? Please choose the profile you want to use
  default
❯ yeah
ちなみにprofileは~/.aws/credentialsに記載する以下のものです。
profileを使用しない場合はAWS_ACCESS_KEY_IDとAWS_SECRET_ACCESS_KEYを入力するように求められます。
事前にprofileを設定しておきましょう。profileの設定方法はaws configureコマンドを使用しても良いですし、直接~/.aws/credentialsに記載しても良いです。~/.aws/configにも忘れずに記載しましょう。
詳細はこちらの記事が参考になります。
$ cat ~/.aws/credentials
[default]
aws_access_key_id=xxxxxxxxxxxxxxxxxxxxxxx
aws_secret_access_key=xxxxxxxxxxxxxxxxxxxxxxx

[yeah]
aws_access_key_id=xxxxxxxxxxxxxxxxxxxxxxx
aws_secret_access_key=xxxxxxxxxxxxxxxxxxxxxxx
使用するprofileを選択した時点でCloudformationのデプロイが開始されます。
S3バケットと各種IAMRoleが作成されています。
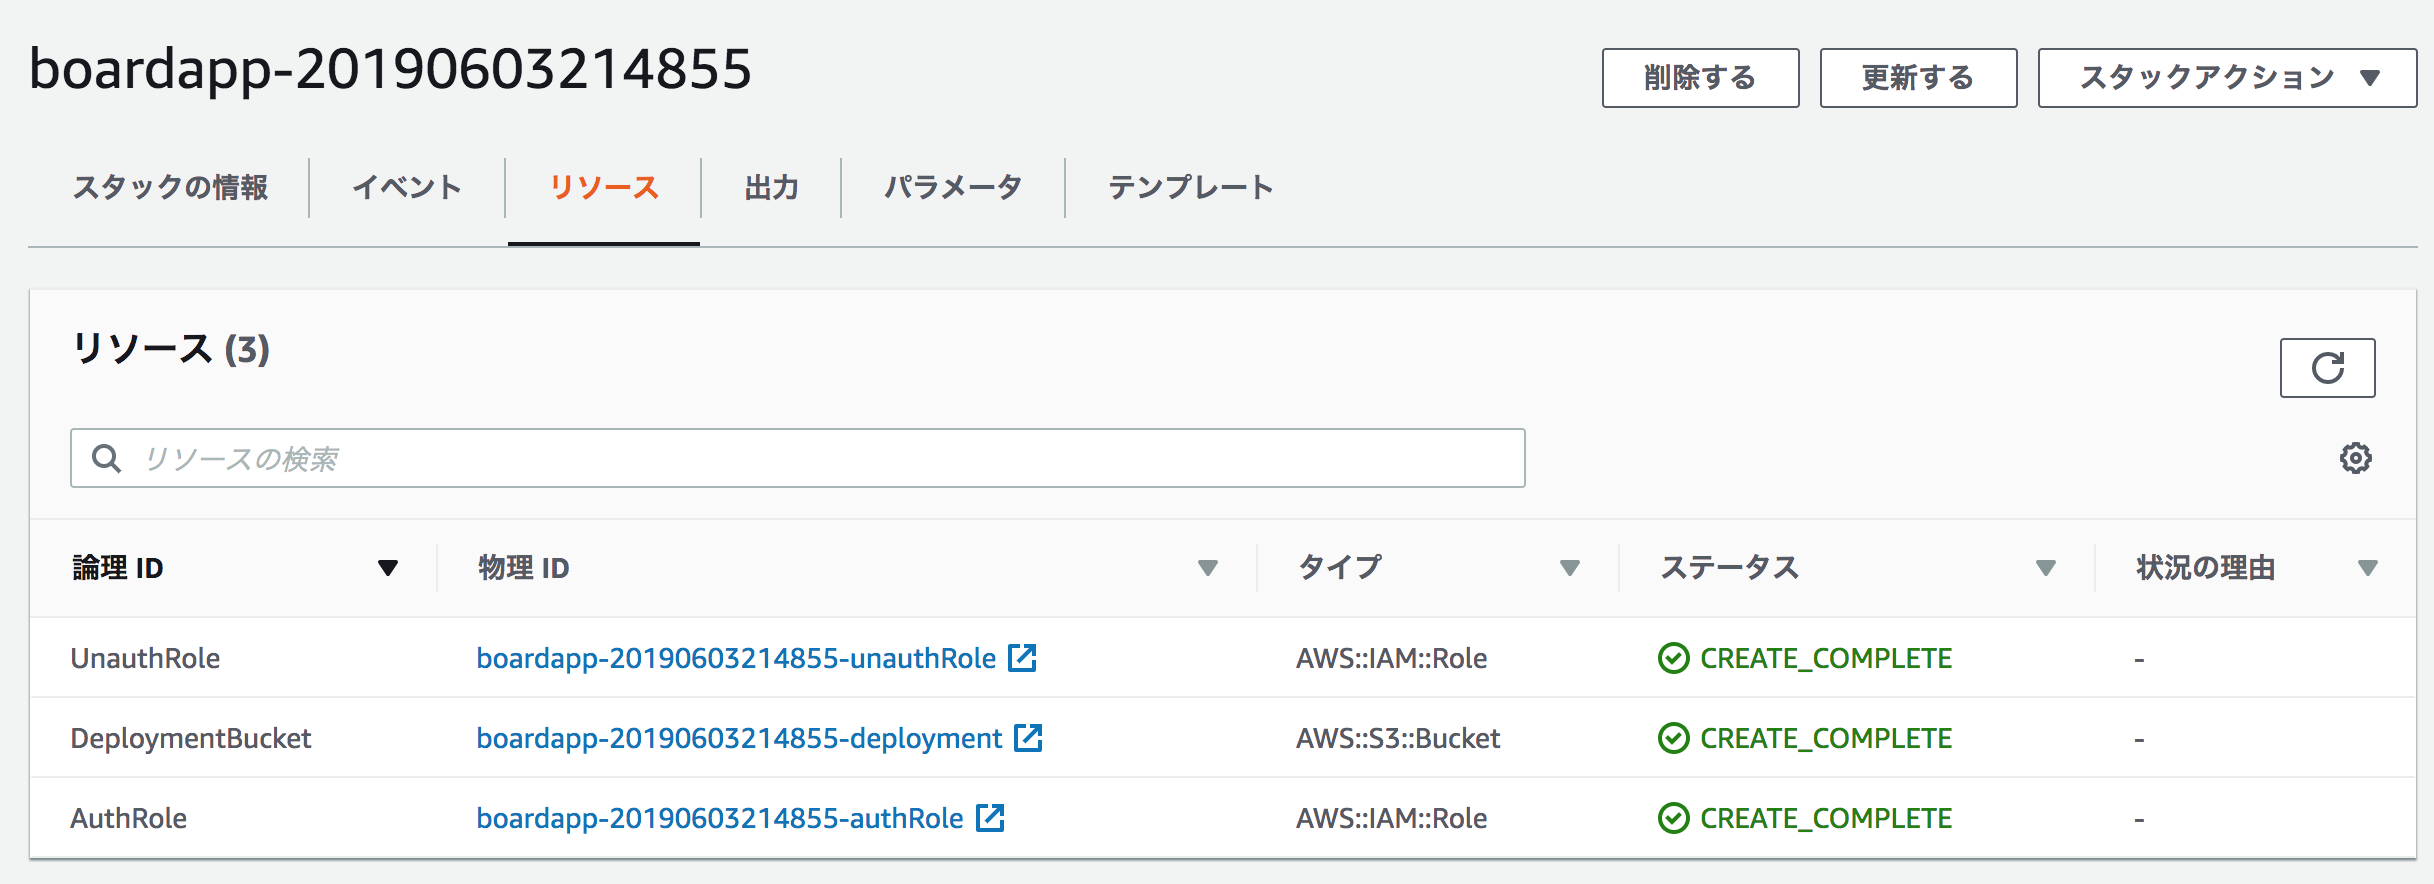
これでAmplifyを使って開発していく準備がようやく整いました。ここまでで約3分です。
バックエンドにGraphQL APIとDBを作る(3〜6分)
今回構築するモデルはこのような感じです。
AmplifyCLIがデフォルトで作ってくれるモデルをそのまま流用します。
type Post @model {
	id: ID!
	title: String!
	content: String!
	price: Int
	rating: Float
}
とりあえず超最小の構成でいきます。
DBのモデルはこの際どうでもいいです。
とにかく早く作り上げることに専念します。
$ amplify add api
? Please select from one of the below mentioned services (Use arrow keys)
❯ GraphQL
  REST

? Provide API name: boardapp

? Choose an authorization type for the API (Use arrow keys)
❯ API key
  Amazon Cognito User Pool

? Do you have an annotated GraphQL schema? (y/N) N

? Do you want a guided schema creation? (Y/n) n

? Provide a custom type name (MyType) Post
amplifyディレクトリにスキーマのモデル定義ができています。
$ tree -L 4 amplify/
amplify/
├── #current-cloud-backend
│   └── amplify-meta.json
└── backend
    ├── amplify-meta.json
    └── api
        └── boardapp
            ├── build
            ├── cloudformation-template.json
            ├── parameters.json
            └── schema.graphql

5 directories, 5 files

$ cat amplify/backend/api/boardapp/schema.graphql
type Post @model {
	id: ID!
	title: String!
	content: String!
	price: Int
	rating: Float
}
あとはAWS上にデプロイしましょう。
$ amplify push
| Category | Resource name | Operation | Provider plugin   |
| -------- | ------------- | --------- | ----------------- |
| Api      | boardapp      | Create    | awscloudformation |
? Are you sure you want to continue? (Y/n) Y
amplify pushコマンドを実行して、バックエンドにAPIを構築します。
作成されるリソースの確認ができます。
想定通りのAPIが作られますのでこのまま Y を選択して下さい。
あとはガイドにしたがって選択すればOKです。
? Do you want to generate code for your newly created GraphQL API (Y/n) Y

? Choose the code generation language target javascript

? Enter the file name pattern of graphql queries, mutations and subscriptions src/graphql/**/*.js

? Do you want to generate/update all possible GraphQL operations - queries, mutations and subscriptions Yes
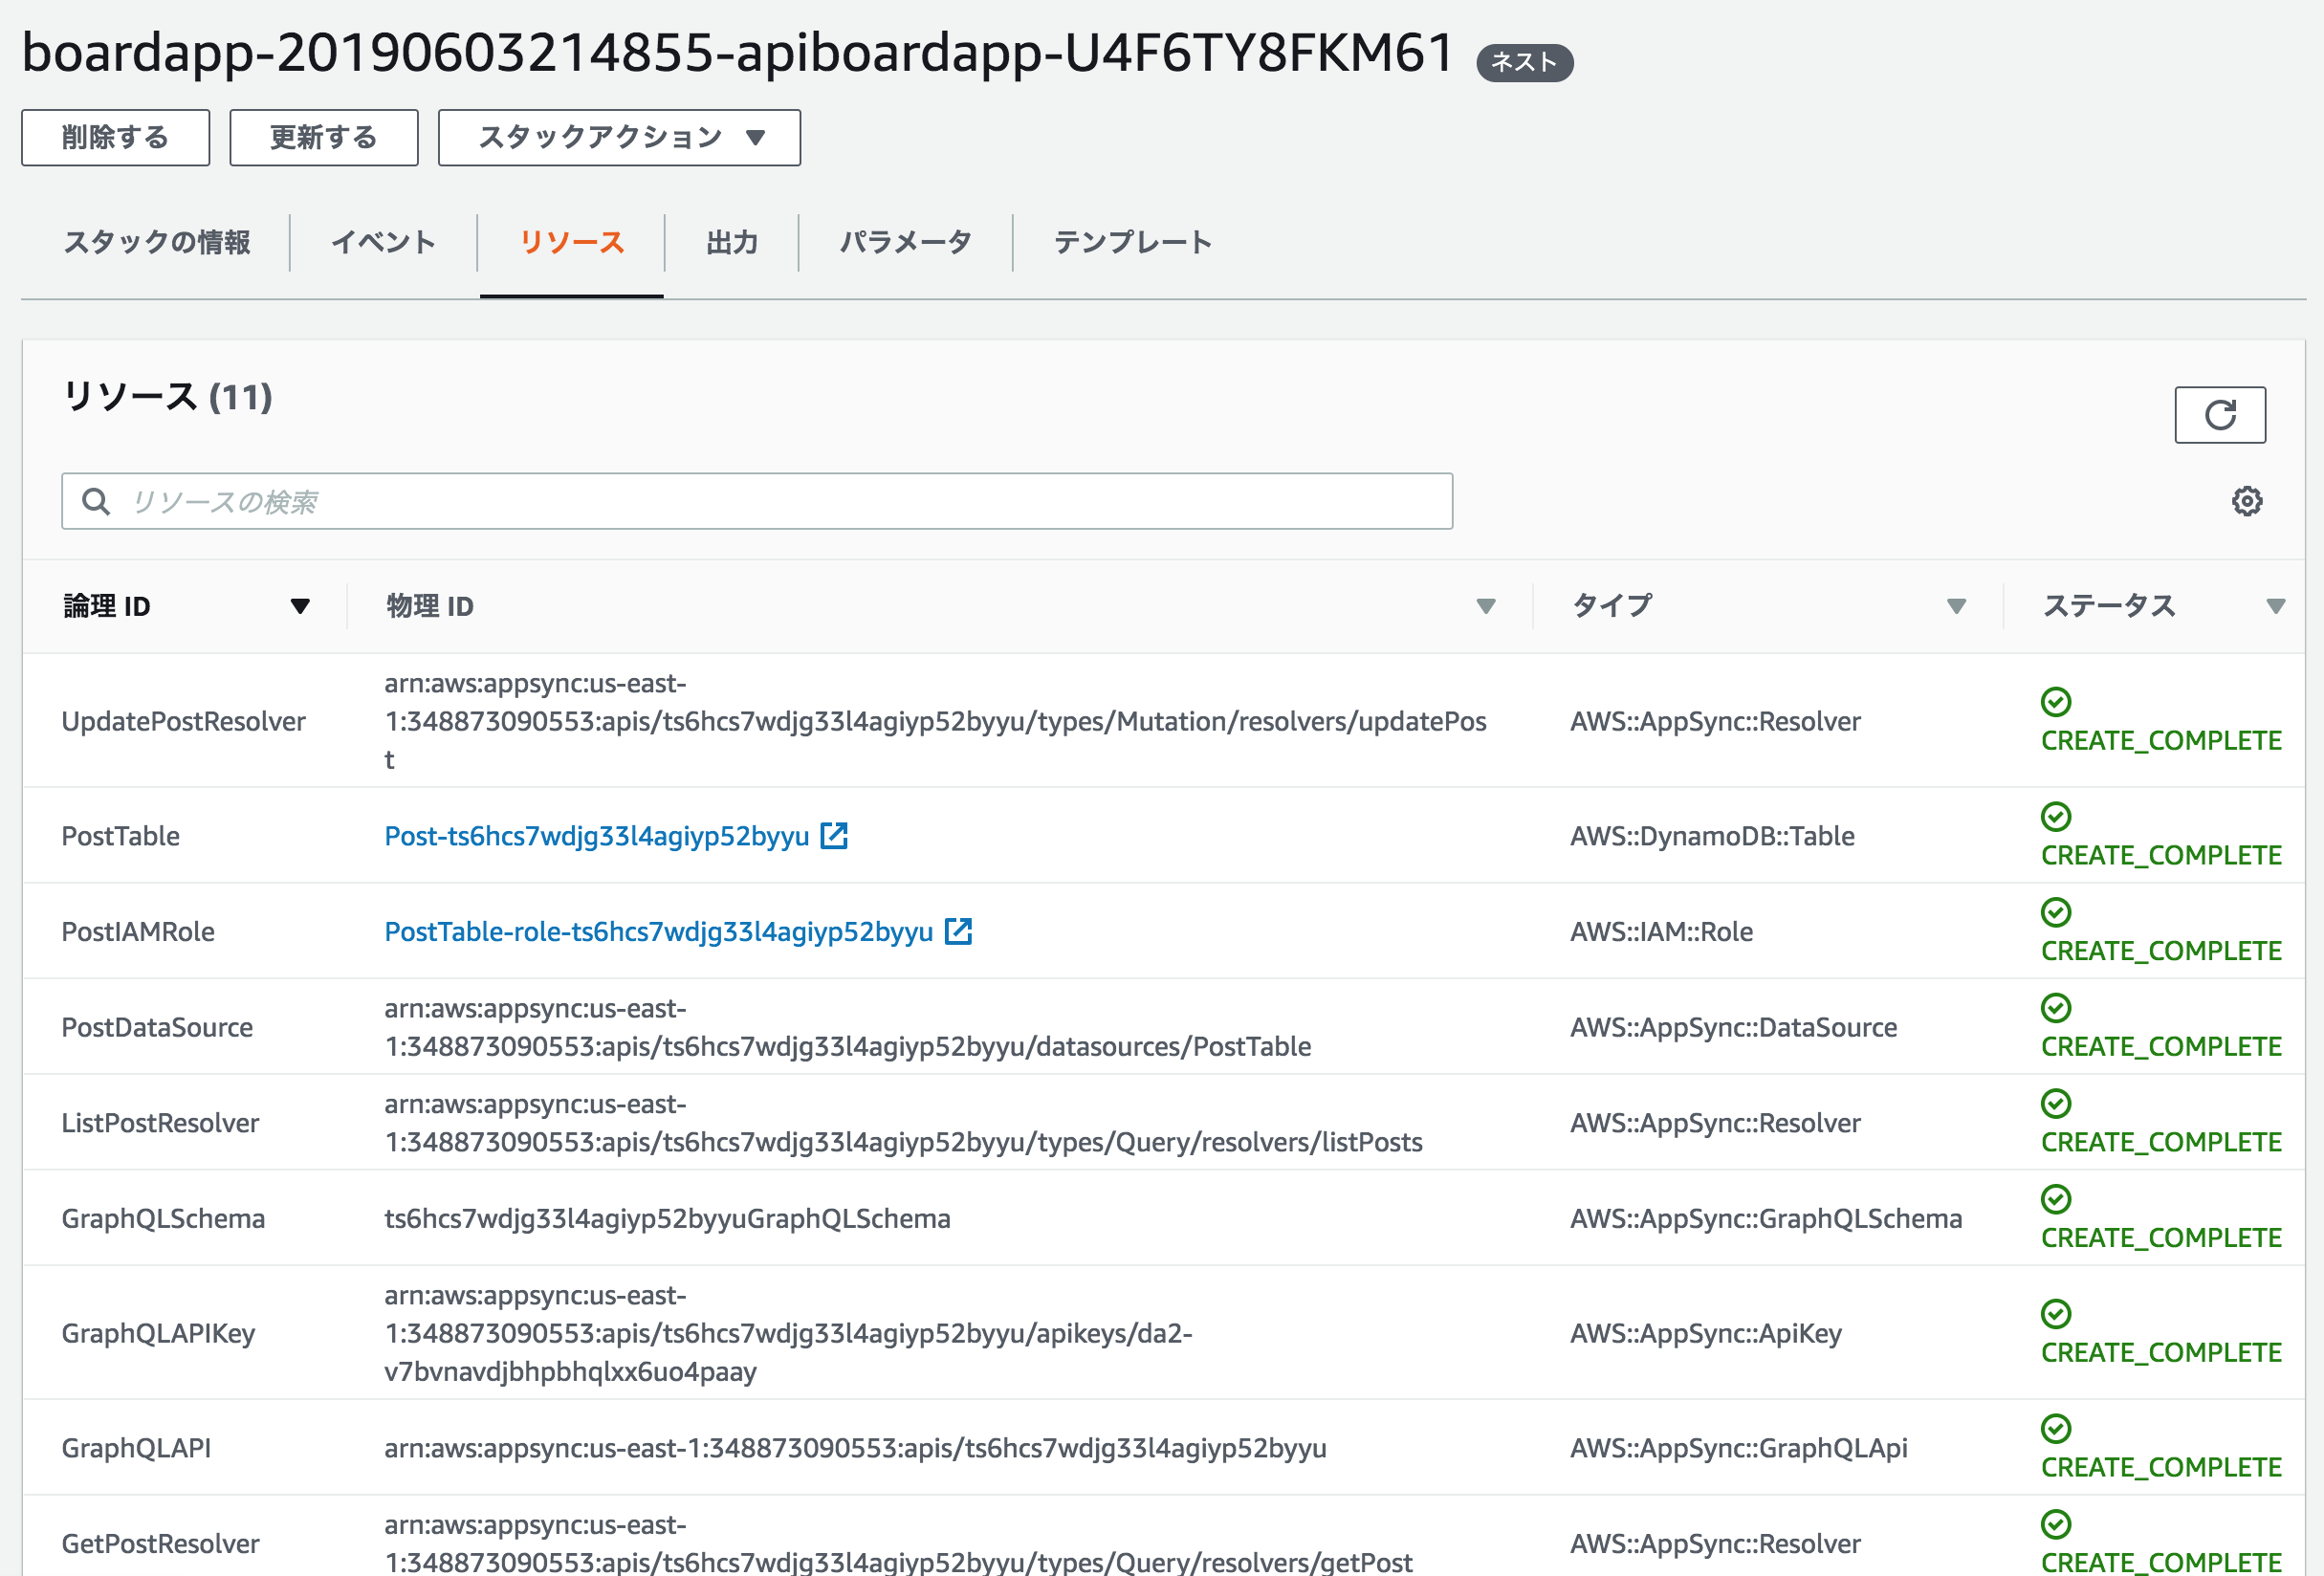
AWSでリソースの作成が開始されます。
最初に構築したスタックのNestedスタックとしてAppSyncのリゾルバーとDynamoDBテーブルなど一連のバックエンドリソースが構築されます。
amplify push実行後にはコンソール上にGraphQLのエンドポイントとAPIキーが表示されます。
わざわざAWSコンソールを確認せずともこのような情報が取得できるのは大変効率がいいですね。
最高のDeveloperExperienceです。
⠋ Updating resources in the cloud. This may take a few minutes...⠋ Generating GraphQL operations⠋ Generatingundefined
✔ Code generated successfully and saved in file
✔ Generated GraphQL operations successfully and saved at src/graphql
✔ All resources are updated in the cloud

GraphQL endpoint: https://xxxxxxxxx.appsync-api.us-east-1.amazonaws.com/graphql
GraphQL API KEY: xxxxxxxxxxxxxxxxxxx
ちなみにこの情報は src/aws-exports.jsに自動的に挿入されるようになっています。
本当に実装する必要がある部分が少なく済むようになっています。
// WARNING: DO NOT EDIT. This file is automatically generated by AWS Amplify. It will be overwritten.

const awsmobile =  {
    "aws_project_region": "us-east-1",
    "aws_appsync_graphqlEndpoint": "https://xxxxxxxxx.appsync-api.us-east-1.amazonaws.com/graphql",
    "aws_appsync_region": "us-east-1",
    "aws_appsync_authenticationType": "API_KEY",
    "aws_appsync_apiKey": "xxxxxxxxxxxxxxxxxxx"
};


export default awsmobile;
クライアントからAPIにアクセスする(6〜15分)
まずはAppsyncにアクセスするためにクライアントライブラリを使用します。
以下の2つをpackaged.jsonに追加しましょう。
$ yarn add aws-amplify aws-amplify-react
ライブラリを追加したらindex.jsでimportしておきましょう。
その際、./aws-exports.jsも同時に読み込ませることで、バックエンドの接続情報をAmplifyに認識させます。
import React from 'react';
import ReactDOM from 'react-dom';
import './index.css';
import App from './App';
import * as serviceWorker from './serviceWorker';
import Amplify from "aws-amplify";                     // <--- 追加
import config from "./aws-exports";                    // <--- 追加
Amplify.configure(config)                              // <--- 追加

ReactDOM.render(<App />, document.getElementById('root'));

// If you want your app to work offline and load faster, you can change
// unregister() to register() below. Note this comes with some pitfalls.
// Learn more about service workers: https://bit.ly/CRA-PWA
serviceWorker.unregister();
一覧表示 query
./src/graphql/queries.jsにクエリが格納されています。
標準的なクエリまで自動生成してくれるのがAmplifyCLIの魅力の一つですね。
これを使っていきましょう。一覧表示ならlistPostsを使えばよいという具合です。
// eslint-disable
// this is an auto generated file. This will be overwritten

export const getPost = `query GetPost($id: ID!) {
  getPost(id: $id) {
    id
    title
    content
    price
    rating
  }
}
`;
export const listPosts = `query ListPosts(
  $filter: ModelPostFilterInput
  $limit: Int
  $nextToken: String
) {
  listPosts(filter: $filter, limit: $limit, nextToken: $nextToken) {
    items {
      id
      title
      content
      price
      rating
    }
    nextToken
  }
}
`;
とりあえず初めの一歩としてApp.jsに一覧表示機能を追加していきます。
import React, { Component } from 'react';
import { API, graphqlOperation } from "aws-amplify";
import { listPosts } from './graphql/queries';

class App extends Component {

  state = {
    posts: []
  }

  async componentDidMount() {
    try {
      const posts = await API.graphql(graphqlOperation(listPosts))
      console.log('posts: ', posts)
    } catch (e) {
      console.log(e)
    }
  }

  render() {
    return (
      <div className="App">
      </div>
    )
  }
}

export default App;
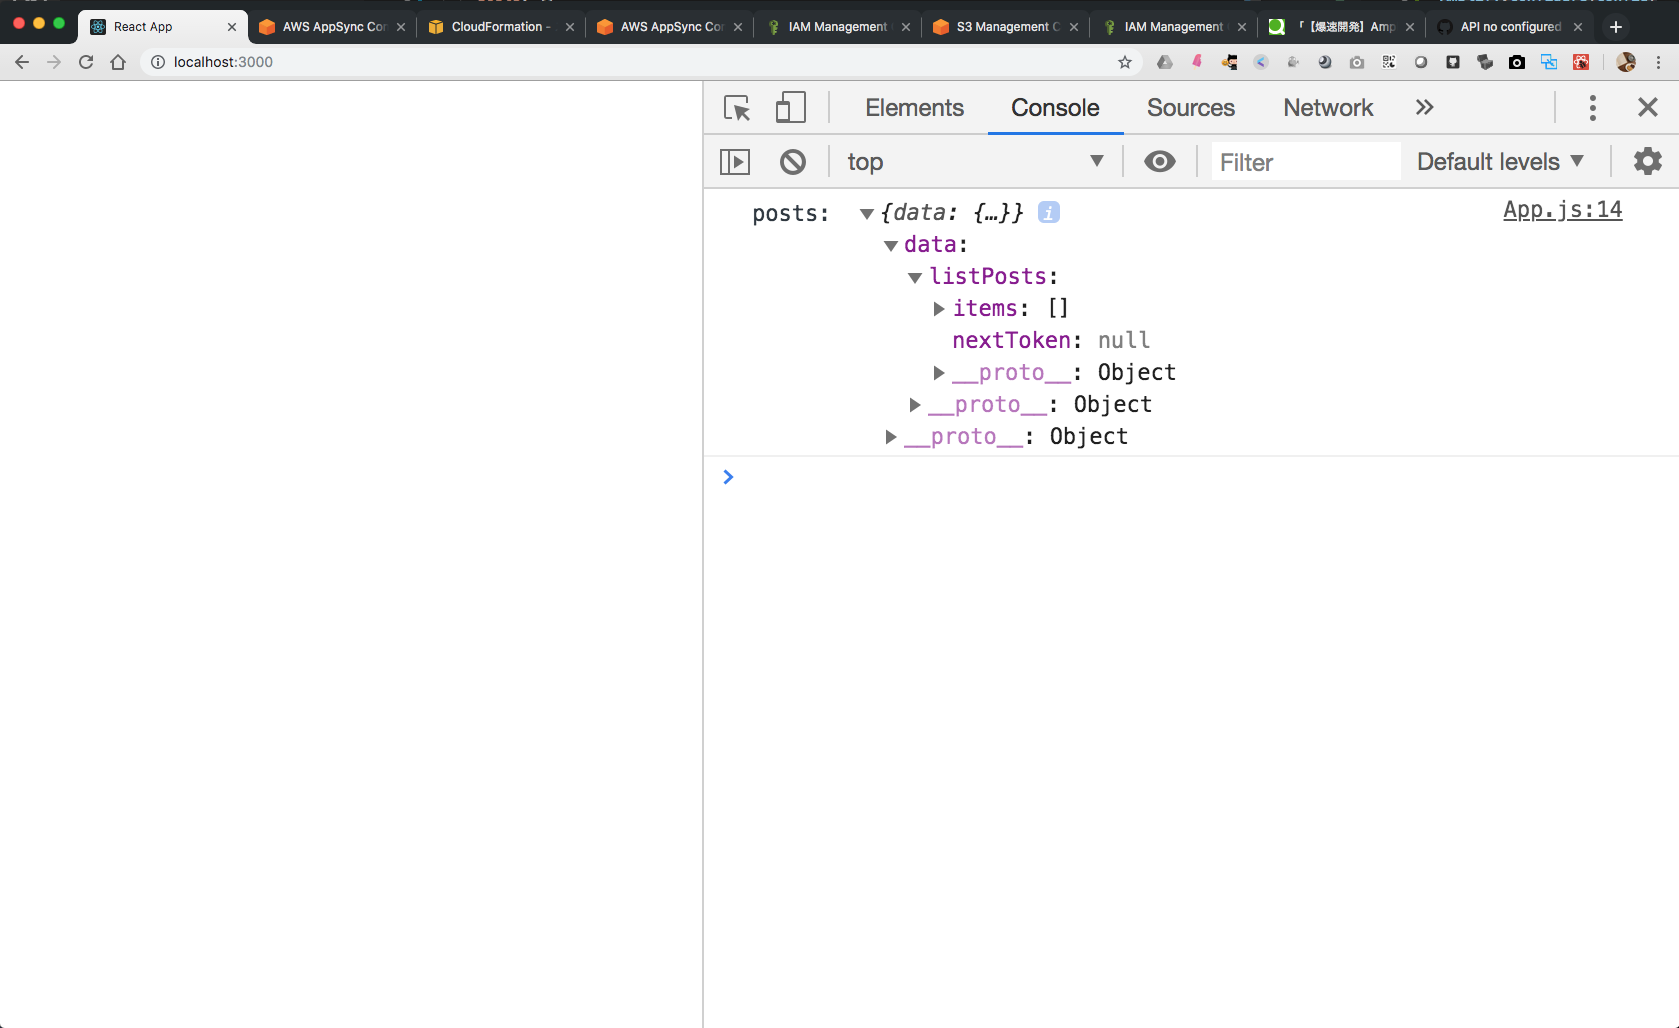
まだレコードを格納していないので何も取得できていませんが、
接続はうまくいっているようです。items: [] と nextToken: nullが帰ってきていますね。
登録 mutation
次に./graphql/mutationsのcreatePostを使用してDBにレコードを登録しましょう。
import { createPost } from './graphql/mutations';

class App extends Component {

  state = {
    posts: [],
    title: "",
    content: ""
  }

-- 略 --

  createPost = async () => {
    // バリデーションチェック
    if (this.state.title === '' || this.state.content === '') return

    // 新規登録 mutation
    const createPostInput = {
      title: this.state.title,
      content: this.state.content
    }

    // 登録処理
    try {
      const posts = [...this.state.posts, createPostInput]
      this.setState({ posts: posts, title: "", content: "" })
      await API.graphql(graphqlOperation(createPost, { input: createPostInput }))
      console.log('createPostInput: ', createPostInput)
    } catch (e) {
      console.log(e)
    }
  }

  onChange = e => {
    this.setState({ [e.target.name]: e.target.value })
  }

  render() {
    return (
      <div className="App">
        <div>
          タイトル
        <input value={this.state.title} name="title" onChange={this.onChange}></input>
        </div>
        <div>
          内容
        <input value={this.state.content} name="content" onChange={this.onChange}></input>
        </div>
        <button onClick={this.createPost}>追加</button>
      </div>
    )
  }
}
フォームに入力して追加します。
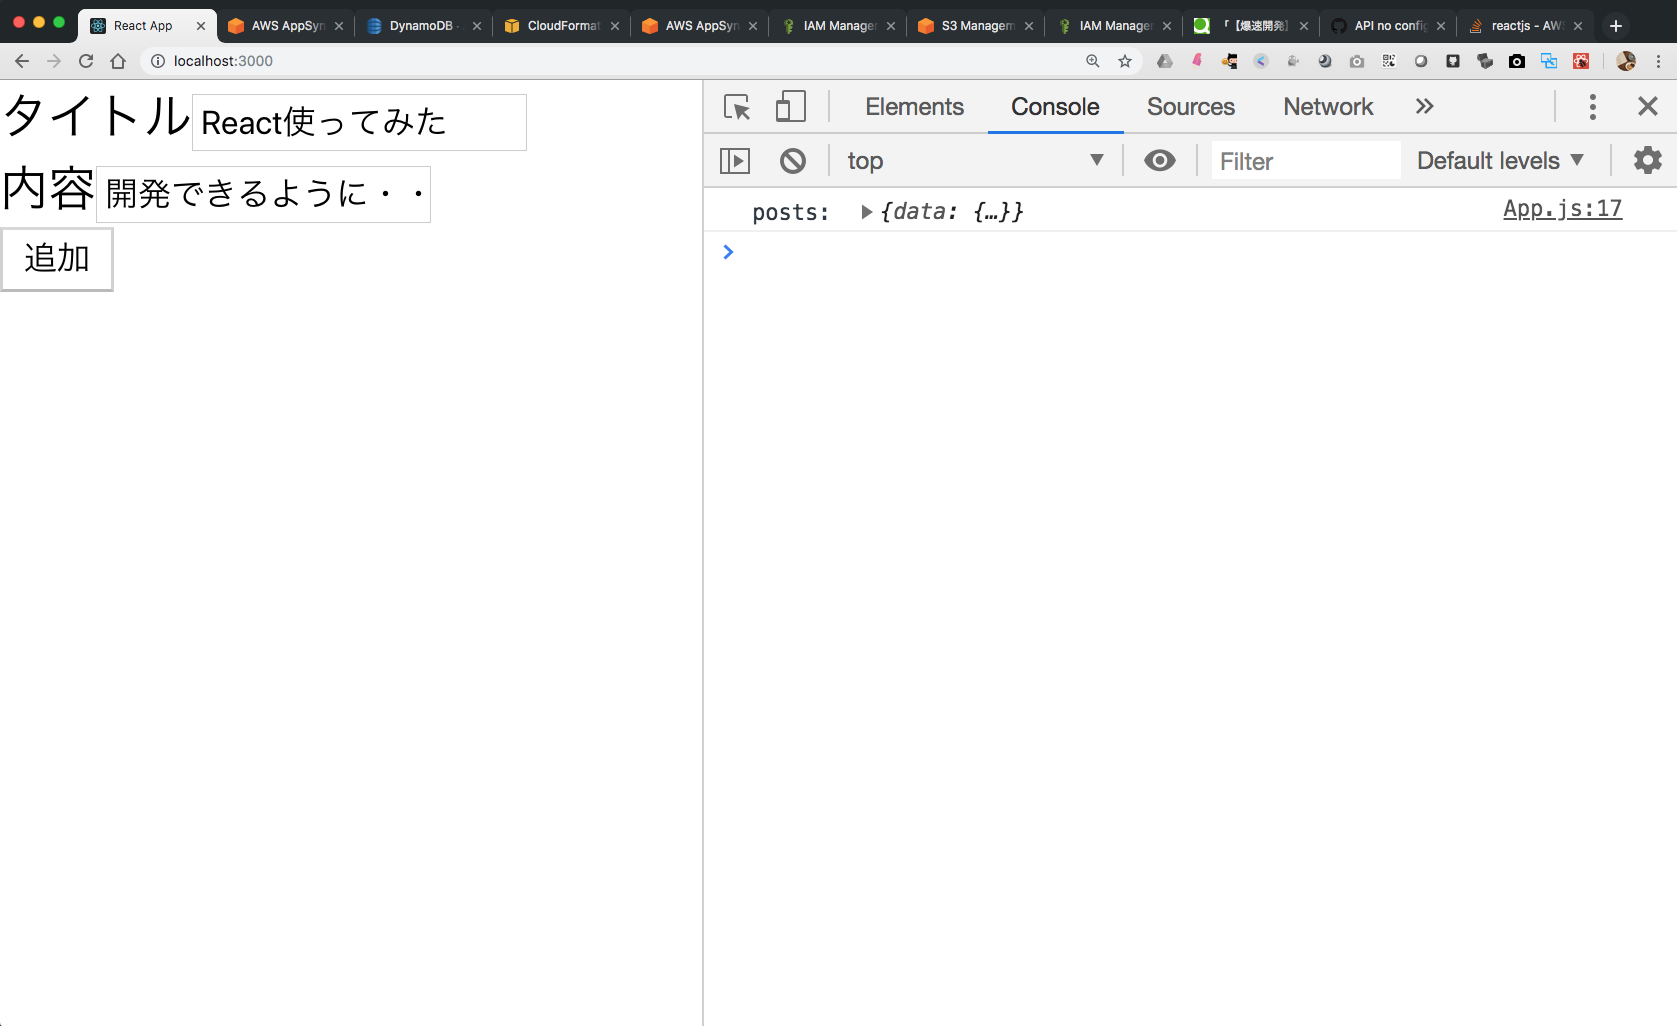
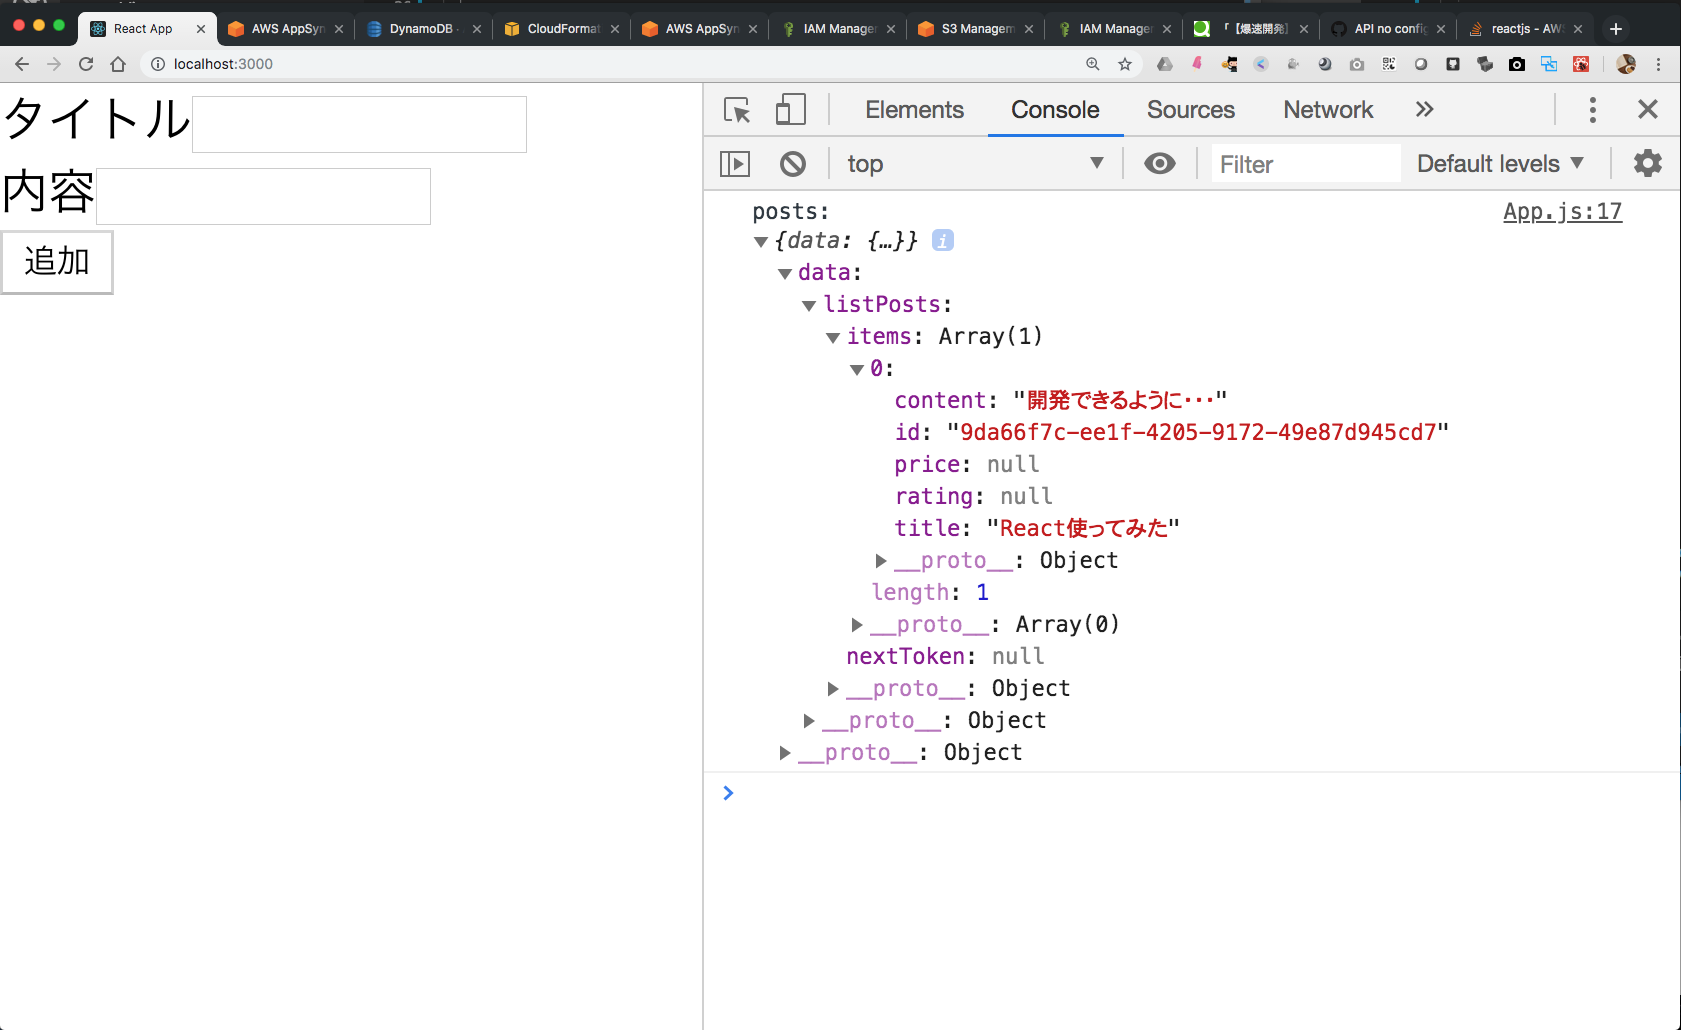
mutationで新規登録のAPIを介してレコードが登録されました。
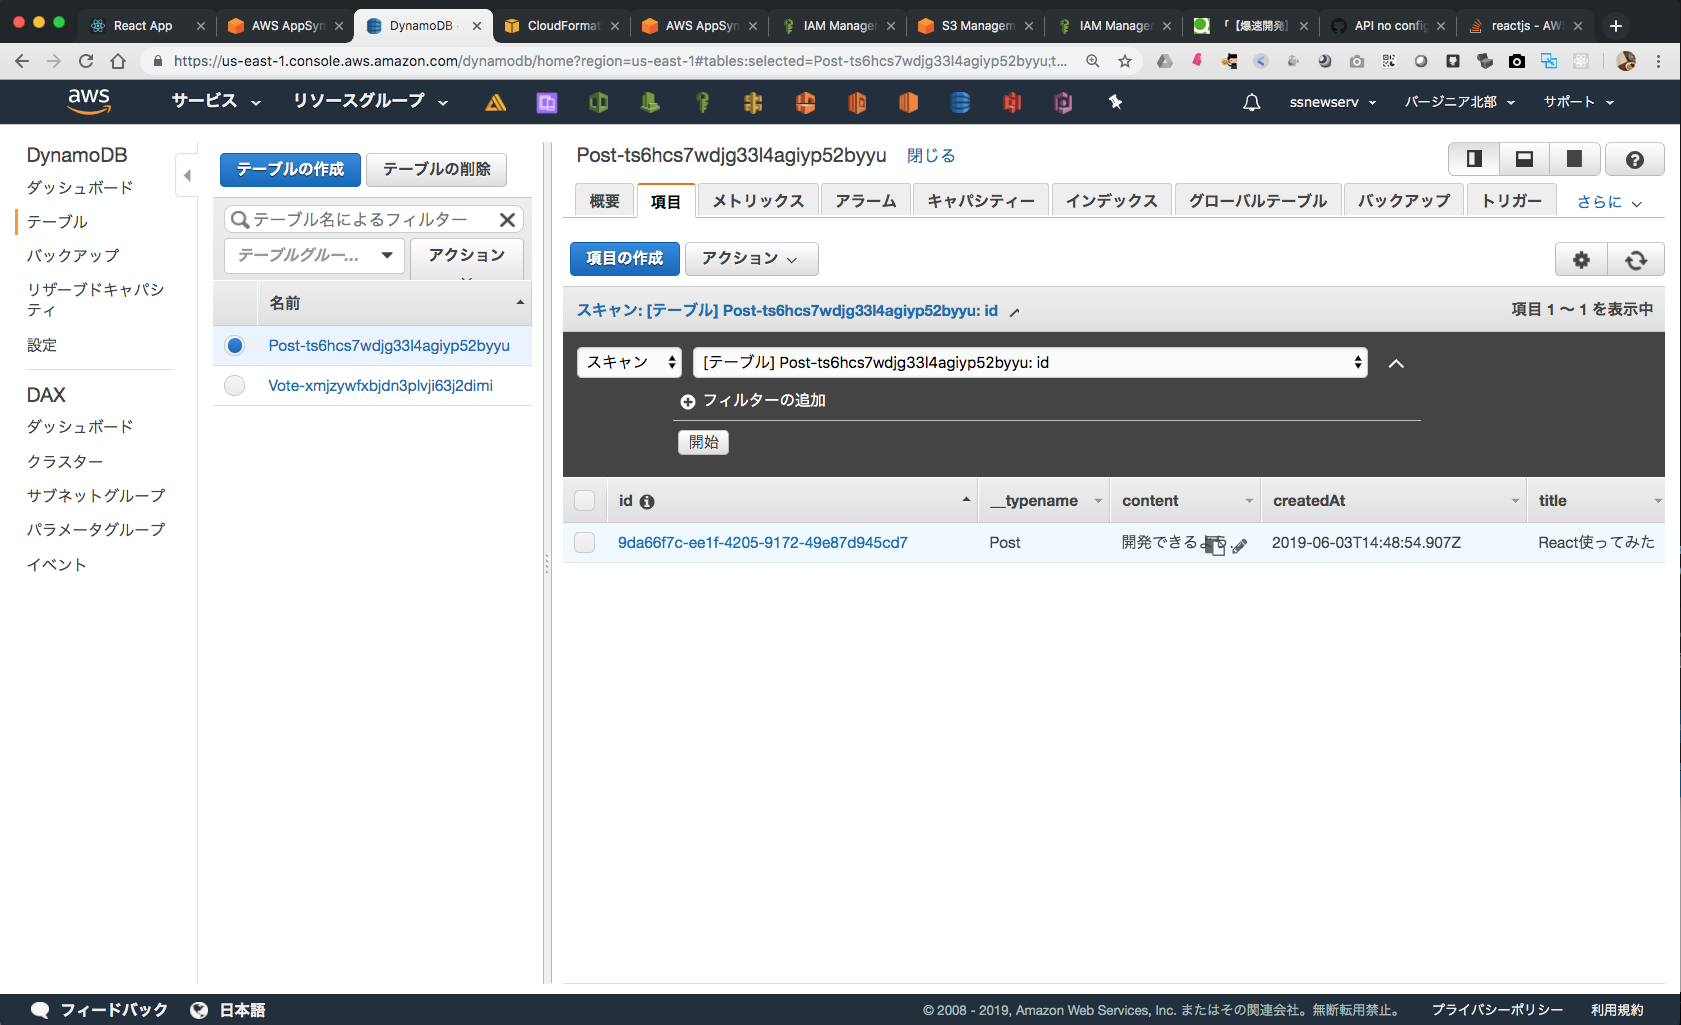
DynamoDBにもレコードが登録されています。
subscription 更新を取得して画面描画する
最後にサブスクリプション(購読)の実装です。
他のユーザの更新をトリガーに、変更分を描画します。
componentDidMountの一部としてsubscriptionを実装すれば特に難しいことはありません。
  async componentDidMount() {
    try {
      const posts = await API.graphql(graphqlOperation(listPosts))
      console.log('posts: ', posts)
      this.setState({ posts: posts.data.listPosts.items })
    } catch (e) {
      console.log(e)
    }

    API.graphql(graphqlOperation(onCreatePost)).subscribe({
      next: (eventData) => {
        console.log('eventData: ', eventData)
        const post = eventData.value.data.onCreatePost
        const posts = [...this.state.posts.filter(content => {
          return (content.title !== post.title)
        }), post]
        this.setState({ posts })
      }
    })
  }
さいごに
なんとかここまで15分で実装を完了しました。
GraphQLの操作は初めはとっかかりずらい部分がありますが、比較的習得しやすいと思います。
手馴れてくれば簡単なモデルを使ったアプリケーションならこのくらいの時間で実装ができます。