この記事について
この記事は筆者がHarvard NLPのPyTorch実装を参考にTransformerを実装した際に得られた知見をまとめた記事です。
Transformerの論文解説記事ではないということをご了承ください。
Transformerについて
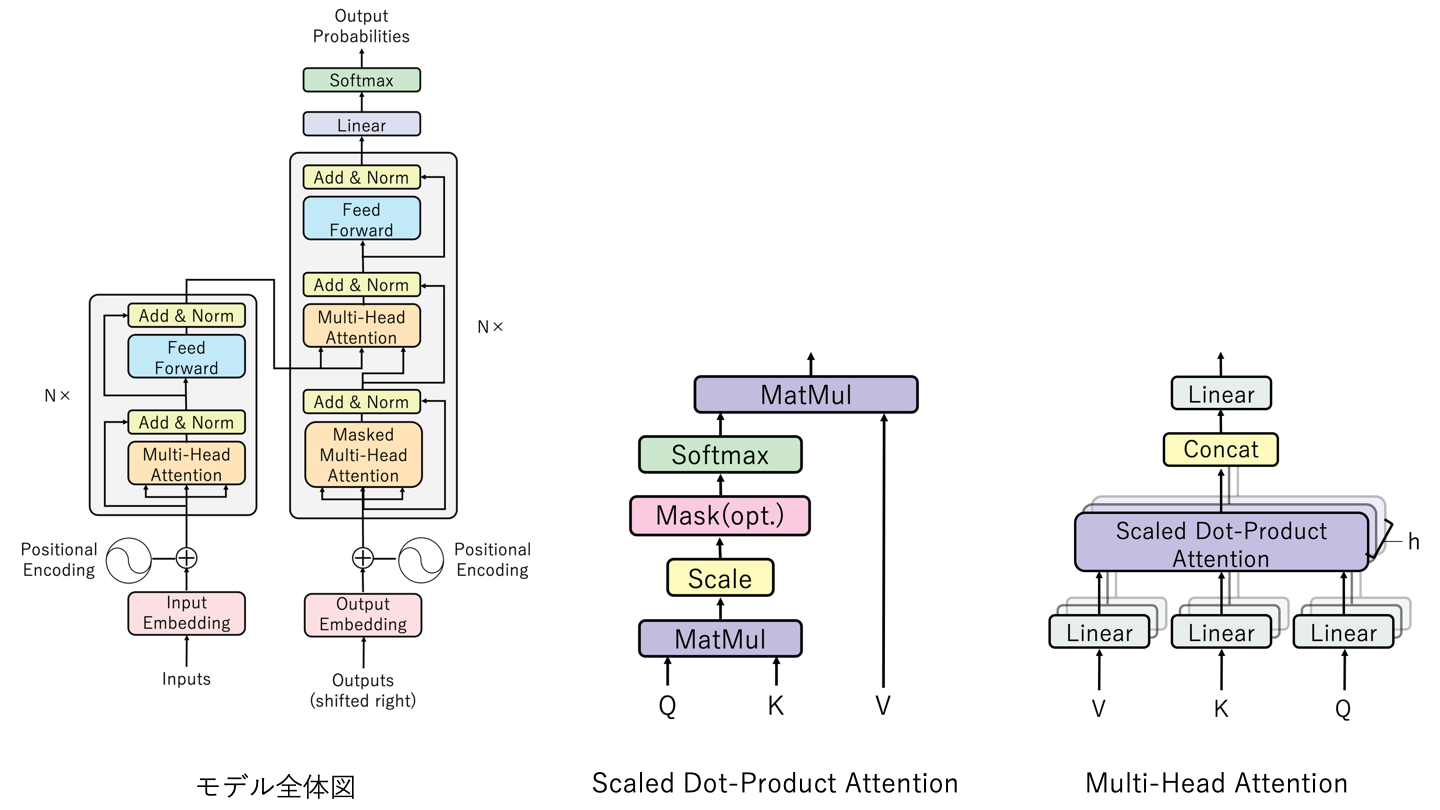
Transformerとは、「Attention is All You Need」という論文で登場したAttentionベースのモデルで、下の図のような構造をしています。
モデルの仕組みを理解したい方は次の記事が読みやすくておすすめです。
論文解説 Attention Is All You Need (Transformer) (Ryobotさん)
作って理解する Transformer / Attention (halhornさん)
データの流れを追う
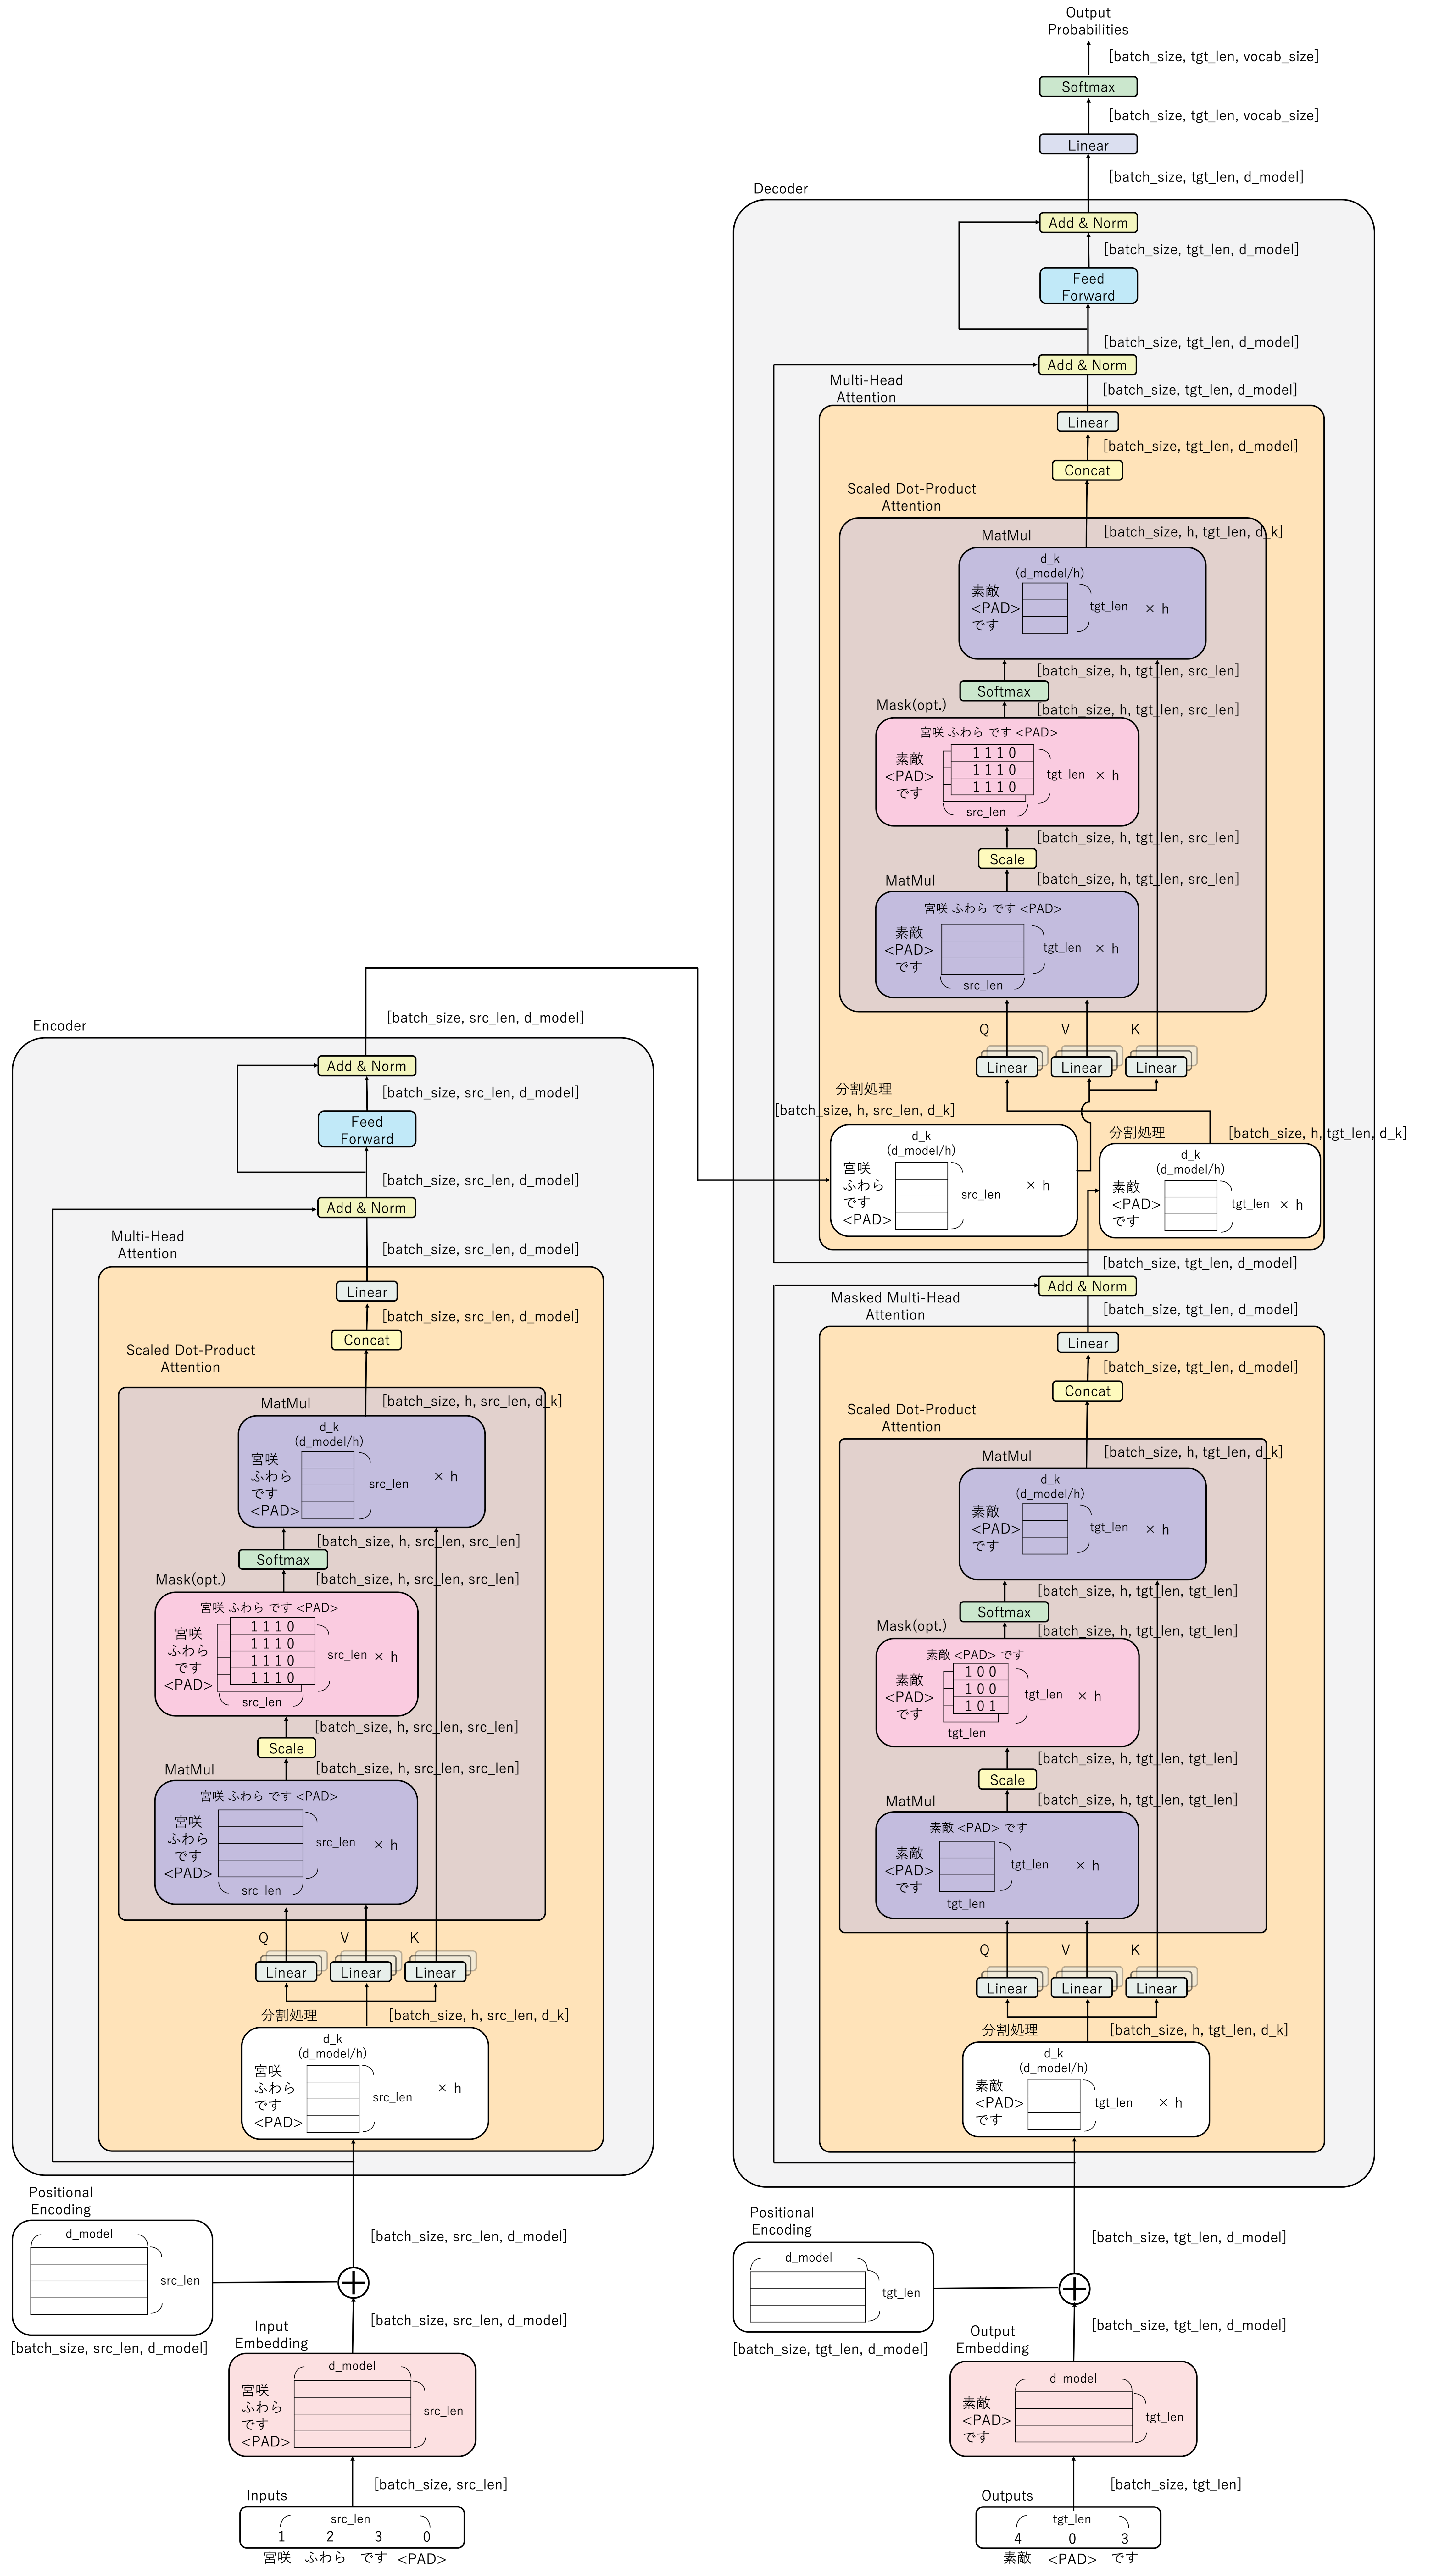
自分で実装してみた後でモデル全体のデータの流れが分かっていればTransformerの仕組みをもっと簡単に理解できたのではないかと思い、モデルの各時点においてTensorがどのような形状をとっているかということをまとめてみました。
図の説明
次のような設定で図を作成しています。
-
「宮咲ふわらです」 → 「素敵です」という対話の学習をしています。
-
Maskingの処理を理解しやすいように、意図的にDecoderの入力文の変なところにパディング記号<PAD>を挿入しています。
-
Encoder/Decoderそれぞれで<PAD>に対するMaskingの処理を行います。
また、図中で使われている変数の説明は表のとおりです。
| 変数名 | 内容 |
|---|---|
| batch_size | 学習時のバッチサイズ |
| src_len / tgt_len | Encoder / Decoderに入力する文章の長さ |
| d_model | 単語ベクトルの次元数 |
| h | Multi-Head Attentionのヘッド数 |
| vocab_size | Decoderで使われる語彙数 |
全体図
画像中の「K」と「V」が逆になっております。申し訳ございません。
AttentionのMaskingの実装について
Attentionのマスクの実装について悩んだので、Harvard NLPでのMaskの実装についてまとめておきます。
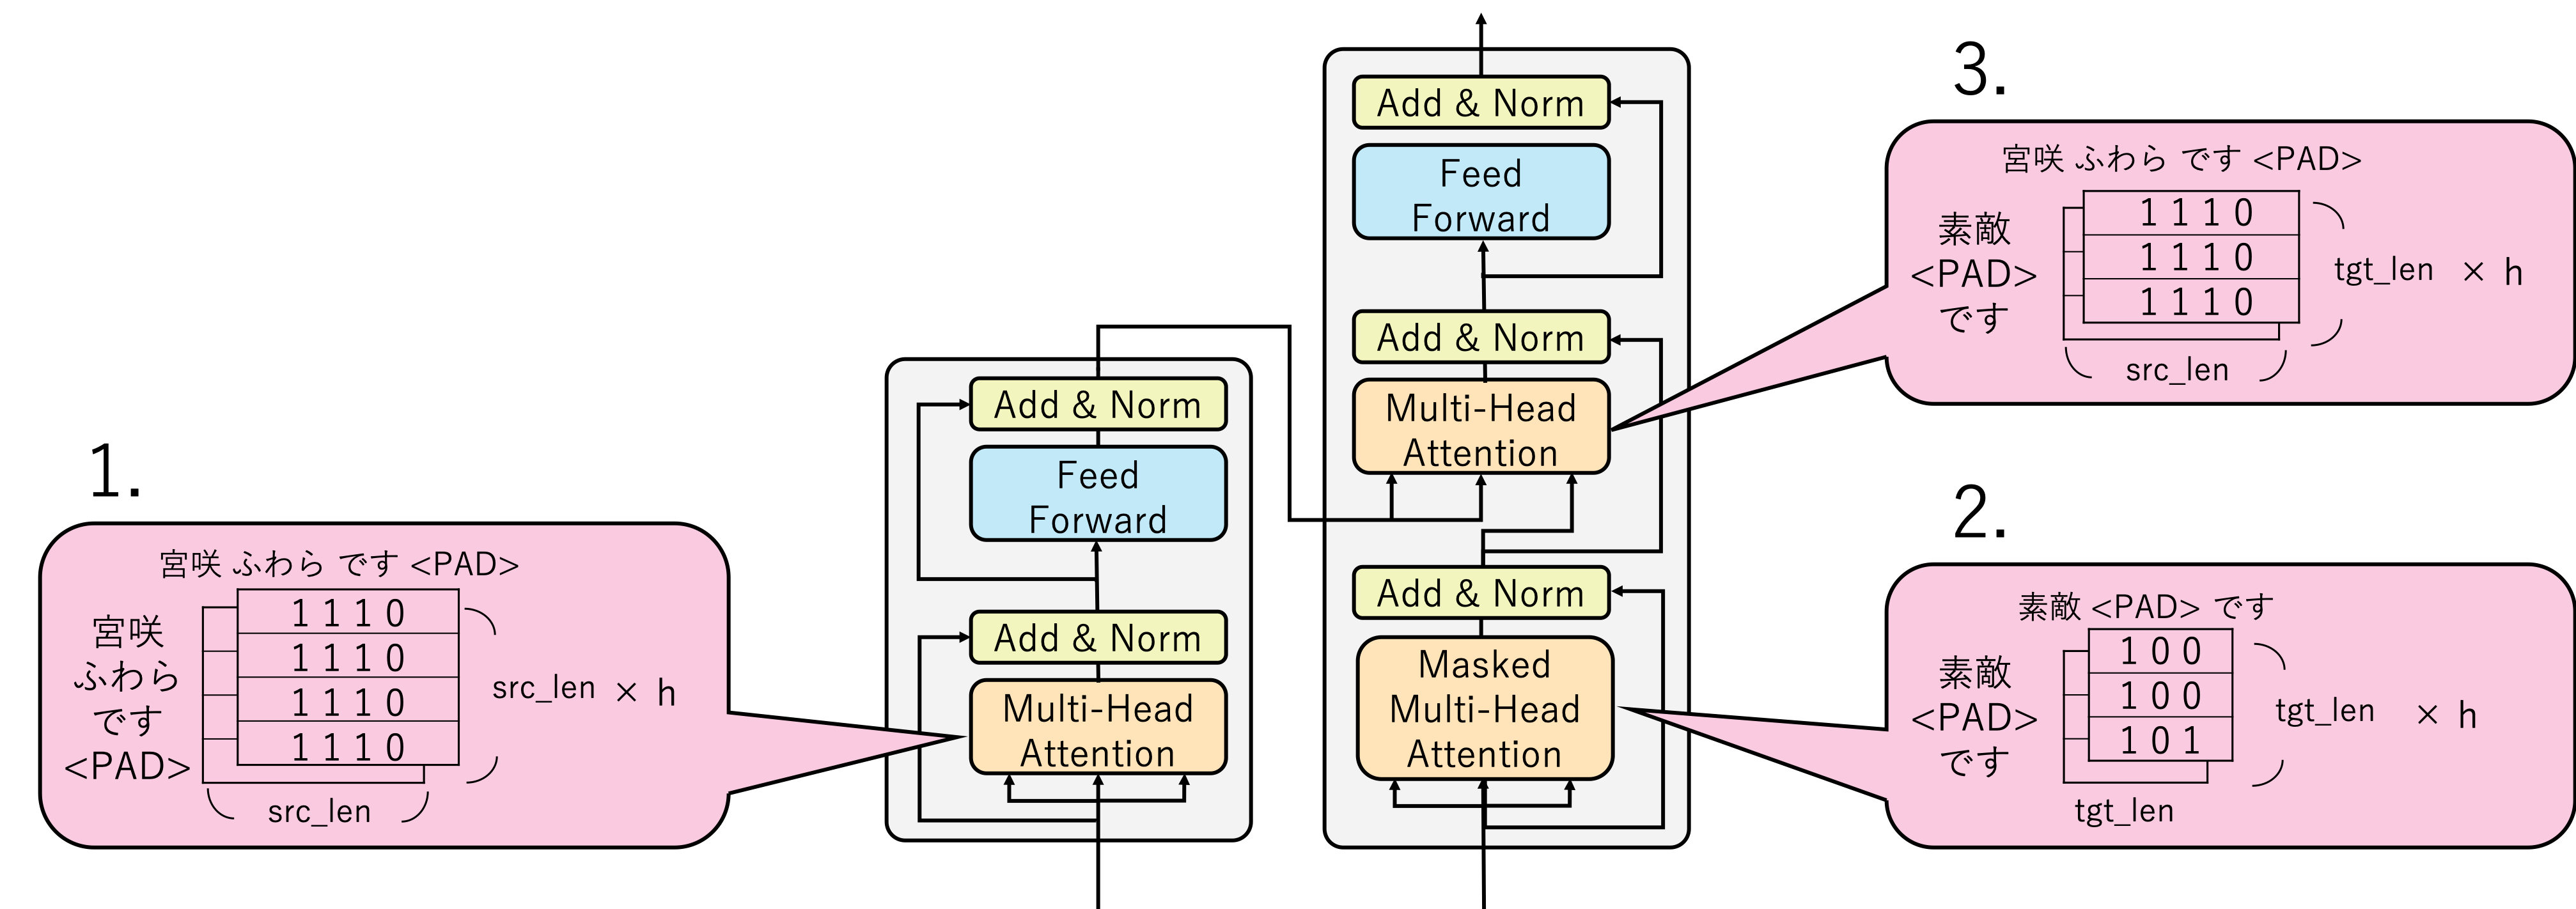
Transformerでは下の図のように3箇所のMulti-Head Attention(の中のScaled Dot-Product Attention)の中でMaskingが登場します。
- EncoderでのSelf-Attention
- DecoderでのSelf-Attention
- DecoderでのSourceTarget-Attention
Harvard NLPの実装では、1と3で使用するsrc_maskと2で使用するtgt_maskの2種類のマスクが用意されています。以下それぞれの説明です。
src_mask
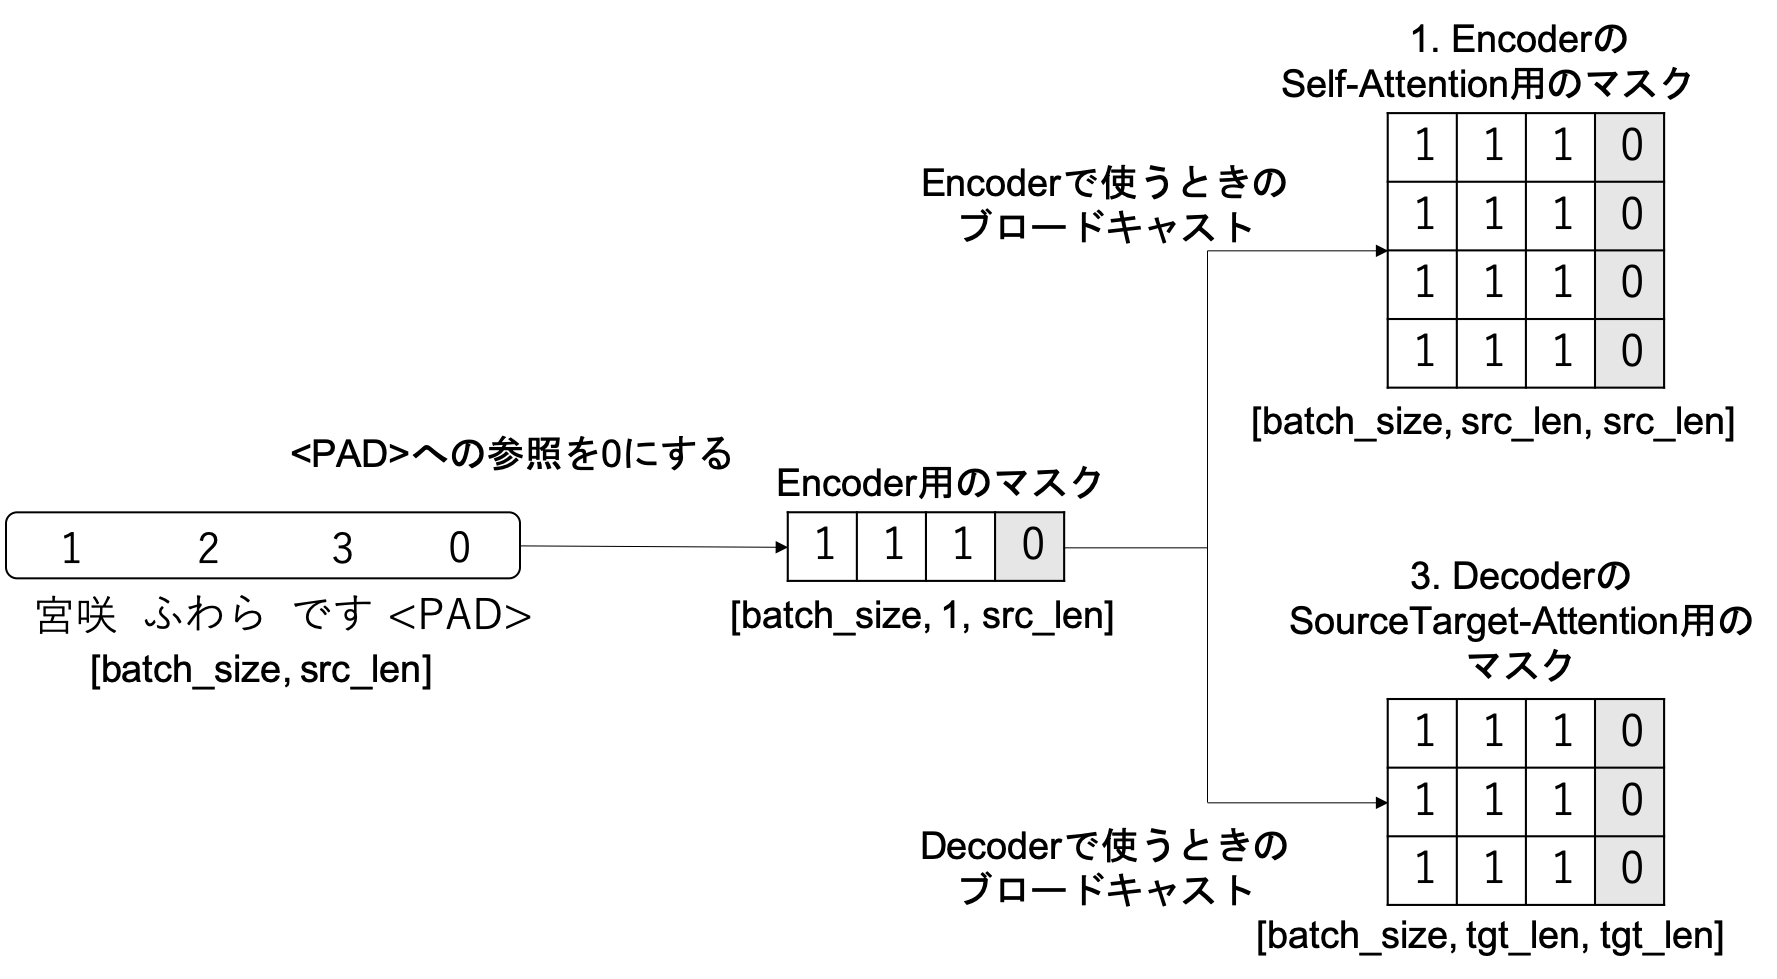
src_maskはEncoderへの入力文のパディングを参照しないようにするためのマスクで、次のように実装されています。
# srcは[batch_size, src_len]
# パディング箇所が0、それ以外が1のTensorを生成
self.src_mask = (src != pad).unsqueeze(-2)  # [batch_size, 1, src_len]
src_maskは[batch_size, 1, src_len]の形で生成されています。こうしておくことで、PyTorchのブロードキャストを利用してSelf-Attention、SourceTarget-Attentionでそれぞれ異なるサイズのTensorにマスクを掛けることができます。
(PyTorch1.1.0のブロードキャストのドキュメント)
tgt_mask
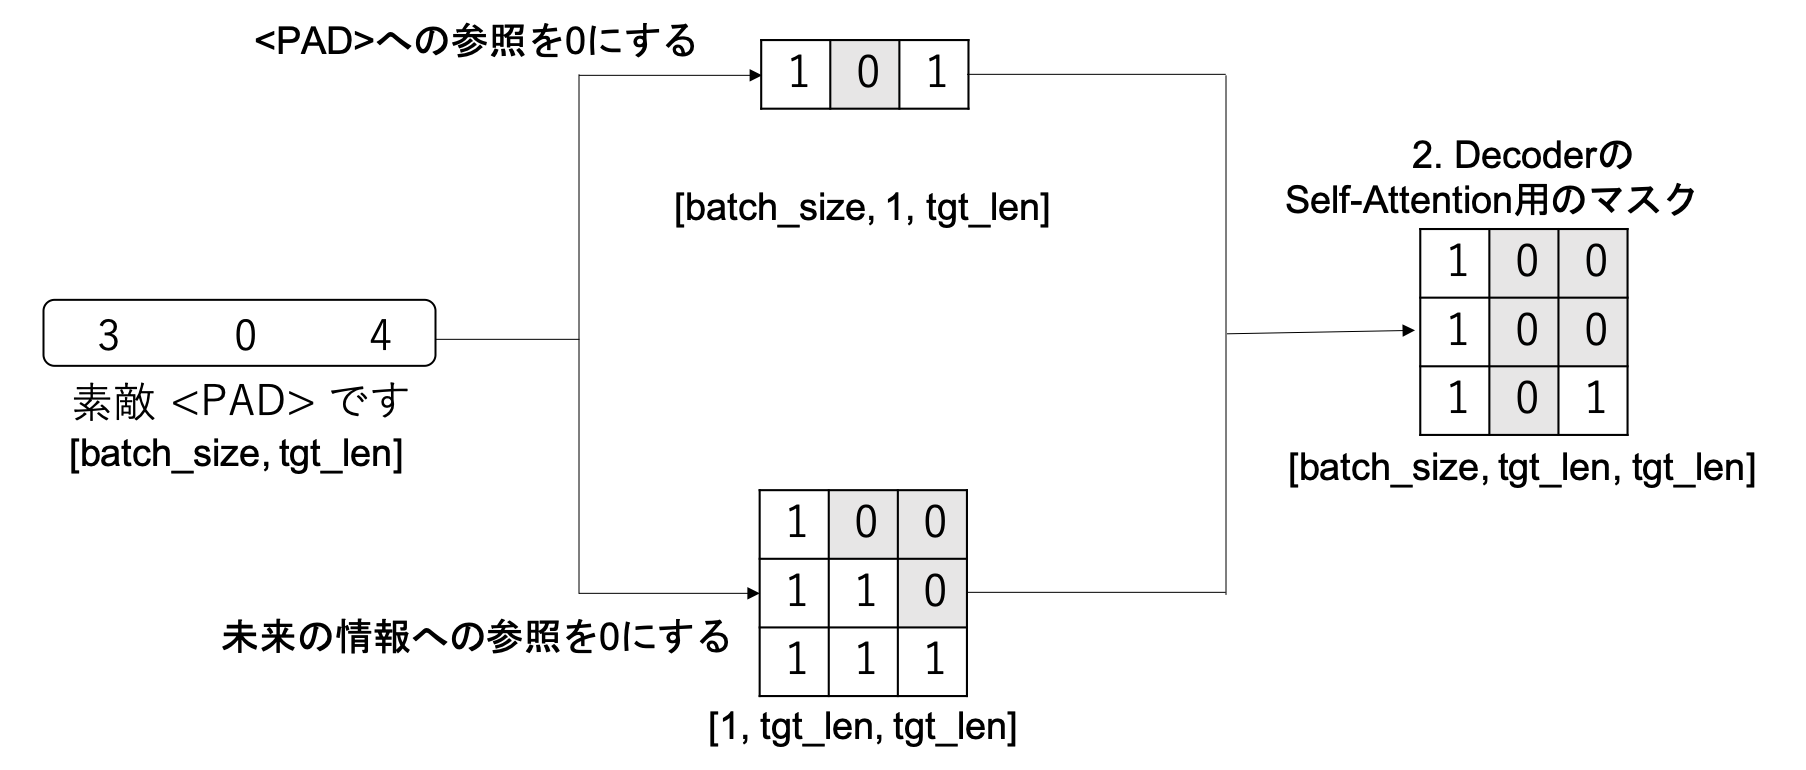
tgt_maskには次の2つの役割があります。
- Decoderへの入力文のパディングを参照しないようにする
- Self-Attentionで未来の単語を参照しないようにする
tgt_maskは次のように実装されています。
# tgtは[batch_size, tgt_len]
# パディング箇所が0、それ以外が1のTensorを生成
tgt_mask = (tgt != pad).unsqueeze(-2)  # [batch_size, 1, tgt_len]
# パディング用のマスクと未来の単語用のマスクを重ねる
tgt_mask = tgt_mask & Variable(
    subsequent_mask(tgt.size(-1)).type_as(tgt_mask.data))  # [batch_size, tgt_len, tgt_len]

# 未来の単語を参照しないようにするマスクを作成する関数
def subsequent_mask(size):
    attn_shape = (1, size, size)  # [1, tgt_len, tgt_len]
    # 三角行列の生成
    subsequent_mask = np.triu(np.ones(attn_shape), k=1).astype('uint8') # [1, tgt_len, tgt_len]
    # 1と0を反転する処理
    return torch.from_numpy(subsequent_mask) == 0
tgt_maskは[batch_size, tgt_len, tgt_len]の形で生成されています。作成するときは、図のようにパディングを参照しないようにするマスクと未来の単語を参照しないようにするマスクの2つを作成した後、それらを重ね合わせています。
最後に
Transformer内部のデータ構造を追うというニッチな内容ですが、少しでも誰かのお役に立てれば幸いです。
