nRF5系のSDKを入れる
SoftDevice S140とnRF5SDKにチェックを入れダウンロード。
- ソフトデバイス
- S113
- small BLE5(ペリフェラル、セントラル用)
- S140
- BLE5(ペリフェラル、セントラル用)
- S340
- BLE5(ペリフェラル、セントラル用)&ANT
- S113
Windowsバージョン
リンクからSeggerEmbeddedStudioを導入する。(Nordicセミコンダクター製チップを扱うための統合開発環境。
インストール時は特に設定はなく次へと進んで終わらせる。
参考https://qiita.com/usashirou/items/7b0156170a3d636a393c
Macバージョン
macのバージョンを選んでダウロード、インストール。
参考https://qiita.com/KentaHarada/items/341a0d5c9571da3aaf32
mac(brewを使う)
caskの使い方が新しくなっています。
もともとはbrew cask install gcc-arm-embeddedを使っていたようですが、caskの使い方が新しくなり、
brew install gcc-arm-embedded --caskと入力してください。
参考https://gist.github.com/BryanJBryce/43f5e36475fd5cd1336136c6154b2d13
Windows,Mac共通
nRF Connect for Desktopをインストールする。
nRF Connectが起動したらBLEとProgrammerのツールを入れる。
nRF54820にソフトデバイスを書き込む。
1.nRF Connect for Desktopを起動してProgrammerをOpenする。
2.Select deviceから書き込み対象を選択する
3.先ほどダウンロードしたs140_nrf... .hexをドロップする。(DeviceDownload.zipの中にある。)
4.Writeをクリックしてソフトデバイスを書き込む。
5.Readをクリックし、nRF54820にFile memory layoutと同様のものがあるかどうかを確認する。
サンプルプログラムのビルドと書き込み
DeviceDownload/nRF5SDF/nRF5_SDK...dde/examples/ble_peripheral/ble_app_blinky_c/hex/ble_app_blinky_c_pca10040_s140.hex 左のファイルを使う。

ソフトデバイスとサンプルプログラムを書き込むと上の写真のようになる。
動作確認
nRF Connect for Desktopを起動してBluetooth Low Energyをopenする。
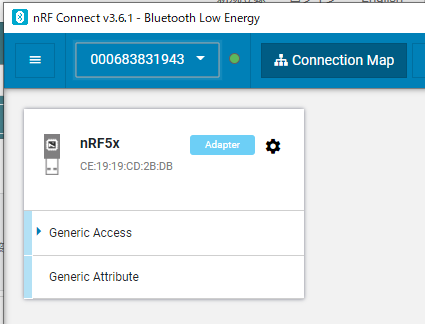
デバイスが認識されていると画像のようになる。
参考文献