この記事では以下の内容について記述しています。
-
Swaggerの基礎概念 -
Swagger Editorを使ったAPIのドキュメント作成 -
Swaggerで作成したAPIのドキュメントを元にモックサーバを立てる
Swaggerとは?
公式より
Swagger is the world’s largest framework of API developer tools for the OpenAPI Specification(OAS), enabling development across the entire API lifecycle, from design and documentation, to test and deployment.
SwaggerはOpenAPI(OAS)のための世界最大のAPI開発フレームワークであり、APIのライフサイクル全体にわたって、設計からドキュメント化、テストおよびデプロイまでを可能にします。
という事なので、APIの仕様設計だけではなく、テストやデプロイまでしてくれる便利ツールです。
基本用語
Swaggerを学ぶと色んな用語があっちこっち飛んでくるので、先にここで話をまとめておきます。
今回は必要最低限の用語と使うやつの名前だけピックアップしました。
-
Swagger Specification
- Swaggerを扱う上で中心となる概念で、Swaggerの仕様に準じた、RESTful APIインターフェイスを記述するためのフォーマット(
YAML/JSON)。
- Swaggerを扱う上で中心となる概念で、Swaggerの仕様に準じた、RESTful APIインターフェイスを記述するためのフォーマット(
-
Swagger Editor
-
Swagger Specificationのエディタ。慣れるまで時間がかかる。
-
-
Swagger UI
-
Swagger Specificationから動的にドキュメントを生成するツール。とても見やすい。
-
-
Swagger Codegen
- Swagger Editorで作成した内容をそのままコードに書き出す。様々な言語に対応しており、言語だけでなくFWにも対応している。
Swagger Editorを使ってSwagger Specificationを作成し、APIの仕様を作成する。
詳細な文法はここを参照する。
ここでは@Fendo181が作成したlumenの簡単なAPIを例に作成していきます。
# Get all authors
GET /api/authors

# Get one author
GET /api/authors/23

#Create an author
POST /api/authors

#Edit an author
PUT /api/authors/23

# Delete an author
DELETE /api/authors/23
これを例にしてSwagger Editorでドキュメントを作成してみます。
swagger: '2.0'
info:
  description: |
    サンプルです.

    You can findout more about Swagger at
    [http://swagger.io](http://swagger.io) or on
    [irc.freenode.net, #swagger](http://swagger.io/irc/).
  version: "1.0.0"
  title: Lumen Authors API
  contact:
    email: fendo181git@gmail.com
  license:
    name: Apache 2.0
    url: http://www.apache.org/licenses/LICENSE-2.0.html
# host: petstore.swagger.io
# basePath: /v2

tags:
- name: authors
  description: Authors Info
  externalDocs:
    description: Find out more
    url: http://swagger.io
# schemes:
# - http
paths:
  /authors:
    get:
      tags:
      - authors
      summary: Get all author by id
      consumes:
      - application/json
      - application/xml
      produces:
      - application/json
      - application/xml
      responses:
        200:
          description: Successful
          schema:
           $ref: '#/definitions/Author'
    post:
      tags:
      - authors
      summary: Create an new author
      produces:
      - application/json
      - application/xml
      parameters:
      - in: body
        name: body
        description: Add New Author
        required: true
        schema:
          $ref: '#/definitions/Author'
      responses:
        200:
          description: Success
  /authors/{id}:
    get:
      tags:
      - authors
      summary: Get an author by id
      produces:
      - application/json
      - application/xml
      parameters:
      - name: id
        in: path
        description: The id that needs to be fetched.
        required: true
        type: string
      responses:
        200:
          description: successful
          schema:
           $ref: '#/definitions/Author'
        400:
          description: Invalid id supplied
        404:
          description: User not found
    put:
      tags:
      - authors
      summary: Updated author by id
      description: Update Author info
      produces:
      - application/json
      - application/xml
      parameters:
      - name: id
        in: path
        description: name that need to be updated
        required: true
        type: string
      - in: body
        name: body
        description: Updated user object
        required: true
        schema:
          $ref: '#/definitions/Author'
      responses:
        200:
          description: author info
    delete:
      tags:
      - authors
      summary: Delete author by id
      description: This can only be done by the logged in user.
      produces:
      - application/json
      - application/xml
      parameters:
      - name: id
        in: path
        description: The name that needs to be deleted
        required: true
        type: string
      responses:
        200:
          description: Deleted Successfully
definitions:
  Author:
    type: object
    properties:
      id:
        type: integer
        format: int64
      name:
        type: string
      email:
        type: string
      github:
        type: string
      twitter:
        type: string
      location:
        type: string
      latest_article_published:
        type: string
externalDocs:
  description: Find out more about Swagger
  url: http://swagger.io
# Added by API Auto Mocking Plugin
host: virtserver.swaggerhub.com
basePath: /Fendo181/APP/1.0.0
schemes:
 - https
 - http
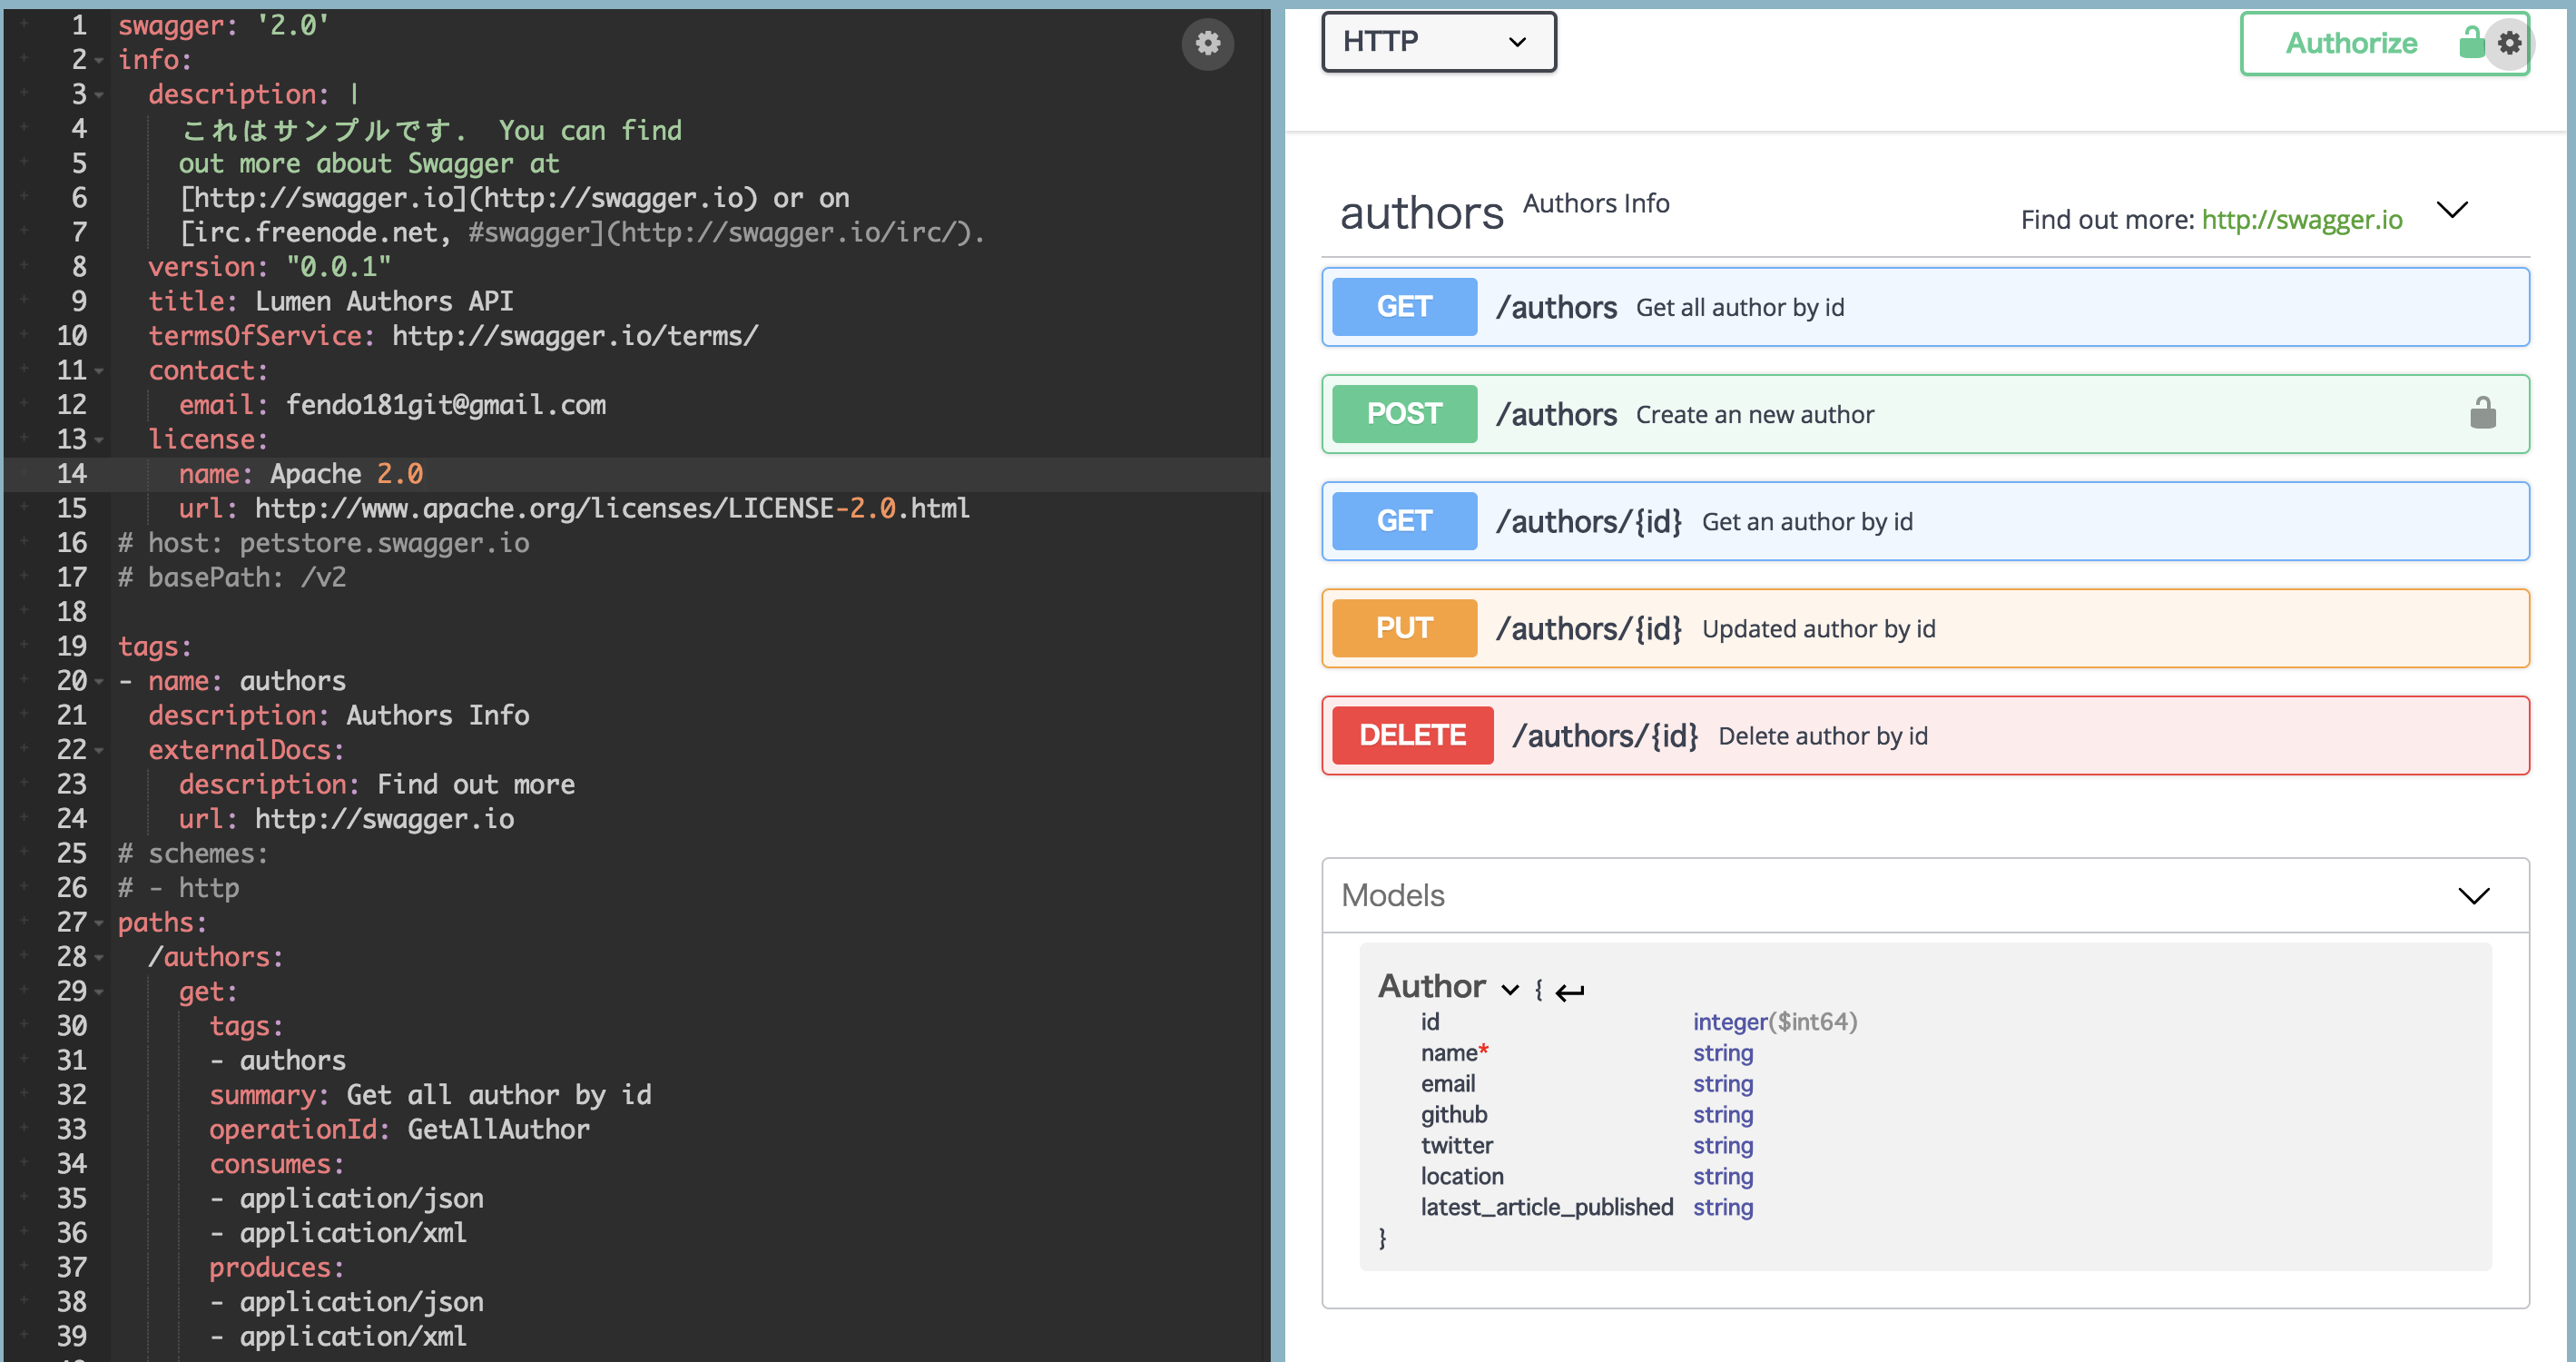
このymalで書かれたSwagger Specification(左)を元にSwagger UI(右)で簡単にAPIのドキュメントを生成する事が可能です。
この様に手順としてはSwagger EditerでSwagger Specificationを記述して、SwaggerUIを見ながら、APIの仕様を設計していく方針になると思います。
また作成したAPIはSwaggerHubで公開する事が可能です。
モックサーバを立てる。
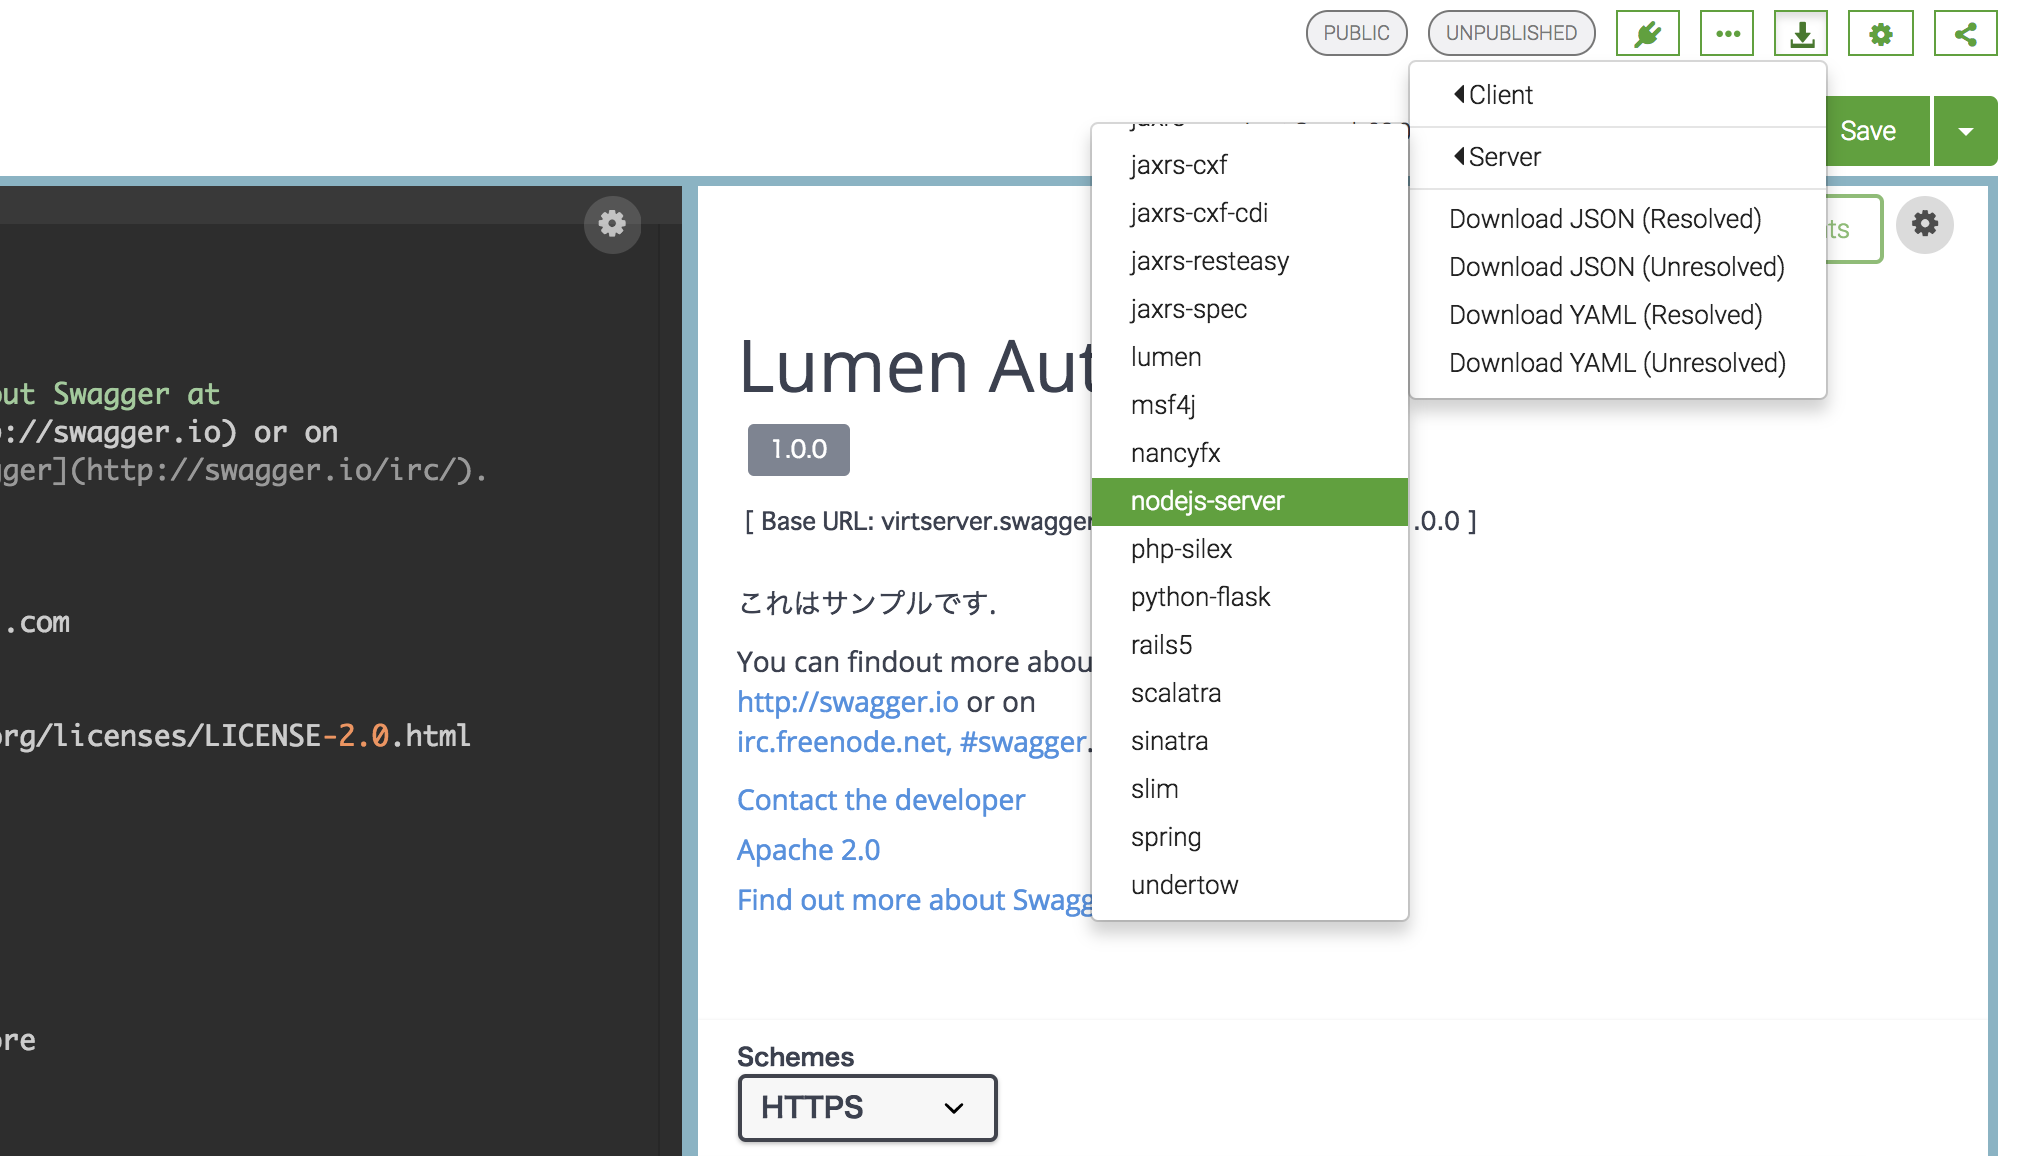
SwaggerHubからサーバファイルを出力してモックサーバを構成してみましょう。SwaggerHubのserverから、指定の環境を選択してファイルを出力します。
今回はnodejs-serverで考えます。
中身の構成は以下の様になっている。
# tree nodejs-server-server-generated -L 1                                                                         [~/src/fendo181/lumen_authors_api][add-swagger-spec]
nodejs-server-server-generated
├── README.md
├── api
│   └── swagger.yaml  #swaggerファイル
├── controllers
│   └── Authors.js
├── index.js
├── node_modules
├── package-lock.json
├── package.json
├── service
│   └── AuthorsService.js
└── utils
    └── writer.js
swagger.yamlはSwaggerHubで記述したSwagger Specファイルがそのまま書き込まれています。
このswagger.yamlをもとにサーバの処理が記述されているのが、Authors.js です。
ここのAuthorsは任意の名前にになります。
ブラウザでSwagger UIを確認する。
npm installを実行する。
$ npm start

> lumen-authors-api@1.0.0 prestart /Users/futoshi.endo/src/fendo181/lumen_authors_api/nodejs-server-server-generated
> npm install
up to date in 0.797s

> lumen-authors-api@1.0.0 start /Users/futoshi.endo/src/fendo181/lumen_authors_api/nodejs-server-server-generated
> node index.js

Your server is listening on port 8080 (http://localhost:8080)
Swagger-ui is available on http://localhost:8080/docs
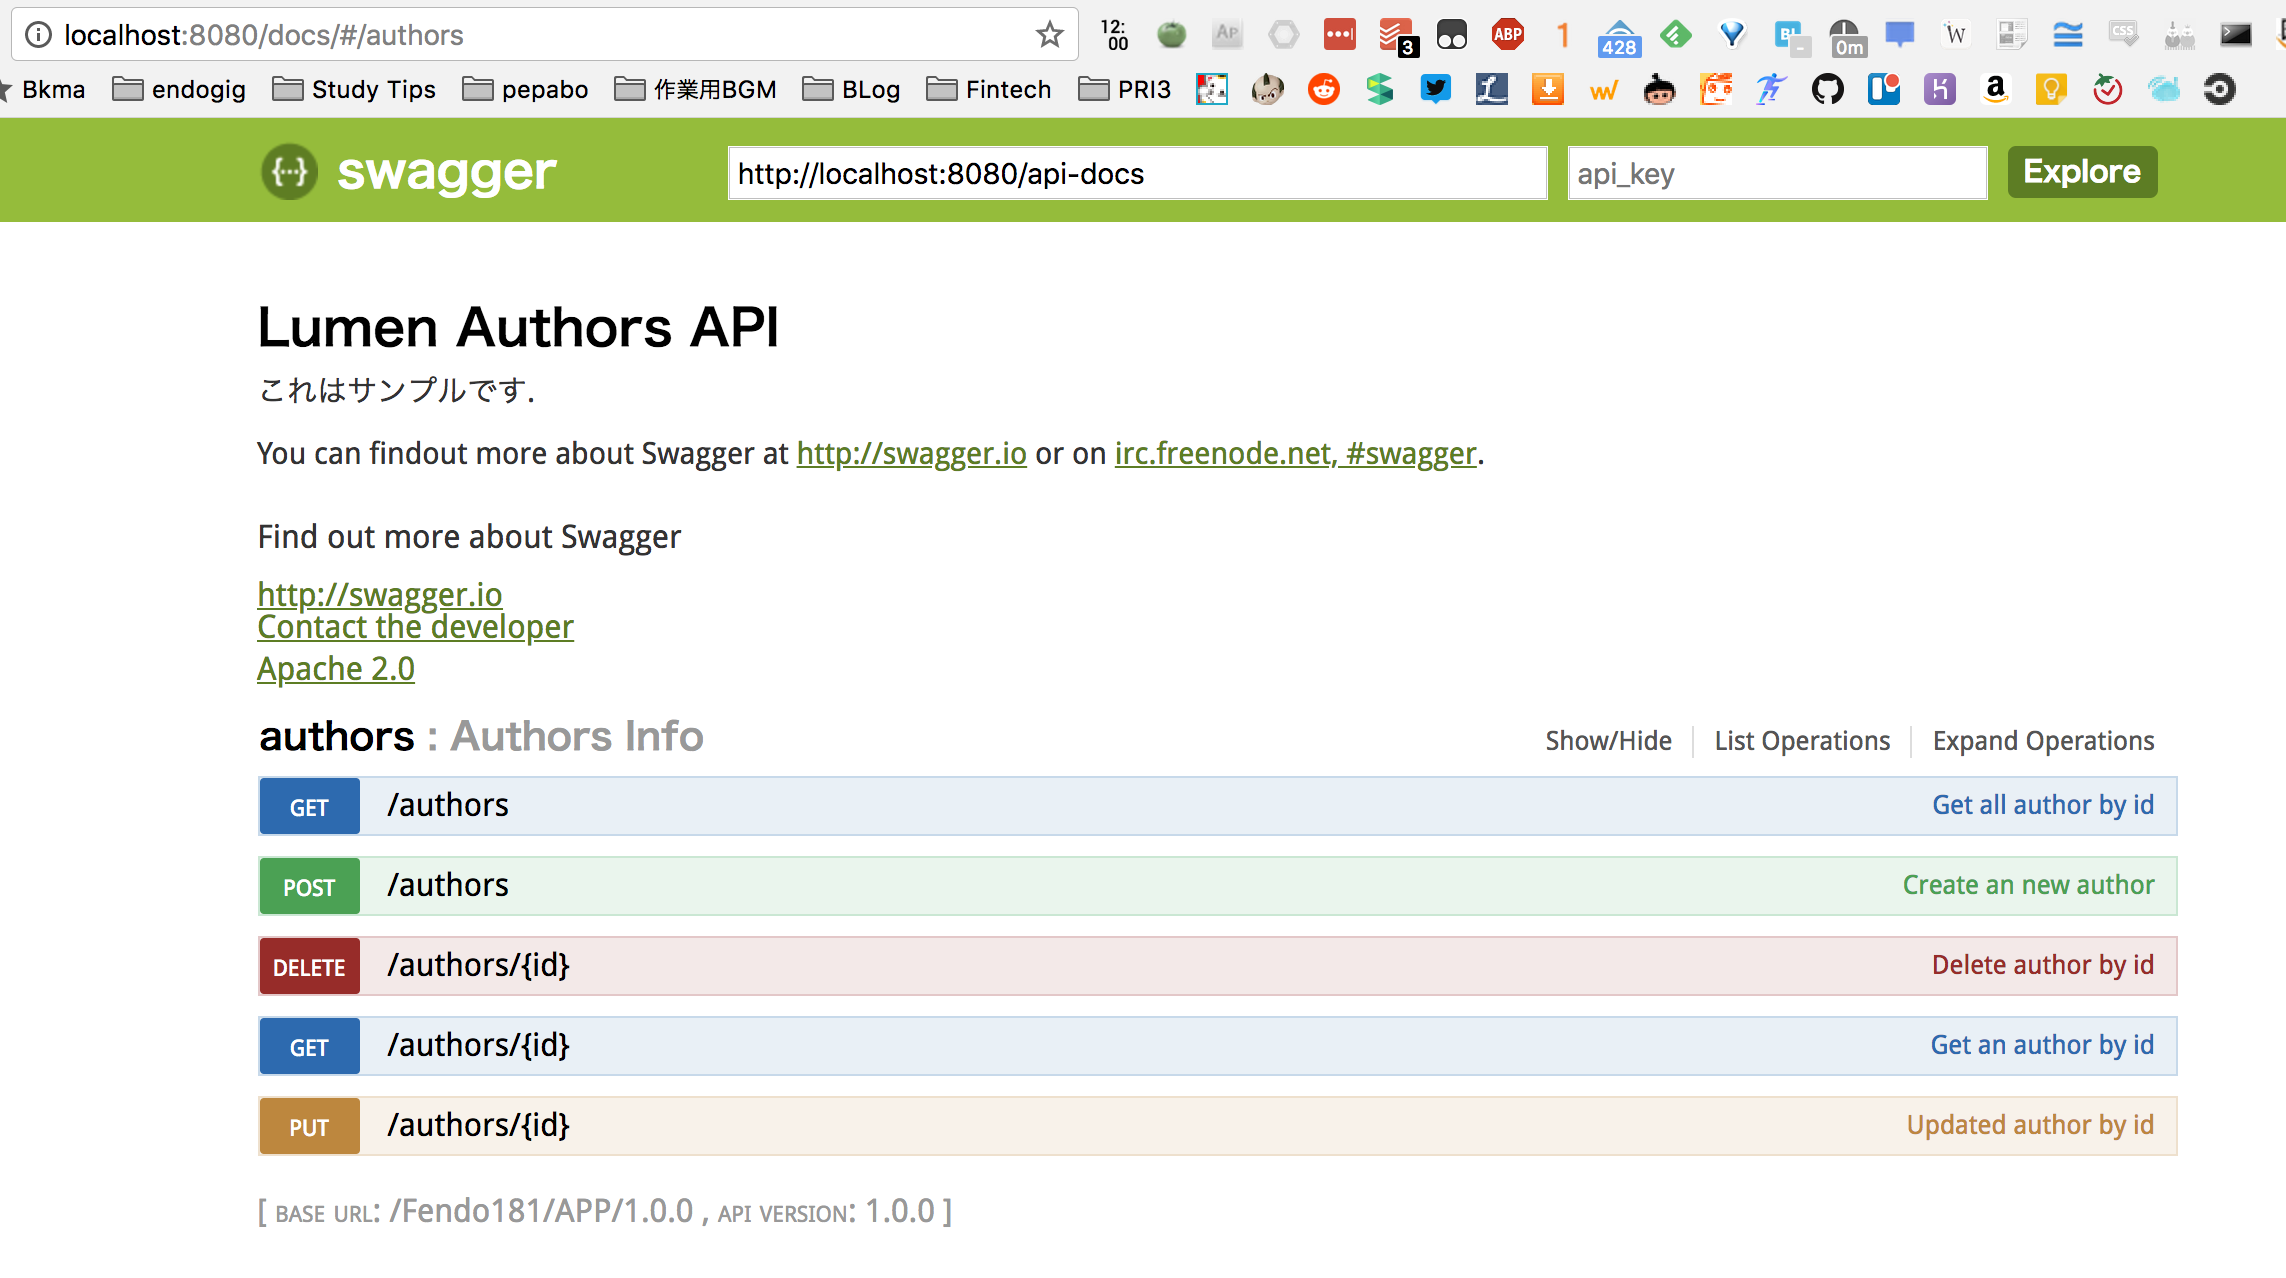
http://localhost:8080/docsにアクセスしてSwagger UIを確認します。
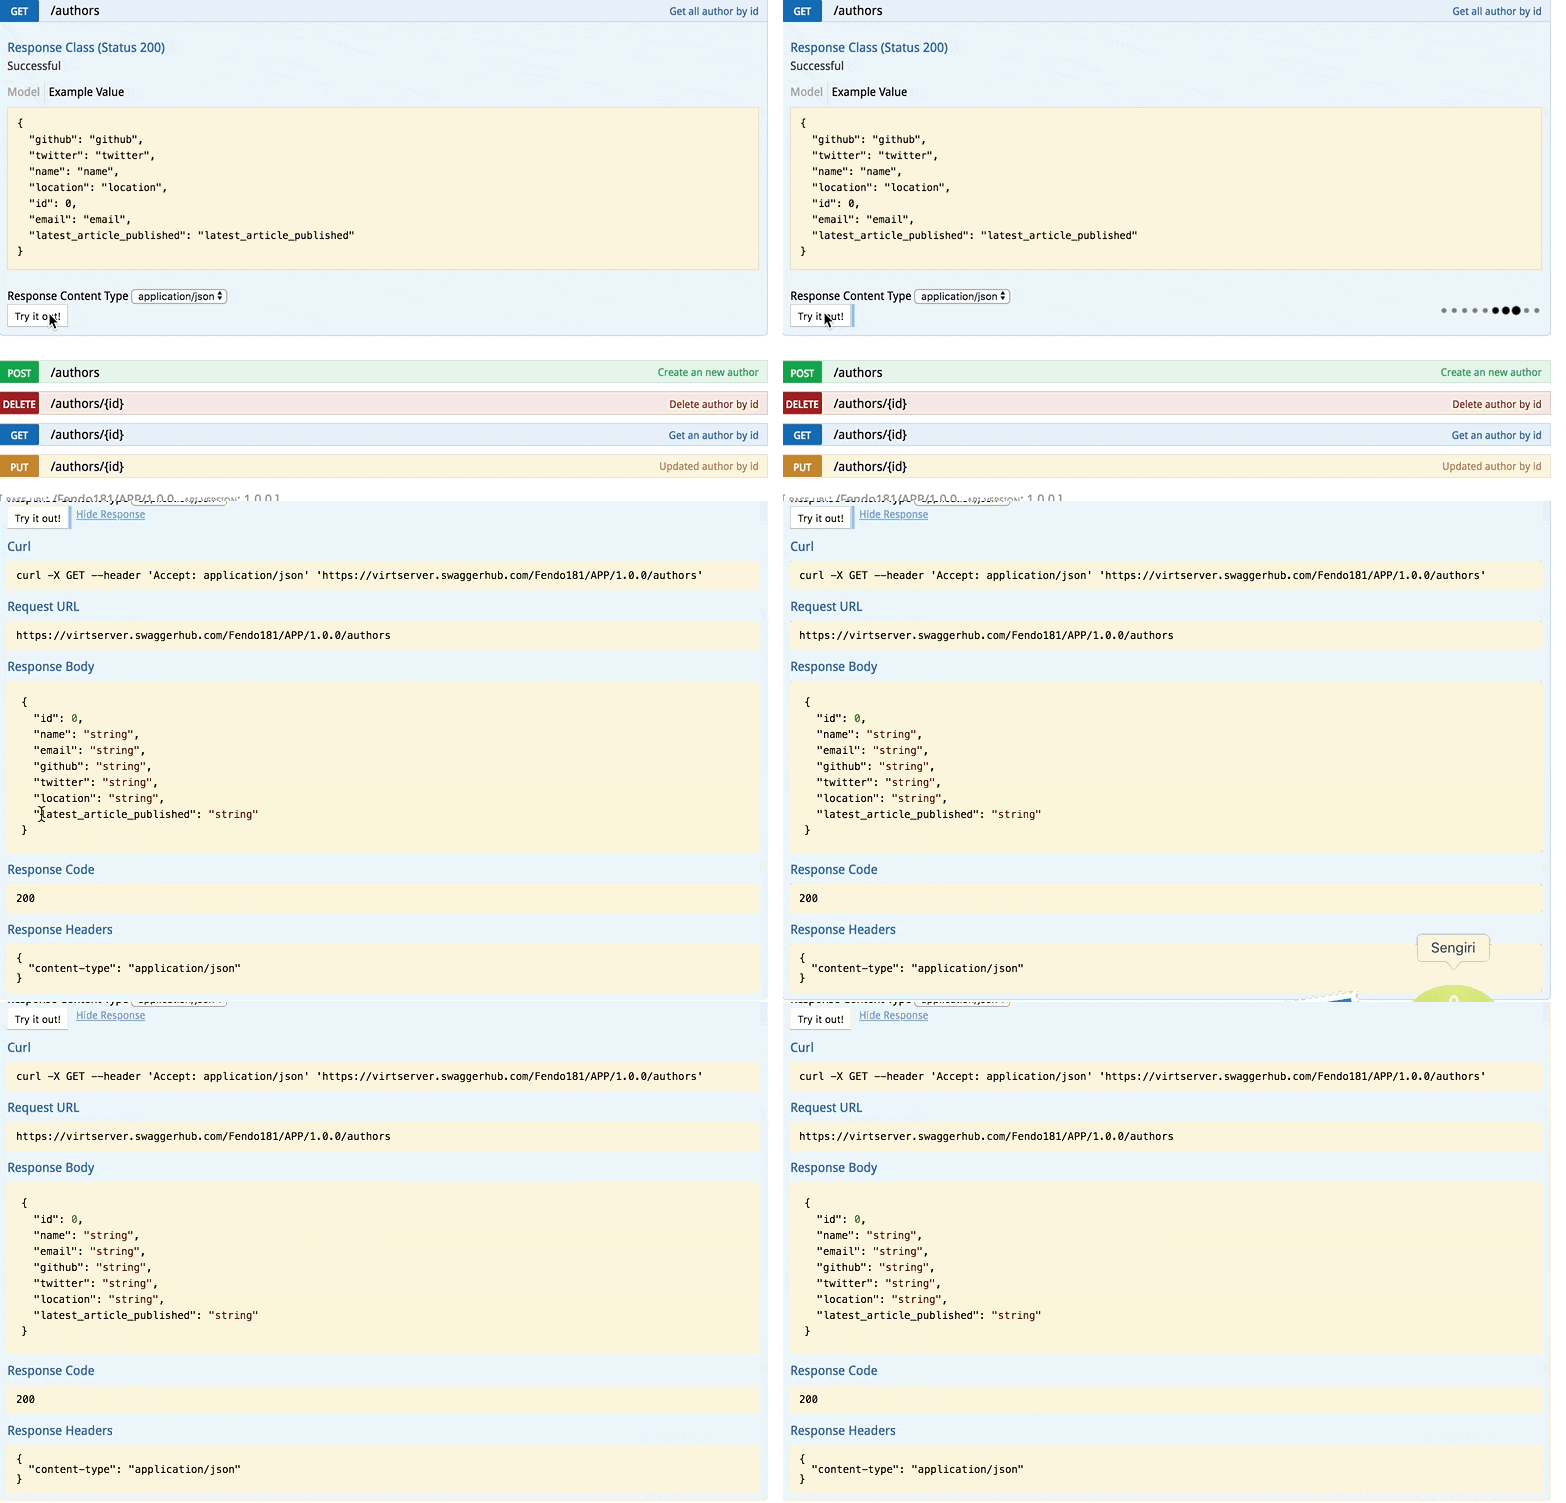
ここで各エンドポイント毎の処理を確認する事もできます。Try It Outでブラウザ上でResponseを確認する事ができます。試しにGETの処理を確認してみましょう。
curlで確認
GET
$ curl -X GET --header 'Accept: application/json' 'https://virtserver.swaggerhub.com/Fendo181/APP/1.0.0/authors'
{
  "id" : 0,
  "name" : "string",
  "email" : "string",
  "github" : "string",
  "twitter" : "string",
  "location" : "string",
  "latest_article_published" : "string"
}


