前回:EmbyをDockerで運用する
これはそろそろDockerを使えるようになりたい筆者の試行錯誤の軌跡です。
Python製WebアプリケーションをDockerで
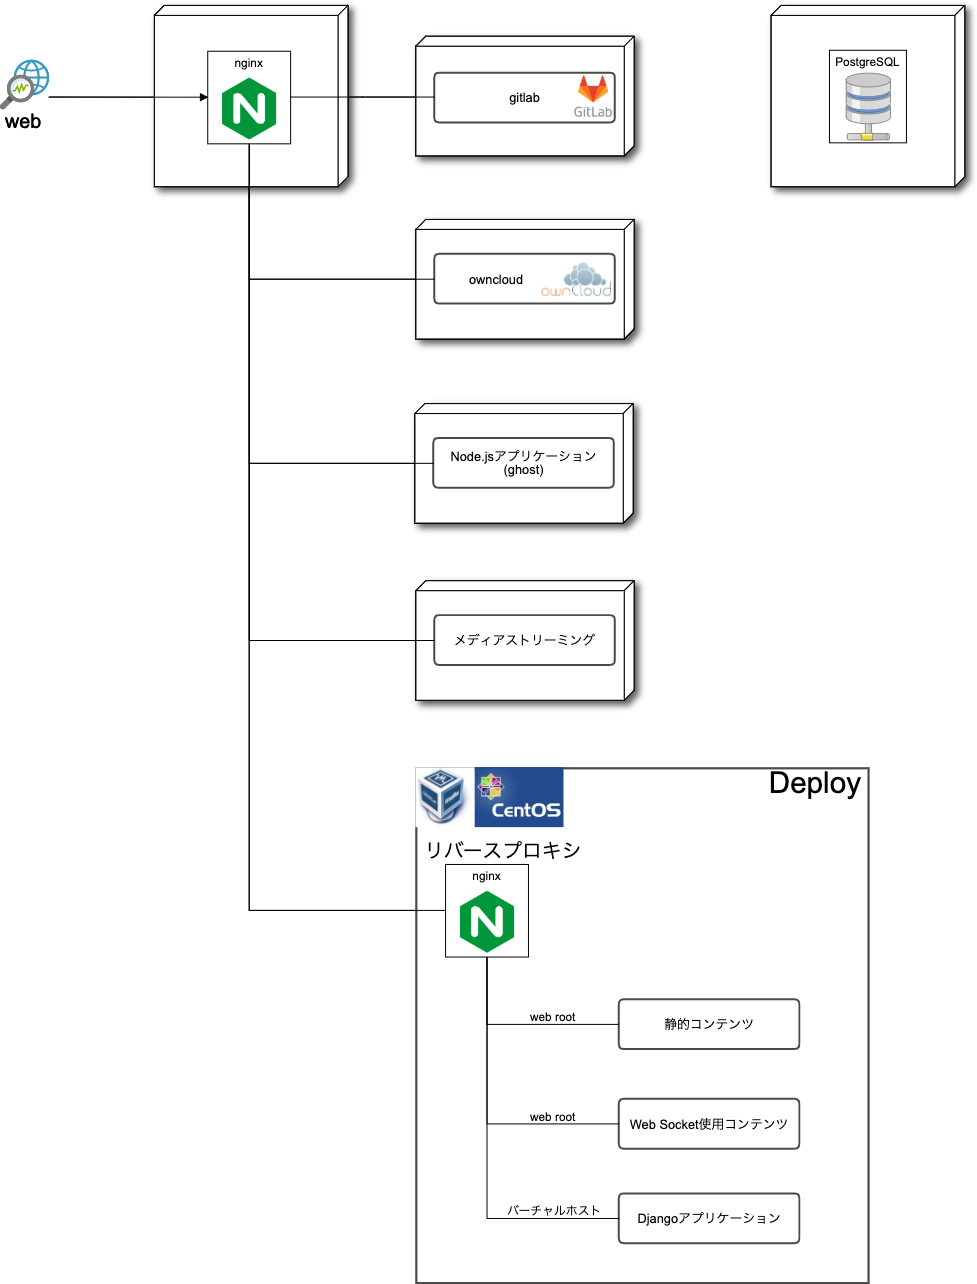
前回はメディアストリーミングサービスのEmbyをコンテナに移行しました。

今回はPython製Webアプリケーションを展開できるDockerイメージを作り、
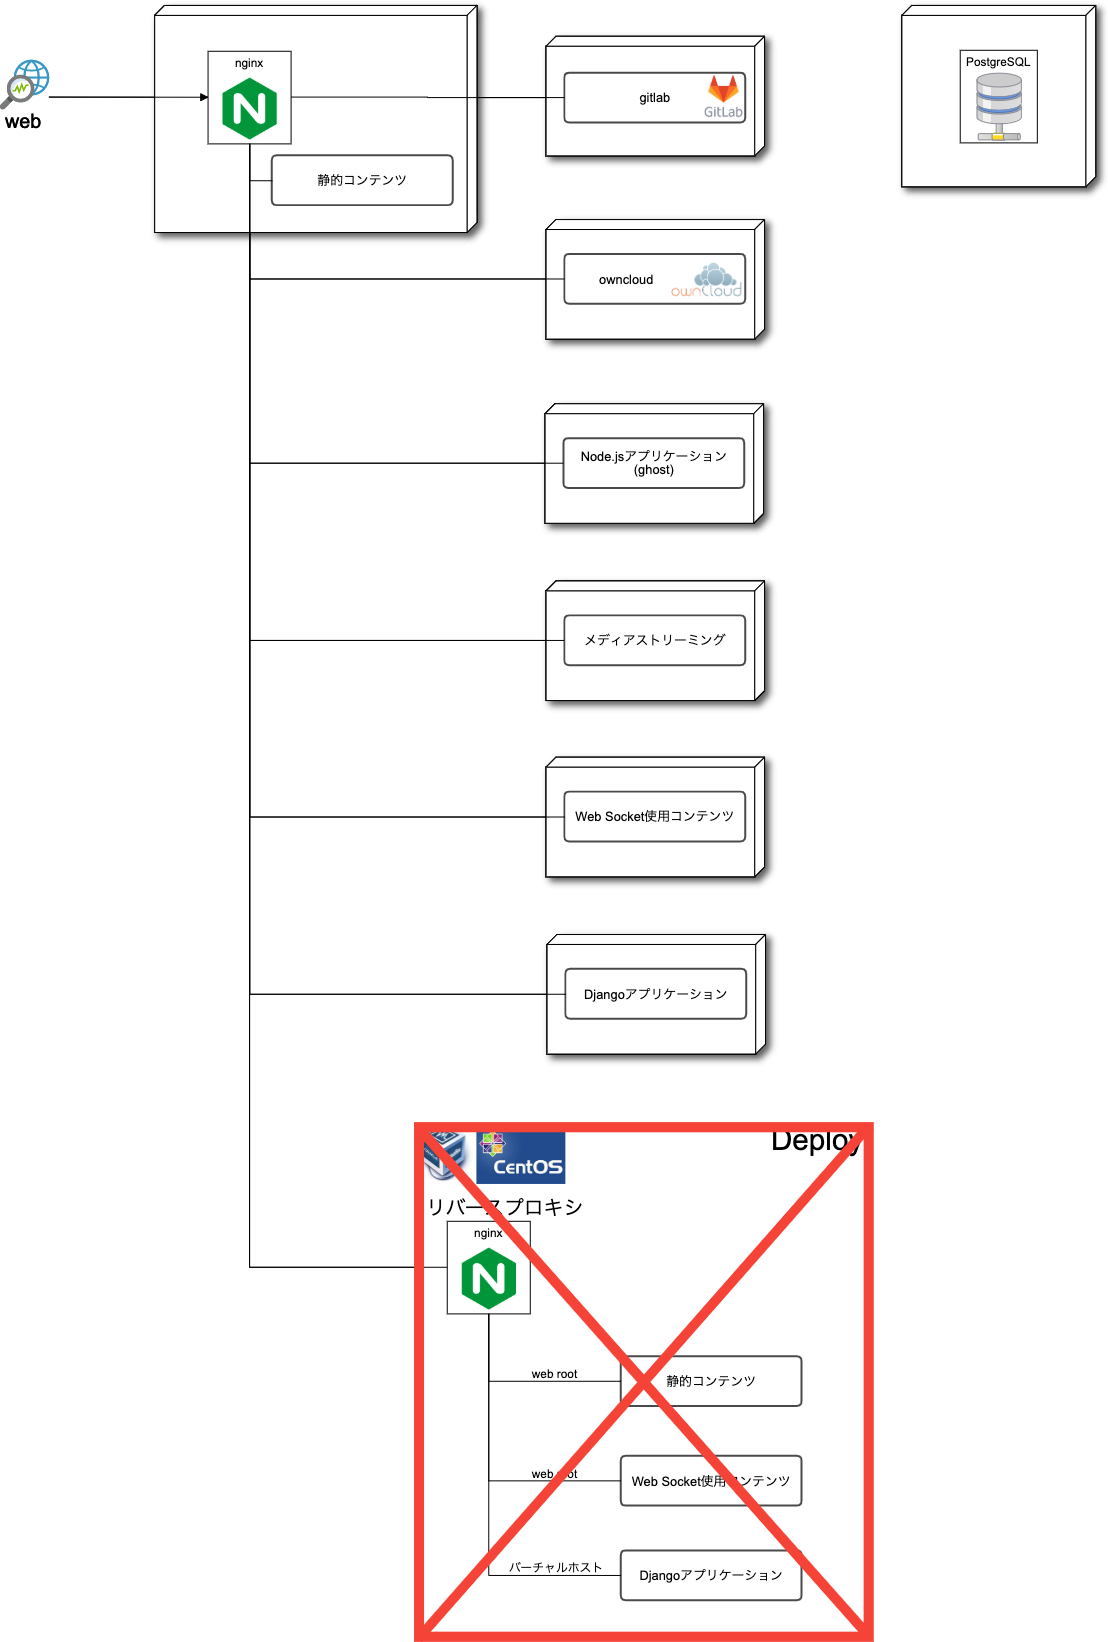
Web Socket使用のアプリケーションとDjangoアプリケーションをDockerに移行します。
ついでに静的コンテンツもコンテナに移動し、VMサーバーを閉じます。

静的コンテンツ
VMサーバーにあったものをDockerホストに移動し、コンテナ起動時に配信ディレクトリへバインドしました。
    deploy:
        image: nginx
        restart: always
        ports:
            - 80:80
            - 443:443
        volumes:
            - /home/fclef/docker/server/deploy/nginx/conf:/etc/nginx/conf.d
+           - /home/fclef/docker/server/deploy/content/html:/usr/share/nginx/html
Python製アプリケーションのDocker運用
Web Socket使用アプリケーションもPython製(bottle)なので、Python製アプリケーションを簡単に展開できるコンテナを目指します。
コンテナ設計
僕はよくPythonでWebアプリケーションを作ります。
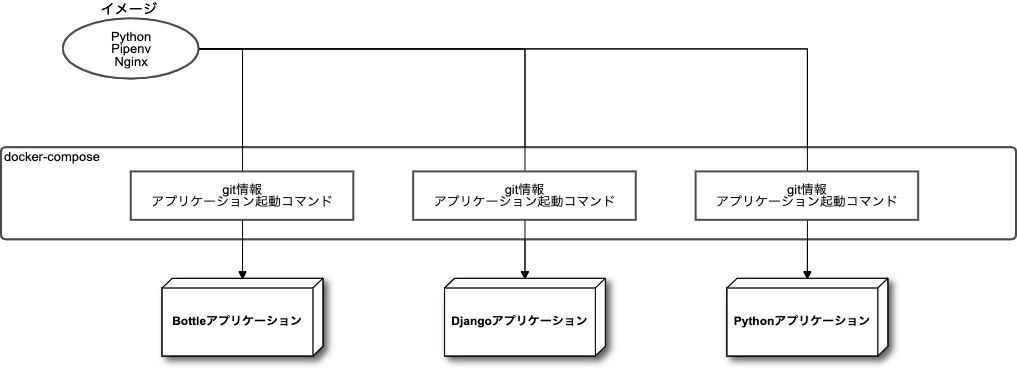
なので、アプリケーションごとイメージに固めてしまうというよりは、
どんなPythonアプリケーションでも動かせる土台をイメージ化し、
具体的なアプリケーション自体はgitの情報をコンテナ起動時に渡して、コンテナ内でクローン、展開させます。

Dockerfile
僕がPythonで何かを作るときは必ずPipenvを使います。
また、Webアプリケーションのときはソケット化してnginxで配信するので、
イメージの時点でPipenv, nginxをインストールしておきます。
FROM python:3.8-slim-buster

# 依存パッケージのインストール
RUN apt-get -y update
RUN apt-get -y upgrade
RUN apt-get install -y git make build-essential libssl-dev zlib1g-dev libbz2-dev libreadline-dev libs
qlite3-dev wget curl llvm libncurses5-dev libncursesw5-dev xz-utils tk-dev libffi-dev nginx

# Pyenvのインストール
RUN git clone https://github.com/yyuu/pyenv.git /.pyenv
ENV PYENV_ROOT /.pyenv
ENV PATH $PYENV_ROOT/bin:$PATH
RUN pyenv init - | bash
# Pipenvのインストール
RUN pip install pipenv
ENV PIPENV_VENV_IN_PROJECT 1
ENV PIPENV_YES true

RUN mkdir /app # アプリケーション配備ディレクトリ
RUN mkdir /script # 各種スクリプト配置ディレクトリ

COPY up.sh /script # 起動スクリプト

# 起動スクリプト内でgitプロジェクトをappにクローンするので移動しておく
WORKDIR /app
# Webアプリケーションの配信はメインWebサーバを介するリバースプロキシなので、80ポートだけ空けておく
EXPOSE 80
RUN chmod +x /script/up.sh
ENTRYPOINT [ "/script/up.sh" ] # コンテナ起動時、起動スクリプトup.shを実行する
コンテナ起動スクリプト
アプリケーションのgit情報はコンテナ起動時に環境変数で渡します。
僕の環境ではなぜかsshでのgitのクローンができないため、httpsでクローンする前提です。
クローンしたら、プロジェクトルートディレクトリにあるPipfileを解析し、必要なPythonバージョンを決定します。
Pythonライブラリの中には、依存するプログラムがインストールされている必要があるケースがあるので、
それらをインストールするためのスクリプト(dependencies.sh)をコンテナ起動時にバインドしておき、ここで呼び出します。
Python製Webアプリケーションのソケット化はgunicornを使うので、gunicornもインストールしておきます。
# !/bin/bash

# 環境変数からgit情報を取得する
gitCloneUrl=${GIT_CLONE_URL}
gitUserName=${GIT_USER_NAME}
gitPassword=${GIT_PASSWORD}
gitCloneTarget=`echo ${gitCloneUrl} | sed -r "s#^(https?://)(.*)#\1${gitUserName}:${gitPassword}@\2#g
"`

# プロジェクト名を取得する
projectName=`echo ${gitCloneUrl} | sed -r "s#.*/(\w+)\.git#\1#g"`
echo "■ ■ ■ PROJECT NAME <${projectName}> ■ ■ ■"

git clone ${gitCloneTarget}

# Pipfileからpythonバージョンを取得する
cd ${projectName}
pythonVersion=`grep python_version Pipfile | sed -r 's/python_version = "(.+)"/\1/g'`
echo "■ ■ ■ PYTHON VERSION <${pythonVersion}> ■ ■ ■"

# インストールするPythonライブラリの中に他プログラムに依存するものがある場合は、ここでインストールしておく。
if [ -f /script/dependencies.sh ]; then
    source /script/dependencies.sh
fi

pipenv --python ${pythonVersion}
pipenv install
pipenv install gunicorn

curPath=`pwd`
export APP_ROOT=${curPath}

chmod +x /script/run.sh
service nginx start
/script/run.sh # アプリケーション起動スクリプト
while true; do sleep 1000; done
コンテナの起動
例として、Djangoアプリケーションを起動する構成をお見せします。
django:
    image: pipenv-gunicorn
    restart: always
    environment:
        GIT_CLONE_URL: https://xxxxxxxx/user/project.git
        GIT_USER_NAME: user
        GIT_PASSWORD: password
    volumes:
        - /home/fclef/docker/server/app/dependencies.sh:/script/dependencies.sh
        - /home/fclef/docker/server/app/run.sh:/script/run.sh
        - /home/fclef/docker/server/app/app.conf:/etc/nginx/conf.d/nginx_gunicorn.co
nf
    depends_on:
        - deploy
        - gitlab
apt-get -y --no-install-recommends install libpq-dev
cd /app/project

source .venv/bin/activate

python manage.py collectstatic --noinput
python manage.py makemigrations
python manage.py migrate

deactivate

/app/project/.venv/bin/gunicorn \
          --access-logfile /var/log/socket_success.log \
          --error-logfile /var/log/socket_error.log \
          --workers 1 \
          --bind unix:/run/socket.sock \
          config.wsgi:application
server {
    listen       80;
    listen [::]:80;
    server_name xxxx.xxx.xxx;

    root /app;

    location /static {
        alias /app/project/static;
    }

    location / {
        include /etc/nginx/proxy_params;
        proxy_pass http://unix:/run/socket.sock;
    }

    location ~ ^/apple-touch-icon(.*)\.png$ {
        root /app/project/;
        rewrite ^/apple-touch-icon(.+)\.png$ /static/img/apple-touch-icon.png break;
    }
}
アプリケーション本体はコンテナ起動時にgitからクローン、
データは別コンテナのPosgreSQLに保存してあるので、
このコンテナは何度作成し直しても正常に運用状態のサービスを展開できます。
基本的に上記イメージと起動方法で大抵のPythonアプリケーションは動かせるようになりました。
gitクローンからデプロイまでの手順が単純なのでアプリケーションを外出しして再利用しやすいイメージが作成できましたが、
環境構築が複雑なアプリケーションの場合は、アプリケーションごとイメージにしてしまった方が保守性があがるかもしれません。
以上、VMサーバー群をコンテナに移行するシリーズでした。