概要
spring initializrでプロジェクトを生成して、Intellijに取り込み、Hello Worldするまでの道のり。
spring initializr
spring initializrを使ってSpring Bootの雛形を生成する。
https://start.spring.io/

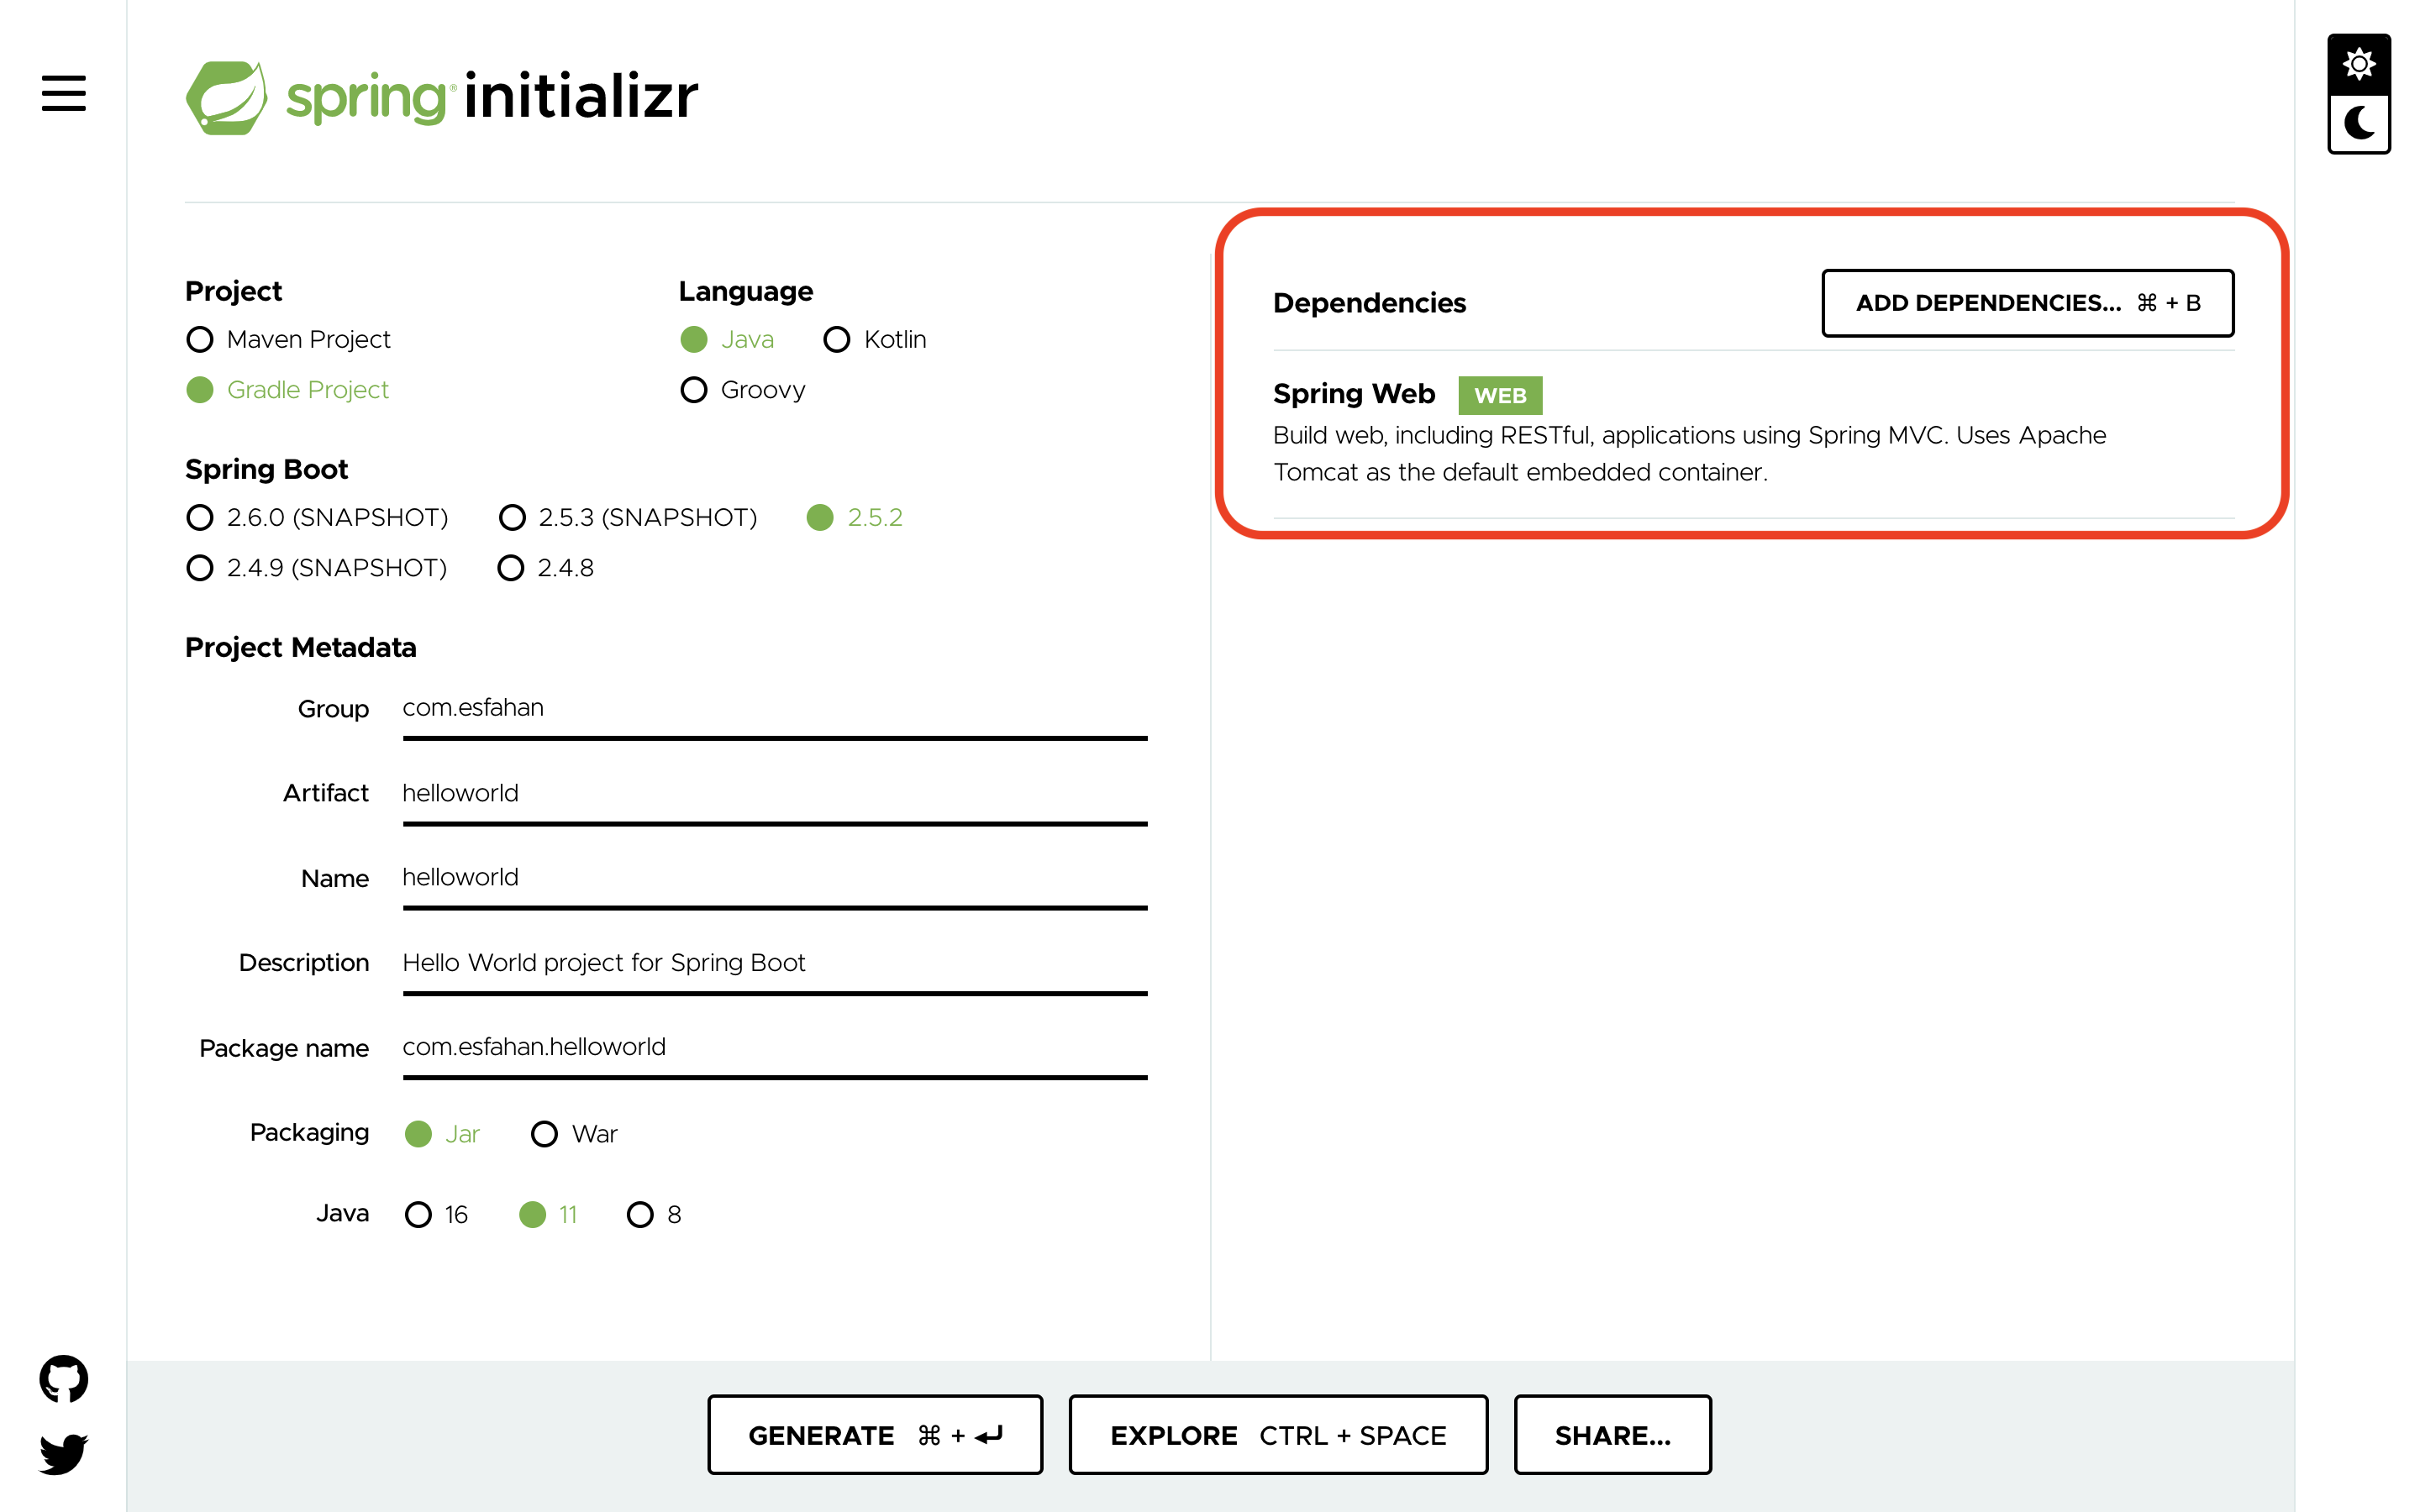
パッケージ名などを指定する。
| Item | Sub | Value |
|---|---|---|
| Project | Gradle Project | |
| Language | Java | |
| Spring Boot | 2.5.2 | |
| Project Metadata | Group | com.esfahan |
| Artifact | helloworld | |
| Name | helloworld | |
| Description | Hello World project for Spring Boot | |
| Package name | com.esfahan.helloworld | |
| Packaging | Jar | |
| Java | 11 |
GENERATEをクリック。
すると、helloworld.zipがダウンロードされる。
Intellijに取り込む
ダウンロードされたhelloworld.zipを解凍する。
解凍されたディレクトリの中にあるbuild.gradleというファイルを右クリックし、Intellijで開くか、もしくは、File -> Openをクリックして、build.gradleを選択して、Open as Projectをクリックする。
buildが完了すると以下のようになる。

依存モジュールを追加する
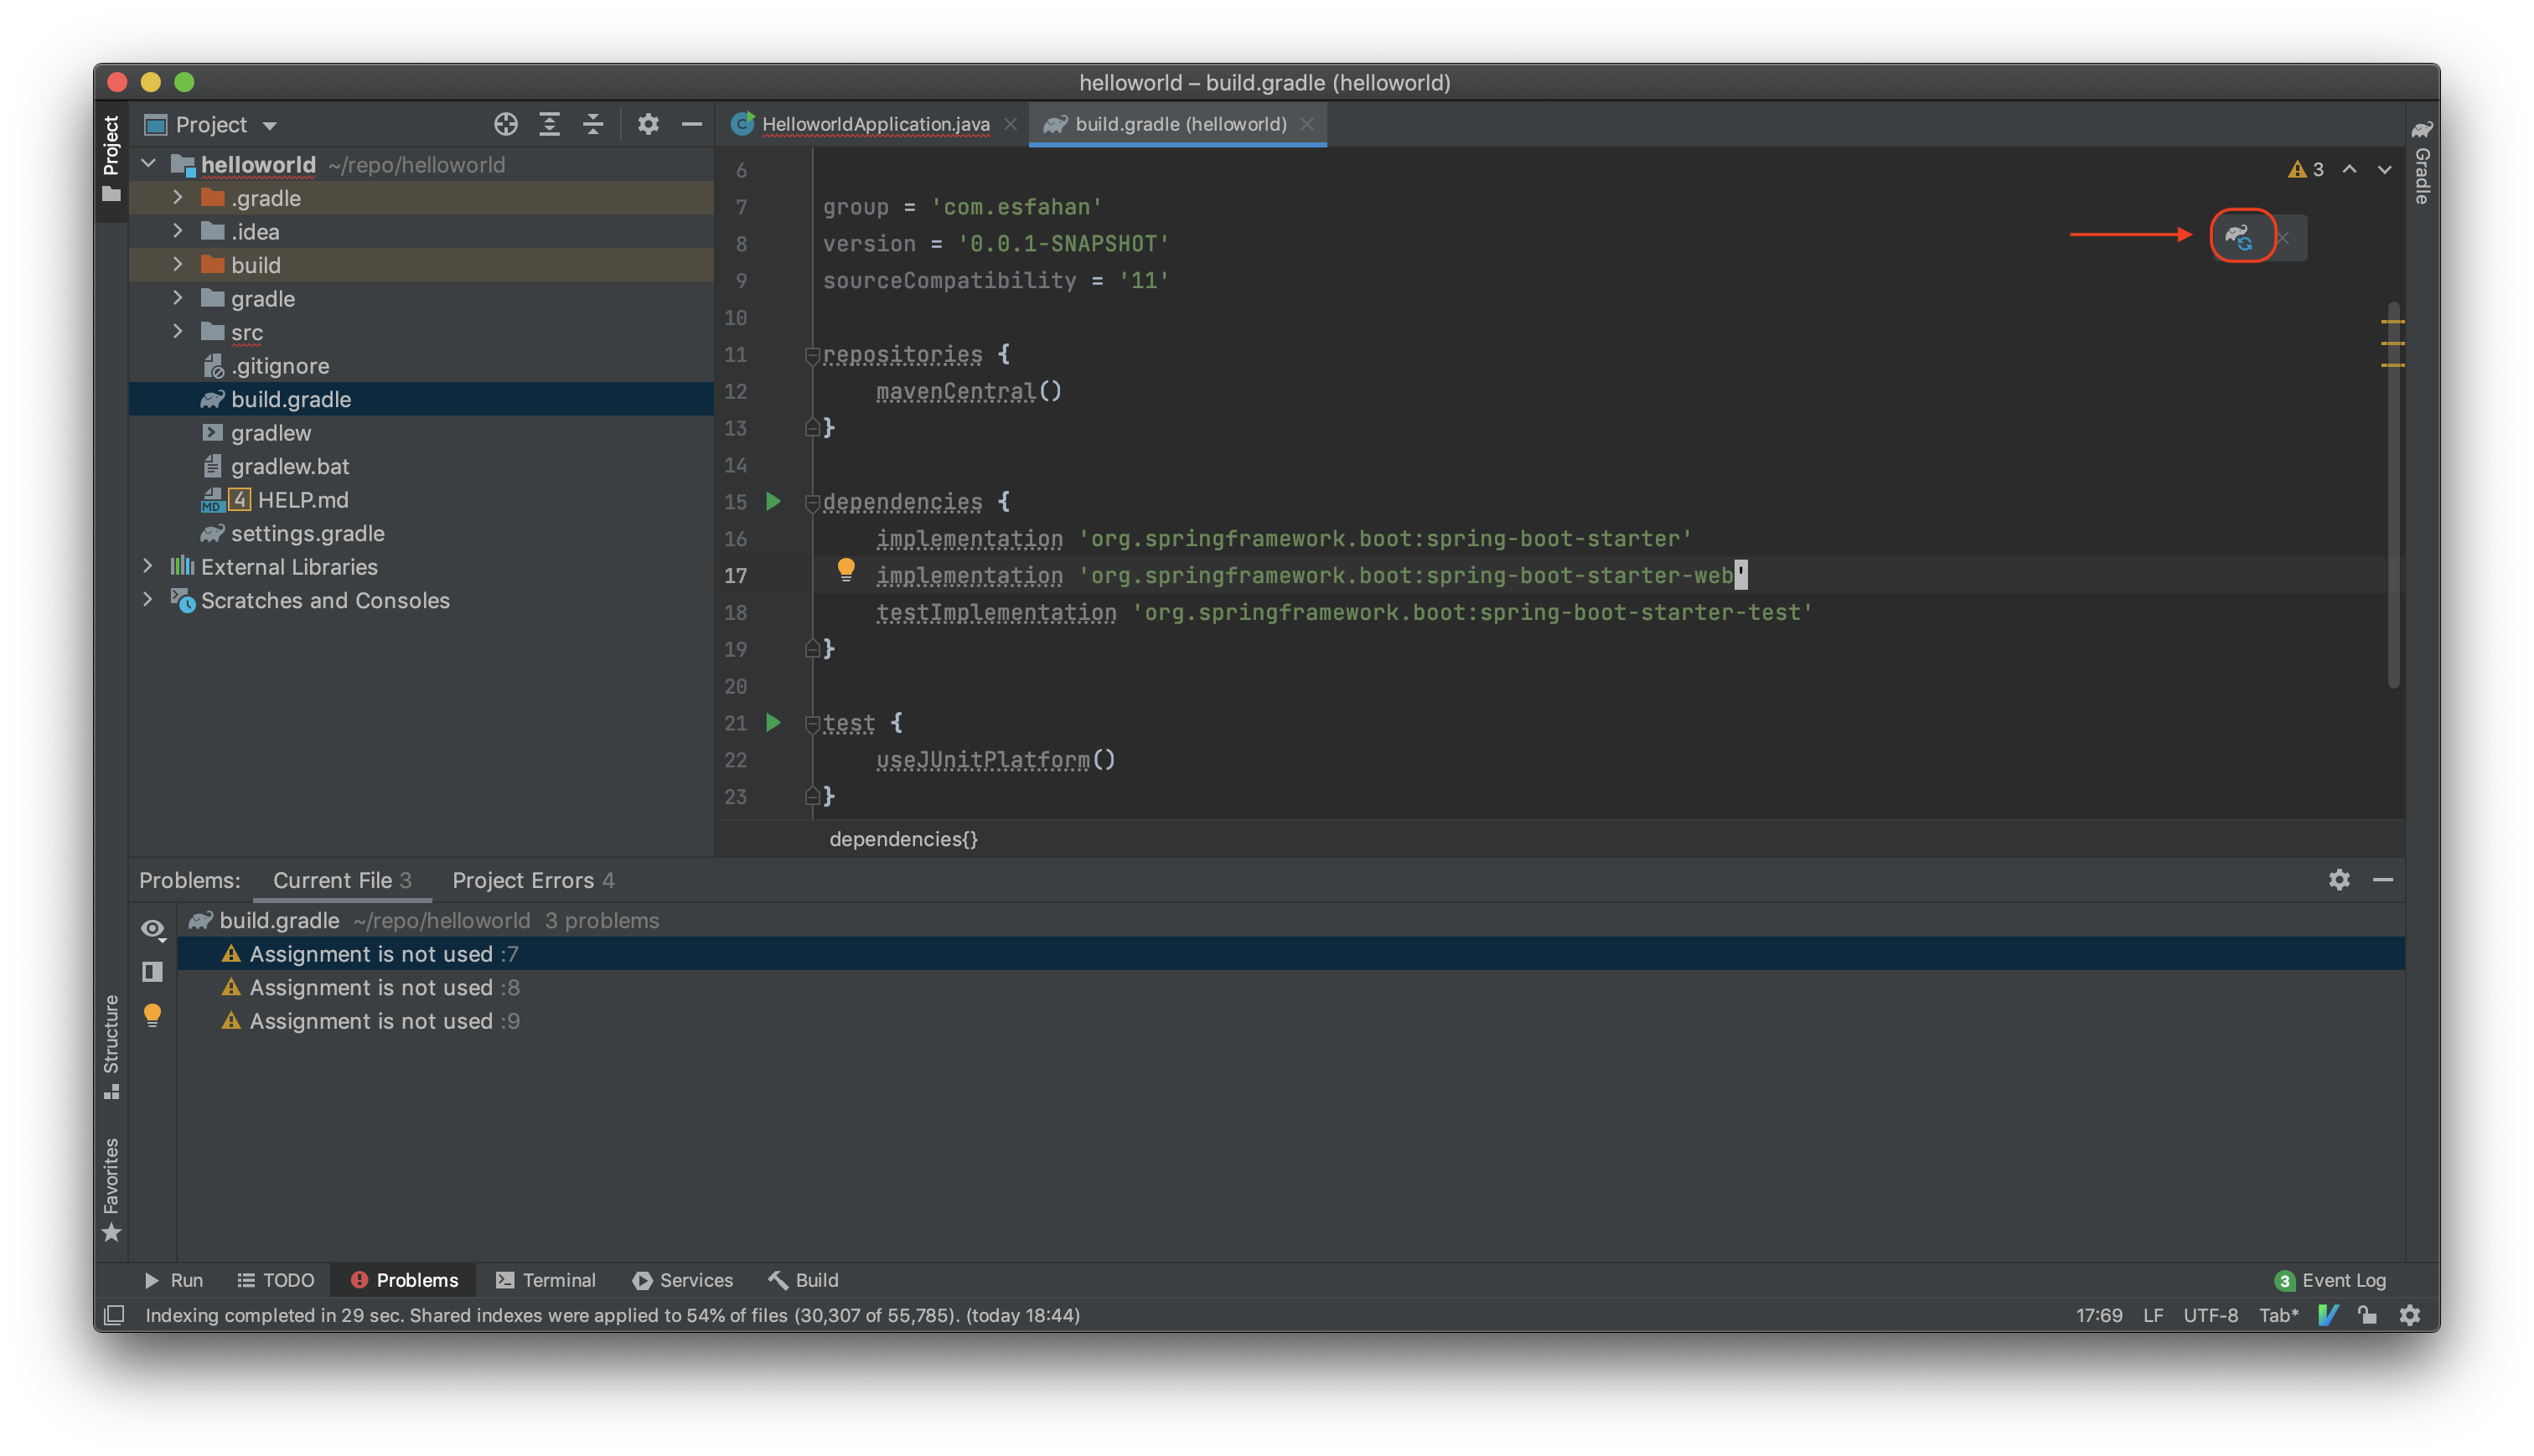
spring webを追加する。bundle.gradleに以下を追記する。
dependencies {
	implementation 'org.springframework.boot:spring-boot-starter'
+	implementation 'org.springframework.boot:spring-boot-starter-web'
	testImplementation 'org.springframework.boot:spring-boot-starter-test'
}
追記したら、以下の画像の赤枠のアイコンをクリックしてモジュールを取り込む。
spring initializrで、以下の様にあらかじめ依存モジュールを指定して生成することも可能。
Hello Worldを返すアプリケーションを作成
src/main/java/com.esfahan.helloworld/HelloworldApplicationというファイルがあるのでダブルクリックして開いて、以下のように編集する。
package com.esfahan.helloworld;

import org.springframework.boot.SpringApplication;
import org.springframework.boot.autoconfigure.SpringBootApplication;
import org.springframework.web.bind.annotation.RequestMapping;
import org.springframework.web.bind.annotation.RestController;

@SpringBootApplication
@RestController
public class HelloworldApplication {

	public static void main(String[] args) {
		SpringApplication.run(HelloworldApplication.class, args);
	}

	@RequestMapping("/")
	String index() {
		return "Hello World!!";
	}
}
各アノテーションの意味
引用元:https://spring.pleiades.io/guides/gs/rest-service/
@SpringBootApplication は、次のすべてを追加する便利なアノテーションです。
@Configuration: アプリケーションコンテキストの Bean 定義のソースとしてクラスにタグを付けます。
@EnableAutoConfiguration: クラスパス設定、他の Bean、さまざまなプロパティ設定に基づいて Bean の追加を開始するよう Spring Boot に指示します。例: spring-webmvc がクラスパスにある場合、このアノテーションはアプリケーションに Web アプリケーションとしてフラグを立て、DispatcherServlet のセットアップなどの主要な動作をアクティブにします。
@ComponentScan: Spring に、com/example パッケージ内の他のコンポーネント、構成、サービスを探して、コントローラーを検出させるように指示します。
class名の左の再生ボタンを押し、Runを選択してアプリケーションを実行する。
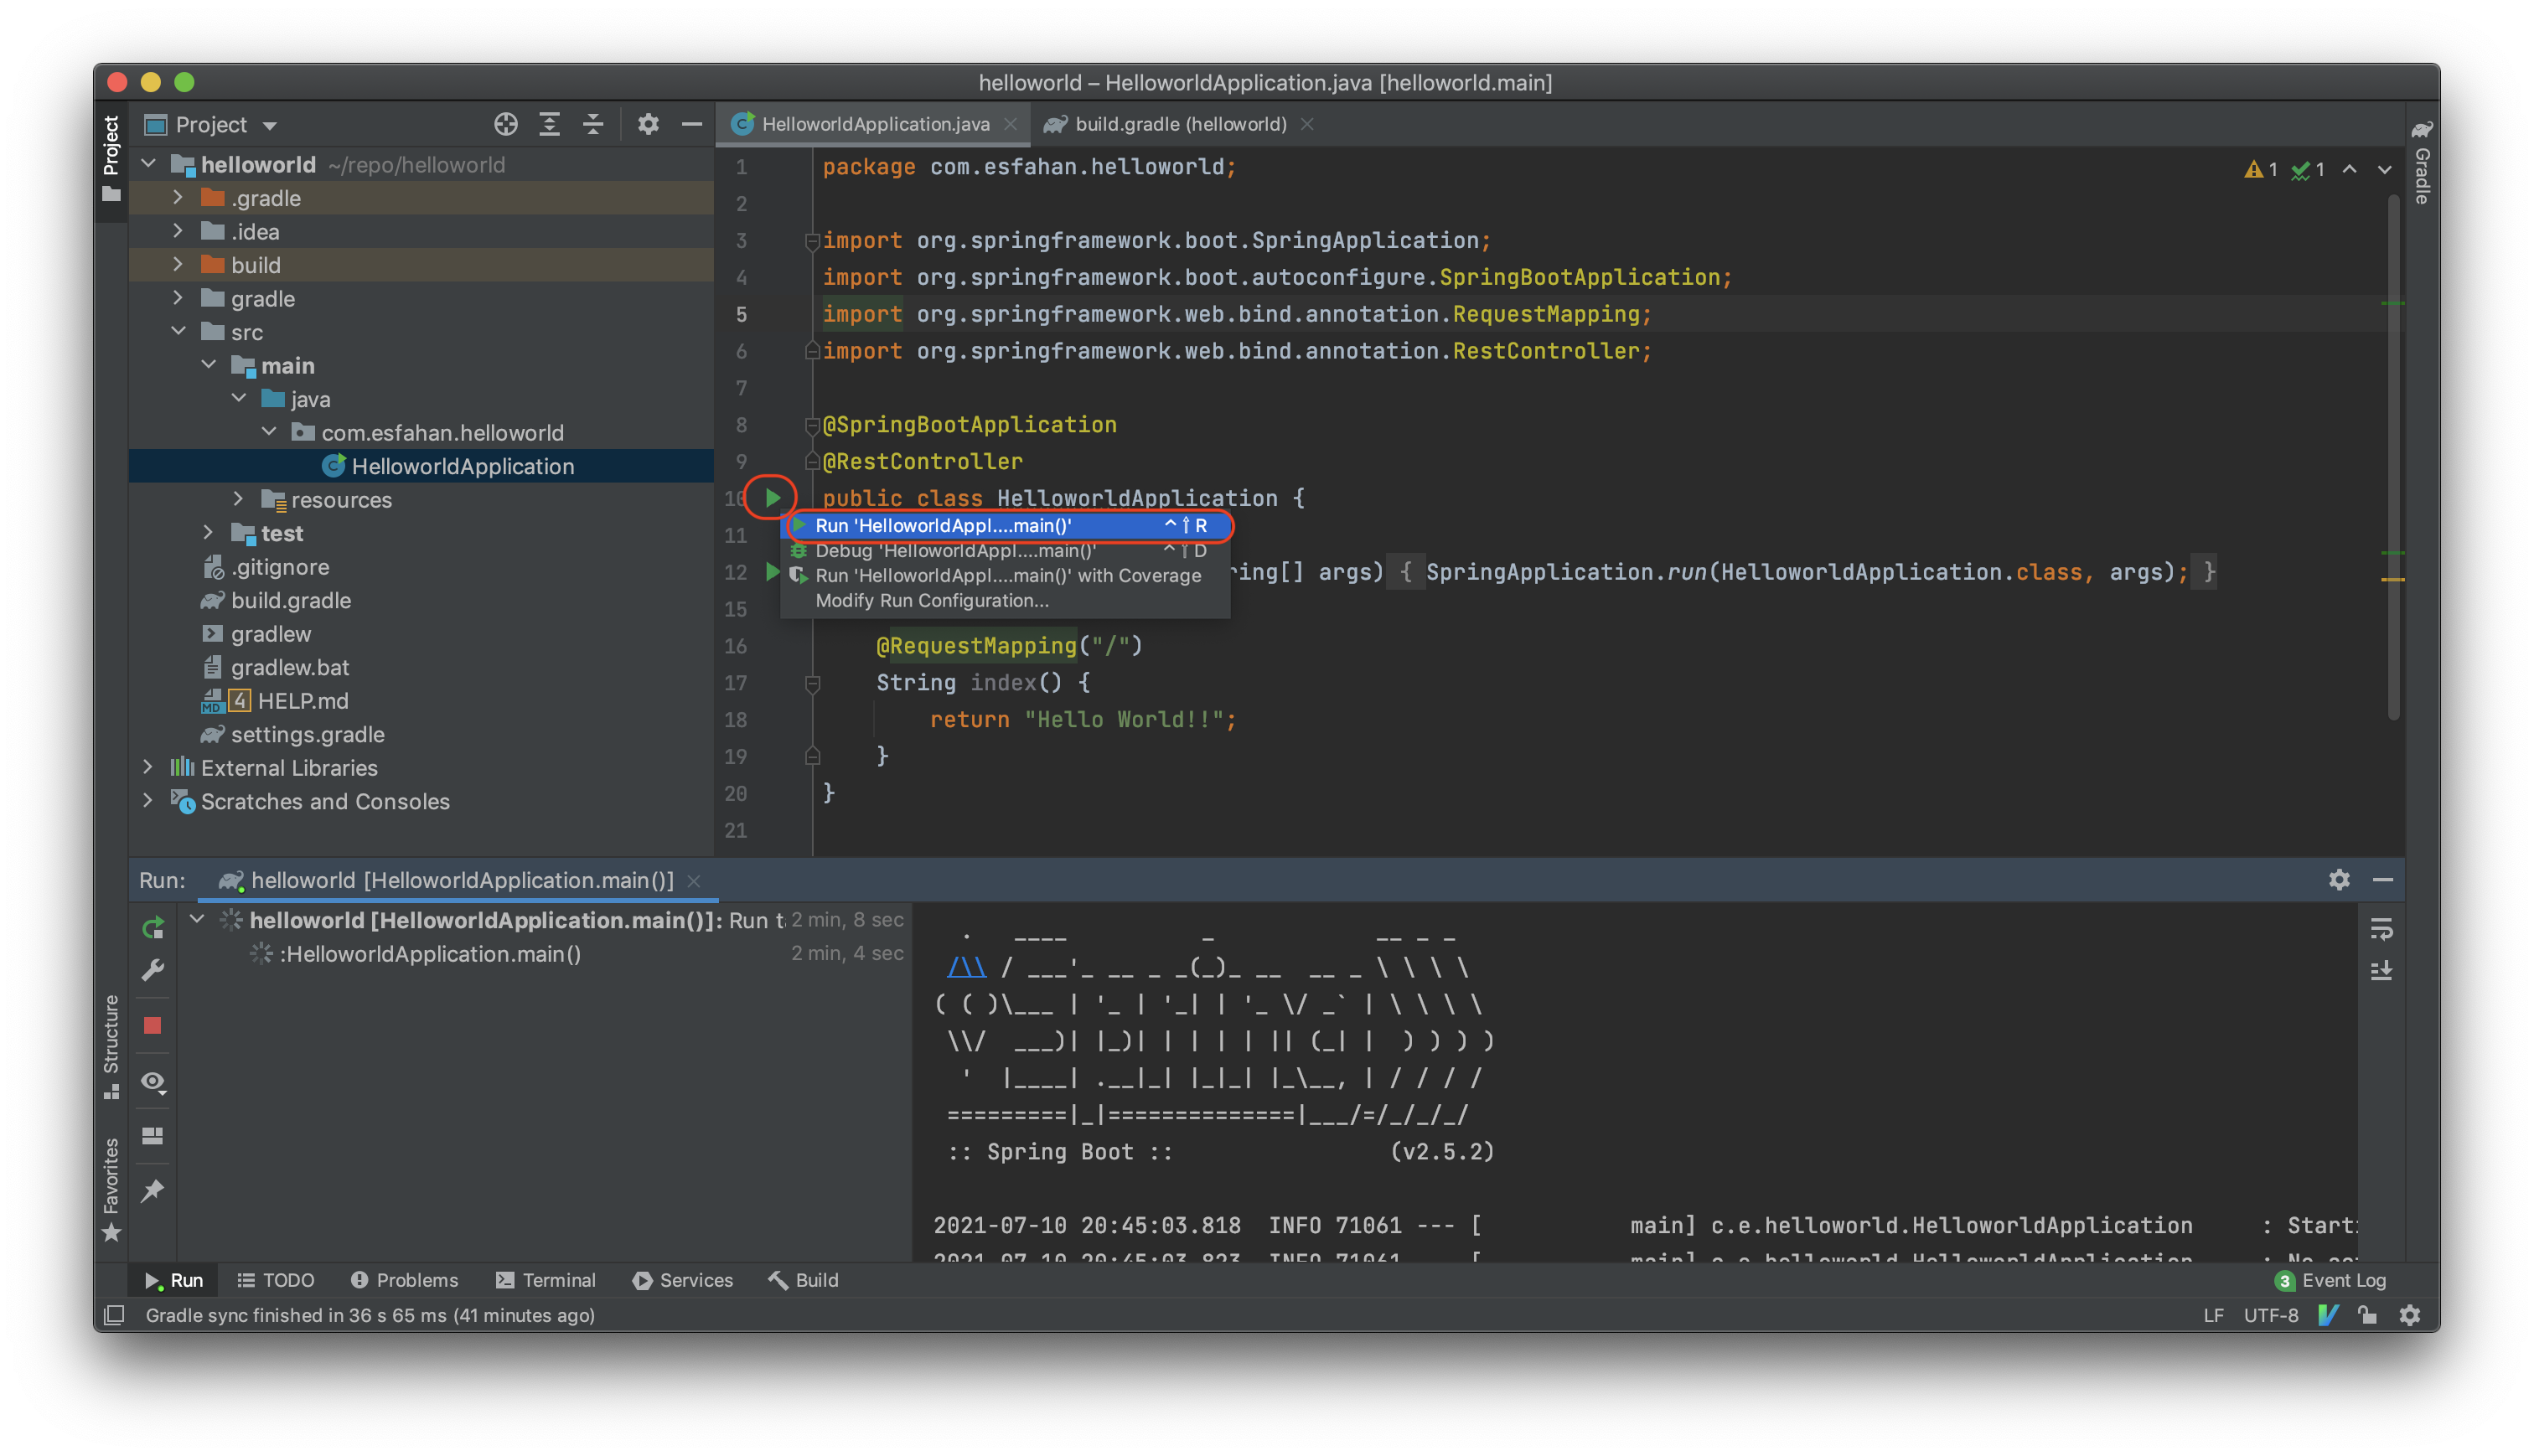
そして以下にアクセスして、Hello World!!と表示されればOK。
http://localhost:8080/
Testcode
Testcodeは以下。(jUnit5)
import org.junit.jupiter.api.Test;
import static org.junit.jupiter.api.Assertions.*;

class HelloworldApplicationTest {
    private HelloworldApplication ha = new HelloworldApplication();

    @Test
    void indexNormal() {
        assertEquals("Hello World!!", ha.index());
    }

    @Test
    void indexOutlier() {
        assertNotEquals("Good-bye World!!", ha.index());
    }
}