Introduction
こういうのが欲しいとなった↓↓↓
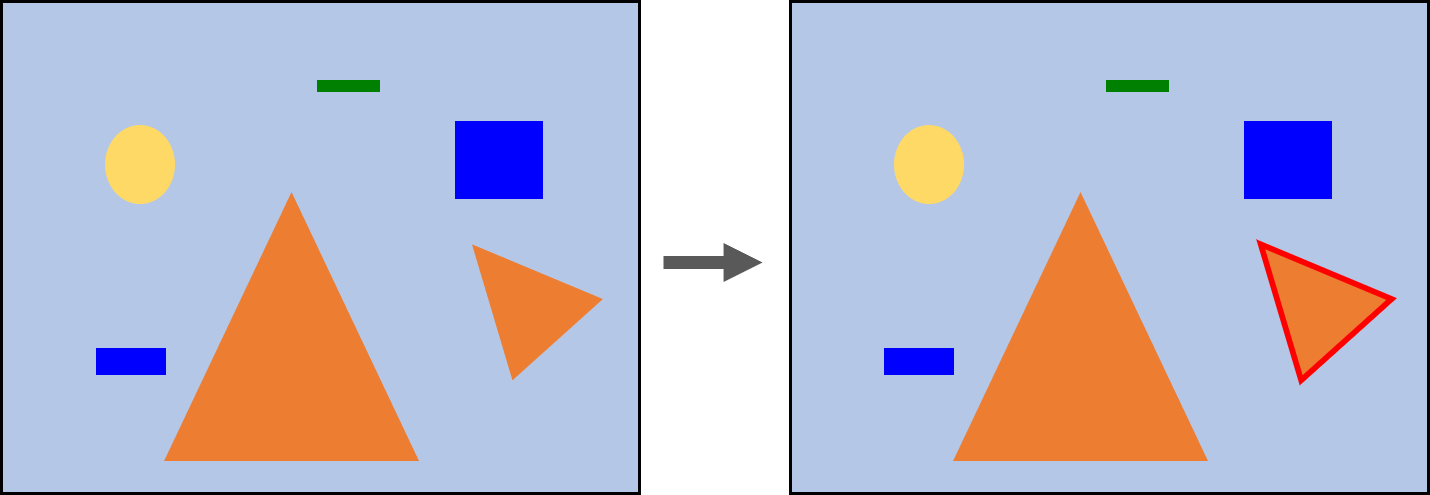
図がチープすぎる.
言語化すると,
様々な色,大きさのオブジェクトが表示された画像から,特定の色・大きさのオブジェクトを検出する
ということをしたかった.
既に多くの優れた解説記事があると思うのだけど,こういうのを書かないとすぐ忘れてしまうので,忘備録的に書きます.
まず結論から
以下の4ステップで画像を処理しています
-
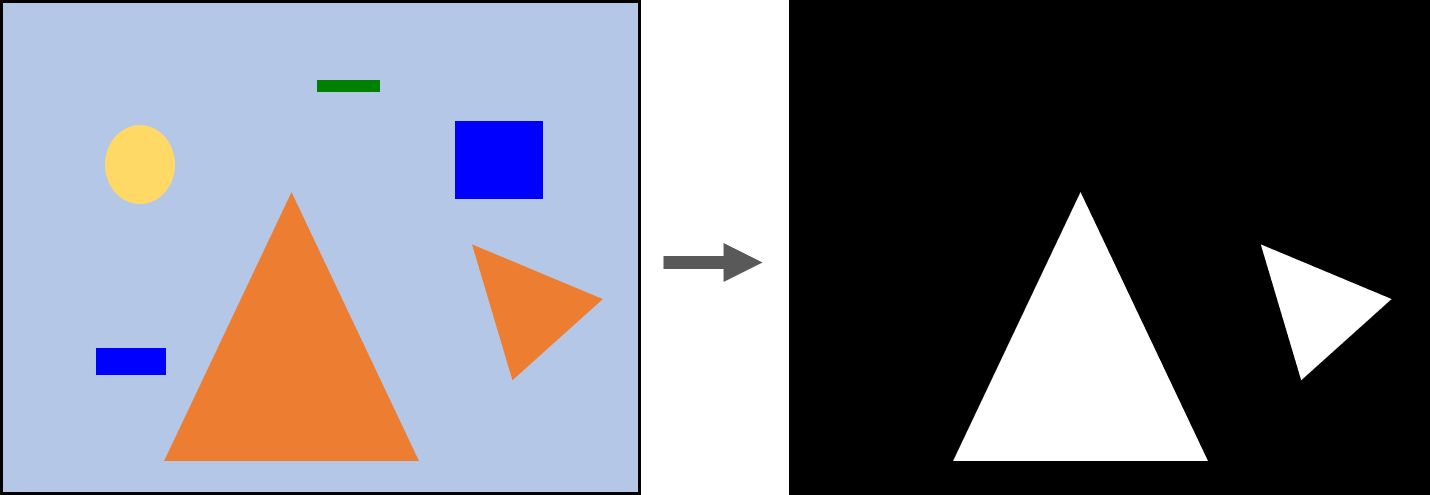
色の情報をもとに二値化
-
輪郭を検出

-
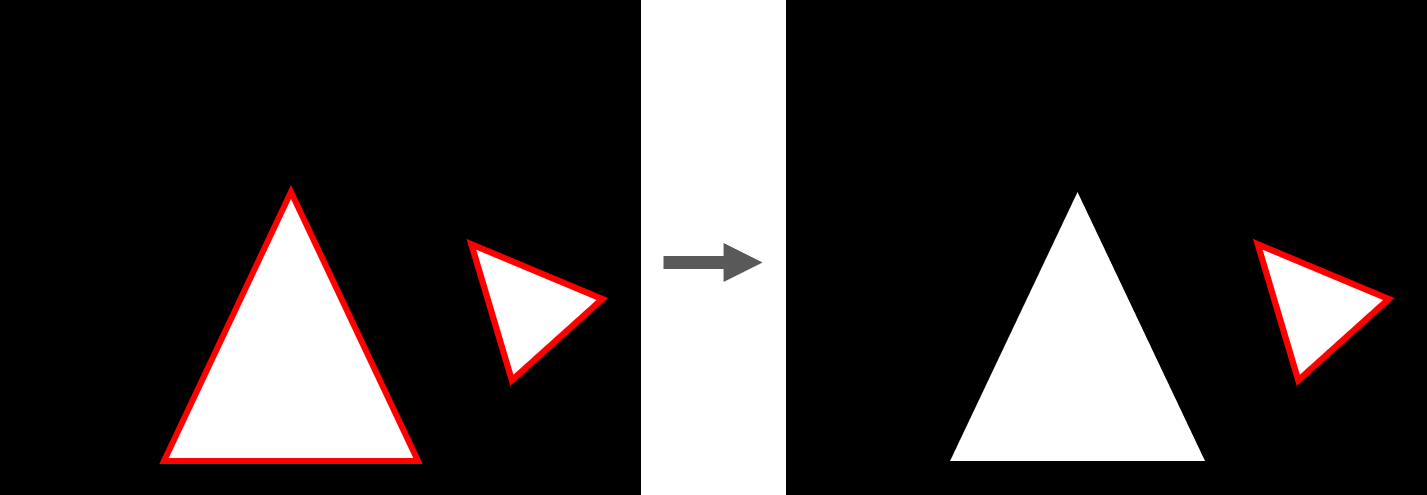
大きさで場合分け
-
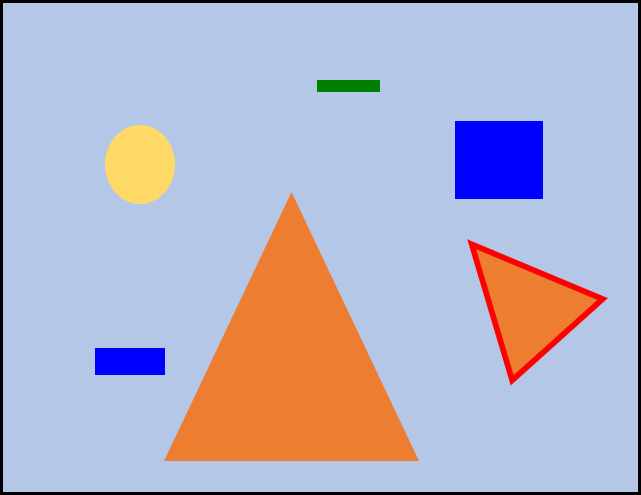
輪郭を元画像に重ねて表示
コード
1. 色の情報をもとに二値化
2. 輪郭を検出
import cv2
import numpy as np

# 画像 "hoge.jpg" を読み込む
# 同じ画像を別変数で2回読み込んでいるのは.片方(img_c)を「画像処理用」,
# もう片方(img_c_origin)を「輪郭と重ねて表示する用」とするため.

filename = "hoge.jpg"

input_img = filename
img_c = cv2.imread(input_img)
img_c_origin = cv2.imread(input_img)

# 前処理(ぼかし)
# 数字は適当
for i in range(2):
	img_c = cv2.GaussianBlur(img_c,(5,5),0)

# 画像のチャンネルを分ける.cv2.imreadで読んだ画像は「RGB」でなく「BGR」の順番なので注意!
B, G, R = cv2.split(img_c)

# RGBそれぞれのチャンネルで二値化します.
# 当該ピクセルが目的の色のときに1,そうでないときに0になります.

# -------- color condition ----------
R_low = 0
R_high = 100
G_low = 100
G_high = 200
B_low = 200
B_high = 250
# -----------------------------------

img_r_th = np.where((R < R_high) & (R > R_low), 1, 0)
img_g_th = np.where((G < G_high) & (G > G_low), 1, 0)
img_b_th = np.where((B < B_high) & (B > B_low), 1, 0)

# 行列の掛け算でなく,各要素の掛け算.こういうことできるから好き.
# 論理積(AND)をとるイメージです.検出オブジェクトを白にするため,最後に255を掛けています.
img_th = img_r_th * img_g_th * img_b_th * 255

# 次に続くfindCOntoursの引数として使うため,uint8にキャストします.
img_th = np.uint8(img_th)

# 輪郭を検出します.
contours = cv2.findContours(img_th, cv2.RETR_TREE, cv2.CHAIN_APPROX_SIMPLE)[0]
画像のぼかし(前処理)がなぜ必要かについては,以下の記事の「前処理」が参考になりました.
機械学習のためのOpenCV入門
今回はいろいろな事情からRGBを使用してるんですが,HSVで検出するやり方もあります.直感的でいいよね.
オブジェクト輪郭検出
輪郭検出の詳細はこちら
輪郭: 初めの一歩
色々と書いてはいるけれど,輪郭検出のあたりはほぼ写経です.愚かなので...
3. 大きさで場合分け
4. 元画像と重ねて表示
# -------- scale condition ----------
Area_th_min = 1
Area_th_max = 1000
# -----------------------------------

# ほしい輪郭を格納するリストを定義します
Active_contours = []

# contourAreaに輪郭を打ち込むと,その輪郭で囲まれた領域の面積が返ってきます.
# これを利用して,特定の大きさのオブジェクト(の輪郭)だけをActive_contoursに格納します.
for cont in contours:
	if cv2.contourArea(cont) > Area_th_min and cv2.contourArea(cont) < Area_th_max:
		Active_contours.append(cont)

# drowContoursを使うと,画像に輪郭を重ねることができます.
# 詳しくは,先の「輪郭:初めの一歩」をご覧ください.
cont_img = cv2.drawContours(img_c_origin, Active_contours, -1, (255,0,0), 3)

# 表示させるために「BGR」を「RGB」に変換しておきます.
cont_img = cv2.cvtColor(cont_img, cv2.COLOR_BGR2RGB)
コード全体
import cv2
import numpy as np
import matplotlib.pyplot as plt

# [[User specified parameters]]

# ------- color condition ----------
R_low = 200
R_high = 250
G_low = 60
G_high = 110
B_low = 80
B_high = 120
# -----------------------------------

# ------- scale condition -----------
Area_th_min = 1200
Area_th_max = 10000
# -----------------------------------


# Step 1 ---------------------------
filename = "hoge.jpg"

input_img = filename
img_c = cv2.imread(input_img)
img_c_origin = cv2.imread(input_img)

for i in range(2):
	img_c = cv2.GaussianBlur(img_c,(5,5),0)

B, G, R = cv2.split(img_c)

img_g_th = np.where((G < G_high) & (G > G_low), 1, 0)
img_b_th = np.where((B < B_high) & (B > B_low), 1, 0)
img_r_th = np.where((R < R_high) & (R > R_low), 1, 0)

img_th = img_r_th * img_g_th * img_b_th * 255
img_th = np.uint8(img_th)

# Step 2 ---------------------------
contours = cv2.findContours(img_th, cv2.RETR_TREE, cv2.CHAIN_APPROX_SIMPLE)[0]

# Step 3 ---------------------------
Active_contours = []

for cont in contours:
	if cv2.contourArea(cont) > Area_th_min and cv2.contourArea(cont) < Area_th_max:
		Active_contours.append(cont)

# Step 4 ---------------------------
cont_img = cv2.drawContours(img_c_origin, Active_contours, -1, (255,0,0), 3)

cont_img = cv2.cvtColor(cont_img, cv2.COLOR_BGR2RGB)
img_c_origin = cv2.cvtColor(img_c_origin, cv2.COLOR_BGR2RGB)

# ------------- show images -------------
plt.gray()

plt.subplot(1,2,1)
plt.imshow(img_th, vmin=0, vmax=255, interpolation = 'none')
plt.title('Threshold')

plt.subplot(1,2,2)
plt.imshow(cont_img, interpolation = 'none')
plt.title('Contour')

plt.show()
# ----------------------------------------
実際に使ってみる
上記のコードには既に,あるR,G,Bの範囲が指定されています.
ここで,入力画像として「まちカドまぞく」の英語版タイトルである「The Demon Girl Next Door」のめちゃめちゃかっこいいロゴを入力画像として指定すると...
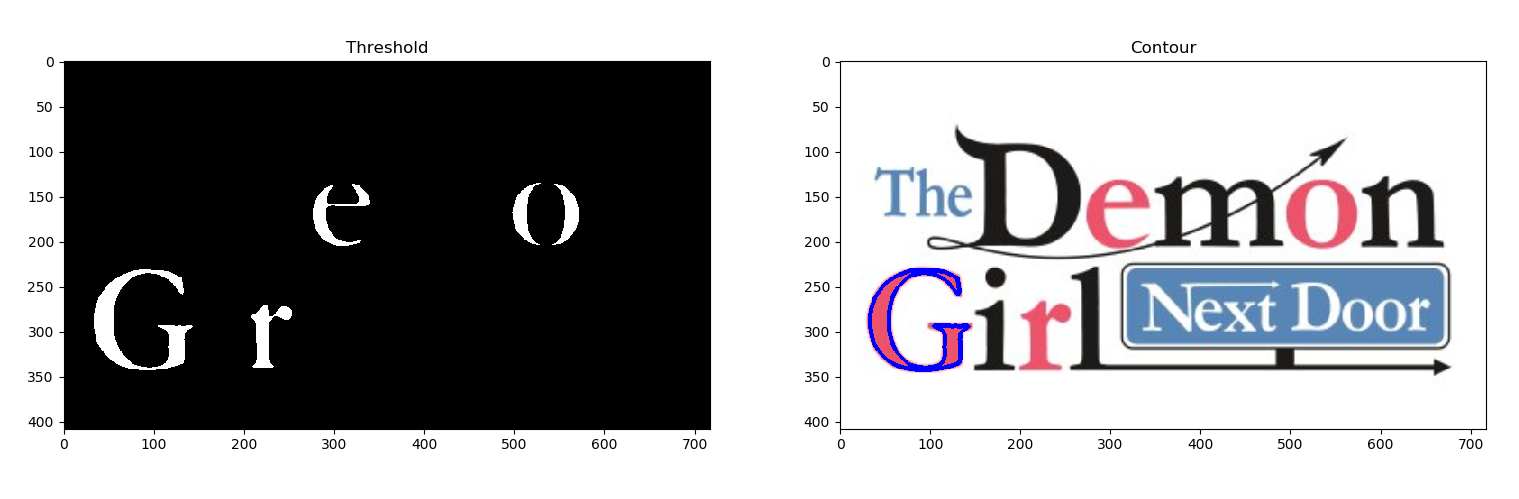
ピンク色の「G」だけが検出されます.
Thresholdの画像では,すべてのピンク色領域が検出されていますが,大きさによる場合分けを行った結果,Gだけが残りました.
ところでこのロゴ画像,黒がシャミ子,ピンクが桃を表してると思うんですけど,どうなんでしょうか...
まちカドまぞくはアマプラで見れるのでみんな見よう.
(2020/11/28追記 アマプラで見放題の時期は終わったんですね,寂しい)
おしまい