CloudFormationを使って、MarketplaceのBitnamiのRedmineをデプロイしてみました。
Redmine自体の自動デプロイは幾つか記事にありますが、自分自身がAWSの経験が浅いことから少し苦労したので備忘の意味も込めて、こちらに残しておきたいと思います。
今回はAWS MarketPlaceのBitnamiのRedmine( https://aws.amazon.com/marketplace/pp/prodview-urx6afmwf5y64 )を使っていますので、Redmine自体の構築は不要になります。なので、細かい設定で迷うことなく構築できます。
ただ、http接続のままとしていますので社内専用か動作確認用など本番以外での使用を推奨します。
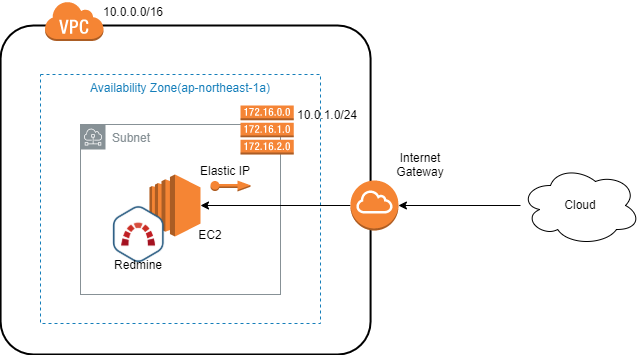
アーキテクチャー
CloudFormationで設定している内容になります。至ってシンプルです。
前提条件
- AWSアカウントを持っていること(権限はフルアクセスを想定)。
- AWSでEC2用にアクセスするキーペアを持っていること。
概要
手順は至ってシンプルです。
- CloudFormationのYAMLテンプレート(後述のredmine.yaml)を作成する。
- CloudFormationでスタックを作成→デプロイする。
- 数分経過したら、PublicDNSにアクセスする。
手順詳細
1. 以下のYAMLファイルを作成する
AWSTemplateFormatVersion: '2010-09-09'
Parameters:
  KeyPair:
    Description: KeyPair Name
    Type: AWS::EC2::KeyPair::KeyName
# Set Redmine imageid
Mappings:
  StackConfig:
    EC2:
      ImageId: 'ami-0fe437920fe3d64e8' # Redmine
Resources:
# Create VPC
  RedmineVPC:
    Type: AWS::EC2::VPC
    Properties:
      CidrBlock: 10.0.0.0/16
      EnableDnsHostnames: true
      EnableDnsSupport: true
      Tags:
        - Key: Name
          Value: RedmineVPC
# Create InternetGateWay
  RedmineIGW:
    Type: AWS::EC2::InternetGateway
    Properties:
      Tags:
        - Key: Name
          Value: RedmineIGW
# Attach IGW VPC
  AttachIGW:
    Type: AWS::EC2::VPCGatewayAttachment
    Properties:
      InternetGatewayId: !Ref RedmineIGW
      VpcId: !Ref RedmineVPC
# create RouteTable
  RedminePublicRoute:
    Type: AWS::EC2::RouteTable
    Properties:
      VpcId: !Ref RedmineVPC
      Tags:
        - Key: Name
          Value: RedminePublicRoute
# Set Routeing
  Route:
    Type: AWS::EC2::Route
    DependsOn: AttachIGW
    Properties:
      RouteTableId: !Ref RedminePublicRoute
      DestinationCidrBlock: 0.0.0.0/0
      GatewayId: !Ref RedmineIGW
# Create PublicSubnet
  PublicSubnet:
    Type: AWS::EC2::Subnet
    Properties:
      AvailabilityZone: ap-northeast-1a
      CidrBlock: 10.0.1.0/24
      VpcId: !Ref RedmineVPC
      Tags:
        - Key: Name
          Value: RedminePublicSubnet
# Subnet Route connection
  PublicSubnetRouteTabelAssociation:
    Type: AWS::EC2::SubnetRouteTableAssociation
    Properties:
      SubnetId: !Ref PublicSubnet
      RouteTableId: !Ref RedminePublicRoute
# Create security group
# port22 80 443
  RedmineSG:
    Type: AWS::EC2::SecurityGroup
    Properties:
      VpcId: !Ref RedmineVPC
      GroupDescription: RedmineSG
      SecurityGroupIngress:
        - IpProtocol: tcp
          FromPort: 22
          ToPort: 22
          CidrIp: 0.0.0.0/0
        - IpProtocol: tcp
          FromPort: 80
          ToPort: 80
          CidrIp: 0.0.0.0/0
        - IpProtocol: tcp
          FromPort: 443
          ToPort: 443
          CidrIp: 0.0.0.0/0
      Tags:
        - Key: Name
          Value: RedmineSG
# Create EC2 instance
  RedmineEC2:
    Type: AWS::EC2::Instance
    Properties:
      AvailabilityZone: ap-northeast-1a
      InstanceType: t2.micro
      ImageId: !FindInMap [ StackConfig, EC2, ImageId ]
      KeyName: !Ref KeyPair
      SubnetId: !Ref PublicSubnet
      SecurityGroupIds:
        - !GetAtt RedmineSG.GroupId
      Tags:
        - Key: Name
          Value: RedmineEnv
  # Create ElasticIP
  RedmineIP:
    Type: AWS::EC2::EIP
    Properties:
      InstanceId: !Ref RedmineEC2
# Output public DNS
Outputs:
  PublicDNS:
    Description: EC2 Public DNS
    Value: !GetAtt RedmineEC2.PublicDnsName
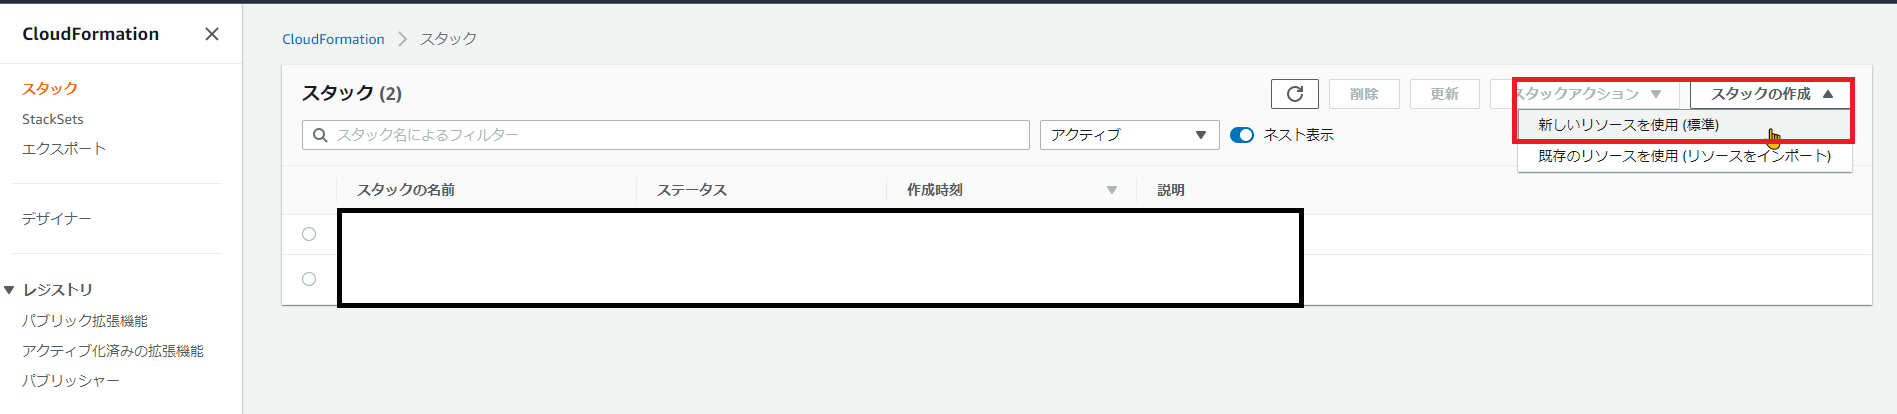
2. CloudFormationで[スタックの作成]-[新しいリソースの仕様(標準)]を選択する。
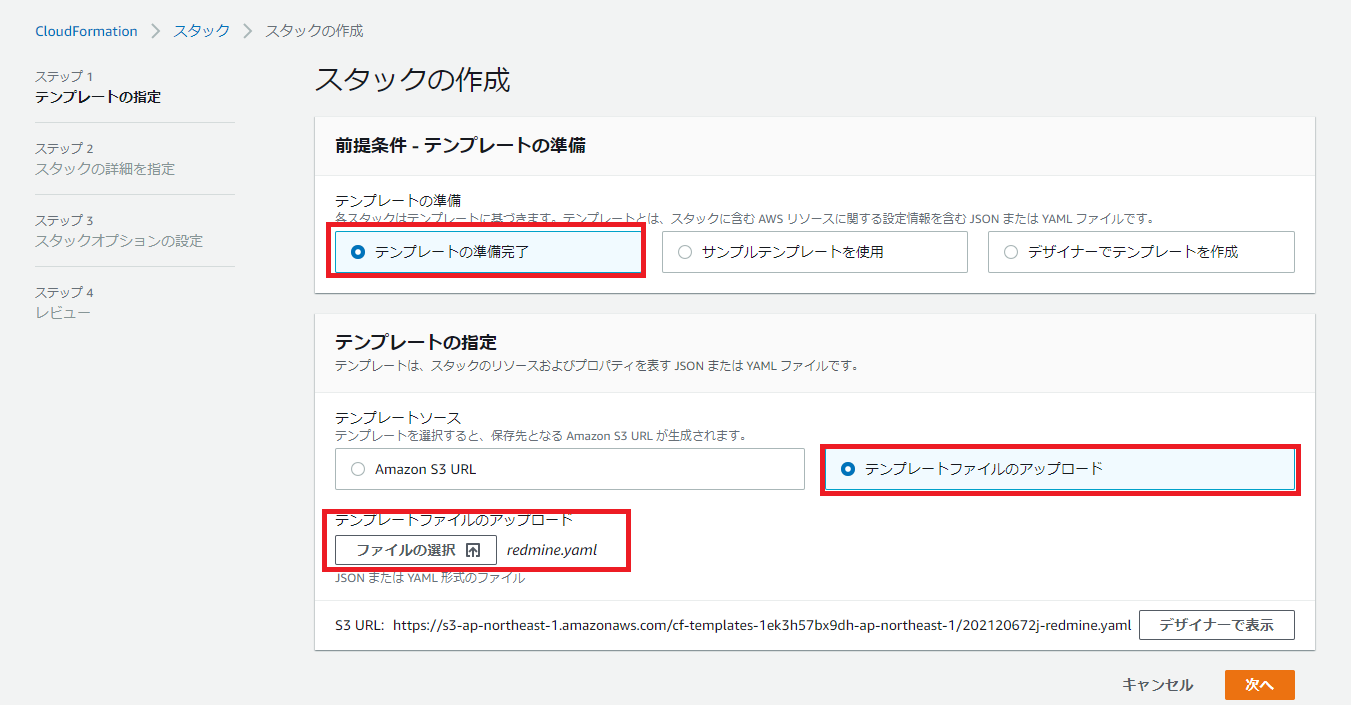
3. [テンプレートの準備完了]-[テンプレートファイルのアップロード]を選択し、作成したredmine.yamlを選択して[次へ]を押す。
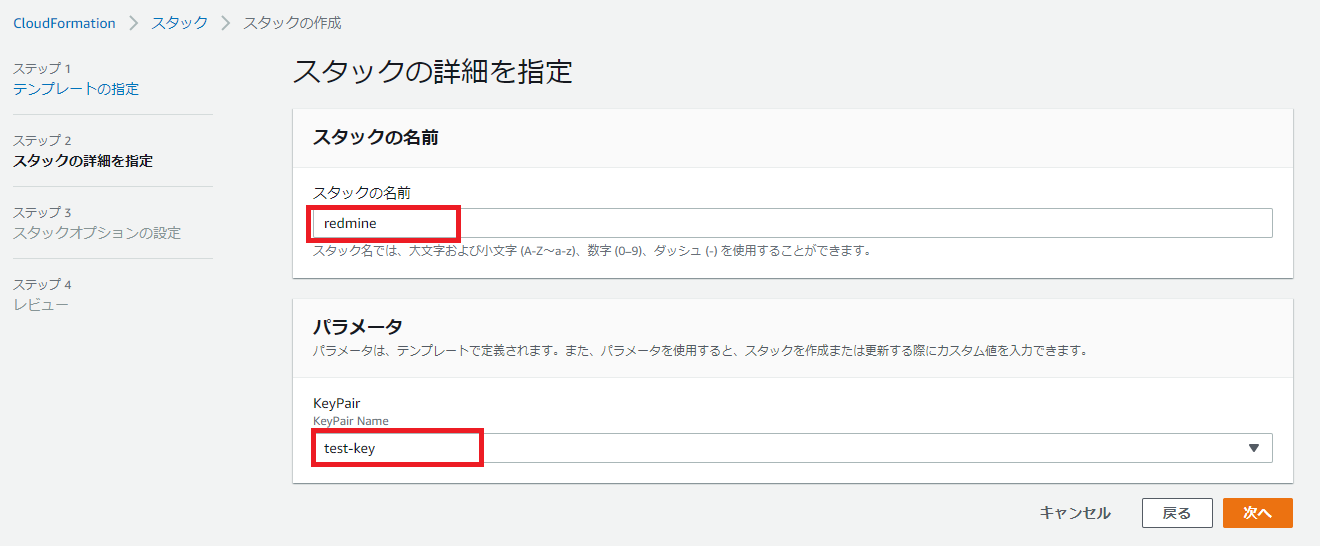
4. [スタックの名前]に任意の名前、[KeyPair]に作成していたEC2のキーペアを選択して[次へ]を押す。
5. スタックオプションの設定ではデフォルトのまま[次へ]を押す。
6. レビューではデフォルトのまま[スタックの作成]を押す。
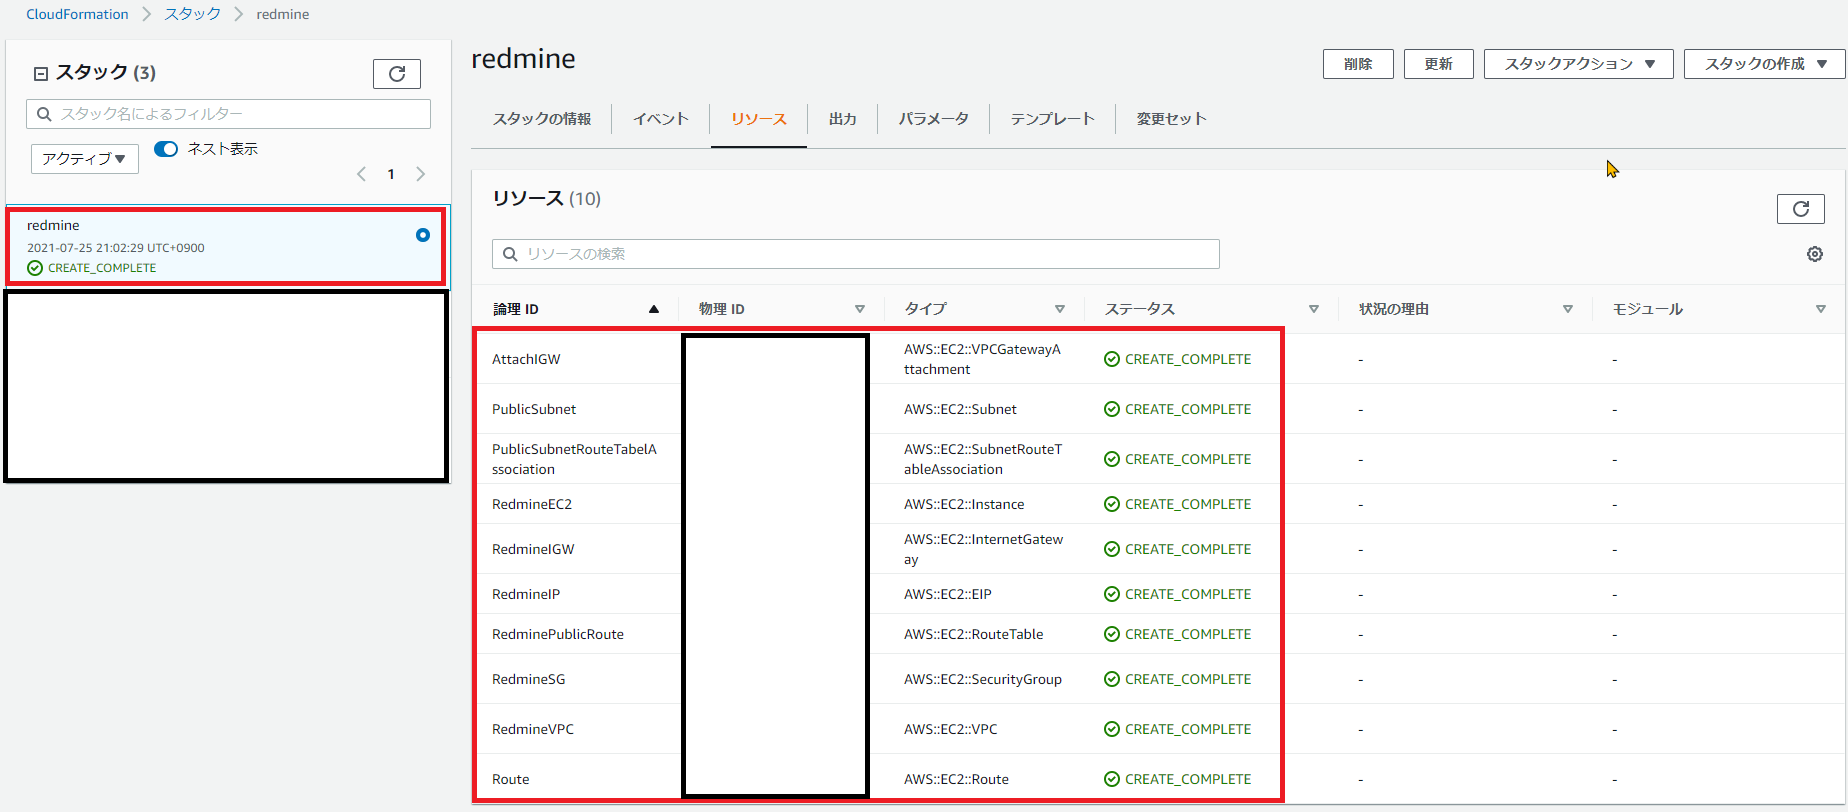
7. 約5分でデプロイが完了する。リソースタブで今回の構成で作成されるリソースを確認する。
- 作成されるリソース: サブネット、EC2、インターネットゲートウェイ、ElasiticIP、セキュリティグループ、VPC
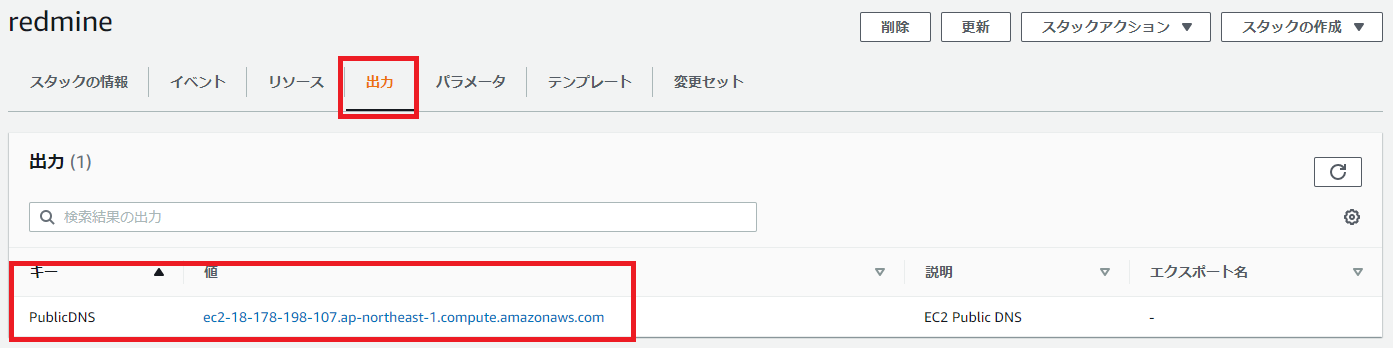
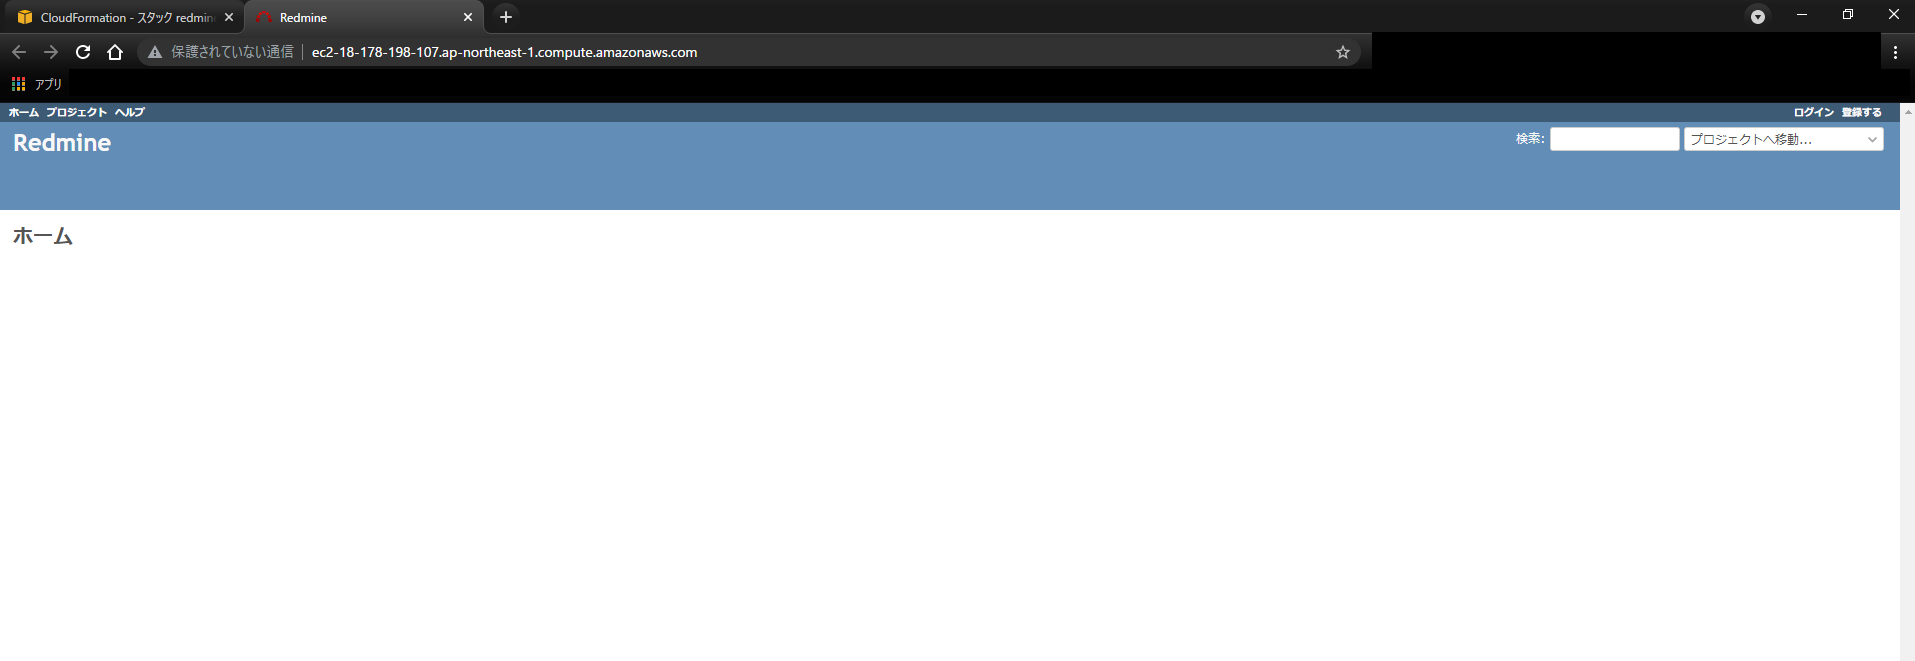
8. 出力タブに表示されているPublicDNSにアクセスする。リソースが作成されても、Redmineデプロイ自体に5分はかかる。
- Redmine画面
Redmineログイン方法
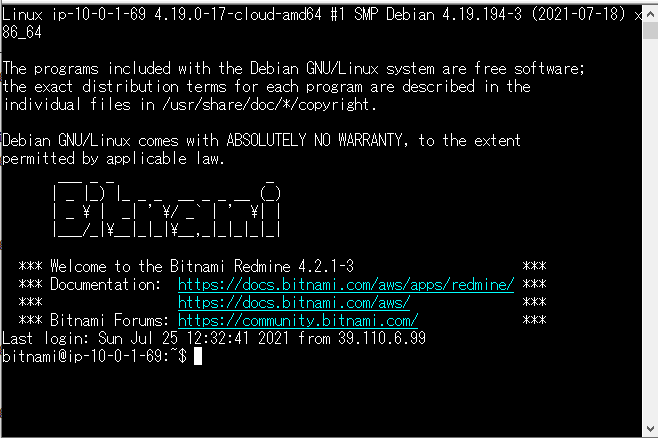
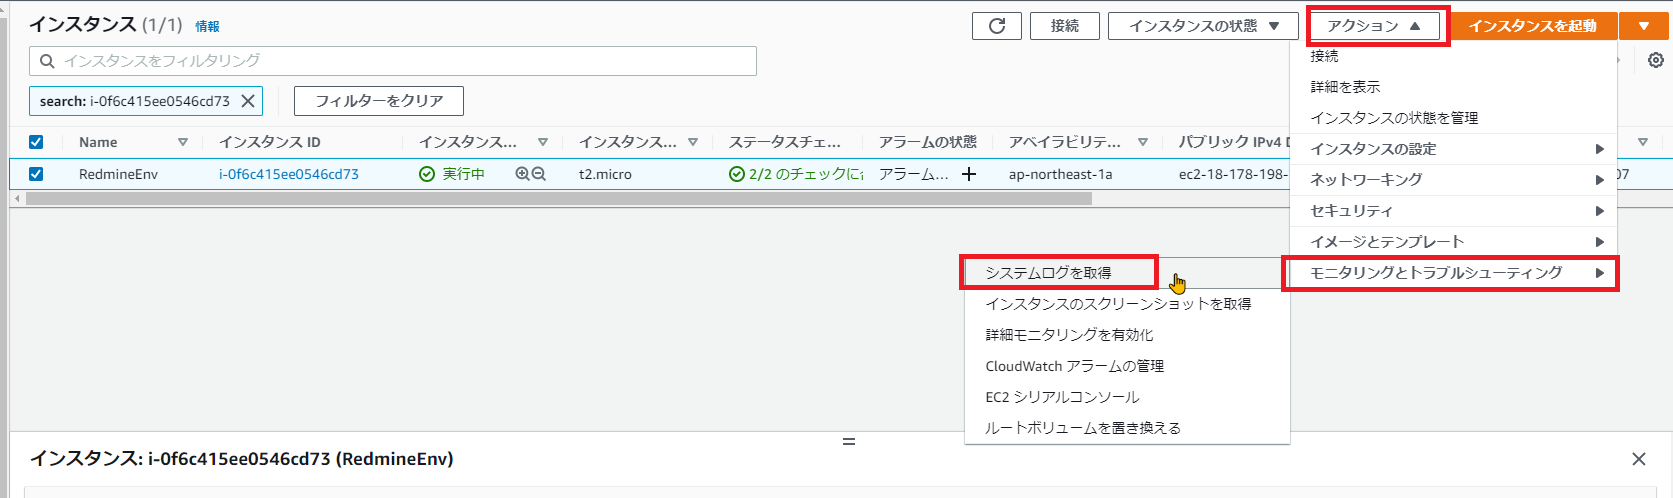
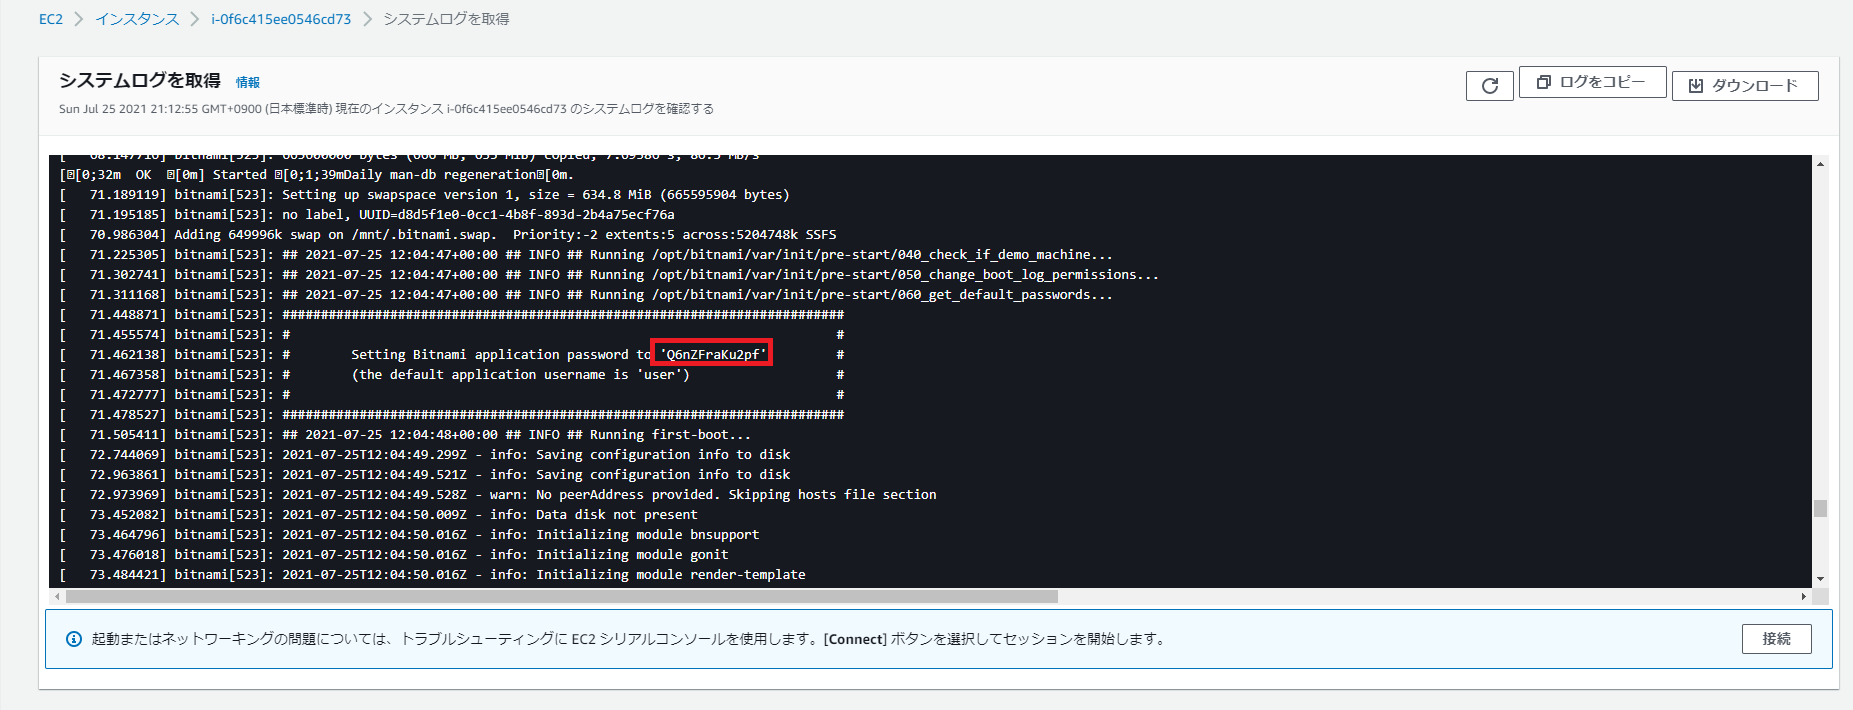
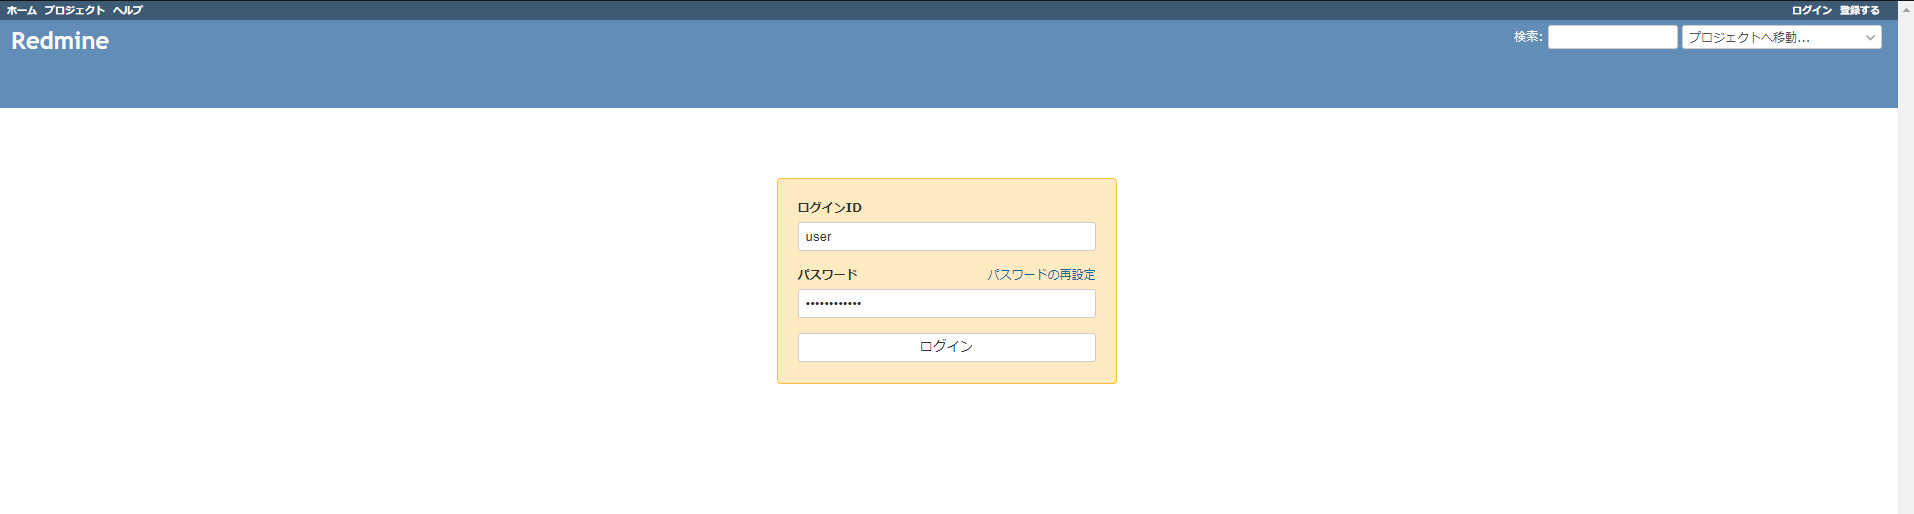
RedmineのログインIDはuser、パスワードはEC2インスタンス画面から[アクション]-[モニタリングとトラブルシューティング]-[システムログを取得]から確認する
今回のパスワードはQ6nZFraKu2pfとなる。
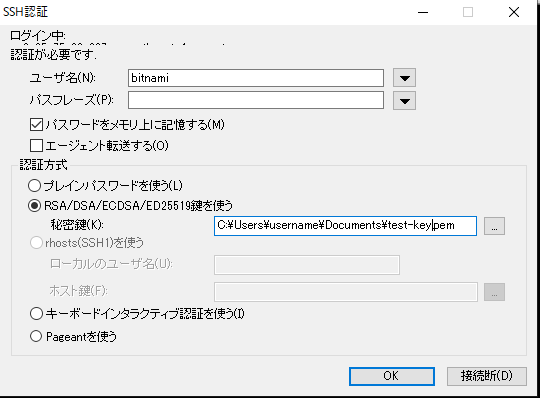
RedmineEC2インスタンスへのSSHログイン
RedmineEC2インスタンスへのSSHログインIDはbitnami、パスワード不要、SSHキーはスタックの詳細を設定で指定したKeyPairの秘密鍵となります。