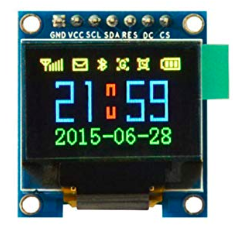
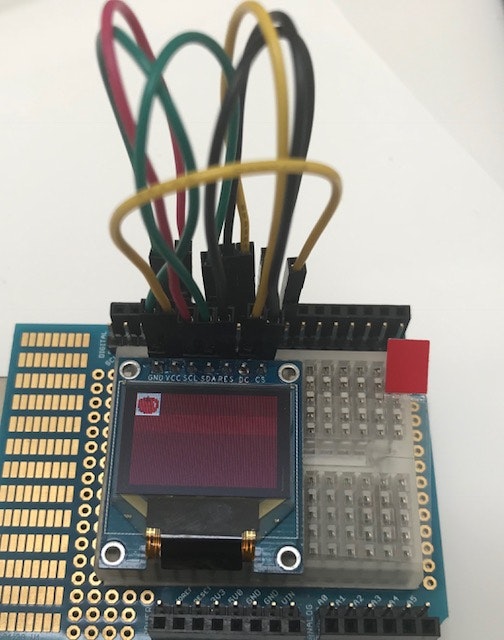
Amazonで購入した小型カラー液晶SSD1331でビットマップを表示してみました。
簡単なアニメーションを表示したかったので、ループで drawPixel()をまわすのではなく、drawBitmap()で画像を一度に表示することにしました。
void drawBitmap(int16_t x, int16_t y, uint8_t *bitmap, int16_t w, int16_t h, uint16_t color);
drawBitmap()はあくまでも1bitの白黒画像に色をつけて表示する仕組みのようです。
bitmapに2値画像を渡して、1が立っている場所はcolorの色で表示し、0のところは元の色を残してスキップします。
ですので、カラー画像を表示するためには版画の多色刷りのようになんども色を変えてdrawBitmap()する必要があります。
例えば赤、茶、白で構成されたりんごの画像  を表示したい場合、
0,0,0,0,0,0,0,0,0,0,0,0,0,0,0,0,
0,0,0,0,0,0,0,0,0,0,0,0,0,0,0,0,
0,0,0,0,0,0,0,0,0,0,0,0,0,0,0,0,
0,0,0,0,1,1,1,0,1,1,1,1,0,0,0,0,
0,0,1,1,1,0,1,0,0,1,0,1,1,1,0,0,
0,1,1,1,1,1,0,0,0,0,1,1,1,1,1,0,
0,1,1,1,1,1,1,1,1,1,1,0,1,1,1,0,
0,1,1,1,1,1,1,1,1,1,1,1,0,1,1,0,
0,1,1,1,1,1,1,1,1,1,1,1,0,1,1,0,
0,1,1,1,1,1,1,1,1,1,1,1,0,1,1,0,
0,0,1,1,1,1,1,1,1,1,1,1,1,1,1,0,
0,0,0,1,1,1,1,1,1,1,1,1,1,1,0,0,
0,0,0,1,1,1,1,1,1,1,1,1,1,1,0,0,
0,0,0,0,0,1,1,1,1,1,1,1,1,0,0,0,
0,0,0,0,0,0,0,1,1,1,1,0,0,0,0,0,
0,0,0,0,0,0,0,0,0,0,0,0,0,0,0,0,

0,0,0,0,0,0,0,0,0,0,0,0,0,0,0,0,
0,0,0,0,0,0,0,0,0,0,0,0,0,0,0,0,
0,0,0,0,0,0,0,1,0,0,0,0,0,0,0,0,
0,0,0,0,0,0,0,1,0,0,0,0,0,0,0,0,
0,0,0,0,0,1,0,1,1,0,1,0,0,0,0,0,
0,0,0,0,0,0,1,1,1,1,0,0,0,0,0,0,
0,0,0,0,0,0,0,0,0,0,0,0,0,0,0,0,
0,0,0,0,0,0,0,0,0,0,0,0,0,0,0,0,
0,0,0,0,0,0,0,0,0,0,0,0,0,0,0,0,
0,0,0,0,0,0,0,0,0,0,0,0,0,0,0,0,
0,1,0,0,0,0,0,0,0,0,0,0,0,0,0,0,
0,0,1,0,0,0,0,0,0,0,0,0,0,0,0,0,
0,0,1,0,0,0,0,0,0,0,0,0,0,0,0,0,
0,0,0,1,1,0,0,0,0,0,0,0,0,0,0,0,
0,0,0,0,0,1,1,0,0,0,0,0,0,0,0,0,
0,0,0,0,0,0,0,0,0,0,0,0,0,0,0,0,
のような2値画像データを用意し、左上→右下の順でMSB->LSB,MSB->LSB,,
のように8ピクセルごとのデータを作っていきます。
nが[0,1]とすると、左上のピクセルが(n_0<<7),左上から右に8番目のピクセルが(n_7<<0)となります。
data[0] = (n_0<<7)+(n_1<<6)+(n_2<<5)+(n_3<<4)+(n_4<<3)+(n_5<<2)+(n_6<<1)+(n_7<<0);
[apple_red]
0x00,0x00,0x00,0x00,0x00,0x00,0x0E,0xF0,
0x3A,0x5C,0x7C,0x3E,0x7F,0xEE,0x7F,0xF6,
0x7F,0xF6,0x7F,0xF6,0x3F,0xFE,0x1F,0xFC,
0x1F,0xFC,0x07,0xF8,0x01,0xE0,0x00,0x00,

[apple_dkred]
0x00,0x00,0x00,0x00,0x01,0x00,0x01,0x00,
0x05,0xA0,0x03,0xC0,0x00,0x00,0x00,0x00,
0x00,0x00,0x00,0x00,0x40,0x00,0x20,0x00,
0x20,0x00,0x18,0x00,0x06,0x00,0x00,0x00,
void drawBitmap(int16_t x, int16_t y, uint8_t *bitmap, int16_t w, int16_t h, uint16_t color, uint16_t bgcolor);
引数を一つ増やしてbgcolorに値を渡すと、ピクセルのない場所はスキップではなくbgcolorで描画するようになります。なので今回は、
- 赤い部分を表示&背景を白で表示
- 茶色部分を表示(それ以外はヌキ)
の2回描画することで背景含め3色の画像を表示しています。
# include <Adafruit_GFX.h>
# include <Adafruit_SSD1331.h>
# include <SPI.h>

# define sclk 13
# define mosi 11
# define cs   10
# define rst  8
# define dc   9

// Color definitions
# define RED             0xF800
# define DKRED           0x7000
# define WHITE           0xFFFF

# define PIC_SIZE_X (16)
# define PIC_SIZE_Y (16)

Adafruit_SSD1331 display = Adafruit_SSD1331(cs, dc, rst);

void setup(void) {
  display.begin();

  const uint8_t apple_red[] PROGMEM = {
    0x00,0x00,0x00,0x00,0x00,0x00,0x0E,0xF0,
    0x3A,0x5C,0x7C,0x3E,0x7F,0xEE,0x7F,0xF6,
    0x7F,0xF6,0x7F,0xF6,0x3F,0xFE,0x1F,0xFC,
    0x1F,0xFC,0x07,0xF8,0x01,0xE0,0x00,0x00,
  };
  const uint8_t apple_dkred[] PROGMEM = {
    0x00,0x00,0x00,0x00,0x01,0x00,0x01,0x00,
    0x05,0xA0,0x03,0xC0,0x00,0x00,0x00,0x00,
    0x00,0x00,0x00,0x00,0x40,0x00,0x20,0x00,
    0x20,0x00,0x18,0x00,0x06,0x00,0x00,0x00,
  };

  display.fillScreen(DKRED);
  display.drawBitmap(0, 0, (uint8_t*)apple_red, PIC_SIZE_X, PIC_SIZE_Y,  RED,WHITE);
  display.drawBitmap(0, 0, (uint8_t*)apple_dkred, PIC_SIZE_X, PIC_SIZE_Y, DKRED);
}

void loop() {
}
少し時間を置いてから別の画像を表示すればアニメーションとして表示が可能です
Youtube
[追記]
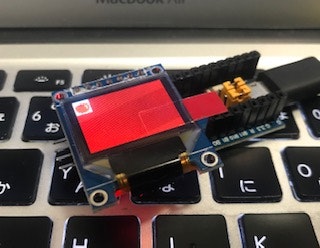
秋葉原ラジオデパート3FのShigezoneで売っていたbluepillクローンでも表示してみました。
# include <Adafruit_GFX.h>
# include <Adafruit_SSD1331.h>
# include <SPI.h>

// You can use any (4 or) 5 pins
# define sclk PB9 //13
# define mosi PB8 //11
# define rst  PB7 //8
# define dc   PB6 //9
# define cs   PB5 //10

// Color definitions
# define RED             0xF800
# define DKRED           0x7000
# define WHITE           0xFFFF

# define PIC_SIZE_X (16)
# define PIC_SIZE_Y (16)

// Option 1: use any pins but a little slower
Adafruit_SSD1331 display = Adafruit_SSD1331(cs, dc, mosi, sclk, rst);
//Adafruit_SSD1331 display = Adafruit_SSD1331(cs, dc, rst);

void setup(void) {
  pinMode(7, OUTPUT); // for Vcc
  digitalWrite(7, HIGH);

  display.begin();

  const uint8_t apple_red[] PROGMEM = {
    0x00,0x00,0x00,0x00,0x00,0x00,0x0E,0xF0,
    0x3A,0x5C,0x7C,0x3E,0x7F,0xEE,0x7F,0xF6,
    0x7F,0xF6,0x7F,0xF6,0x3F,0xFE,0x1F,0xFC,
    0x1F,0xFC,0x07,0xF8,0x01,0xE0,0x00,0x00,
  };
  const uint8_t apple_dkred[] PROGMEM = {
    0x00,0x00,0x00,0x00,0x01,0x00,0x01,0x00,
    0x05,0xA0,0x03,0xC0,0x00,0x00,0x00,0x00,
    0x00,0x00,0x00,0x00,0x40,0x00,0x20,0x00,
    0x20,0x00,0x18,0x00,0x06,0x00,0x00,0x00,
  };

  display.fillScreen(DKRED);
  display.drawBitmap(0, 0, (uint8_t*)apple_red, PIC_SIZE_X, PIC_SIZE_Y,  RED,WHITE);
  display.drawBitmap(0, 0, (uint8_t*)apple_dkred, PIC_SIZE_X, PIC_SIZE_Y, DKRED);
}

void loop() {
}
スケッチは液晶をそのままボードに挿せるよう、
高速のSPIモード
Adafruit_SSD1331 display = Adafruit_SSD1331(cs, dc, rst);
から低速のソフトウェアSPIモード
Adafruit_SSD1331 display = Adafruit_SSD1331(cs, dc, mosi, sclk, rst);
にしてピン番号を変えただけです。
また今回はPlatformIOでビルドしています。
BluePillクローンでビルドを通すためにこちらの処理をしています。
また、必要なライブラリはPlatformIOのライブラリから
Adafruit_GFX
Adafruit_SSD1331
で検索すると出てくるのでポチッとインストールすればOKです。


