概要
前回までに、アプリの作成は完了しました。
今回は、プロダクトとしてパッケージング(Windowsだと .exe 、macOSだと.dmg や .pkg ファイルの作成)およびインストーラーの作成を行います。
アイコンの準備
アイコンを設定しなくてもパッケージングはできるのですが、プロダクトとしてアプリ作成するには、必ず必要になる作業でしょう。
Windows用としては、.ico ファイル、macOS用としては、.icns ファイルが必要になります。
それぞれ、もととなる画像の種類は、大きさに合わせて数種類作成する必要があります。
画像ファイルからの変換については、下記を参照してください。
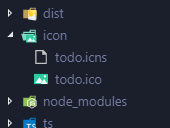
今回は、作成したファイルを、プロジェクトフォルダに 'icon' フォルダを作って置いておきます。
electron-builder の導入
パケージするツールとして、 electron-packager もありますが、electron-builder を利用すると、パッケージとインストーラーの作成までできるので楽だと思います。
> npm install --save-dev electron-builder
main.js の修正
main.js では index.html を読み込みますが、これはするパスとなるように下記のように修正します。
(原因はわかりませんが、私の環境では、このようにする必要がありました)
function createWindow() {
    // ブラウザウィンドウの作成
    win = new BrowserWindow({
        width: 800,
        height: 600
    })
    // index.html をロードする
    // --> 変更
    const path = require('path');
    win.loadFile(path.join(__dirname, './index.html'));
    //win.loadFile('index.html')
    // <-- 変更
    // 起動オプションに、 "--debug"があれば開発者ツールを起動する
    if (process.argv.find((arg) => arg === '--debug')) {
        win.webContents.openDevTools()
    }
    // ブラウザウィンドウを閉じたときのイベントハンドラ
    win.on('closed', () => {
        // 閉じたウィンドウオブジェクトにはアクセスできない
        win = null
    })
}
パッケージの定義を作成する
package.json 内に electron-builder の設定を記述します。
{
・・・
  "scripts": {
    "build": "webpack",
    "start": "electron ./ --debug",
    "package:mac": "webpack && electron-builder --mac --x64",
    "package:windows": "webpack && electron-builder --win --x64",
    "package:linux": "webpack && electron-builder --linux --x64"
  },
・・・
  "build": {
    "productName": "TODO",
    "appId": "todo.exsample.com",
    "directories": {
      "output": "./product"
    },
    "files": [
      "./dist/**/*.js",
      "./index.html",
      "./main.js",
      "./icon/**/*"
    ],
    "dmg": {
      "contents": [
        {
          "x": 410,
          "y": 150,
          "type": "link",
          "path": "/Applications"
        },
        {
          "x": 130,
          "y": 150,
          "type": "file"
        }
      ]
    },
    "mac": {
      "icon": "./icon/todo.icns",
      "target": [
        "dmg"
      ]
    },
    "win": {
      "icon": "./icon/todo.ico",
      "target": "msi"
    }
  }
}
各プロパティの詳細やここに書かれていないプロパティは、公式のページを参照してください。
directories / output でパッケージおよびインストーラーの出力先を指定します。
files では、アプリの動作に必要なファイルを指定します。 "**/*" という書き方は、フォルダの深さに関係なく、ファイルすべて、という意味です。
mac, win でそれぞれのパッケージの設定を行っています。
script で作成のためのコマンドを定義しています。
作成してみる
windows であれば、下記を実行すると、product フォルダにインストーラーができるはずです。
> npm run package:windows
インストーラーで、レジストリの処理やファイルのコピーなど、様々な処理を行いたい場合は、Inno Setup などで作成すると良いです。
electron-builder で作成された win-unpacked フォルダ内のファイル一式としてインストーラーに含めると良いでしょう。起動する exe もここにあります。
まとめ
Electronアプリの開発については、ひとまずおしまいです。
Reactや Reduxの話が多く、Electronについての話が少なかったかなと思います。
できれば、メインプロセス、レンダープロセス、その間のプロセス間通信とかも書きたかったのですが、これは別の機会にしたいかなと思います。
