0
2

Delete article

Deleted articles cannot be recovered.

Draft of this article would be also deleted.

Are you sure you want to delete this article?

More than 1 year has passed since last update.

【環境構築】Selenium, Chrome Driver のインストール

Last updated at Posted at 2022-08-19

はじめに

Python で自動ログイン操作する環境を作成します。

本記事を進めるには以下が PC にインストールしている必要があります。

まだ、入っていない方はインストールをお願いします。

環境

  • Windows 11 Pro: 22000.856
  • Powershell: 5.1.22000.832
  • Jupyter lab: 3.4.5
  • Google Chrome 104.0.5112.82

環境構築

Jupyter Lab の起動

Powershell で以下のコマンドを実行します。

jupyter lab

Selenium の インストール

! pip install selenium

Chrome Driver のインストール

Chrome の version を確認

  • 画面右上の三つの点をクリックします。

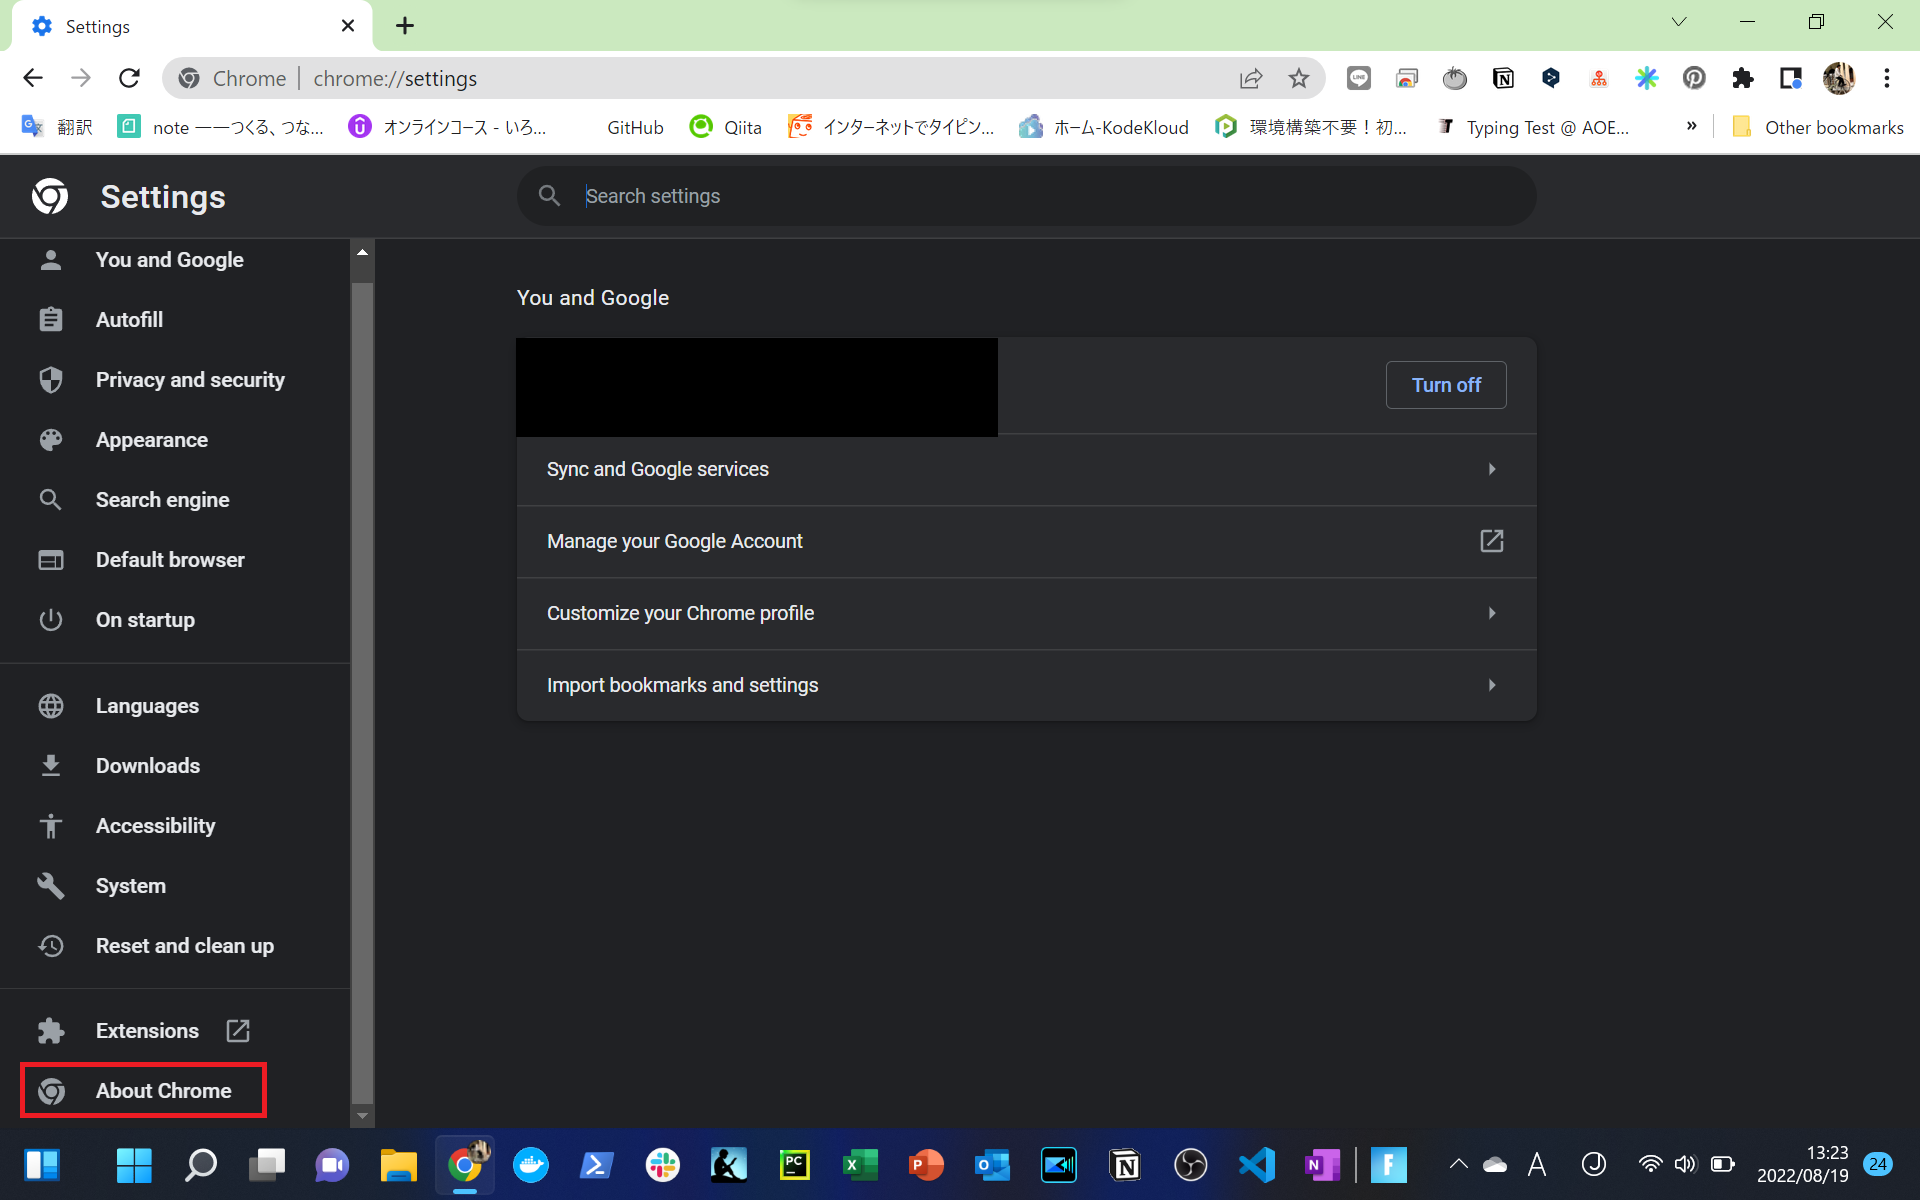
  • Setting をクリックします。
    スクリーンショット 2022-08-19 132221.png

  • About Chrome をクリックします。
    スクリーンショット 2022-08-19 132345.png

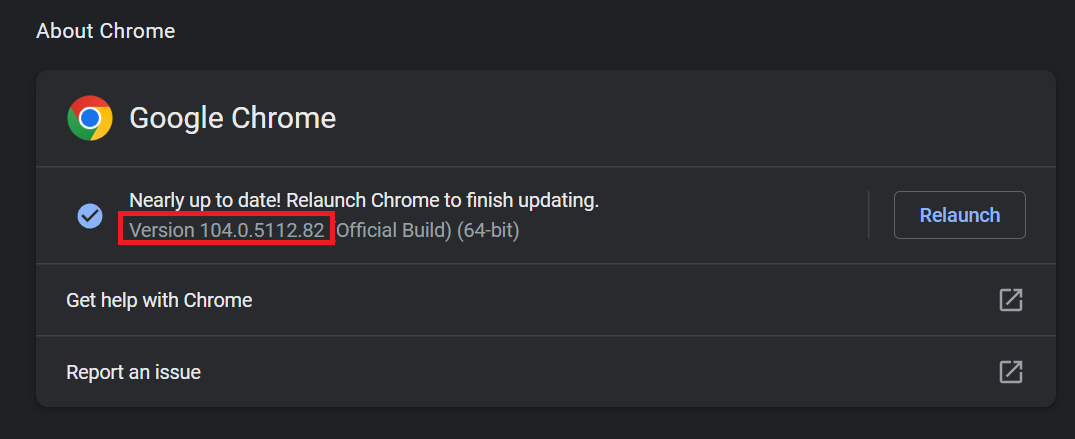
  • version を確認します。
    スクリーンショット 2022-08-19 132425.png

  • ChromeDriver の サイトにアクセス 。確認した version より古くて近いものをコピーまたはメモします。

  • 下記のコードを実行します。

!pip install chromedriver_binary==<バージョン番号>
  • 使用するライブラリを呼び出します。
from selenium import webdriver
  • Chrome Browser を起動します。
browser = webdriver.Chrome()
  • 以下の画面になったら完了です。
    image.png

最後に

次回は Docker 上に構築してみます。

参考

[selenium向け] ChromeDriverをpipでインストールする方法(パス通し不要、バージョン指定可能)

0
2
0

Register as a new user and use Qiita more conveniently

  1. You get articles that match your needs
  2. You can efficiently read back useful information
  3. You can use dark theme
What you can do with signing up
0
2

Delete article

Deleted articles cannot be recovered.

Draft of this article would be also deleted.

Are you sure you want to delete this article?