1. 概要
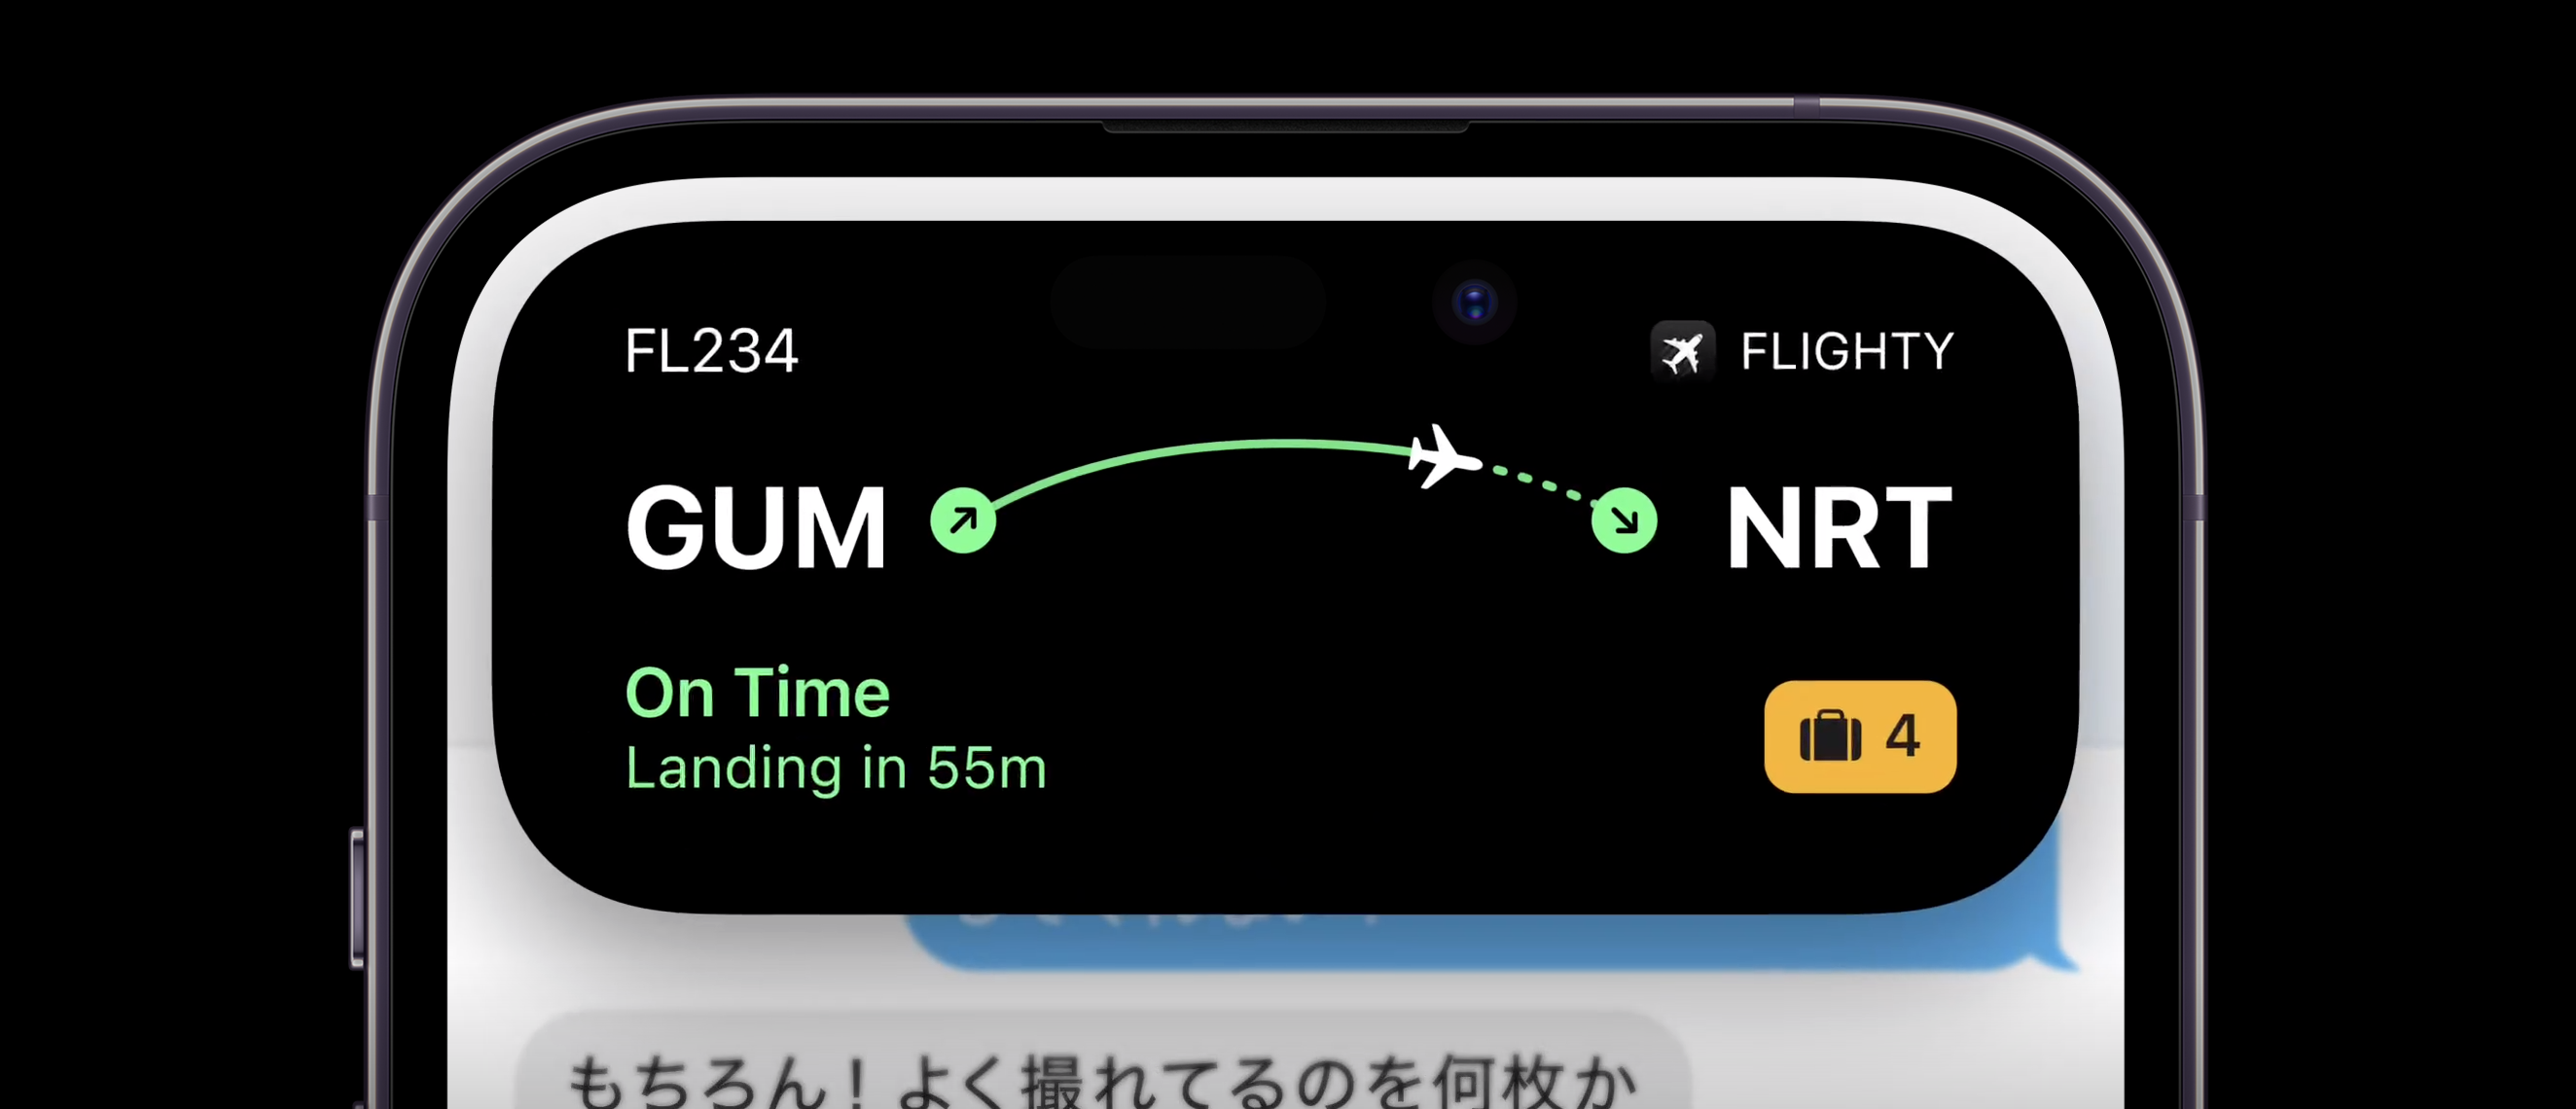
前回の記事(【iOS16.1】ActivityKitを触ってみた 〜Live Activity編〜)では、Live ActivityやDynamic Islandとはどういったものなのかについて、またロック画面内でのLive Activityの実装方法に焦点をあてました。今回は、ActivityKitを用いて、Dynamic IslandのLive ActivityのUIを構築するための方法について書いていきたいと思います。
2. ActivityKitとDynamic Island
前回の記事でも記載しましたが、ActivityKitはApple公式のドキュメントで以下のように記載されています。
With the ActivityKit framework, you can start a Live Activity to share live updates from your app in the Dynamic Island and on the Lock Screen. For example, a sports app might allow a person to start a Live Activity that makes live information available at a glance for the duration of a game.
ActivityKitフレームワークを使用すると、ライブアクティビティを開始して、ダイナミックアイランドとロック画面でアプリからの直接的なアップデートを共有できます。たとえば、スポーツアプリでは、ライブアクティビティを開始して、試合中にライブ情報を一目で確認できるようにすることができます。

(出典: Apple Developer: ActivityKit)
また、ActivityKitを通して、Live ActivityやDynamic Islandを操作しようとすると、SwiftUIとWidgetKitを用いる必要があるとも述べられています。つまり、Live ActivityあるいはDynamic Islandをアプリ内に導入しようとすると、少なからずSwiftUIの導入は必要となります。
3. Dynamic Islandの実装方法
3-0. 開発環境
- Macbook Air M1, 2020 (macOS Ventura 13.0)
- Version 14.1 RC (14B47b)
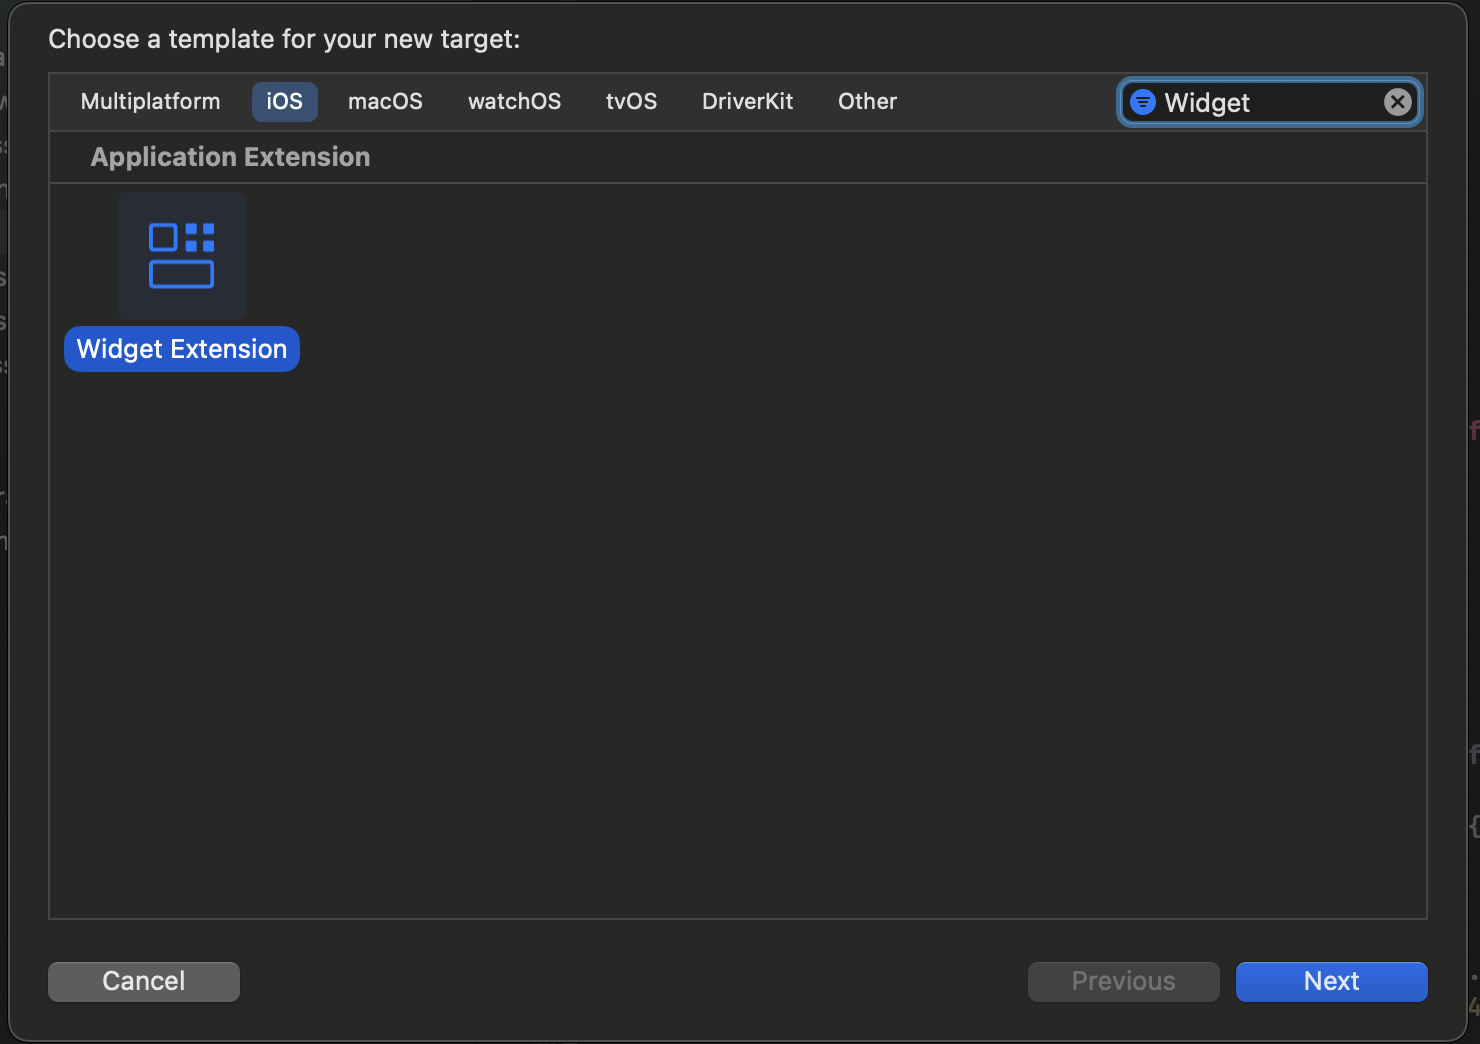
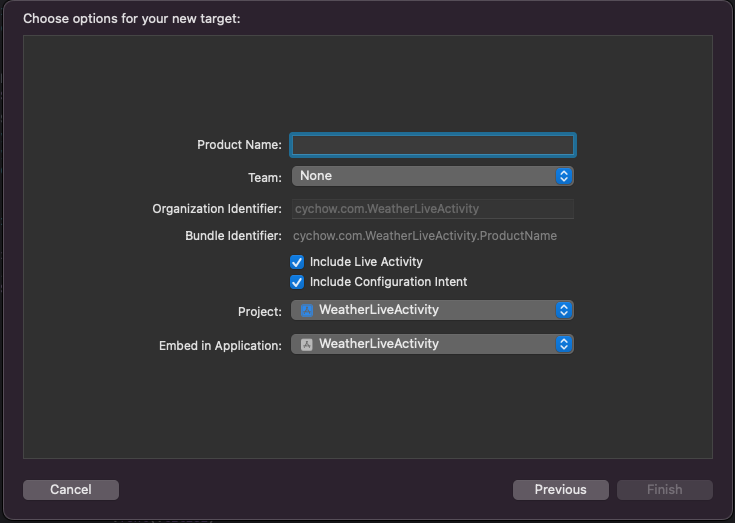
3-1. SwiftUIのプロジェクトを作成し、File > New > Targetで、Widget Extensionを選択する
TargetからWidget Extensionを追加することができる。Xcode14.1 beta版では自力でLiveActivityやDynamicIslandを実装するコードを書かないといけなかったが、RC版からはExtension生成時に、LiveActivityを追加するかのチェックが登場し、テンプレートを用意してくれるようになっている。
3-2. info.plistファイルで「NSSupportsLiveActivities」をBooleanとして追加し、ValueをYesにする。

3-3. Widget Extension側のswiftファイルにActivityConfigurationを呼び出す。
下記のコードのdynamicIsland内にて、Dynamic IslandのUIを構築することができる。
import ActivityKit
import WidgetKit
import SwiftUI

struct WeatherStatusAttributes: ActivityAttributes {
    public struct ContentState: Codable, Hashable {
        // コンテンツの状態が更新されるとき、ライブアクティビティのビューを更新する
        var status: Status = .sunny
    }

    // その他の変数
    var temperature: Double
    var weather: String
}

// MARK: Weather Status
enum Status: String, CaseIterable, Codable, Equatable{
    // SFSymbolの画像を設定
    case sunny = "sun.max.fill"
    case rainy = "cloud.rain.fill"
    case cloudy = "cloud.fill"
}

struct WeatherStatusLiveActivity: Widget {
    var body: some WidgetConfiguration {
        ActivityConfiguration(for: WeatherStatusAttributes.self) { context in
            // ここではLive ActivityのViewを設定する
        } dynamicIsland: { context in
            // iPhone14Pro/Pro Max向けのDynamic Islandをここで実装することができる
            DynamicIsland {
                DynamicIslandExpandedRegion(.leading) {
                }
                DynamicIslandExpandedRegion(.trailing) {
                }
                DynamicIslandExpandedRegion(.center) {
                }
                DynamicIslandExpandedRegion(.bottom) {
                }
            } compactLeading: {
            } compactTrailing: {
            } minimal: {
            }
        }
    }
}
ここで、DynamicIsland内の位置関係について見ていきたいと思います。
上記のコードをみていると、DynamicIslandExpandedRegionで.leadingや.trailing、.center、.bottomと指定されていたり、compactLeadingや、compactTrailing、minimalなどが書かれています。
まず、DynamicIslandExpandedRegionはDynamicIsland展開時の位置関係を表しています。
Apple公式のドキュメントでは以下のように書かれていました。
・ center places content below the TrueDepth camera.
・ leading places content along the leading edge of the expanded Live Activity next to the TrueDepth camera and wraps additional content below it.
・ trailing places content along the trailing edge of the expanded Live Activity next to the TrueDepth camera and wraps additional content below it.
・ bottom places content below the leading, trailing, and center content.
・ centerは、TrueDepth カメラの下にコンテンツを配置します。
・ leadingは、TrueDepthカメラの横に展開されたLive Activityの前縁に沿ってコンテンツを配置し、その下に追加のコンテンツを包み込みます。
・ trailingは、TrueDepthカメラの横に展開されたLive Activityの後縁に沿ってコンテンツを配置し、その下に追加のコンテンツを包み込みます。
・ bottomは、leading、trailing、およびcenterのコンテンツの下にコンテンツを配置します。

(出典: Apple Developer: Displaying live data with Live Activities)
次に、compactLeadingや、compactTrailing、minimalについてみていきます。
まずは、compactLeadingや、compactTrailingについてです。
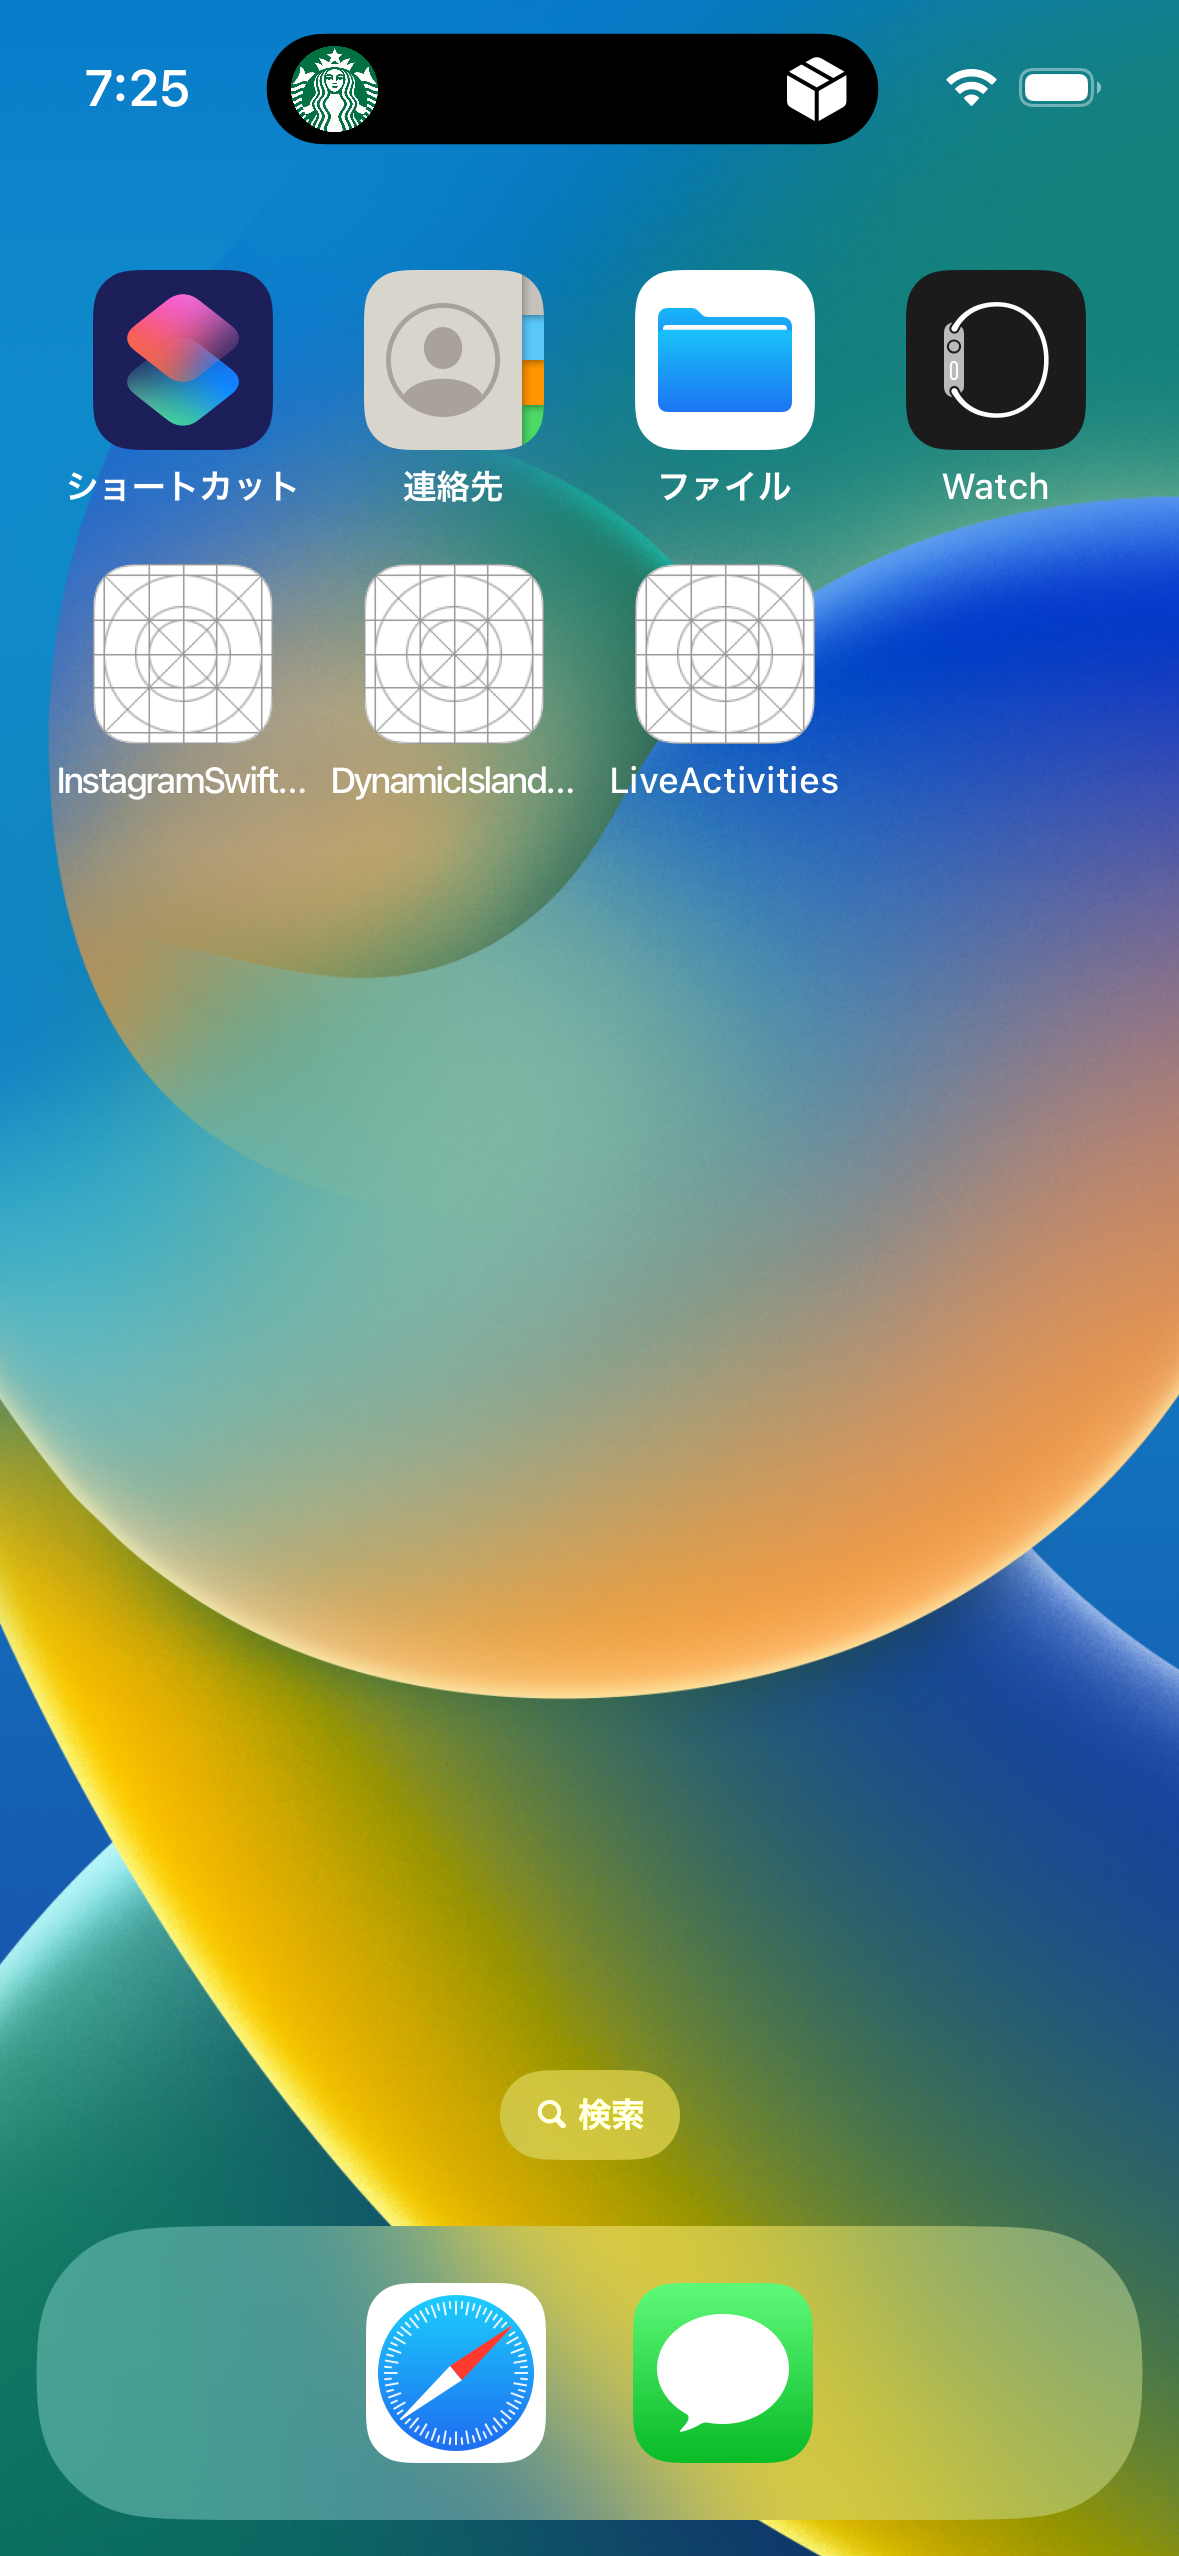
以下のスクショのように、TrueDepthカメラの左部分の領域がcompactLeadingとなります。一方で、TrueDepthカメラの右部分の領域がcompactTrailingになります。

続いて、minimalについてです。
minimalは複数のLive Activityが存在するときにTrueDepthカメラの右側部分に表示される、円形の領域です。

上記の内容をまとめると以下のようなコードとなる。
import ActivityKit
import WidgetKit
import SwiftUI

// (中略)

struct WeatherStatusLiveActivity: Widget {
    var body: some WidgetConfiguration {
        ActivityConfiguration(for: WeatherStatusAttributes.self) { context in
            // ここではLive ActivityのViewを設定する
        } dynamicIsland: { context in
            // iPhone14Pro/Pro Max向けのDynamic Islandをここで実装することができる
            DynamicIsland {
                // Dynamic IslandのLive Activity展開時のUIを構築する
                DynamicIslandExpandedRegion(.leading) {
                    // TrueDepthカメラの下にコンテンツを配置する

                }
                DynamicIslandExpandedRegion(.trailing) {
                    // TrueDepthカメラの横に展開されたLiveActivityの前縁に沿ってコンテンツを配置し、その下に追加のコンテンツを包み込む

                }
                DynamicIslandExpandedRegion(.center) {
                    // TrueDepthカメラの横に展開されたLive Activityの後縁に沿ってコンテンツを配置し、その下に追加のコンテンツを包み込む

                }
                DynamicIslandExpandedRegion(.bottom) {
                    // leading、trailing、およびcenterのコンテンツの下にコンテンツを配置する

                }
            } compactLeading: {
                // TrueDepthカメラの左側部分の領域にコンテンツを配置する

            } compactTrailing: {
                // TrueDepthカメラの右側部分の領域にコンテンツを配置する

            } minimal: {
                // 複数のLive Activityが存在するときにTrueDepthカメラの右側部分に表示される、円形の領域にコンテンツを配置する

            }
        }
    }
}
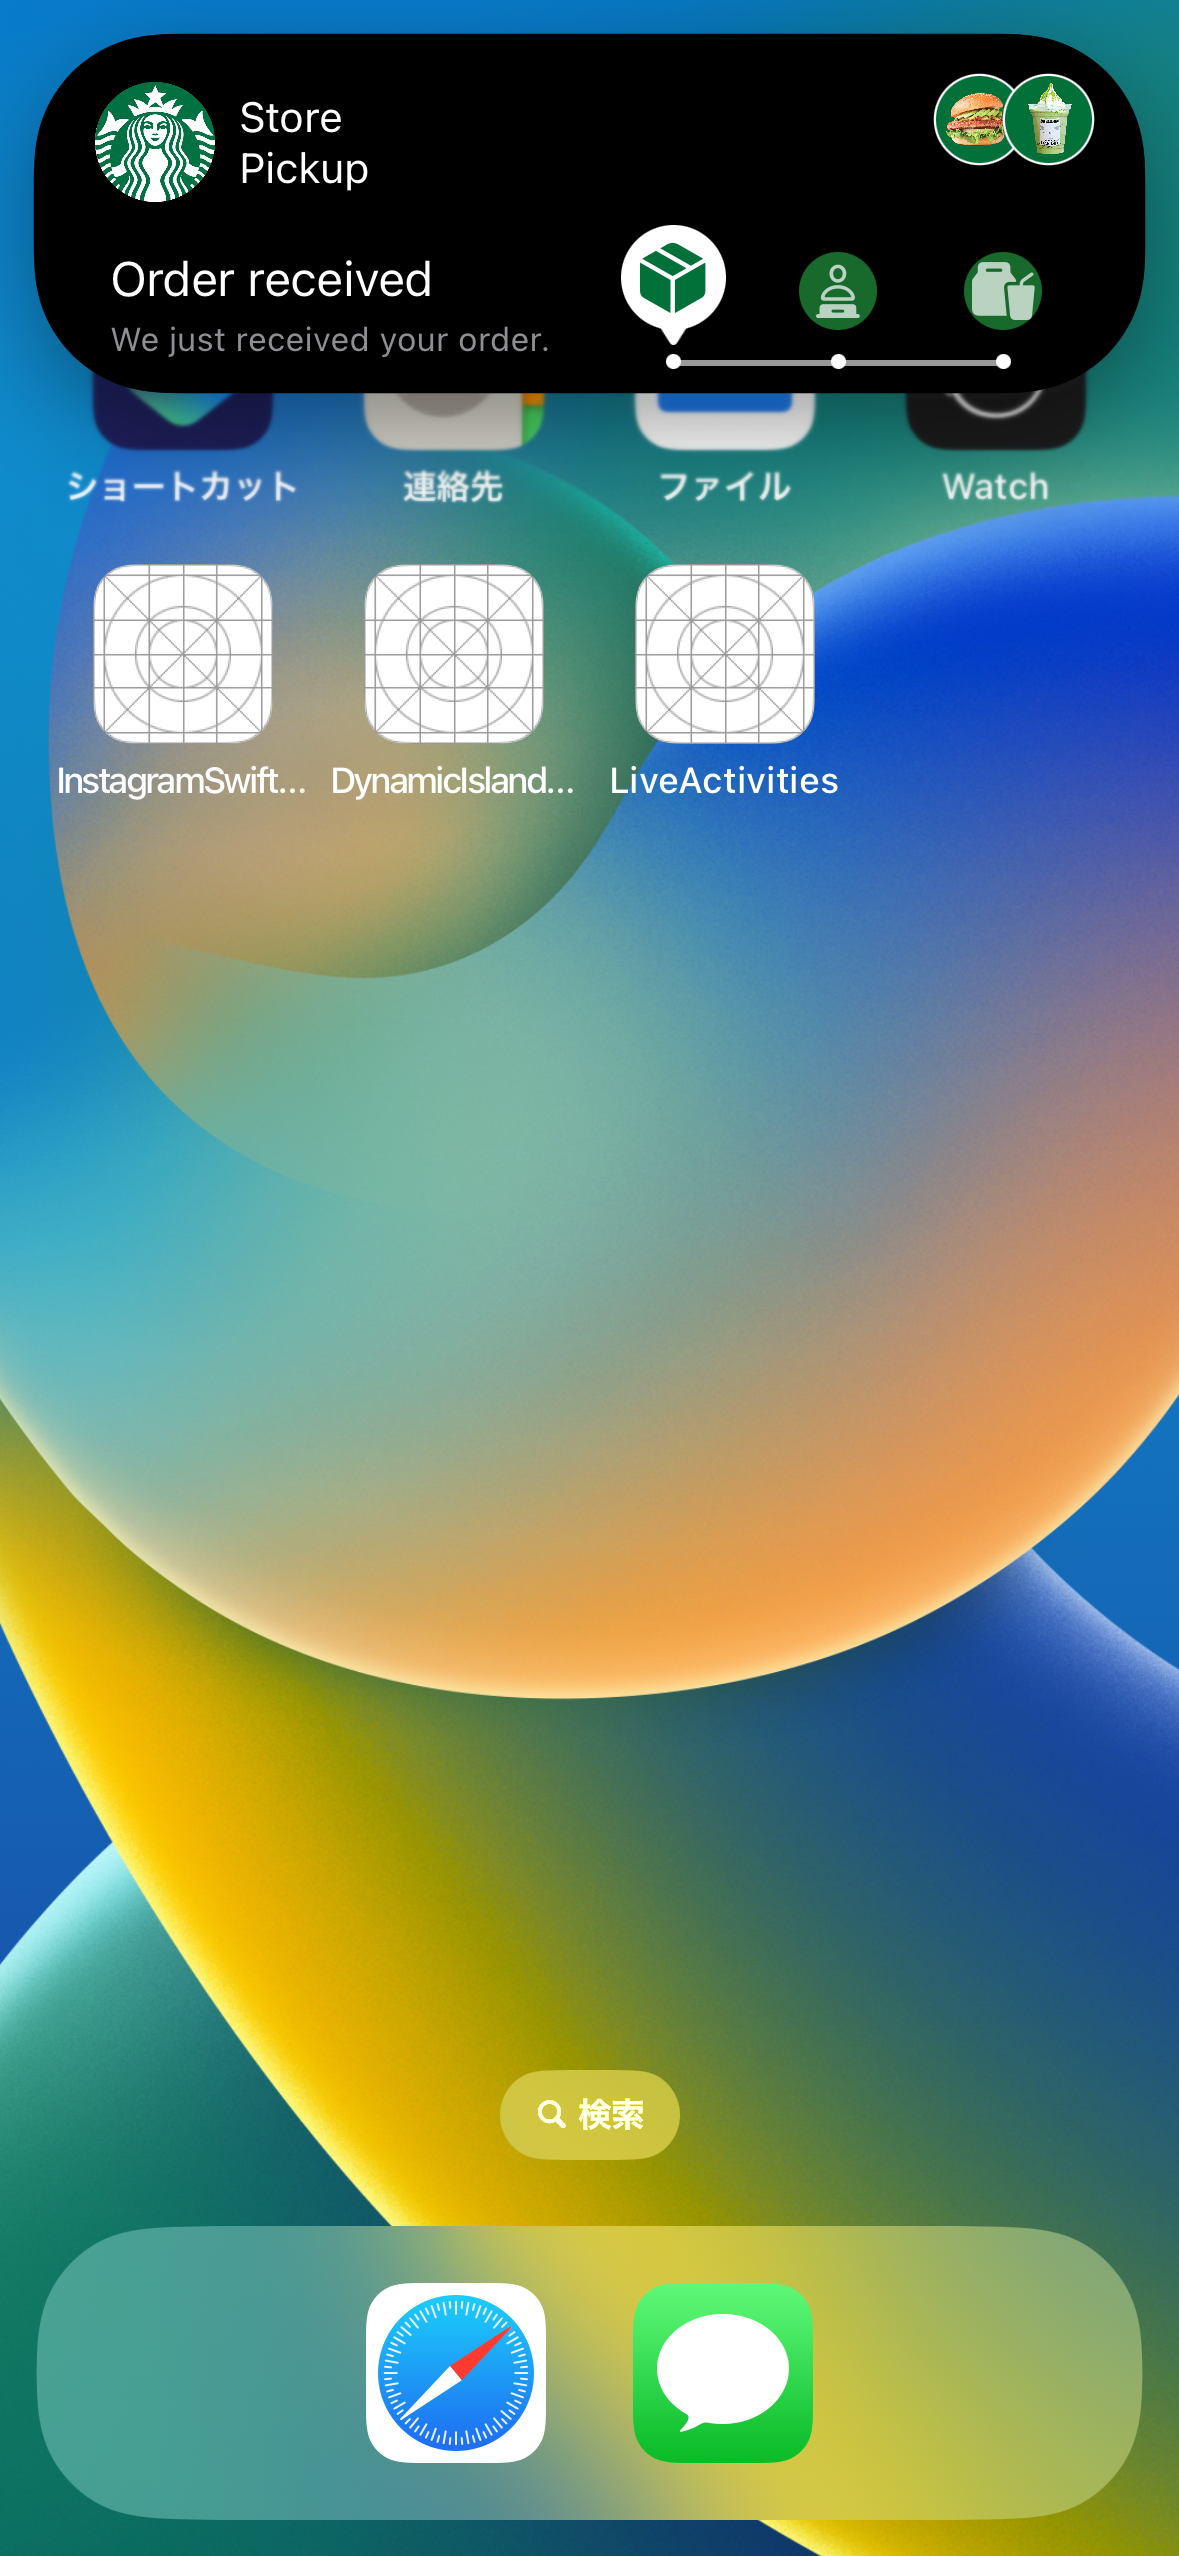
3-4. Dynamic Islandで表示したいViewをActivityConfiguration内で構築する。
こちらの動画を写経して、デザインしたものが以下のようになる。
@main
struct OrderStatus: Widget {
    var body: some WidgetConfiguration {
        ActivityConfiguration(for: OrderAttributes.self) { context in

        } dynamicIsland: { context in
            DynamicIsland {
                DynamicIslandExpandedRegion(.leading) {
                    HStack {
                        Image("Logo")
                            .resizable()
                            .aspectRatio(contentMode: .fit)
                            .frame(width: 40, height: 40)

                        Text("Store Pickup")
                            .font(.system(size: 14))
                            .foregroundColor(.white)
                            .frame(maxWidth: .infinity, alignment: .leading)
                    }
                }
                DynamicIslandExpandedRegion(.trailing) {
                    HStack(spacing: -2) {
                        ForEach(["Burger", "Shake"], id: \.self) { image in
                            Image(image)
                                .resizable()
                                .aspectRatio(contentMode: .fit)
                                .frame(width: 25, height: 25)
                                .background {
                                    Circle()
                                        .fill(Color("Green"))
                                        .padding(-2)
                                }
                                .background {
                                    Circle()
                                        .stroke(.white, lineWidth: 1.5)
                                        .padding(-2)
                                }
                        }
                    }
                }
                DynamicIslandExpandedRegion(.center) {
                }
                DynamicIslandExpandedRegion(.bottom) {
                    dynamicIslandStatusView(context: context)
                }
            } compactLeading: {
                Image("Logo")
                    .resizable()
                    .aspectRatio(contentMode: .fit)
                    .padding(4)
                    .offset(x: -4)
            } compactTrailing: {
                Image(systemName: context.state.status.rawValue)
                    .font(.title3)
            } minimal: {
                Image(systemName: context.state.status.rawValue)
                    .font(.title3)
            }
        }
    }

    @ViewBuilder
    func dynamicIslandStatusView(context: ActivityViewContext<OrderAttributes>) -> some View {
        HStack(alignment: .bottom, spacing: 0) {
            VStack(alignment: .leading, spacing: 4) {
                Text(message(status: context.state.status))
                    .font(.callout)
                    .foregroundColor(.white)
                Text(subMessage(status: context.state.status))
                    .font(.caption2)
                    .foregroundColor(.gray)
            }
            .frame(maxWidth: .infinity, alignment: .leading)
            .offset(x: 5, y: 5)

            HStack(alignment: .bottom, spacing: 0) {
                ForEach(Status.allCases, id: \.self) { type in
                    Image(systemName: type.rawValue)
                        .font(context.state.status == type ? .title2 : .body)
                        .foregroundColor(context.state.status == type ? Color("Green") : .white.opacity(0.7))
                        .frame(width: context.state.status == type ? 35 : 26, height: context.state.status == type ? 35 : 26)
                        .background {
                            Circle()
                                .fill(context.state.status == type ? .white : .green.opacity(0.5))
                        }
                        .background(alignment: .bottom, content: {
                            BottomArrow(status: context.state.status, type: type)
                        })
                        .frame(maxWidth: .infinity)
                }
            }
            .overlay(alignment: .bottom, content: {
                Rectangle()
                    .fill(.white.opacity(0.6))
                    .frame(height: 2)
                    .offset(y: 12)
                    .padding(.horizontal, 27.5)
            })
            .offset(y: -5)
        }
    }
}
参考