1. 概要
1-1. Live Activityについて
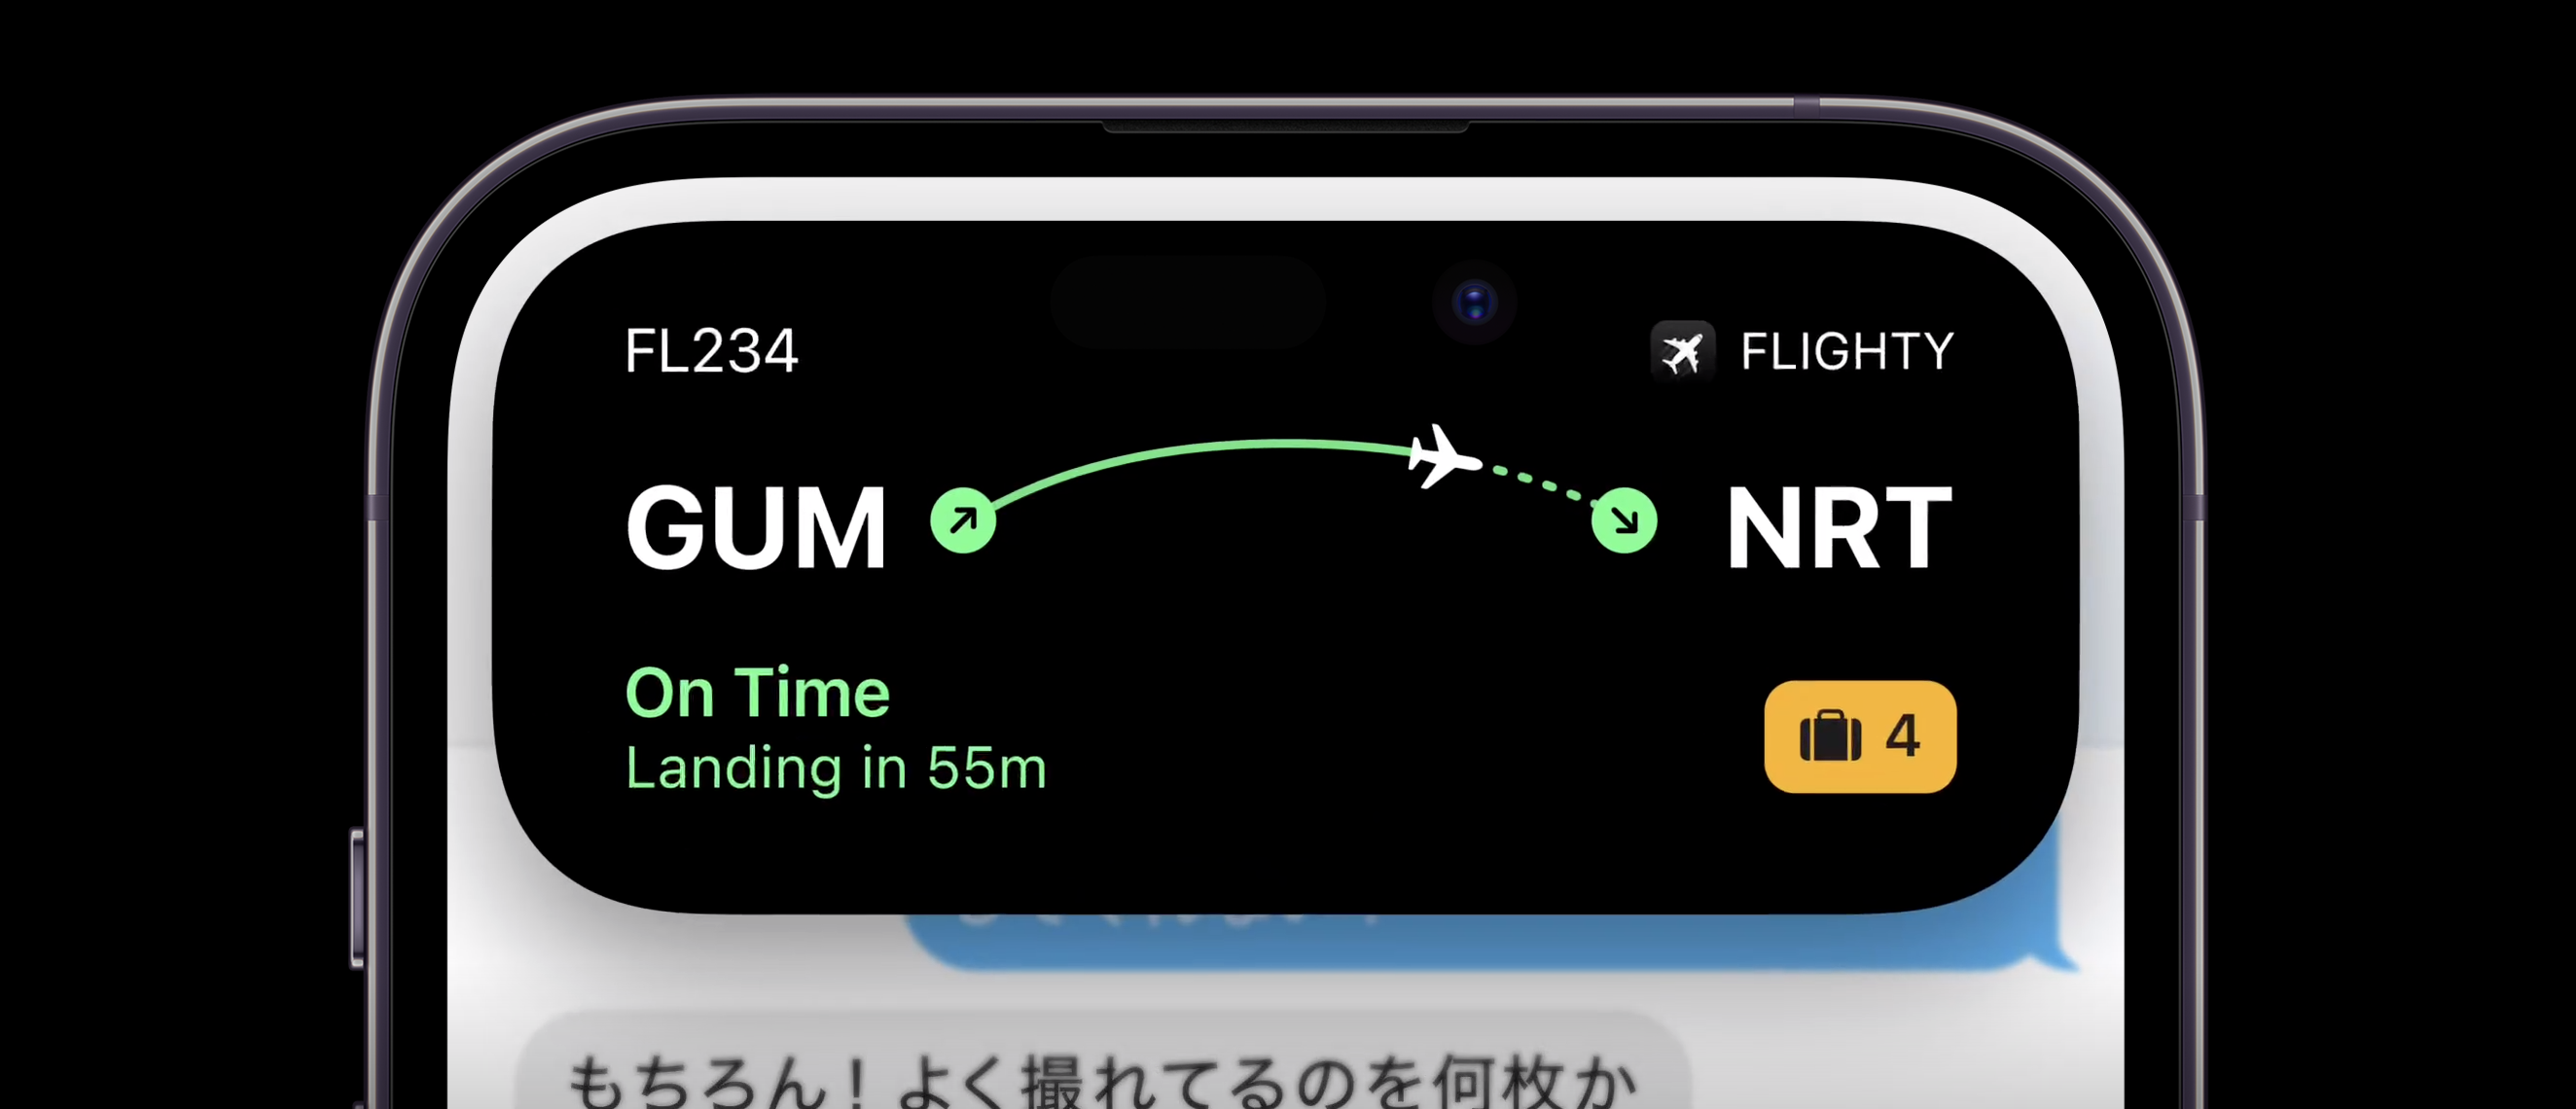
Live Activityは、WWDC22のiOS16の機能で紹介されたロック画面で表示されるWidgetとなり、Dynamic Islandと同様にさまざまな情報を表示することができます。※iOS16.0ではApple純正アプリが対応し、iOS16.1からサードパーティ製のアプリも対応しました。

1-2. Dynamic Islandについて
また、Live Activityの延長線で、2022年9月のApple EventにてiPhone14Proと同時にDynamic Islandという、パンチホール部分を利用した新たなUI機構が発表されました。Dynamic Islandではタイマーを表示させたり、配達状況などを確認したりとさまざまな情報を表示することができます。
Apple Storeで実際に触ってみても、既存のノッチ部分とは違い、カメラやセンサー部分もタップすることができ、非常に画期的な機能だなという感想でした。
2. ActivityKitとLive Activity
2-1. ActivityKitとは
まず、Live Activityを扱うにあたって、ActivityKitというものを使用します。ActivityKitはXcode14.1のbeta版から使用できるようになりました。公式ドキュメントではAcitivityKitについて、以下のように紹介されています。
With the ActivityKit framework, you can start a Live Activity to share live updates from your app in the Dynamic Island and on the Lock Screen. For example, a sports app might allow a person to start a Live Activity that makes live information available at a glance for the duration of a game.
ActivityKitフレームワークを使用すると、ライブアクティビティを開始して、ダイナミックアイランドとロック画面でアプリからの直接的なアップデートを共有できます。たとえば、スポーツアプリでは、ライブアクティビティを開始して、試合中にライブ情報を一目で確認できるようにすることができます。

(出典: Apple Developer: ActivityKit)
また、ActivityKitを通して、Live ActivityやDynamic Islandを操作しようとすると、SwiftUIとWidgetKitを用いる必要があるとも述べられています。つまり、Live ActivityあるいはDynamic Islandをアプリ内に導入しようとすると、少なからずSwiftUIの導入は必要となります。
3. Live Activityの実装方法
3-0. 動作環境
- Macbook Air M1, 2020 (macOS Ventura 13.0)
- Version 14.1 RC (14B47b)
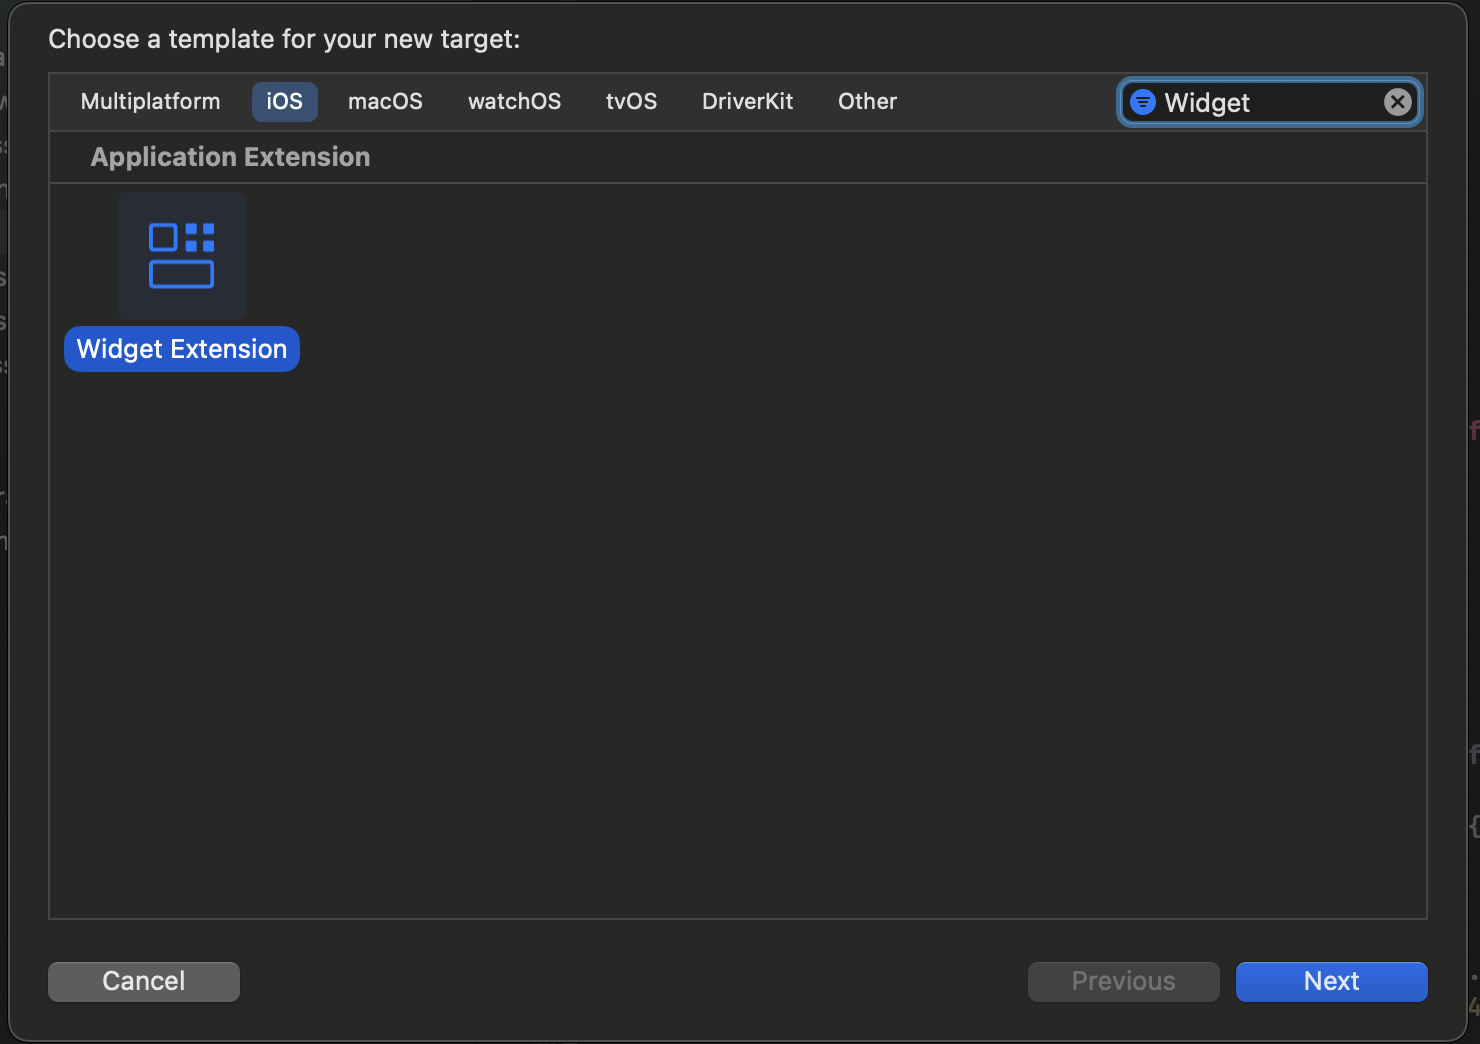
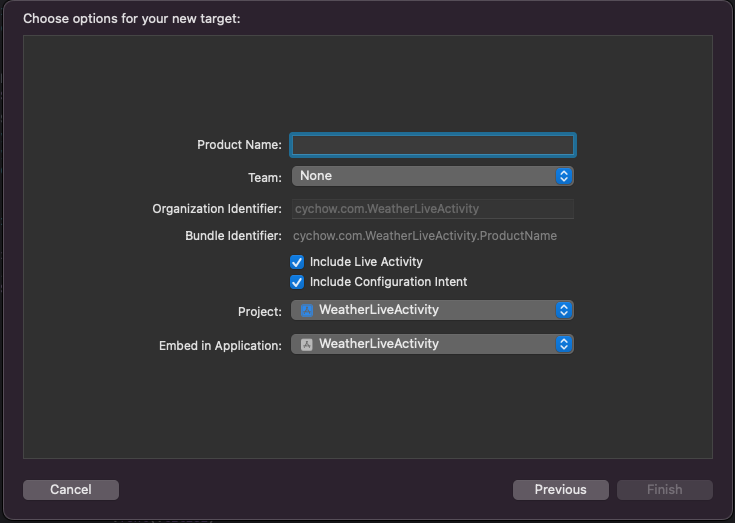
3-1. SwiftUIのプロジェクトを作成し、File > New > Targetで、Widget Extensionを選択する
TargetからWidget Extensionを追加することができる。Xcode14.1 beta版では自力でLiveActivityやDynamicIslandを実装するコードを書かないといけなかったが、RC版からはExtension生成時に、LiveActivityを追加するかのチェックが登場し、テンプレートを用意してくれるようになっている。
3-2. info.plistファイルで「NSSupportsLiveActivities」をBooleanとして追加し、ValueをYesにする。
※これを設定してあげないと、いつまでもLive ActivityやDynamic Islandが起動しないので注意!(ここで時間を潰してしまいました...😰)

3-3. Live Activityの表示に使用する属性を作成する。
Attributesは、beta版は自身で用意する必要があったが、RC版の場合はLiveActivityのテンプレート生成時に同時に生成してくれているので、自分で書く必要はない。
import ActivityKit
import WidgetKit
import SwiftUI

struct WeatherStatusAttributes: ActivityAttributes {
    public struct ContentState: Codable, Hashable {
        // MARK: コンテンツの状態が更新されるとき、ライブアクティビティのビューを更新する
        var status: Status = .sunny
    }

    // MARK: その他の変数
    var temperature: Double
    var weather: String
}

// MARK: Weather Status
enum Status: String, CaseIterable, Codable, Equatable{
    // MARK: SFSymbolの画像を設定
    case sunny = "sun.max.fill"
    case rainy = "cloud.rain.fill"
    case cloudy = "cloud.fill"
}
3-4. Widget Extension側のswiftファイルにActivityConfigurationを呼び出してあげる。
※ ソースコード内にDynamic Island部分も含まれているが、Dynamic Island部分は次回の記事で説明できればと思います。
import ActivityKit
import WidgetKit
import SwiftUI

struct WeatherStatusAttributes: ActivityAttributes {
    public struct ContentState: Codable, Hashable {
        // MARK: コンテンツの状態が更新されるとき、ライブアクティビティのビューを更新する
        var status: Status = .sunny
    }

    // MARK: その他の変数
    var temperature: Double
    var weather: String
}

// MARK: Weather Status
enum Status: String, CaseIterable, Codable, Equatable{
    // MARK: SFSymbolの画像を設定
    case sunny = "sun.max.fill"
    case rainy = "cloud.rain.fill"
    case cloudy = "cloud.fill"
}

struct WeatherStatusLiveActivity: Widget {
    var body: some WidgetConfiguration {
        ActivityConfiguration(for: WeatherStatusAttributes.self) { context in
            // MARK: ここでLive ActivityのViewを設定する

        } dynamicIsland: { context in
            // MARK: iPhone14Pro/Pro Max向けのDynamic Islandをここで実装することができる
            DynamicIsland {
                DynamicIslandExpandedRegion(.leading) {
                }
                DynamicIslandExpandedRegion(.trailing) {
                }
                DynamicIslandExpandedRegion(.center) {
                }
                DynamicIslandExpandedRegion(.bottom) {
                }
            } compactLeading: {
            } compactTrailing: {
            } minimal: {
            }
        }
    }
}
3-5. Live Activityに表示するViewを設定する。
import ActivityKit
import WidgetKit
import SwiftUI

struct WeatherStatusAttributes: ActivityAttributes {
    public struct ContentState: Codable, Hashable {
        // MARK: コンテンツの状態が更新されるとき、ライブアクティビティのビューを更新する
        var status: Status = .sunny
    }

    // MARK: その他の変数
    var temperature: Double
    var weather: String
}

// MARK: Weather Status
enum Status: String, CaseIterable, Codable, Equatable{
    // MARK: SFSymbolの画像を設定
    case sunny = "sun.max.fill"
    case rainy = "cloud.rain.fill"
    case cloudy = "cloud.fill"
}

struct WeatherStatusLiveActivity: Widget {
    var body: some WidgetConfiguration {
        ActivityConfiguration(for: WeatherStatusAttributes.self) { context in
            // MARK: ここでLive ActivityのViewを設定する
            ZStack {
                RoundedRectangle(cornerRadius: 15, style: .continuous)
                    .fill(Color.red.gradient.opacity(0.6))

                VStack {
                    HStack {
                        Text("今日の天気は")
                            .font(.title2)

                        Image(systemName: context.state.status.rawValue)
                            .frame(width: 50, height: 50)

                        Text(String(format: "%@ ℃", String(context.attributes.temperature)))
                            .font(.title2)

                    }
                }
                .padding(15)
            }
            .activitySystemActionForegroundColor(Color.gray)
        } dynamicIsland: { context in
            // MARK: iPhone14Pro/Pro Max向けのDynamic Islandをここで実装することができる
            DynamicIsland {
                DynamicIslandExpandedRegion(.leading) {
                }
                DynamicIslandExpandedRegion(.trailing) {
                }
                DynamicIslandExpandedRegion(.center) {
                }
                DynamicIslandExpandedRegion(.bottom) {
                }
            } compactLeading: {
            } compactTrailing: {
            } minimal: {
            }
        }
    }
}
3-6. LiveActivityを呼び出したいView内でLiveActivityを開始する処理を実装する。
LiveActivityを開始する上で、以下の処理を追加する必要があります。
let weatherAttributes = WeatherAttributes(temperature: 24.5, weather: "晴れ")
let initialContentState = WeatherAttributes.ContentState()

 do {
    // MARK: ここでLiveActivityを開始する処理を呼び出している。
    let activity = try Activity.request(attributes: weatherAttributes, contentState: initialContentState, pushType: nil)
    // MARK: アップデート時のIDを保持しておく。
    currentID = activity.id
    print("Activity Added Successfully. id: \(activity.id)")
} catch {
    print(error.localizedDescription)
}
この開始処理をView内に盛り込んだソースコードが以下のものとなります。
import SwiftUI
import WidgetKit
import ActivityKit
struct ContentView: View {
// MARK: Updating Live Activity
@State var currentID: String = ""
@State var currentSelection: Status = .sunny
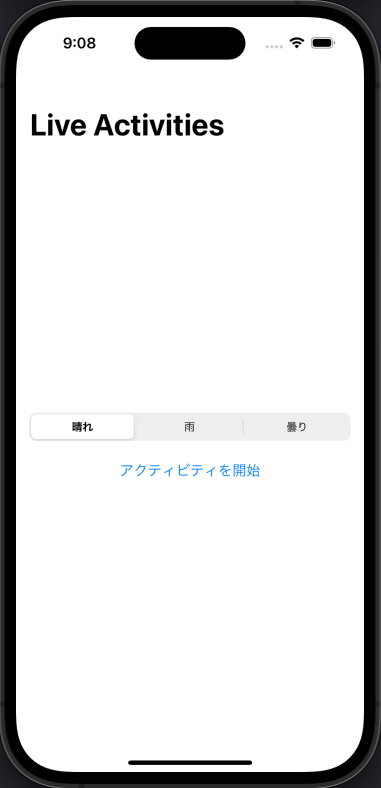
var body: some View {
NavigationStack {
VStack {
Picker(selection: $currentSelection) {
Text("晴れ")
.tag(Status.research)
Text("雨")
.tag(Status.confirm)
Text("曇り")
.tag(Status.complete)
} label: {
}
.labelsHidden()
.pickerStyle(.segmented)
// MARK: ボタンタップ時LiveActivityを開始する
Button("アクティビティを開始") {
addLiveActivity()
}
.padding(.top)
}
.navigationTitle("Live Activities")
.padding(15)
}
}
// MARK: LiveActivityを開始を宣言する処理
func addLiveActivity() {
let weatherAttributes = WeatherStatusAttributes(temperature: 24.5, weather: "晴れ")
let initialContentState = WeatherStatusAttributes.ContentState()
do {
// MARK: ここでLiveActivityを開始する処理を呼び出している。
let activity = try Activity.request(attributes: weatherAttributes, contentState: initialContentState, pushType: nil)
// MARK: アップデート時のIDを保持しておく。
currentID = activity.id
print("Activity Added Successfully. id: \(activity.id)")
} catch {
print(error.localizedDescription)
}
}
}
struct ContentView_Previews: PreviewProvider {
static var previews: some View {
ContentView()
}
}
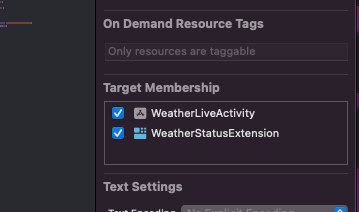
※ ただし、WeatherStatusLiveActivity.swiftのTarget Membershipで、メインの方にチェックが入っていないとContendViewでWidget Extension側で定義したstructなどが認識されないため注意が必要です。

3-7. LiveActivityを終了する処理を実装する。
開始したLiveActivityを終了したいときは以下の処理を実装する必要があります。
Task {
    // 終了するまでに2秒間のタイムラグを設けている(必要ではない)
    try await Task.sleep(nanoseconds: 2_000_000_000)
    // LiveActivityを終了する処理
    await activity.end(using: activity.contentState, dismissalPolicy: .immediate)
}
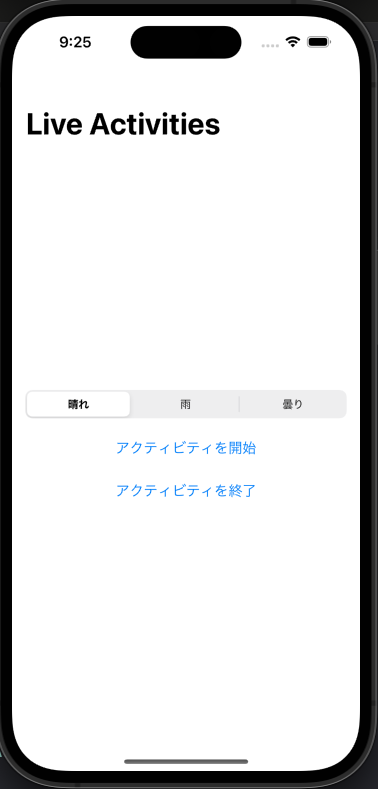
この処理をさきほどのViewに盛り込むと以下のようになります。
struct ContentView: View {
    @State var currentID: String = ""
    @State var currentSelection: Status = .sunny

    var body: some View {
        NavigationStack {
            VStack {
                Picker(selection: $currentSelection) {
                    Text("晴れ")
                        .tag(Status.sunny)
                    Text("雨")
                        .tag(Status.rainy)
                    Text("曇り")
                        .tag(Status.cloudy)
                } label: {
                }
                .labelsHidden()
                .pickerStyle(.segmented)

                // MARK: ボタンタップ時LiveActivityを開始する
                Button("アクティビティを開始") {
                    addLiveActivity()
                }
                .padding(.top)
                // MARK: ボタンタップ時LiveActivityを終了する
                Button("アクティビティを終了") {
                    removeActivity()
                }
                .padding(.top)
            }
            .navigationTitle("Live Activities")
            .padding(15)
        }
    }

    // MARK: LiveActivityを終了する処理
    func removeActivity() {
        if let activity = Activity.activities.first(where: { (activity: Activity<WeatherStatusAttributes>) in
            activity.id == currentID
        }) {
            Task {
                try await Task.sleep(nanoseconds: 2_000_000_000)
                await activity.end(using: activity.contentState, dismissalPolicy: .immediate)
            }
        }
    }

    // MARK: LiveActivityを開始を宣言する処理
    func addLiveActivity() {
        let weatherStatusAttributes = WeatherStatusAttributes(temperature: 24.5, weather: "晴れ")
        let initialContentState = WeatherStatusAttributes.ContentState()

         do {
            // MARK: ここでLiveActivityを開始する処理を呼び出している。
            let activity = try Activity.request(attributes: weatherStatusAttributes, contentState: initialContentState, pushType: nil)
            // MARK: アップデート時のIDを保持しておく。
            currentID = activity.id
            print("Activity Added Successfully. id: \(activity.id)")
        } catch {
            print(error.localizedDescription)
        }
    }
}

struct ContentView_Previews: PreviewProvider {
    static var previews: some View {
        ContentView()
    }
}
3-8. データを更新する処理を追加する。
アプリ内で何かトリガーにし、Live Activity上のデータを更新したいときは以下のようなupdateメソッドを用いる。
Task {
    await activity.update(using: updatedState)
}
updateメソッドを盛り込んだものが以下のコードとなります。
import SwiftUI
import WidgetKit
import ActivityKit

struct ContentView: View {
    @State var currentID: String = ""
    @State var currentSelection: Status = .sunny

    var body: some View {
        NavigationStack {
            VStack {
                Picker(selection: $currentSelection) {
                    Text("晴れ")
                        .tag(Status.sunny)
                    Text("雨")
                        .tag(Status.rainy)
                    Text("曇り")
                        .tag(Status.cloudy)
                } label: {
                }
                .labelsHidden()
                .pickerStyle(.segmented)

                // MARK: ボタンタップ時LiveActivityを開始する
                Button("アクティビティを開始") {
                    addLiveActivity()
                }
                .padding(.top)
                // MARK: ボタンタップ時LiveActivityを終了する
                Button("アクティビティを終了") {
                    removeActivity()
                }
                .padding(.top)
            }
            .navigationTitle("Live Activities")
            .padding(15)
            .onChange(of: currentSelection) { newValue in
                // Retreiving Current Activity From the List Of Phone Activities
                if let activity = Activity.activities.first(where: { (activity: Activity<WeatherStatusAttributes>) in
                    activity.id == currentID
                }) {
                    print("Activity Found")
                    DispatchQueue.main.asyncAfter(deadline: .now() + 2) {
                        var updatedState = activity.contentState
                        updatedState.status = currentSelection
                        Task {
                            await activity.update(using: updatedState)
                        }
                    }
                }
            }
        }
    }

    // MARK: LiveActivityを終了する処理
    func removeActivity() {
        if let activity = Activity.activities.first(where: { (activity: Activity<WeatherStatusAttributes>) in
            activity.id == currentID
        }) {
            Task {
                try await Task.sleep(nanoseconds: 2_000_000_000)
                await activity.end(using: activity.contentState, dismissalPolicy: .immediate)
            }
        }
    }

    // MARK: LiveActivityを開始を宣言する処理
    func addLiveActivity() {
        let weatherStatusAttributes = WeatherStatusAttributes(temperature: 24.5, weather: "晴れ")
        let initialContentState = WeatherStatusAttributes.ContentState()

         do {
            // MARK: ここでLiveActivityを開始する処理を呼び出している。
            let activity = try Activity.request(attributes: weatherStatusAttributes, contentState: initialContentState, pushType: nil)
            // MARK: アップデート時のIDを保持しておく。
            currentID = activity.id
            print("Activity Added Successfully. id: \(activity.id)")
        } catch {
            print(error.localizedDescription)
        }
    }
}

struct ContentView_Previews: PreviewProvider {
    static var previews: some View {
        ContentView()
    }
}
更新処理を追加したことにより、PickerViewで選択した天気マークがLive Activity上で更新されるようになります。

4. まとめ
今回はLive Acitivityに焦点を当て、記事を書きましたが、次はDynamic Islandについて書ければと思っています。また、今回紹介した機能以外にも公式ドキュメントのDisplaying live data with Live Activitiesにはより、さまざまなパターンの書き方が書かれているため、一度目を通しておくことをお勧めします!
ここまで、読んでいただきありがとうございました!!
(間違っている点などがございましたらコメントなどでご指摘ただいけると嬉しいです💦)
参考