Graffity のUnityエンジニアのCovaです。
今回は AppleVisionPro 上でUnity-DOTS(旧称Unity EntityComponentSystem;ECS) を動かせるらしいので実際に試してみました。
結論
- ちゃんと動く!!
- パフォーマンスもやっぱりDOTSなので出る
Unity-DOTSとは?
Unity のDataOrientedTechnologyStack といわれているもので、ざっくり説明すると「データ設計とか色々悪くてパフォーマンス出せてなかったから、パフォーマンス最大化するように色々設計見直したわ」っていうやつです。
具体的にはEntityComponentSystem と呼ばれるアーキテクチャパターン(設計パターン。≠デザインパターン)を採用しています。
ECSについては
@4_mio_11 さんの記事
や
@simplestar さんの記事
などを参考にキャッチアップすることをお勧めです。
- Unity初心者がいきなり手を出すとボコボコにされてしまう可能性大です(マジで挫折します)
- MVPやMVRPでの設計に慣れている方はECSでの各種要素の役割分担は割とすんなり受け入れ易いかと思います
- Unity中級者(目安としてはC#Pureクラスでゲームロジックをある程度意識して書くようになった)程度になってから触れるのがおすすめです
検証環境
| 項目 | 説明 |
|---|---|
| Unity | Unity6000.0.47f1 |
| PolySpatial | 2.2.4 |
| Unity.Entities | 1.3.14 |
| VisionOS | 2.0.4 |
Unity の設定方法
導入フローとしては以下の通りです
-
Unity のPro以上のライセンスを用意
-
Unity6.0.xの最新をDL
- VisionOS モジュールも入れる
-
新規Projectを作成
- Core 3D (URP)を選択
- VisionOSにSwitchPlatformする
-
必要なPackage を導入
- com.unity.xr.visionos
- com.unity.polyspatial
- com.unity.polyspatial.extensions
- com.unity.polyspatial.visionos
- com.unity.physics
面倒な人は下記のmanifest.json をそのままPackagesフォルダ内に設定して上書きしてください
manifest.json{ "dependencies": { "com.unity.ai.navigation": "2.0.7", "com.unity.collab-proxy": "2.8.1", "com.unity.entities": "1.3.14", "com.unity.ide.rider": "3.0.35", "com.unity.ide.visualstudio": "2.0.23", "com.unity.inputsystem": "1.14.0", "com.unity.multiplayer.center": "1.0.0", "com.unity.physics": "1.3.14", "com.unity.polyspatial": "2.2.4", "com.unity.polyspatial.extensions": "2.2.4", "com.unity.polyspatial.visionos": "2.2.4", "com.unity.render-pipelines.universal": "17.0.4", "com.unity.test-framework": "1.5.1", "com.unity.timeline": "1.8.7", "com.unity.ugui": "2.0.0", "com.unity.visualscripting": "1.9.6", "com.unity.xr.interaction.toolkit": "3.0.8", "com.unity.xr.visionos": "2.2.4", "com.unity.modules.accessibility": "1.0.0", "com.unity.modules.ai": "1.0.0", "com.unity.modules.androidjni": "1.0.0", "com.unity.modules.animation": "1.0.0", "com.unity.modules.assetbundle": "1.0.0", "com.unity.modules.audio": "1.0.0", "com.unity.modules.cloth": "1.0.0", "com.unity.modules.director": "1.0.0", "com.unity.modules.imageconversion": "1.0.0", "com.unity.modules.imgui": "1.0.0", "com.unity.modules.jsonserialize": "1.0.0", "com.unity.modules.particlesystem": "1.0.0", "com.unity.modules.physics": "1.0.0", "com.unity.modules.physics2d": "1.0.0", "com.unity.modules.screencapture": "1.0.0", "com.unity.modules.terrain": "1.0.0", "com.unity.modules.terrainphysics": "1.0.0", "com.unity.modules.tilemap": "1.0.0", "com.unity.modules.ui": "1.0.0", "com.unity.modules.uielements": "1.0.0", "com.unity.modules.umbra": "1.0.0", "com.unity.modules.unityanalytics": "1.0.0", "com.unity.modules.unitywebrequest": "1.0.0", "com.unity.modules.unitywebrequestassetbundle": "1.0.0", "com.unity.modules.unitywebrequestaudio": "1.0.0", "com.unity.modules.unitywebrequesttexture": "1.0.0", "com.unity.modules.unitywebrequestwww": "1.0.0", "com.unity.modules.vehicles": "1.0.0", "com.unity.modules.video": "1.0.0", "com.unity.modules.vr": "1.0.0", "com.unity.modules.wind": "1.0.0", "com.unity.modules.xr": "1.0.0" } } -
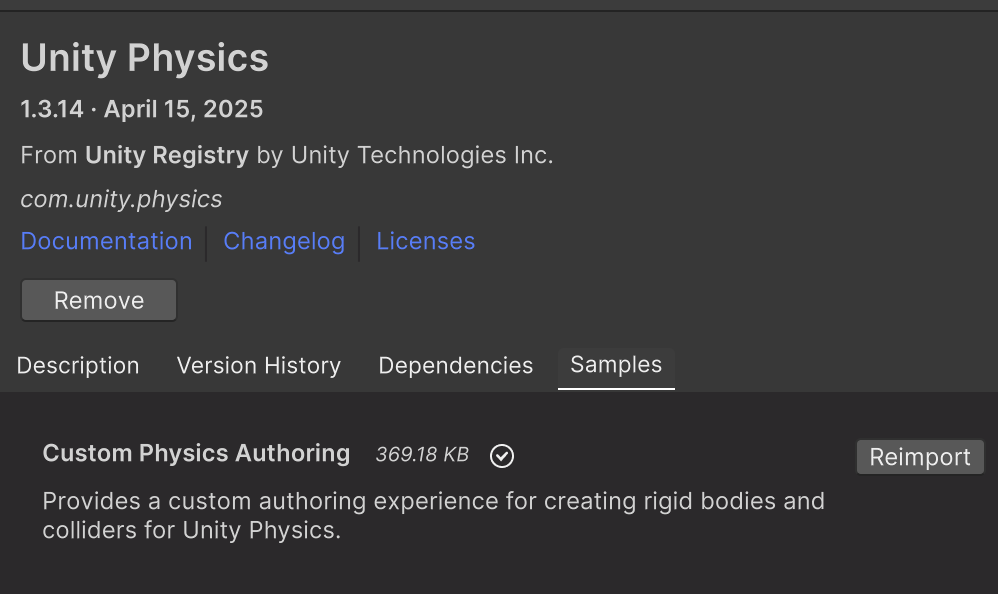
Unity.Physics のサンプルを入れておく
- なぜかSampleを入れないとPhysicsBody コンポーネントが現れなかったりしたので導入推奨
-
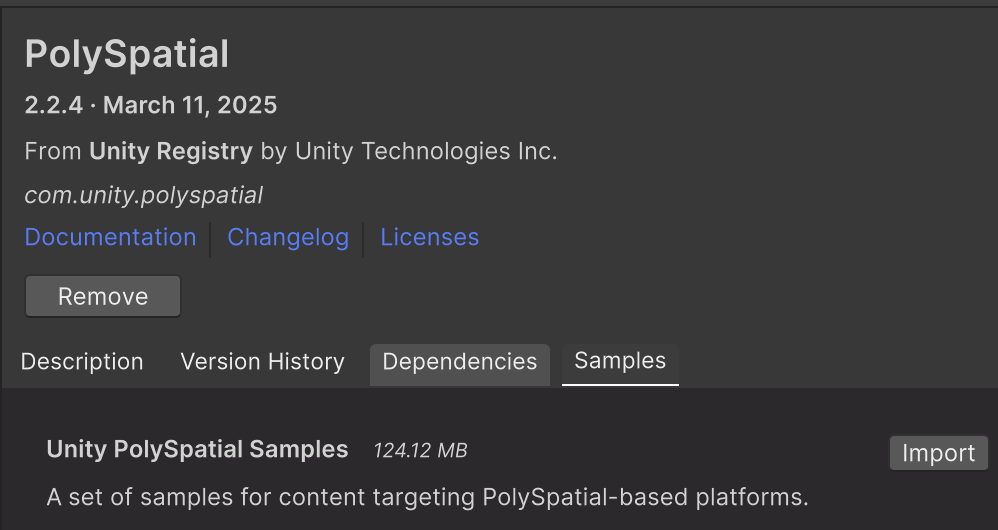
PolySpatial 周りのScene作りが大変なのでPolySpatialのSampleも導入推奨
-
Sample を導入していれば
Assets/Samples/PolySpatial/Scenes/Manipulation.unityのSceneを複製して、そちらを以降は編集する -
Hierarchy のメニューから
New Empty Sub Sceneを選択してDOTS用のSubSceneを新規に作成します- ここでは
dotPhysicsSubと命名しておきます
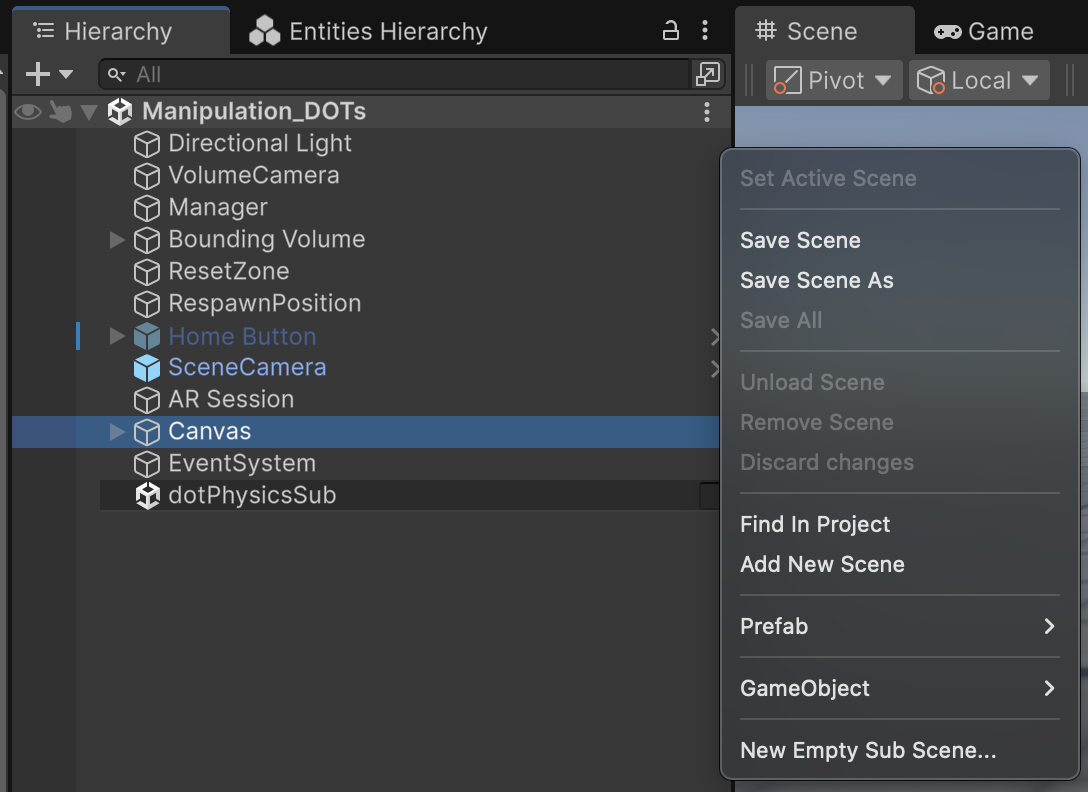
- ここでは
-
指定のPrefabを生成するScriptを用意します
Spawner.csusing Unity.Entities; using Unity.Mathematics; public struct Spawner : IComponentData { public Entity Prefab; public float3 SpawnPosition; public float NextSpawnTime; public float SpawnRate; } public struct CubeTag : IComponentData { }SpawnerAuthoring.csusing UnityEngine; using Unity.Entities; class SpawnerAuthoring : MonoBehaviour { public GameObject Prefab; public float SpawnRate; } class SpawnerBaker : Baker<SpawnerAuthoring> { public override void Bake(SpawnerAuthoring authoring) { var entity = GetEntity(TransformUsageFlags.None); AddComponent(entity, new Spawner { // By default, each authoring GameObject turns into an Entity. // Given a GameObject (or authoring component), GetEntity looks up the resulting Entity. Prefab = GetEntity(authoring.Prefab, TransformUsageFlags.Dynamic), SpawnPosition = authoring.transform.position, NextSpawnTime = 0.0f, SpawnRate = authoring.SpawnRate }); } }SpawnerSystem.csusing Unity.Collections; using Unity.Entities; using Unity.Transforms; using Unity.Burst; using Unity.Mathematics; [BurstCompile] [UpdateInGroup(typeof(SimulationSystemGroup))] public partial struct OptimizedSpawnerSystem : ISystem { public void OnCreate(ref SystemState state) { state.RequireForUpdate<Spawner>(); } public void OnDestroy(ref SystemState state) { } [BurstCompile] public void OnUpdate(ref SystemState state) { EntityCommandBuffer.ParallelWriter ecb = GetEntityCommandBuffer(ref state); var prefabEntity = SystemAPI.GetSingleton<Spawner>().Prefab; var transform = SystemAPI.GetComponentLocalTransform>(prefabEntity); // Creates a new instance of the job, assigns the necessary data, and schedules the job in parallel. new ProcessSpawnerJob { ElapsedTime = SystemAPI.Time.ElapsedTime, defaultRotation = transform.Rotation, defaultScale = transform.Scale, Ecb = ecb }.ScheduleParallel(); } private EntityCommandBuffer.ParallelWriter GetEntityCommandBuffer(ref SystemState state) { var ecbSingleton = SystemAPI.GetSingleton<BeginSimulationEntityCommandBufferSystem.Singleton>(); var ecb = ecbSingleton.CreateCommandBuffer( state.WorldUnmanaged); return ecb.AsParallelWriter(); } } [BurstCompile] public partial struct ProcessSpawnerJob : IJobEntity { public EntityCommandBuffer.ParallelWriter Ecb; public double ElapsedTime; public quaternion defaultRotation; public float defaultScale; private void Execute([ChunkIndexInQuery] int chunkIndex, ref Spawner spawner) { // If the next spawn time has passed. if (spawner.NextSpawnTime < ElapsedTime) { // Spawns a new entity and positions it at the spawner. Entity newEntity = Ecb.Instantiate(chunkIndex, spawner.Prefab); Ecb.SetComponent(chunkIndex, newEntity, LocalTransform.FromPositionRotationScale( spawner.SpawnPosition, defaultRotation, defaultScale )); Ecb.AddComponent(chunkIndex, newEntity, new CubeTag()); // Resets the next spawn time. spawner.NextSpawnTime = (float)ElapsedTime + spawner.SpawnRate; } } } -
先ほど作ったSubSceneに新規にObjectを2つ作ります
-
片方をSpawnerにします
- SpawnAuthoringコンポーネントをつけます
- Cube は後ほど作るPrefabを設定予定

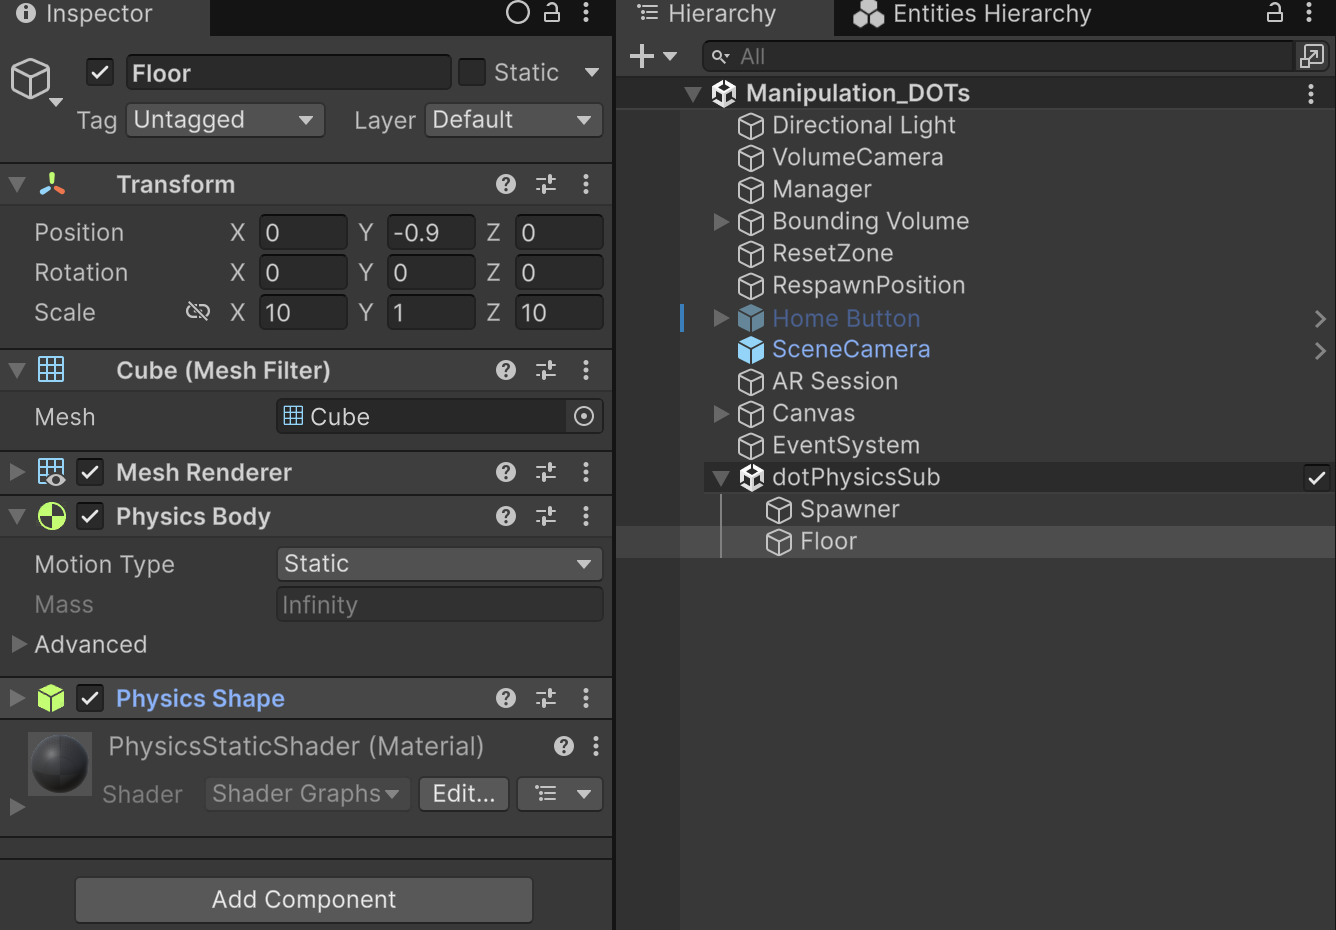
-
片方を落下防止用のFloorにします(GameObject→3D→Cubeを推奨)
- LocalScale を調整して平たくします
- PhysicsBodyコンポーネントをくっつけます
- MotionType はStaticにしておきます
- PhysicsShape を導入します
- 形状は軽いのでBoxにしておきます
- 形状は軽いのでBoxにしておきます
-
-
自動生成用のPrefabを作ります
- GameObject→3D→Cube をベースにします
- PhysicsBodyコンポーネントをくっつけます
- 今回はデフォルトのままにします
- PhysicsShape を導入します
- 形状は軽いのでBoxにしておきます
-
Prefabを先ほどのSpawnAuthoringに登録します
ここまで出来れば無事再生すればPrefabで設定したCubeが落下して一定間隔で生成されます
DebugのためにUIと連動させたい
まず
PolySpatial ではGraphicRaycaster の代わりに TrackedDeviceGraphicRaycaster コンポーネントがないとCanvas 操作ができないので要注意
で、DOTSで開発するときはUIは今までのUnityのUIを利用するので GameObjectベースのシステム上で動くUI と DOTS のSystem側 と連携させる必要があります。
Cubeの個数取得UI
下記のようなUIに設定するScriptを用意(今回はMVPパターンにするのが面倒だったのでViewにロジックを全部入れ込んじゃってます)
using TMPro;
using UnityEngine;
using Unity.Entities;

public class InfoView : MonoBehaviour
{
    private static string LABEL = "Cubes: ";
    public TextMeshProUGUI spawnCountText;

    private EntityManager entityManager;
    private EntityQuery cubeQuery;

    void Start()
    {
        entityManager = World.DefaultGameObjectInjectionWorld.EntityManager;
        cubeQuery = entityManager.CreateEntityQuery(ComponentType.ReadOnly<CubeTag>());
    }

    void Update()
    {
        int count = cubeQuery.CalculateEntityCount();
        spawnCountText.SetText(LABEL + string.Intern(count.ToString()));
    }
}
ここのcubeQuery の部分で予めSpawnSystem側で設定したCubeTag のカウントをとってくるクエリを生成して、Update でそのクエリからEntity個数=Cubeの個数をとってきています
生成間隔の調整
UISlider を用います。
using TMPro;
using UnityEngine;
using UnityEngine.UI;
using Unity.Entities;

public class SliderView : MonoBehaviour
{
    private static string LABEL = "Interval: ";
    [SerializeField] Slider spawnRateSlider;
    [SerializeField] TextMeshProUGUI labelText;
    private EntityManager entityManager;
    private EntityQuery spawnerQuery;

    void Start()
    {
        entityManager = World.DefaultGameObjectInjectionWorld.EntityManager;
        spawnerQuery = entityManager.CreateEntityQuery(typeof(Spawner));
        spawnRateSlider.onValueChanged.AddListener(OnSpawnRateChanged);
    }

    void OnSpawnRateChanged(float newValue)
    {
        // Spawner コンポーネントを更新
        if (!spawnerQuery.IsEmptyIgnoreFilter)
        {
            var spawnerEntity = spawnerQuery.GetSingletonEntity();
            var spawner = entityManager.GetComponentData<Spawner>(spawnerEntity);
            spawner.SpawnRate = newValue;
            entityManager.SetComponentData(spawnerEntity, spawner);
        }

        labelText.SetText( LABEL + string.Intern( newValue.ToString("0.00")) );
    }
}
上記のようにSliderにコールバックを登録して、コールバック内でクエリを元に必要なSystemにアクセスしてEntityのパラメータをSetComponentData で更新するという内容です。
実践
Cube 2000個程度なら全然処理落ちしないです!!
感想・注意点
- DOTS は専用のUnity.Physics を使っているので、そのままではAppleVisionPro 側で操作できません
- PolySpatial のRay周りの仕組みはGameObjectベースで組まれているため、Unity.Physics 向けに改変しないとGazeとかが反応しないです
- ユーザーが操作できないので、現状は完全に観賞用という感じです
- PolySpatial 側のInput周りを改変できたら大革命になりそうです
- 流石に2019年のexpermeentalの頃よりは情報が増えているのとLLMの発達で、LLMを使いながらコーディングすることで2時間程度で今回のScriptは組めました
最後に
Graffity ではAppleVisionPro やMeta Quest3 を用いたAR/MRコンテンツを鋭意製作中ですので、開発に興味のある方は是非ご連絡ください