1
1

Delete article

Deleted articles cannot be recovered.

Draft of this article would be also deleted.

Are you sure you want to delete this article?

More than 1 year has passed since last update.

QiitaでGA4を利用する方法

Last updated at Posted at 2023-06-14

初めに

旧Google Analytics(UA)は2023年7月1日をもってサポートを終了する。
ユニバーサル アナリティクスは廃止されます

GA4とQiitaの連携方法を記載している記事が少なかったため、記載します。

注意
今後は旧Google AnalyticsをUA,Google Analytics4をGA4と記述する

GA4のプロパティの作成

まず初めに、GA4で計測ができるようにプロパティを作成します。
下記手順に分かれて進めてください。

  • 使用中のUAにGA4を導入する
  • GA4を新規導入する

使用中のUAにGA4を導入する

[GA4] 設定アシスタントを使用して GA4 プロパティを設定するを参考にしてください。

GA4を新規導入する

  1. GA4の公式サイトにアクセスします。

  2. 「測定を開始」をクリック
    image.png

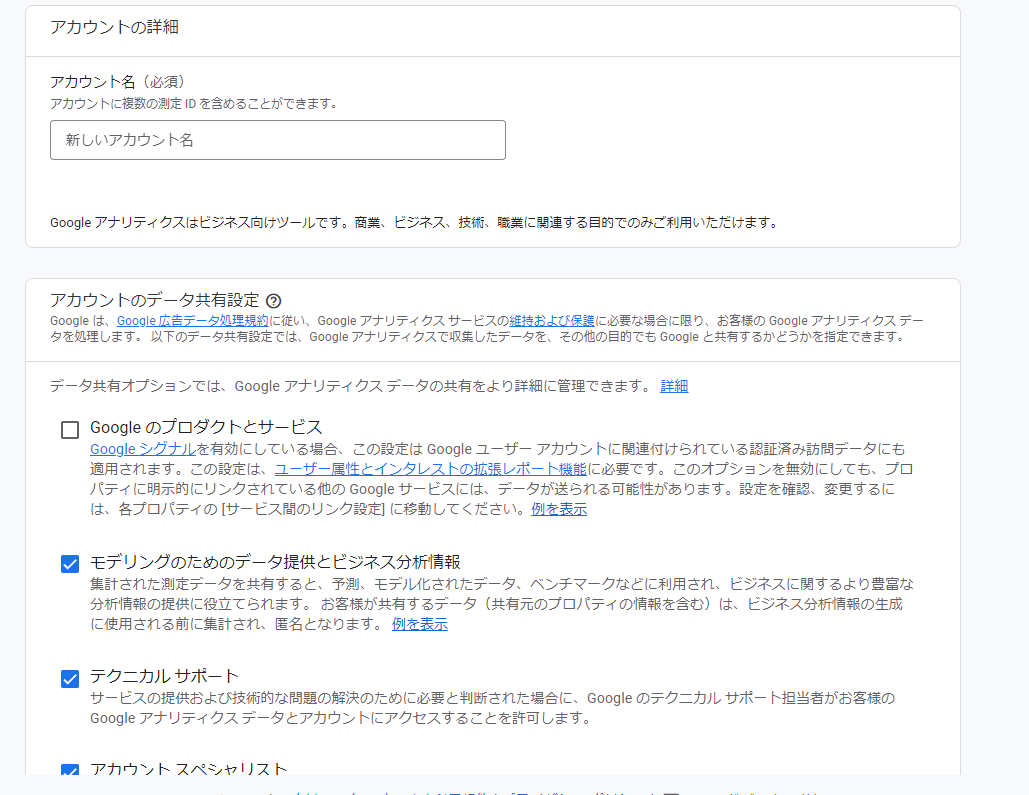
  3. アカウント名を入力し、「アカウントのデータ共有設定」を確認して次へ
    image.png

  4. 「プロパティの作成」・「お店やサービスの詳細」・「ビジネス目標」を任意に設定

  5. 「データ収集」でプラットフォームを「ウェブ」にして、ウェブサイトのURLに「 https://qiita.com 」を入力。ストリーム名は任意に設定

  6. 作成したプロパティにログインしたら、左下の「管理」→「データストリーム」をクリック
    image.png

  7. 表示される作成したストリーム名の測定IDをQiitaのGoogleアナリティクス設定に貼り付け。

8.更新するをクリックします。
これでトラッキングIDの登録は完了です。

参考

1
1
0

Register as a new user and use Qiita more conveniently

  1. You get articles that match your needs
  2. You can efficiently read back useful information
  3. You can use dark theme
What you can do with signing up
1
1

Delete article

Deleted articles cannot be recovered.

Draft of this article would be also deleted.

Are you sure you want to delete this article?