サーバやPC上のプログラムでModbus機器からデータを取得、その第二回です。
第一回では、Android上のModbusシミュレータからデータを取得するための、Perlスクリプトのサンプルを紹介しました。Perlでは問題があるという方は、他の言語で記述しても原理は変わらないはずなので、他の言語で実装してみてください。
サーバやPC上のプログラムでModbus機器からデータを取得 (1)
今回は、取得したデータをデータベースに保存します。
データベース
以前の記事で使用した、MySQLとテーブル"from_plc"
を使います。
PLCからゲートウェイでデータを取得しデータベースにJSONで保存 (4)
C:\Users\hoge\Downloads>mysql -u hoge -p
Enter password: *******
Welcome to the MySQL monitor.  Commands end with ; or \g.
Your MySQL connection id is 60
Server version: 8.0.29 MySQL Community Server - GPL

Copyright (c) 2000, 2022, Oracle and/or its affiliates.

Oracle is a registered trademark of Oracle Corporation and/or its
affiliates. Other names may be trademarks of their respective
owners.

Type 'help;' or '\h' for help. Type '\c' to clear the current input statement.

mysql> use hoge
Database changed
mysql> desc from_plc;
+-------------+-----------+------+-----+-------------------+-------------------+
| Field       | Type      | Null | Key | Default           | Extra             |
+-------------+-----------+------+-----+-------------------+-------------------+
| body        | json      | YES  |     | NULL              |                   |
| time_insert | timestamp | YES  |     | CURRENT_TIMESTAMP | DEFAULT_GENERATED |
+-------------+-----------+------+-----+-------------------+-------------------+
2 rows in set (0.02 sec)

mysql>
Perlスクリプト
前回は、Perlスクリプトを僕のセルフォンTermux上で動作させましたが、今回はPCのWindows上で開発し動作させます。何故?
僕のセルフォンのTurmuxのcpanになんらかの問題があるらしく、DBIのビルドができないんです。いろいろトライしたけど僕には解決は無理と判断し、Turmax上のPerlスクリプトを放棄しました。
DBIは必須ではないですが、データベースをアクセスするPerlなら、DBIを使うのが一般的ですよね。
DBIのない環境で、これ以上Perlを書く気にはなれませんよね。まあ、僕のせいなんですけどね。
「サーバやPC上のプログラムでModbus機器からデータを取得 (1)」で作成したスクリプトに手を加えました。これで、Modbus機器からModbus/TCPにより取得したデータをデータベースに保存します。
#!/usr/bin/perl

use IO::Socket;
use DBI;
use Time::HiRes "gettimeofday";
use utf8;
use Encode;
use JSON;

{
	my $Server = 'localhost';
	my $Port = 502;

	my $TransactionID = 0x0200;
	my $ProtocolID = 0x0000;
	my $Length = 0x0006;

	my $UnitID = 0x01;
	my $FunctionCode = 0x03;
	my $StartAddress = 0x0000;
	my $CountRegister = 0x0001;

	my $req = pack("n3C2n2",
		$TransactionID, $ProtocolID, $Length,
		$UnitID, $FunctionCode,
		$StartAddress, $CountRegister);

	my $old = -1;

	while (1) {
		my $socket = new IO::Socket::INET(
			PeerAddr=>$Server,
			PeerPort=>$Port,
			Proto=>'tcp');
		die "IO::Socket : $!" unless $socket;

		my $size = $socket->send($req);
		shutdown($socket, 1);

		my $response = "";
		$socket->recv($response, 1024);

		my @data = unpack("n3C3n", $response);
		my $Register = $data[6];

		if ($old != $Register) {
			print "sent data:\n";
			BinaryDump($req);
			print "received response:\n";
			BinaryDump($response);

			my $now = getCurrentTimeStr();
			my $output_data = {
				'ts' => $now,
				'value' => $Register
			};
			my $json_text = decode('utf-8', encode_json( $output_data ));
			print $json_text . "\n";
			my @values = ($json_text);

			$user = 'hoge';
			$passwd = 'hoge001';
			$db = DBI->connect('DBI:mysql:hoge:localhost', $user, $passwd);
			$sth = $db->prepare("INSERT INTO from_plc (body) values (?)");
			$sth->execute(@values);
			$sth->finish;
			$db->disconnect;
		}

		$old = $Register;

		$socket->close();
		sleep 1;
	}

}

# 利用させていただきました
# https://netlog.jpn.org/r271-635/2018/11/perl-bynary-dumper.html
sub BinaryDump {
	my ($buf) = @_;
	my $len;
	my $i;

	$len = length($buf);
	printf ("length = %d\n", $len);
	for ($i = 0; $i < $len; $i++) {
		printf("%02X ", ord(substr($buf, $i, 1)));
		# 16文字目で画面上の改行
		if (($i % 16) == 15) {
			print "\n";
		}
	}
	if (($i % 16) != 15) {
		print "\n";
	}
}

# 利用させていただきました
# https://akrad.hatenablog.com/entry/2018/10/20/234528
sub getCurrentTimeStr {
	my ($epochSec, $microSec) = gettimeofday();
	my ($sec, $min, $hour, $day, $mon, $year) = localtime($epochSec);
	$year += 1900;
	$mon++;
	return "$year"
		. '-' . sprintf("%02d", $mon)
		. '-' . sprintf("%02d", $day)
		. 'T' . sprintf("%02d", $hour)
		. ':' . sprintf("%02d", $min)
		. ':' . sprintf("%02d", $sec)
		. '.' . "$microSec";
}
Perlの自由さと気楽さが良いですね。
テスト
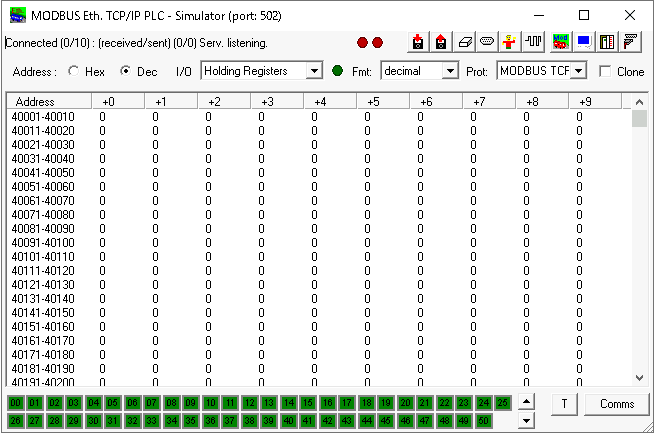
Windows上ということで、再び MOD-RSsim に登場いただきます。MOD-RSsimを起動しておきます。
Perlスクリプトを実行します。
C:\Users\hoge\Downloads>perl sample.pl
sent data:
length = 12
02 00 00 00 00 06 01 03 00 00 00 01
received response:
length = 11
02 00 00 00 00 05 01 03 02 00 00
{"ts":"2022-07-30T15:05:59.916895","value":0}
Holding Register 40001 の0を取得しデータベースに保存されます。
MOD-RSsim で 40001 に任意の数値を入力します。
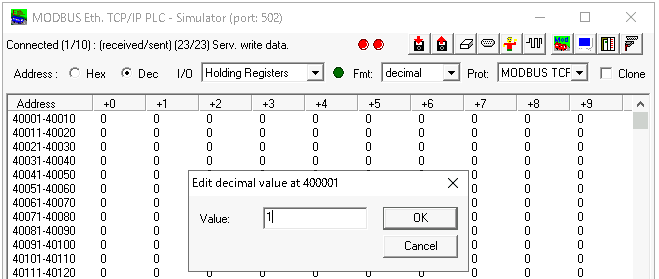
40001 のデータが変わる都度、データベースに値が保存されます。
C:\Users\hoge\Downloads>perl sample.pl
sent data:
length = 12
02 00 00 00 00 06 01 03 00 00 00 01
received response:
length = 11
02 00 00 00 00 05 01 03 02 00 00
{"ts":"2022-07-30T15:05:59.916895","value":0}
sent data:
length = 12
02 00 00 00 00 06 01 03 00 00 00 01
received response:
length = 11
02 00 00 00 00 05 01 03 02 00 01
{"ts":"2022-07-30T15:06:04.10446","value":1}
sent data:
length = 12
02 00 00 00 00 06 01 03 00 00 00 01
received response:
length = 11
02 00 00 00 00 05 01 03 02 00 02
{"ts":"2022-07-30T15:06:07.41537","value":2}
sent data:
length = 12
02 00 00 00 00 06 01 03 00 00 00 01
received response:
length = 11
02 00 00 00 00 05 01 03 02 00 03
{"value":3,"ts":"2022-07-30T15:06:10.72655"}
sent data:
length = 12
02 00 00 00 00 06 01 03 00 00 00 01
received response:
length = 11
02 00 00 00 00 05 01 03 02 00 04
{"value":4,"ts":"2022-07-30T15:06:12.150828"}
sent data:
length = 12
02 00 00 00 00 06 01 03 00 00 00 01
received response:
length = 11
02 00 00 00 00 05 01 03 02 00 05
{"ts":"2022-07-30T15:06:14.213053","value":5}
Terminating on signal SIGINT(2)

C:\Users\hoge\Downloads>
データベースのテーブル"from_plc"を確認してみます。
C:\Users\hoge\Downloads>mysql -u hoge -p
Enter password: *******
Welcome to the MySQL monitor.  Commands end with ; or \g.
Your MySQL connection id is 75
Server version: 8.0.29 MySQL Community Server - GPL

Copyright (c) 2000, 2022, Oracle and/or its affiliates.

Oracle is a registered trademark of Oracle Corporation and/or its
affiliates. Other names may be trademarks of their respective
owners.

Type 'help;' or '\h' for help. Type '\c' to clear the current input statement.

mysql> use hoge
Database changed
mysql> select * from from_plc;
+----------------------------------------------------+---------------------+
| body                                               | time_insert         |
+----------------------------------------------------+---------------------+
| {"ts": "2022-07-30T15:05:59.916895", "value": 0}   | 2022-07-30 15:05:59 |
| {"ts": "2022-07-30T15:06:04.10446", "value": 1}    | 2022-07-30 15:06:04 |
| {"ts": "2022-07-30T15:06:07.41537", "value": 2}    | 2022-07-30 15:06:07 |
| {"ts": "2022-07-30T15:06:10.72655", "value": 3}    | 2022-07-30 15:06:10 |
| {"ts": "2022-07-30T15:06:12.150828", "value": 4}   | 2022-07-30 15:06:12 |
| {"ts": "2022-07-30T15:06:14.213053", "value": 5}   | 2022-07-30 15:06:14 |
+----------------------------------------------------+---------------------+
6 rows in set (0.00 sec)

mysql>
まとめ
このように、Modbus機器からのデータ取得は、専用の機器や商用のソフトウェアがなくても可能です。今回はModbus/TCPでしたが、RTUでも原理は同じです。
データ取得だけではなく、Modbus機器にデータを書き込むことも難しくはありません。Modbusの仕様を理解すれば、データの取得も書き込みも簡単です。
Modbusに限らず、各メーカのPLCの仕様もほとんどがオープンになっているので、それぞれの仕様を理解しさえすれば、Modbusと同じように自分で書いたプログラムでの読み書きが可能です。
様々な種類のPLCやリモートIOなどをアクセスする場合には、ゲートウェイなどを利用したほうが良いかもしれません。一方で、限られた種類のPLCやリモートIOをアクセスする場合は、自分で書いたプログラムを使用するという選択もあると思います。
「作らない」のではなく「作れない」んです。なぜ「作れない」のか?「作らない」からです。