はじめに
本記事はAWS環境にてAWS CDKでEC2をデプロイするための方法について記載しています。
AWS CDKについては以前書いた5分で理解するAWS CDKを参照。
CDKのデプロイ(EC2)
ウォークスルーとしてAmazon EC2 でウェブアプリケーションをデプロイするを参考にしながら、コード1を一部変更してデプロイします。使用する言語はTypeScriptです。
準備作業
作業ディレクトリで以下のコマンドを実行し、新しいTypeScript用のCDKプロジェクト作成します。
$ mkdir ec2-cdk
$ cd ec2-cdk/
$ cdk init app --language typescript
CDKプロジェクト作成後に生成されたファイルを確認します。
エントリポイントはbin/ec2-cdk.tsファイルです。
従って、エントリポイントから呼ばれるlib/ec2-cdk-stack.tsファイルを実装してAWSリソースの構築を行います。
- bin/ec2-cdk.ts
#!/usr/bin/env node
import 'source-map-support/register';
import * as cdk from 'aws-cdk-lib';
import { Ec2CdkStack } from '../lib/ec2-cdk-stack';

const app = new cdk.App();
new Ec2CdkStack(app, 'Ec2CdkStack', {
  /* If you don't specify 'env', this stack will be environment-agnostic.
   * Account/Region-dependent features and context lookups will not work,
   * but a single synthesized template can be deployed anywhere. */

  /* Uncomment the next line to specialize this stack for the AWS Account
   * and Region that are implied by the current CLI configuration. */
  // env: { account: process.env.CDK_DEFAULT_ACCOUNT, region: process.env.CDK_DEFAULT_REGION },

  /* Uncomment the next line if you know exactly what Account and Region you
   * want to deploy the stack to. */
  // env: { account: '123456789012', region: 'us-east-1' },

  /* For more information, see https://docs.aws.amazon.com/cdk/latest/guide/environments.html */
});%
- lib/ec2-cdk-stack.ts
import { Stack, StackProps } from 'aws-cdk-lib';
import { Construct } from 'constructs';
// import * as sqs from 'aws-cdk-lib/aws-sqs';

export class Ec2CdkStack extends Stack {
  constructor(scope: Construct, id: string, props?: StackProps) {
    super(scope, id, props);

    // The code that defines your stack goes here

    // example resource
    // const queue = new sqs.Queue(this, 'Ec2CdkQueue', {
    //   visibilityTimeout: cdk.Duration.seconds(300)
    // });
  }
}
上記コードを基にEC2インスタンスの定義情報を実装していきます。
VSCodeを使用している環境でcdk-ec2-key-pairモジュールが存在しない場合、以下のようなエラーが出力されます。
上記エラーが出た場合は以下のコマンドを実行し、npmでcdk-ec2-key-pairをインストールします。
$ npm install cdk-ec2-key-pair
以下は出力結果です。「found 0 vulnerabilities」のメッセージより、パッケージに対する脆弱性が見つからなかったことが確認できます。
また、npmインストール後、ワークスペースで問題が検出されなかったことについて確認できます。
npm WARN ec2-cdk@0.1.0 No repository field.
npm WARN ec2-cdk@0.1.0 No license field.

+ cdk-ec2-key-pair@3.3.1
added 1 package from 1 contributor and audited 375 packages in 2.312s

28 packages are looking for funding
  run `npm fund` for details

found 0 vulnerabilities
EC2インスタンスを1台構築するための定義情報を記載したlib/ec2-cdk-stack.tsファイルは以下になります。セキュリティグループはSSHのみ許可しています。
- lib/ec2-cdk-stack.ts
import { Stack, StackProps } from 'aws-cdk-lib';
import { Construct } from 'constructs';

import * as ec2 from 'aws-cdk-lib/aws-ec2';
import * as iam from "aws-cdk-lib/aws-iam"; // Allows working with IAM resources
import * as s3assets from "aws-cdk-lib/aws-s3-assets"; // Allows managing files with S3
import * as keypair from "cdk-ec2-key-pair"; // Helper to create EC2 SSH keypairs
import * as path from "path"; // Helper for working with file paths

export class Ec2CdkStack extends Stack {
  constructor(scope: Construct, id: string, props?: StackProps) {
    super(scope, id, props);

    // The code that defines your stack goes here

    // Look up the default VPC
    const vpc = ec2.Vpc.fromLookup(this, "VPC", {
      isDefault: true
    });

    // Create a key pair to be used with this EC2 Instance
    const key = new keypair.KeyPair(this, "KeyPair", {
      name: "cdk-keypair",
      description: "Key Pair created with CDK Deployment",
    });
    key.grantReadOnPublicKey;

    // Security group for the EC2 instance
    const securityGroup = new ec2.SecurityGroup(this, "SecurityGroup", {
      vpc,
      description: "Allow SSH (TCP port 22) and HTTP (TCP port 80) in",
      allowAllOutbound: true,
    });

    // Allow SSH access on port tcp/22
    securityGroup.addIngressRule(
      ec2.Peer.anyIpv4(),
      ec2.Port.tcp(22),
      "Allow SSH Access"
    );

    // IAM role to allow access to other AWS services
    const role = new iam.Role(this, "ec2Role", {
      assumedBy: new iam.ServicePrincipal("ec2.amazonaws.com"),
    });

    // IAM policy attachment to allow access to
    role.addManagedPolicy(
      iam.ManagedPolicy.fromAwsManagedPolicyName("AmazonSSMManagedInstanceCore")
    );

    // Look up the AMI Id for the Amazon Linux 2 Image with CPU Type X86_64
    const ami = new ec2.AmazonLinuxImage({
      generation: ec2.AmazonLinuxGeneration.AMAZON_LINUX_2,
      cpuType: ec2.AmazonLinuxCpuType.X86_64,
    });

    // Create the EC2 instance using the Security Group, AMI, and KeyPair defined.
    const ec2Instance = new ec2.Instance(this, "Instance", {
      vpc,
      instanceType: ec2.InstanceType.of(
        ec2.InstanceClass.T2,
        ec2.InstanceSize.MICRO
      ),
      machineImage: ami,
      securityGroup: securityGroup,
      keyName: key.keyPairName,
      role: role,
    });
  }
}
デプロイ作業
以下のコマンドを実行し、CloudFormationの定義情報が出力されるので、定義するテンプレートの内容を確認します。
$ cdk synth
アカウントとリージョンの指定がない場合、エラーが出力されます。
Cannot retrieve value from context provider vpc-provider since account/region are not specified at the stack level. Configure "env" with an account and region when you define your stack.See https://docs.aws.amazon.com/cdk/latest/guide/environments.html for more details.

Subprocess exited with error 1
そのため、bin/ec2-cdk.tsファイルに下記、envの行を追記します。変更箇所は1行のみです。
bin/ec2-cdk.ts
const app = new cdk.App();
new Ec2CdkStack(app, 'Ec2CdkStack', {
  env: {account: 'XXXXXXXXXXXX', region: 'ap-northeast-1'},
});
再度、synthコマンドを実行すると正常な結果が出力されることが確認できます。
問題ないことを確認してデプロイします。
$ cdk deploy
Do you wish to deploy these changes (y/n)? y
デプロイ完了後、以下のようなメッセージが出力されます。
EC2 Instance Connectや、セッションマネージャーを用いてSSHでEC2インスタンスに接続できます。
 ✅  Ec2CdkStack

✨  Deployment time: 219.15s

Stack ARN:
arn:aws:cloudformation:ap-northeast-1:XXXXXXXXXXXX:stack/Ec2CdkStack/XXXXXXXX-XXXX-XXXX-XXXX-XXXXXXXXXXXX

✨  Total time: 225.55s
Tips
ウォークスルーで使用したコードのAMIの指定は以下の通りにclass AmazonLinuxImageクラスを使用しています。
// Look up the AMI Id for the Amazon Linux 2 Image with CPU Type X86_64
    const ami = new ec2.AmazonLinuxImage({
      generation: ec2.AmazonLinuxGeneration.AMAZON_LINUX_2,
      cpuType: ec2.AmazonLinuxCpuType.X86_64,
    });
動作的にはAmazonLinuxの最新バージョンを選択し、AMI IDはSSMパラメータストアに公開された値が選択されます。
TipsとしてUbuntuのイメージを使用する例について以下に記載します。
以下の例ではfromSsmParameterメソッドを使用して取得したAMI IDをmachineImageの値に設定しています。
    // Look up the AMI Id for the Amazon Linux 2 Image with CPU Type X86_64
    /* const ami = new ec2.AmazonLinuxImage({
      generation: ec2.AmazonLinuxGeneration.AMAZON_LINUX_2,
      cpuType: ec2.AmazonLinuxCpuType.X86_64,
    }); */

    const machineImage = ec2.MachineImage.fromSsmParameter(
      '/aws/service/canonical/ubuntu/server/focal/stable/current/amd64/hvm/ebs-gp2/ami-id',
    )

 // Create the EC2 instance using the Security Group, AMI, and KeyPair defined.
    const ec2Instance = new ec2.Instance(this, "Instance", {
      vpc,
      instanceType: ec2.InstanceType.of(
        ec2.InstanceClass.T2,
        ec2.InstanceSize.MICRO
      ),
      machineImage: machineImage,
      securityGroup: securityGroup,
      keyName: key.keyPairName,
      role: role,
    });
AWS CLIで実行すると詳細を確認できます。
bash-3.2$ aws ssm get-parameter --name "/aws/service/canonical/ubuntu/server/focal/stable/current/amd64/hvm/ebs-gp2/ami-id"
{
    "Parameter": {
        "Name": "/aws/service/canonical/ubuntu/server/focal/stable/current/amd64/hvm/ebs-gp2/ami-id",
        "Type": "String",
        "Value": "ami-0bf8833870a0f064c",
        "Version": 249,
        "LastModifiedDate": "2022-06-16T10:35:48.842000+09:00",
        "ARN": "arn:aws:ssm:ap-northeast-1::parameter/aws/service/canonical/ubuntu/server/focal/stable/current/amd64/hvm/ebs-gp2/ami-id",
        "DataType": "aws:ec2:image"
    }
}
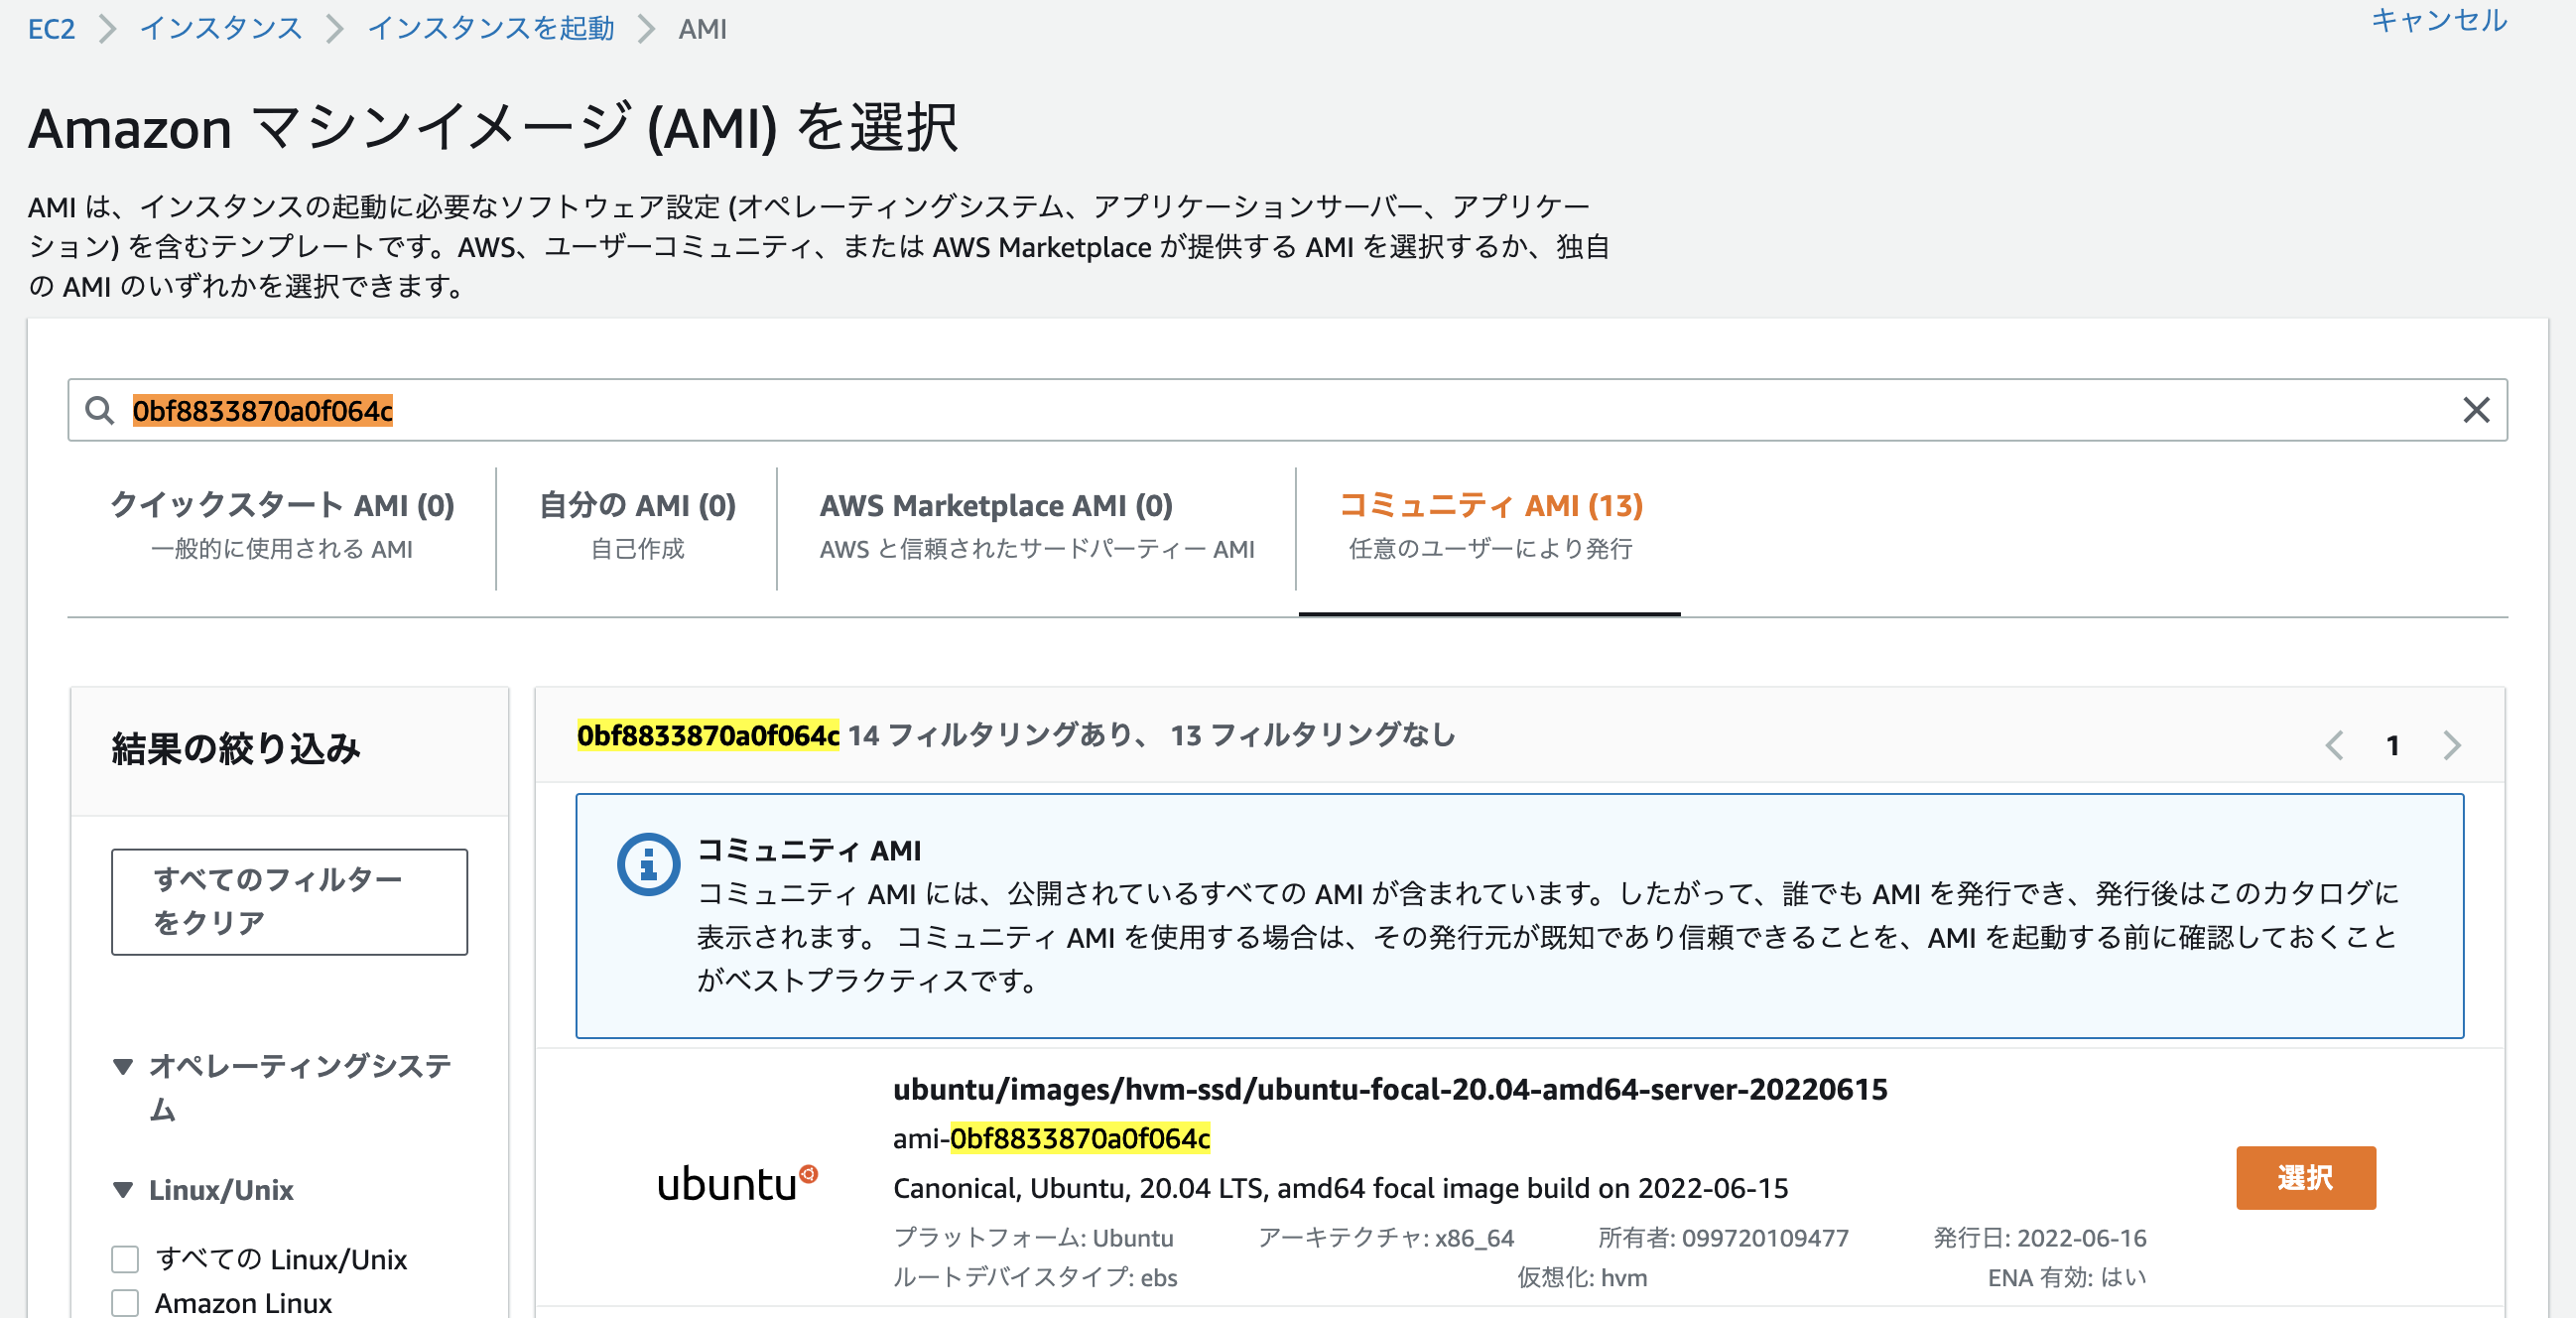
このAMI(Ubuntu, 20.04 LTS, amd64)はコミュニティとしてUbuntuを開発しているCanonicalによって提供されていますす。
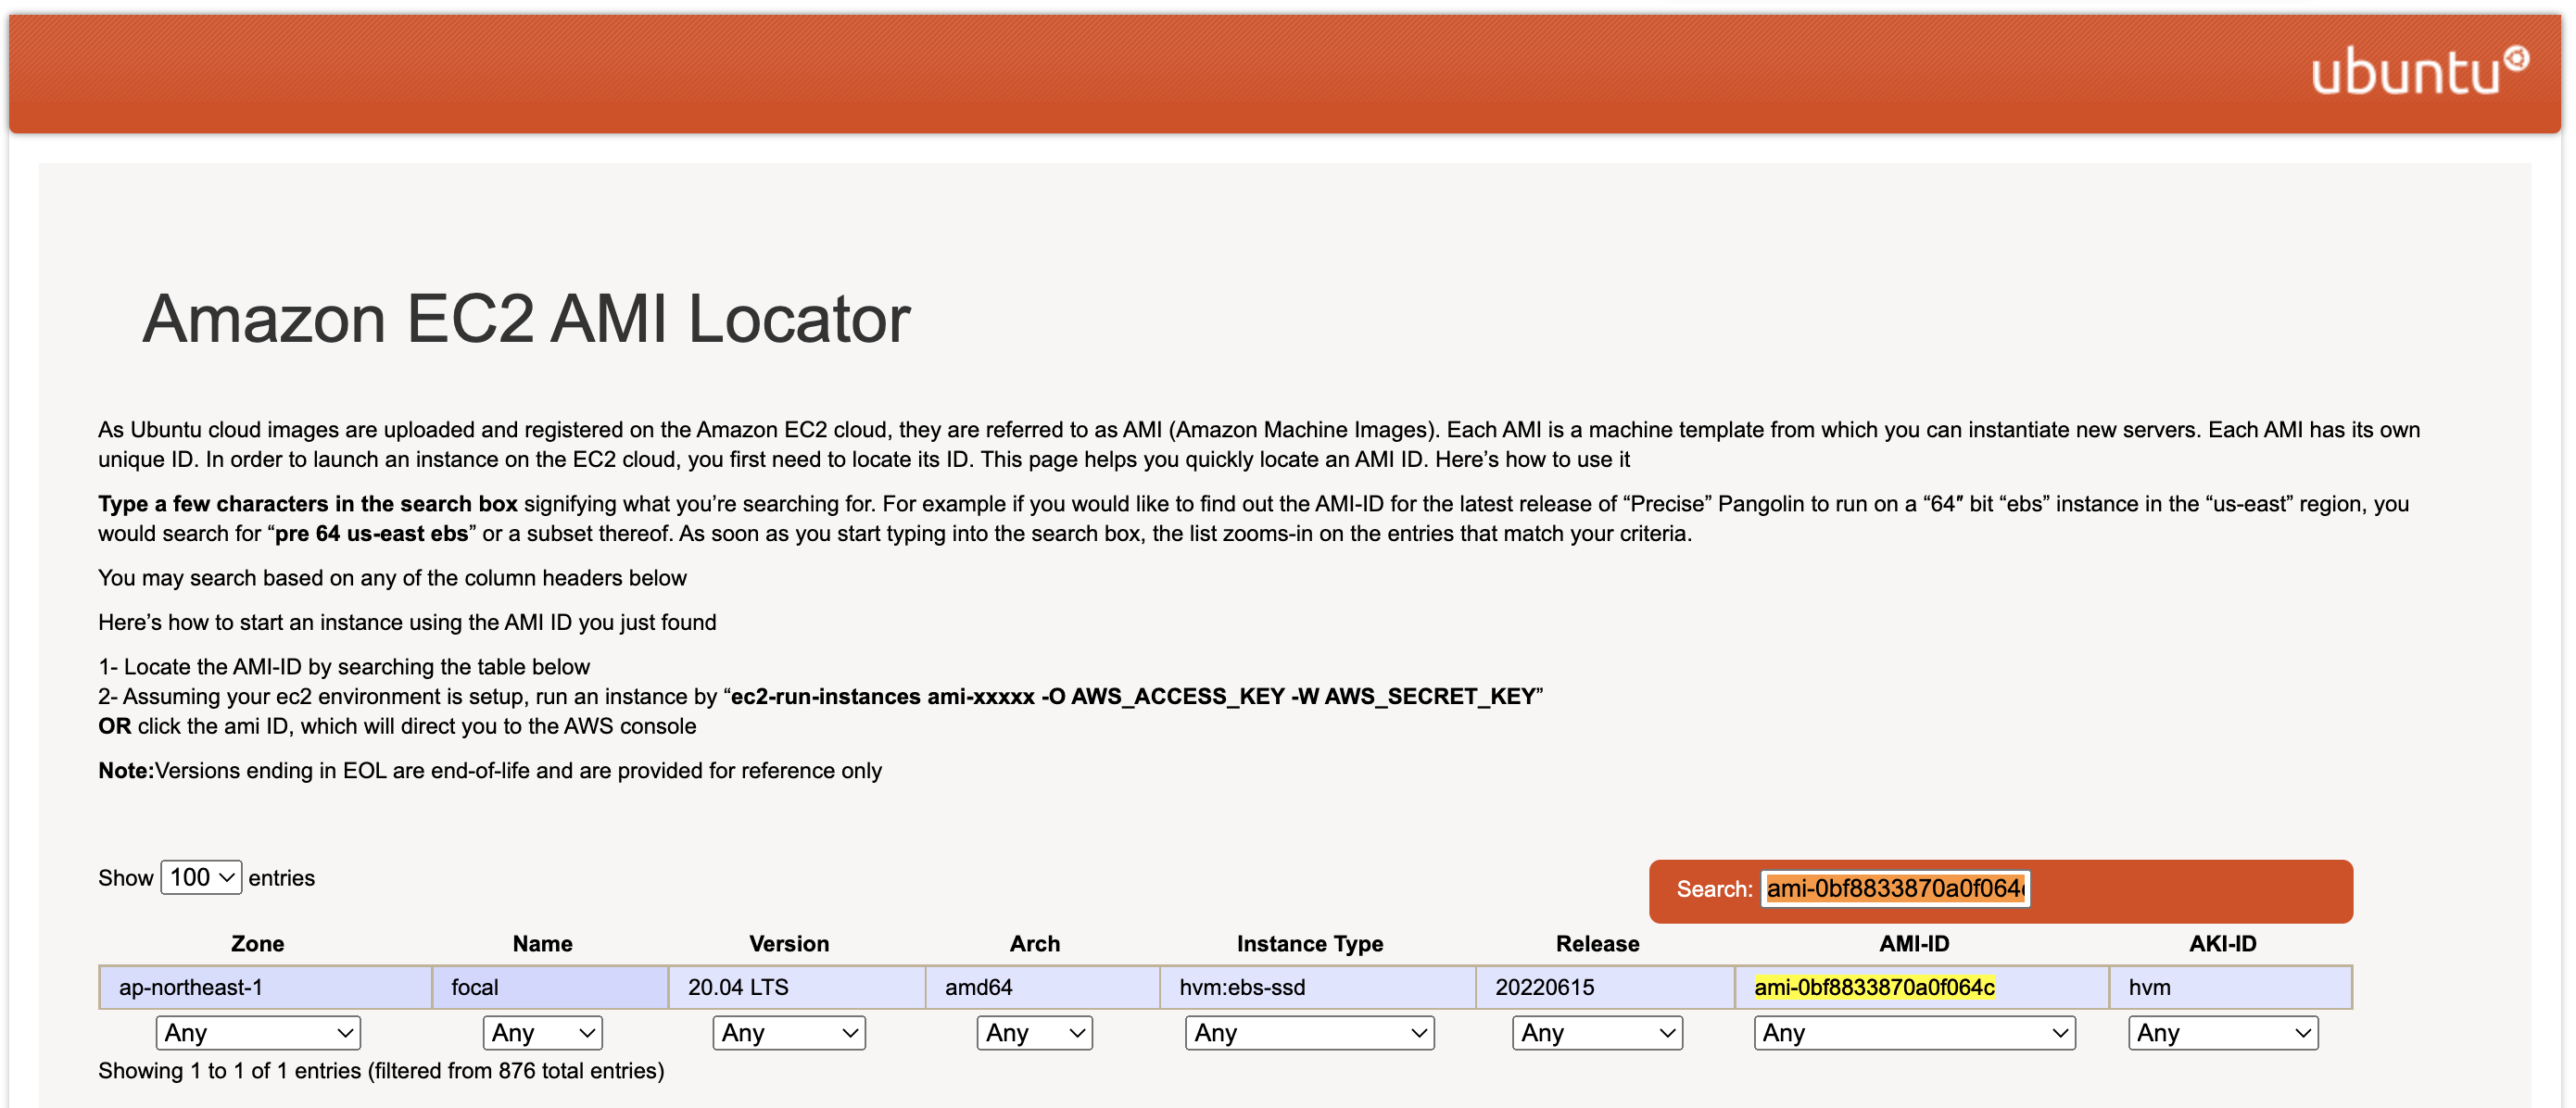
Ubuntuの場合、Amazon EC2 AMI Locatorから専用のAMIについて調べることができます。
以下は上記のAMI ID ami-0bf8833870a0f064cで検索した例です。
おわりに
ウォークスルーで使用した公式ドキュメントではユーザーデータを渡し、インスタンス起動時に任意のスクリプトを実行して初期構築を実現しています。
実際に運用を考慮した考え方としてリソースの作成・削除が頻繁に行われる環境などではCDKに全てを組み込みAWSで一元管理する運用でも良いと思いますが、Ansibleなど構成管理ツールを使用している環境などでは、インフラの構成管理について検討が必要です。
クラウドファーストの今、クラウドインフラの資産をAWSに寄せるかAnsibleなどのIaCツールに寄せるかについては、インフラを利用する組織の環境や状況に応じて変わってくため、手段を目的化しないことが重要です。


