はじめに
本記事はDockerコンテナ開発に関する生産性向上のためのヒントについて記載しています。
Dockerは、バージョンアップによって新しい機能が追加されます。また、Visual Studio Codeでは、Dockerコンテナ開発に役立つ拡張機能が存在します。
本記事では、本記事執筆時点で2024年にGAされた機能を軸にVisual Studio Codeのナレッジについてまとめています。これからDockerコンテナ開発行う方のご参考になれば幸いです。
※本記事の環境はmacOSです。
Docker
公式ブログは、Dockerの知識をアップデートするのに役立ちます。
Docker Init
Docker Initは、コンテナ内でプロジェクトを実行するために必要なファイルを生成するコマンドラインユーティリティです。
2023年に発表された機能ですが、2024年になって正式にGAされました。
docker initコマンドは、対話形式のメニューを表示します。各言語またはフレームワーク毎に入力を行うことで、以下のファイルを生成します。コマンドの詳細については公式ドキュメントのdocker initをご確認ください。
.dockerignoreDockerfileREADME.Docker.mdcompose.yaml
以下は、実行例です。アプリケーションのプラットフォームは、Nodeを選択しています。
$ docker init
Welcome to the Docker Init CLI!

This utility will walk you through creating the following files with sensible defaults for your project:
  - .dockerignore
  - Dockerfile
  - compose.yaml
  - README.Docker.md

Let's get started!

? What application platform does your project use? Node
? What version of Node do you want to use? 20
? Which package manager do you want to use? yarn
? What command do you want to use to start the app? yarn start
? What port does your server listen on? 8080

✔ Created → .dockerignore
✔ Created → Dockerfile
✔ Created → compose.yaml
✔ Created → README.Docker.md

→ Your Docker files are ready!
  Review your Docker files and tailor them to your application.
  Consult README.Docker.md for information about using the generated files.

! Warning → The following files required to run your application were not found. Create them before running your application:
  - package.json
  - yarn.lock

What's next?
  Start your application by running → docker compose up --build
  Your application will be available at http://localhost:8080
上記docker initコマンド実行後、生成されたDockerfileは以下の通りです。
# syntax=docker/dockerfile:1

# Comments are provided throughout this file to help you get started.
# If you need more help, visit the Dockerfile reference guide at
# https://docs.docker.com/go/dockerfile-reference/

# Want to help us make this template better? Share your feedback here: https://forms.gle/ybq9Krt8jtBL3iCk7

ARG NODE_VERSION=20

FROM node:${NODE_VERSION}-alpine

# Use production node environment by default.
ENV NODE_ENV production


WORKDIR /usr/src/app

# Download dependencies as a separate step to take advantage of Docker's caching.
# Leverage a cache mount to /root/.yarn to speed up subsequent builds.
# Leverage a bind mounts to package.json and yarn.lock to avoid having to copy them into
# into this layer.
RUN --mount=type=bind,source=package.json,target=package.json \
    --mount=type=bind,source=yarn.lock,target=yarn.lock \
    --mount=type=cache,target=/root/.yarn \
    yarn install --production --frozen-lockfile

# Run the application as a non-root user.
USER node

# Copy the rest of the source files into the image.
COPY . .

# Expose the port that the application listens on.
EXPOSE 8080

# Run the application.
CMD yarn start
上記Dockerfileだけでは、コンテナをデプロイできません。コンテナをデプロイするためには、package.json及びyarn.lockファイル、アプリケーションに必要なソースコードが必要です。
Docker Scout
Docker Scoutは、Dockerイメージの脆弱性スキャンやコンプライアンスをチェックするための機能を提供します。
2023年にGAされた機能ですが、本機能を活用することで、脆弱性をプロアクティブに見つけることができます。
docker scoutコマンドは、複数のサブコマンドが存在します。コマンドの詳細については公式ドキュメントのdocker scoutをご確認ください。また、チートシートなどをご参考にください。
以下は、実行例です。
docker scout quickview(エイリアス:docker scout qv)は、イメージの概要を表示します。指定されたイメージに関する脆弱性及びベースイメージの脆弱性が表示されます。イメージの引数がない場合は、最後にビルドされたイメージが分析されます。
$ docker scout quickview
    i New version 1.13.0 available (installed version is 1.11.0) at https://github.com/docker/scout-cli
          ✓ SBOM of image already cached, 277 packages indexed

    i Base image was auto-detected. To get more accurate results, build images with max-mode provenance attestations.
      Review docs.docker.com ↗ for more information.

  Target             │  local://test-server:latest  │    0C     0H     0M     0L
    digest           │  6a104c356a38                │
  Base image         │  node:20-alpine              │    0C     0H     0M     0L
  Updated base image │  node:22-alpine              │    0C     0H     0M     0L
                     │                              │

What's next:
    View base image update recommendations → docker scout recommendations local://test-server:latest
    Include policy results in your quickview by supplying an organization → docker scout quickview local://test-server:latest --org <organization>
docker scout cvesは、イメージの脆弱性を分析します。イメージが指定されていない場合は、最後にビルドされたイメージが使用されます。
$ docker scout cves
    i New version 1.13.0 available (installed version is 1.11.0) at https://github.com/docker/scout-cli
          ✓ SBOM of image already cached, 277 packages indexed
    ✓ No vulnerable package detected


## Overview

                    │       Analyzed Image
────────────────────┼──────────────────────────────
  Target            │
    digest          │  6a104c356a38
    platform        │ linux/arm64
    vulnerabilities │    0C     0H     0M     0L
    size            │ 58 MB
    packages        │ 277


## Packages and Vulnerabilities

  No vulnerable packages detected
近年注目されているSBOMですが、Dockerも対応しています。
SBOMの概要やDockerの対応状況については以前書いた、セキュアなソフトウェア開発 背景から理解するSBOM入門のdockerをご参照ください。
Docker Debug
Docker Debugは、Docker Desktop 4.33でGAされた機能です。
デバッグ目的に使用される機能ですが、現在のところPro、Teams、またはBusinessライセンスのユーザーが利用できます。※PERSONALの個人ユーザーは利用不可
使い方は、シェルを持たないコンテナのデバッグ時に利用します。コマンドの詳細については公式ドキュメントのdocker debugをご確認ください。
$ docker debug <container name>
Visual Studio Code
Visual Studio Code(以下、VS Code)は、すべての開発者の間で好まれるIDEとして、2023年のStack Overflowの年次開発者調査でも堂々の1位をキープしています。
codeコマンド
codeコマンドは、作業するディレクトリまたはフォルダを起点にしてVSCodeを開くことができます。
$ code .
Windowsと違ってMacの場合はセットアップが必要なため、知らない方も少なくはないと思いますが、以下の様にcodeコマンドのパスを通すだけで簡単に設定できます。詳しくは公式ドキュメントのLaunching from the command lineをご参考にください。
- コマンド パレット
(Cmd+Shift+P)を開き、「shell command」と入力して、シェル コマンド「Install 'code' command in PATH command」を実行 - ターミナルを再起動
Dev Containers
VS Codeの拡張機能よりDev Containersを使用することで、コンテナーを開発環境として使用できます。
Dev Containersの概要は、公式ドキュメントのDeveloping inside a Containerから確認できます。
Dev Containersは、コンテナ内からワークスペースとして利用しているローカルシステムのファイルにアクセスできるため、シームレスな開発を実現します。従来のdocker run -vを実行するなど、Dockerボリュームを使用したホストとコンテナ間でソースコードを共有する手順が不要です。
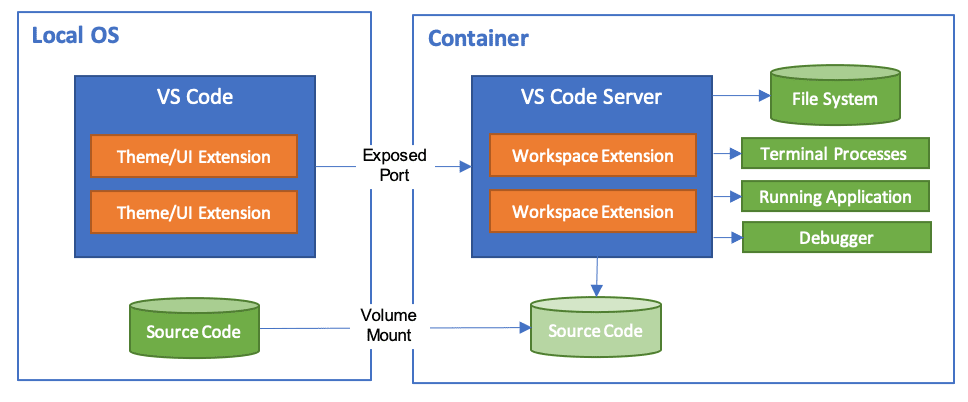
出典元:Developing inside a Container
また、各プロジェクトが独自のコンテナ内で動作するため、ローカルシステムに影響を与えることなく、クリーンなワークスペースが実現できます。
Dev Containers拡張機能は、Development Containersを基に開発されています。また、Development Containersの仕様は公開されているため、Specificationから確認できます。
GitHubでは、Development Containersを活用したGitHub Codespacesというソリューションを展開しています。GitHub Codespacesは、GitHubリポジトリに統合された開発環境を提供します。ブラウザなどから開発環境にアクセスすることができます。
quick start
公式ドキュメントのPicking your quick startを参考にしながら始めましょう。
上記公式ドキュメントでは3つのクイックスタートが紹介されています。本記事では、2番目のQuick start: Open an existing folder in a containerを例にローカルシステムの既存フォルダを指定して、フルタイムのコンテナ開発環境として構築する方法について紹介します。環境はNode.jsです。
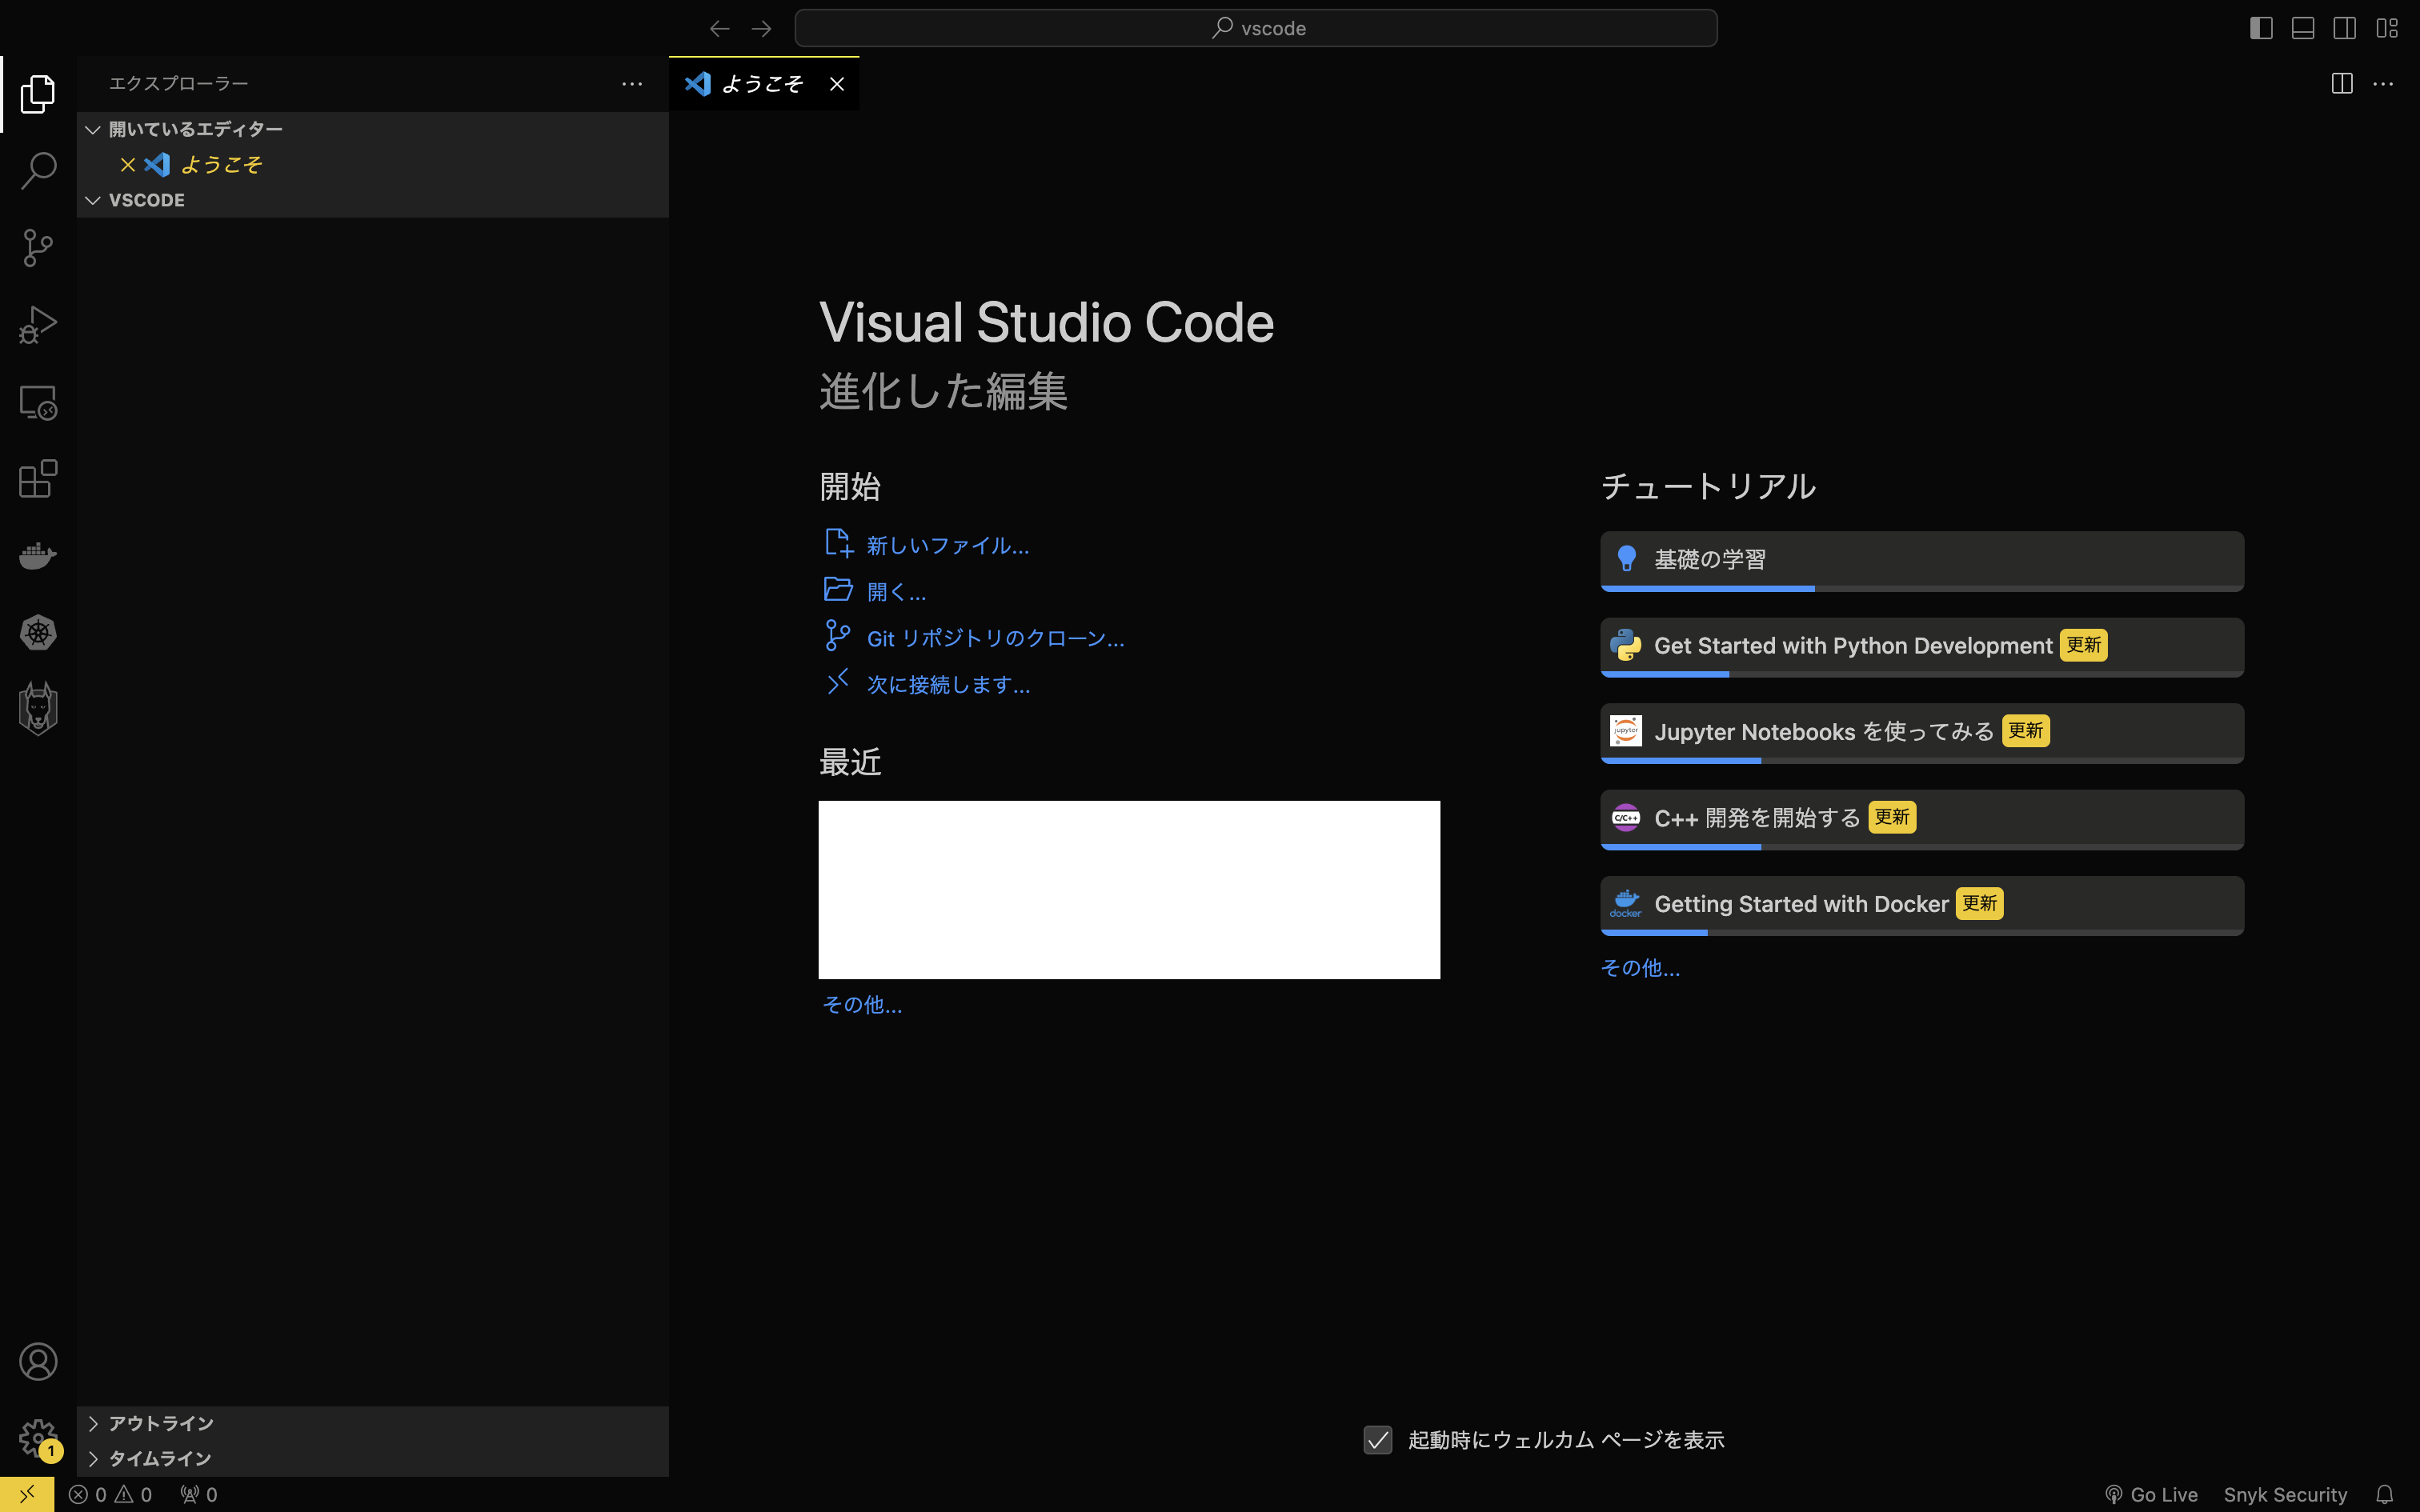
起点とする任意のディレクトリでcodeコマンドを実行してVS Codeを開き、画面左下の開発コンテナーのアイコン(><)を押します。
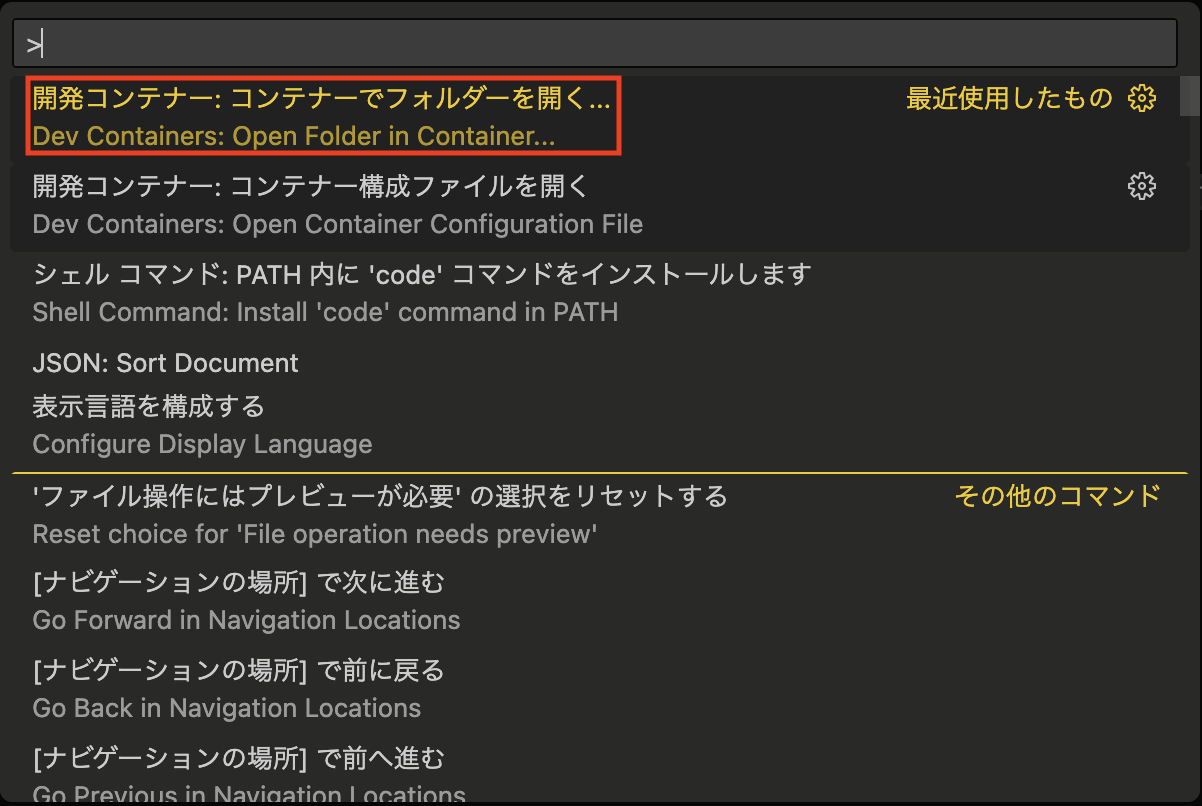
コマンドパレットから「開発コンテナー: コンテナーでフォルダーを開く...」を選択します。(macOSの場合、Cmd+Shift+P)
コンテナー構成を保存する場所を選択するため、本記事では例として「ユーザーデータ フォルダーに構成を追加する」を選択します。
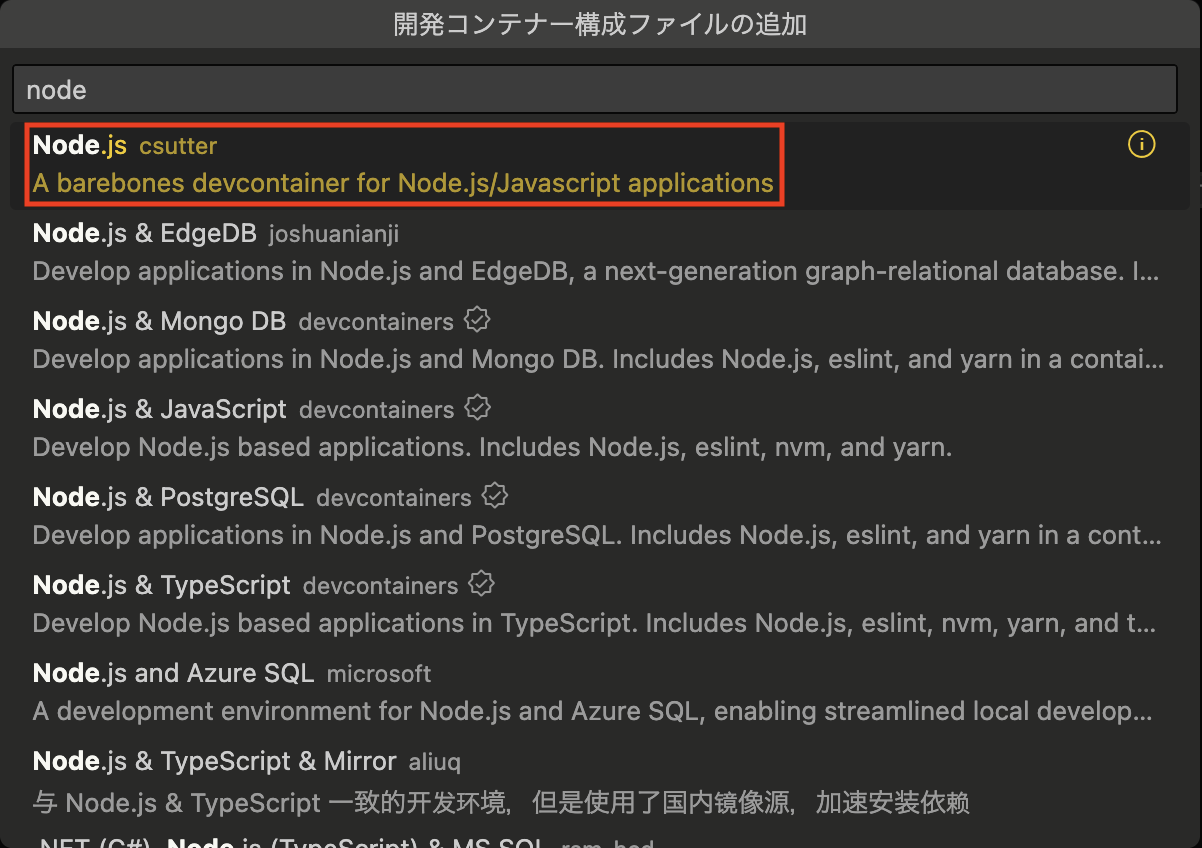
「Node.js csutter」を選択します。
「20 (既定)」を選択します。
「OK」を押します。
画面右下に以下の様なメッセージが表示されると、コンテナが起動します。
開発
上記手順を実行することで、開発コンテナーの機能を用いて開発が行えます。
例としてNext.jsをインストールします。
$ npx create-next-app@latest
Need to install the following packages:
create-next-app@14.2.5
Ok to proceed? (y)

✔ What is your project named? … my-app
✔ Would you like to use TypeScript? … No / Yes
✔ Would you like to use ESLint? … No / Yes
✔ Would you like to use Tailwind CSS? … No / Yes
✔ Would you like to use `src/` directory? … No / Yes
✔ Would you like to use App Router? (recommended) … No / Yes
✔ Would you like to customize the default import alias (@/*)? … No / Yes
Creating a new Next.js app in /workspaces/tutorial/my-app.

Using npm.

Initializing project with template: app-tw


Installing dependencies:
- react
- react-dom
- next

Installing devDependencies:
- typescript
- @types/node
- @types/react
- @types/react-dom
- postcss
- tailwindcss
- eslint
- eslint-config-next

npm warn deprecated inflight@1.0.6: This module is not supported, and leaks memory. Do not use it. Check out lru-cache if you want a good and tested way to coalesce async requests by a key value, which is much more comprehensive and powerful.
npm warn deprecated rimraf@3.0.2: Rimraf versions prior to v4 are no longer supported
npm warn deprecated @humanwhocodes/object-schema@2.0.3: Use @eslint/object-schema instead
npm warn deprecated @humanwhocodes/config-array@0.11.14: Use @eslint/config-array instead
npm warn deprecated glob@7.2.3: Glob versions prior to v9 are no longer supported

added 360 packages, and audited 361 packages in 16s

136 packages are looking for funding
  run `npm fund` for details

found 0 vulnerabilities
Initialized a git repository.

Success! Created my-app at /workspaces/tutorial/my-app

npm notice
npm notice New patch version of npm available! 10.8.1 -> 10.8.2
npm notice Changelog: https://github.com/npm/cli/releases/tag/v10.8.2
npm notice To update run: npm install -g npm@10.8.2
npm notice
以下のコマンドを実行して、Next.jsを開発モードで起動します。
$ yarn dev
yarn run v1.22.22
$ next dev
  ▲ Next.js 14.2.5
  - Local:        http://localhost:3000

 ✓ Starting...
 ✓ Ready in 1242ms
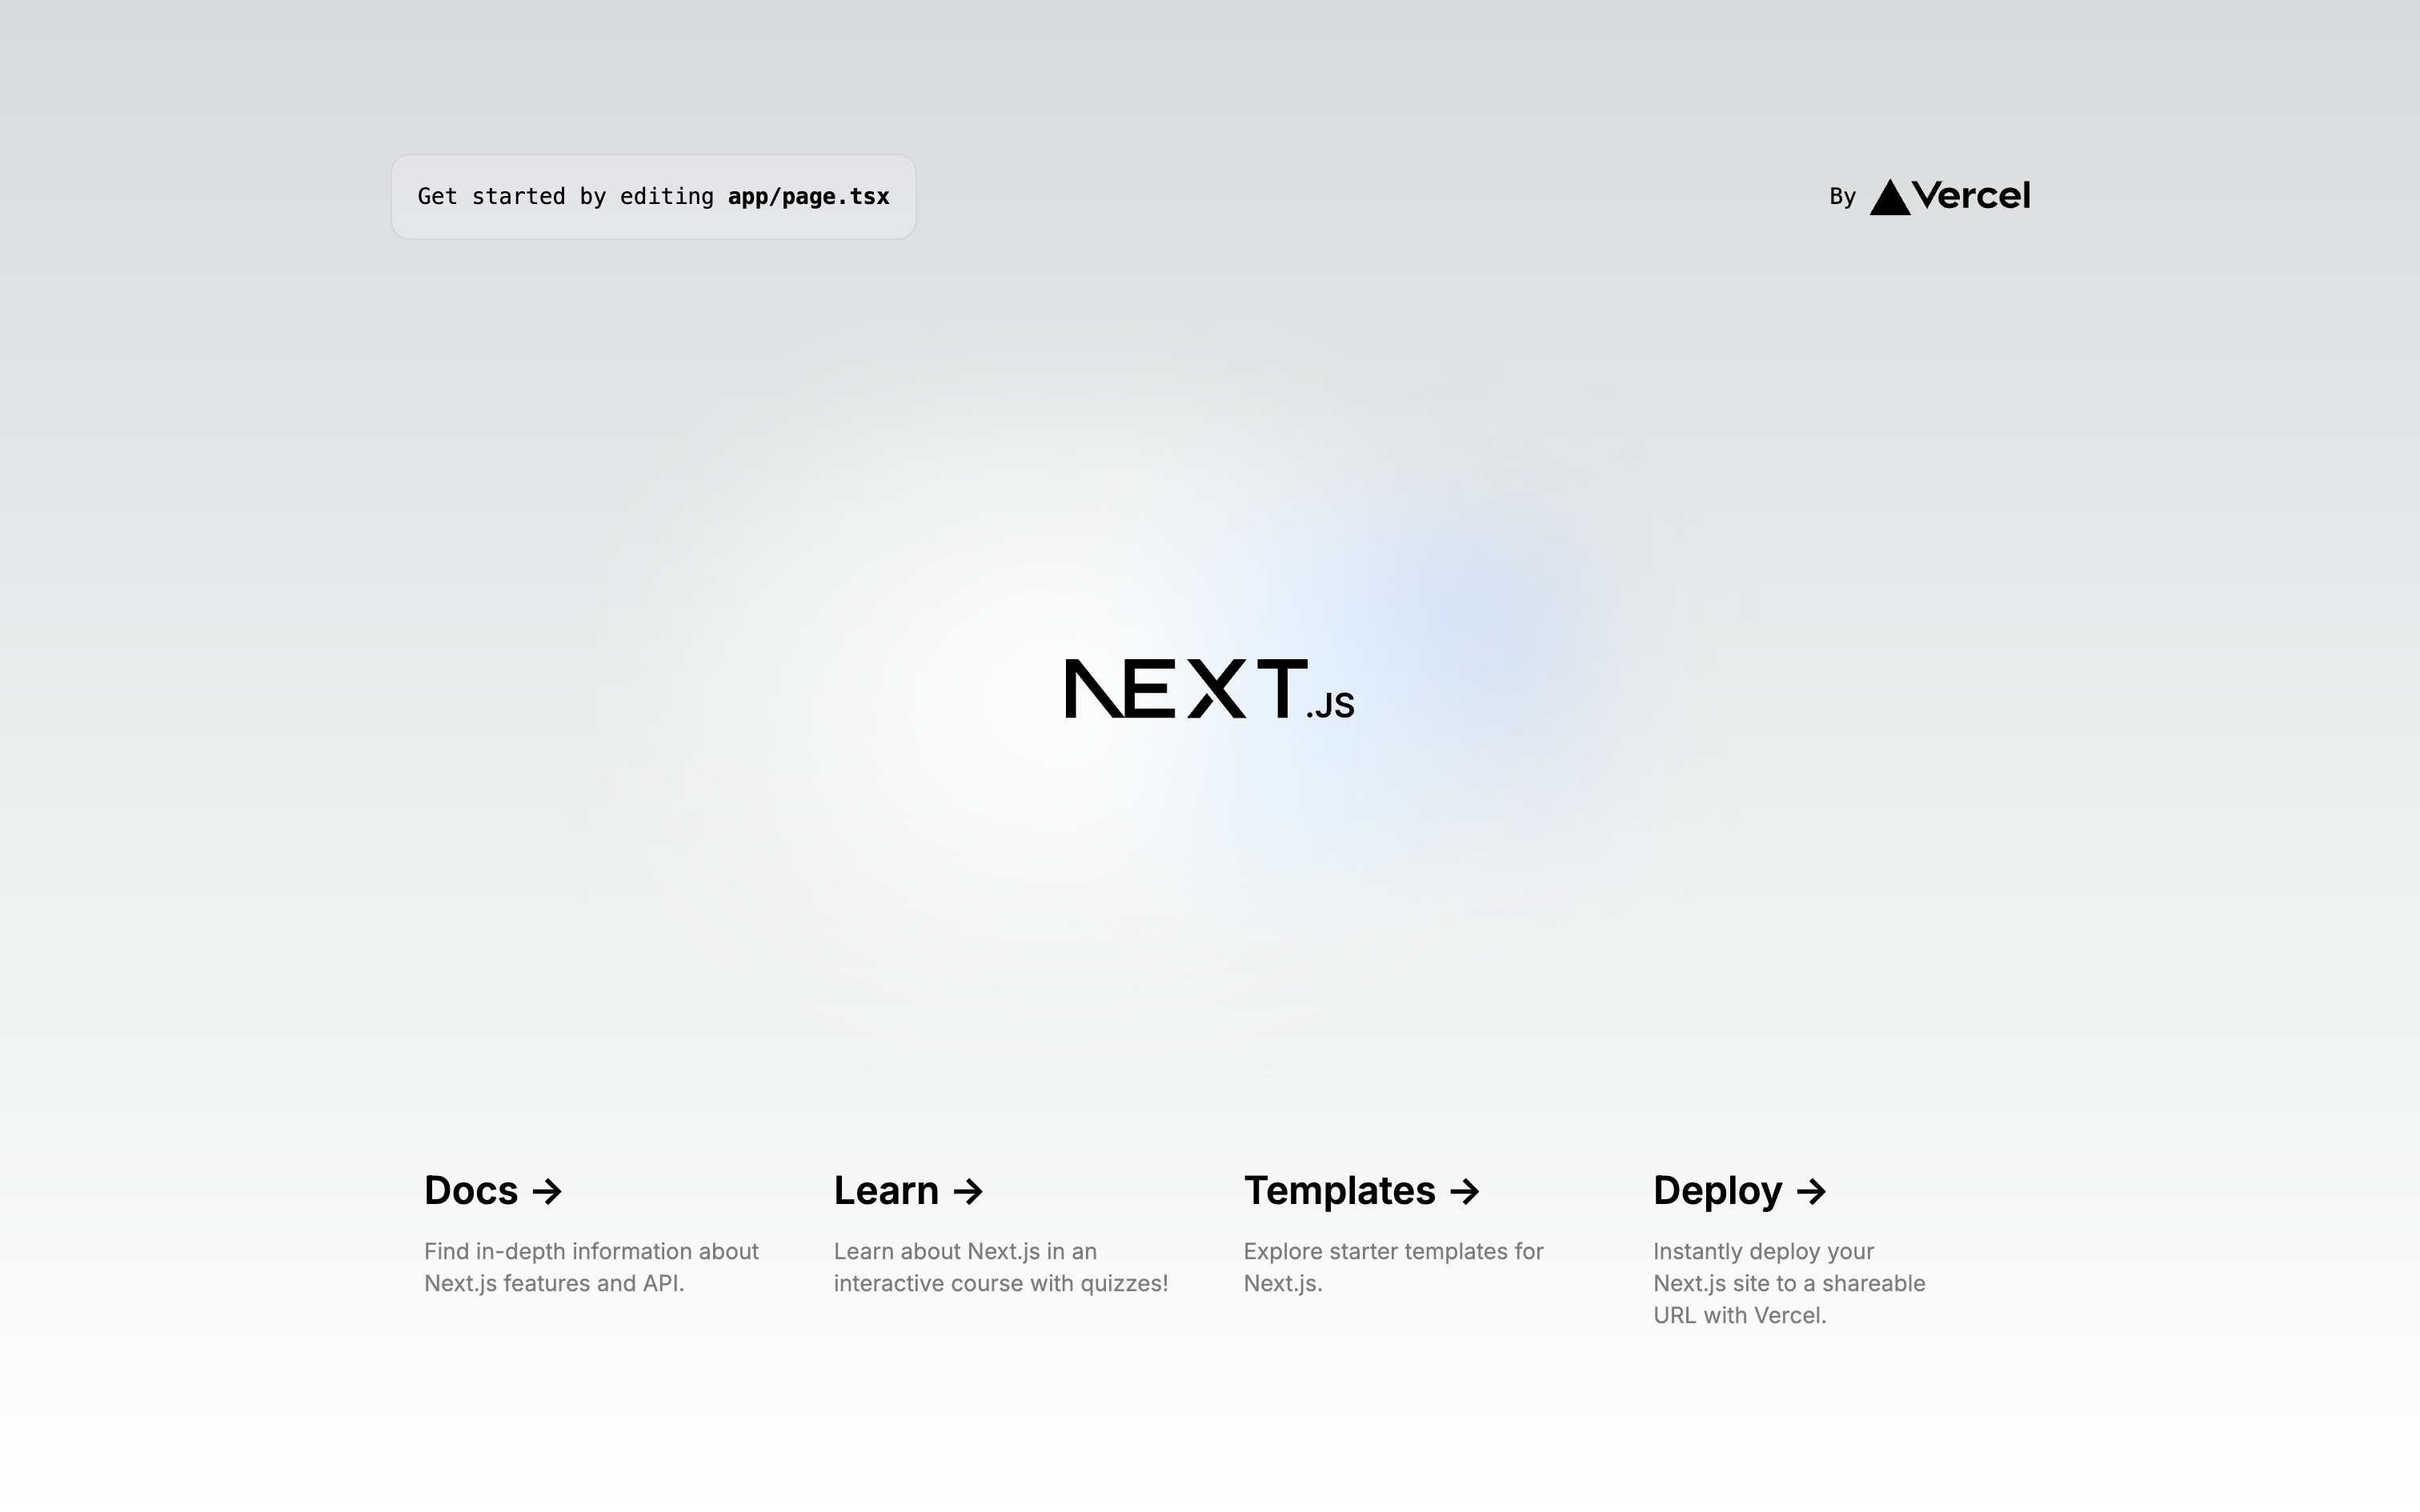
ブラウザからアクセスすると、以下の様な画面が表示されます。
コンテナを切断して再度コンテナ開発を行う場合は、VS Codeの画面左下に「開発コンテナー」が表示されていることを確認します。
コンテナー構成の確認
コンテナー構成を確認する方法について以下に記載します。
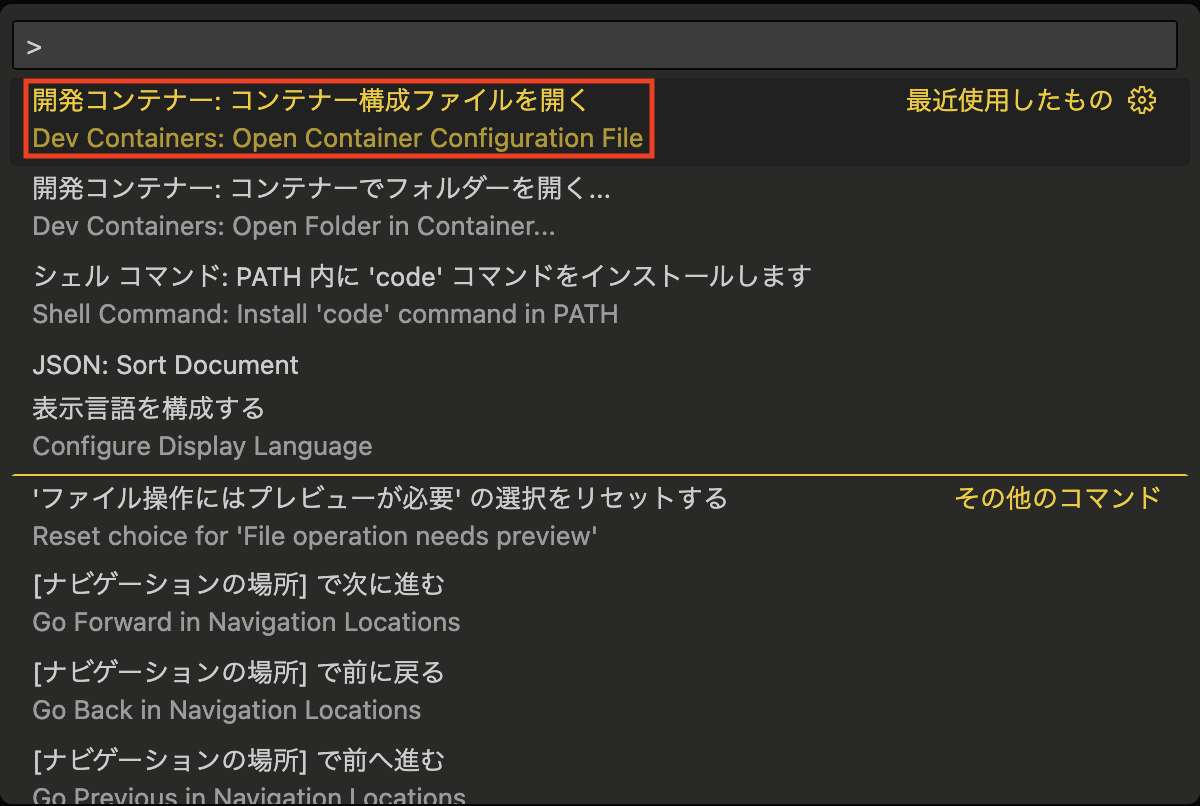
コマンドパレットから「開発コンテナー: コンテナー構成ファイルを開く...」を選択します。
devcontainer.jsonファイルが表示されます。
Dockerfileのリンクを押すと、Dockerfileも確認できます。
コンテナー構成を保存する場所として「ユーザーデータ フォルダーに構成を追加する」を選択時、macOSの場合、/Users/<UserName>/Library/Application\ Support/Code/User/globalStorage/ms-vscode-remote.remote-containers/configs/<FolderName>/.devcontainer配下にdevcontainer.json及びDockerfileが生成されます。ファイルが存在する限り同じ構成を利用することができます。
おわりに
セキュリティの観点では、SBOMを使用してアプリケーションに含まれるパッケージをカタログ化することで、ソフトウェアサプライチェーンのセキュリティを強化することが今後重要になってくるため、BuildKitを使ったイメージの構築を学ぶのが良いと思います。
