はじめに
前回の記事(Windows10のPCに分析環境(Python3+JupyterLab)を作ってみた)で、分析環境はとりあえず整備完了。
待ちに待った、Pythonプログラミングを開始!
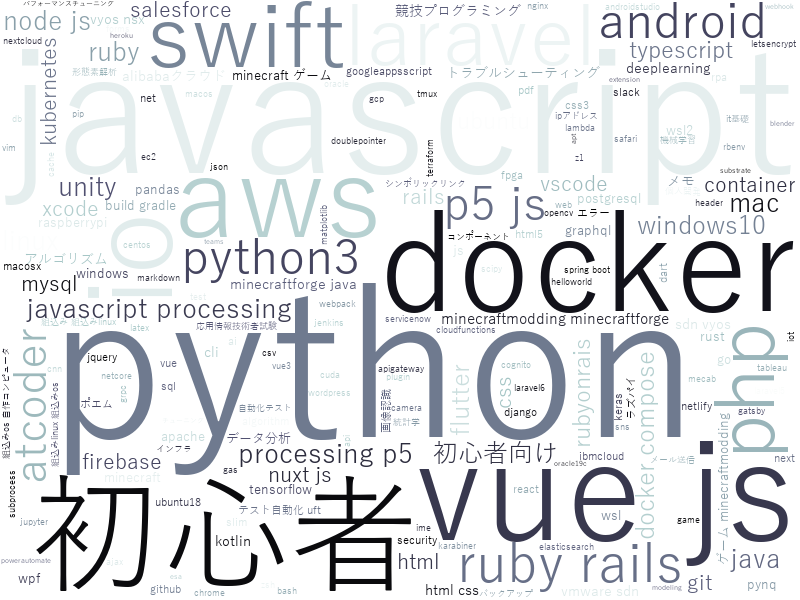
今回はWordCloudを描画します。WordCloud自体はこちらを参照のこと。
本稿で紹介すること
- Qiita APIからの記事情報の取得
- WordCloudの描画
Qiita API v2ドキュメント
WordCloud for Python documentation
本稿で紹介しないこと
- Pythonライブラリの使い方
- requests
- json
- wordcloud
- pathlib
サンプルコード
Code量も多くないので、全体のCodeを紹介。
ポイントは2つ。
1. GETリクエストを実行する際、アクセストークンを指定
Qiita API v2ドキュメントに以下の記載があるように、アクセストークンを取得し、Codeに埋め込むのがベター。
利用制限
認証している状態ではユーザごとに1時間に1000回まで、認証していない状態ではIPアドレスごとに1時間に60回までリクエストを受け付けます。
2. イメージを描画する際、日本語対応フォントを指定
WordCloud for Python documentationに以下の記載があるように、自然言語処理で日本語を扱うため、日本語対応フォントを(適宜インストールして)指定するのがベター。
font_path:string
Font path to the font that will be used (OTF or TTF). Defaults to DroidSansMono path on a Linux machine. If you are on another OS or don’t have this font, you need to adjust this path.
import requests
import json

url = 'https://qiita.com/api/v2/items?per_page=100&page='
headers = {'Authorization': 'Bearer ${YOUR ACCESS-TOKEN}'}

tags = []
for i in range(5):
    print('=====')
    print('Downloading ... ' + url + str(i+1))
    print('-----')
    #response = requests.get(url + str(i+1))
    response = requests.get(url + str(i+1), headers=headers)

    for article in json.loads(response.text):
        print(article['title'])
        tags.extend([tag['name'].lower() for tag in article['tags']])
    print('=====')

from wordcloud import WordCloud
from pathlib import Path

result_dir_path = Path('..').joinpath('result')

# 分割テキストからwordcloudを生成・フォント指定
wc = WordCloud(font_path=r"C:\WINDOWS\Fonts\YuGothR.ttc", background_color='white', colormap='bone', width=800, height=600)
wc.generate(" ".join(tags))
wc.to_file(result_dir_path.joinpath('trends_of_qiita_wordcloud_shortver.png'))
Pythonと(色は薄いが)JavaScriptのタグを付与した記事が多い模様。
まとめ
Qiita記事のタグを使って、WordCloudを描画する方法を紹介。
