Python DjangoフレームワークでHTML表示
前回の簡単な文字表示アプリ記事の続きです。
Hello World!と表示させた超基礎内容でした。
今回は、pythonで処理した内容をキレイにブラウザで表示させるための基礎としてHTMLに記述することで表現の幅を広げます。

内容が古くなったのでDjango 3で記事更新しました。 updated: 2021/09
 Pythonで作るDjangoアプリ記事一覧
| 内容 | |
|---|---|
| part1 | 簡単な文字表示アプリを作る |
| part2 | HTMLテンプレート表示 ← ココ |
| part3 | "画像" "CSS" "Javascript"実装 |
| part4 | フォーム送信 |
| part5 | データベースの値取得・更新 |
| 番外編 | Django AWS デプロイ |
| APIサーバー編 | Django REST frameworkとReact #4 |
| 単体テスト編 | Django unittestで単体テスト |
HTMLテンプレートでWEBページを作る
WEBアプリを作るための最初のステップとしてHTMLから始めた人は多いのではないでしょうか?
DjangoでもHTMLテンプレートというのを使っていて、サーバーに保存されているデータや、なにかしらの計算をしてページを作る(動的に作るという)ことができます。
ソースコード
この章のコードは以下です。確認やコピペでどうぞ
HTMLファイルを作成
前回文字を固定で表示させることはできましたが、毎回同じ表示をするようなアプリではDjango使う意味ないですよね。
ということでHTMLテンプレートを使って柔軟に表示をさせるのは必要不可欠です。とうことでブラウザに表示させるための基礎となるhtmlファイルを作成していきます。
基本的にはHTMLで、データを埋め込むための記法を使うことができるという感じです。
フォルダ、ファイルの作成
templateフォルダをアプリケーションフォルダ内に作成。
C:\Users\○○○\django\testproject\webtestapp\templates
webtestappフォルダ作成。
C:\Users\○○○\django\testproject\webtestapp\templates\webtestapp
htmlファイルを作成。
C:\Users\○○○\django\testproject\webtestapp\templates\webtestapp\index.html
簡単な表示をさせてみます。
<!doctype html>
<html lang="ja">
  <head>
    <meta charset="utf-8">
    <title>テストWebアプリ</title>
  </head>
  <body>
    <h1>index.html表示してます</h1>
  </body>
</html>
ただのHTMLですね。
viewsとhtmlテンプレートで表示を作る
views.py変更 htmlに表示させる内容
前回使っていたHttpResponseはテンプレートを出力(レンダー)するのには不要なので消してテンプレートを使うように変えましょう。
from django.shortcuts import render

def index(request):
    return render(request,'webtestapp/index.html')
render関数の引数はrequestが第一引数。
第二引数はtemplatesフォルダからみてどこのファイルを参照するかです。
testproject/webtestapp/templates/webtestapp/index.html
という構成にしました。
Djangoがデフォルトでtemplatesまではhtmlファイルを探してくれるのでそれ以降のフォルダを指定するので
'webtestapp/index.html' になります。
テンプレート使った表示の確認
python manage.py runserver
OKそうです。
ただ、HTMLを表示させただけですが、表示は確認できました。
データをテンプレートに埋め込む
では、本題のデータを埋め込む方法を見ていきましょう
<!doctype html>
<html lang="ja">
  <head>
    <meta charset="utf-8">
    <title>テストWebアプリ</title>
  </head>
  <body>
    <h1>index.html表示してます</h1>
    {{ insert_something }}
  </body>
</html>
変更箇所は{{ insert_something }}だけです。insert_somethingというデータをviewに用意しましょう。
データは辞書で指定します。変数の名前は何でもいいですので今回はmy_dictを引数に追加することにします。
from django.shortcuts import render

def index(request):
    my_dict = {
        'insert_something':"views.pyのinsert_something部分です。",
    }
    return render(request, 'webtestapp/index.html', my_dict)
用意したデータを第三引数に指定。HTMLテンプレートの中でinsert_somethingというデータを埋め込むと指定したので、対応するようにキー名insert_somethingを用意しました。
表示を確認してみましょう。
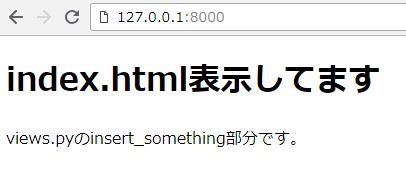
ちゃんとmydictの中のinsert_somethingの中身である、
views.pyのinsert_something部分です。
という文字を表示できました。
複数データを埋め込む
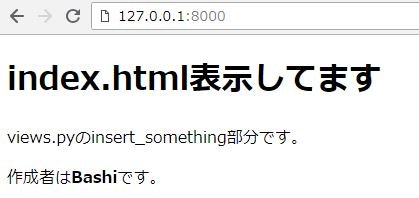
何個でも表示可能です。追加したいときは手順は同じように辞書とhtmlテンプレートファイルに追加します。
from django.shortcuts import render

def index(request):
    my_dict = {
        'insert_something':"views.pyのinsert_something部分です。",
        'name':'Bashi',
    }
    return render(request, 'webtestapp/index.html', my_dict)
<!doctype html>
<html lang="ja">
  <head>
    <meta charset="utf-8">
    <title>テストWebアプリ</title>
  </head>
  <body>
    <h1>index.html表示してます</h1>
    {{ insert_something }}
    <p>作成者は<b>{{ name }}</b>です。</p>
  </body>
</html>
テンプレートで for によりリストデータを表示させる
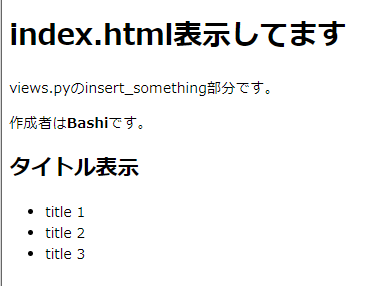
Pythonで使えるforと同じようなものをhtmlテンプレートでも使うことができます。
試しにテキトーなタイトルを表示させるため複数のデータ(リスト)を用意します。
from django.shortcuts import render

def index(request):
    my_dict = {
        'insert_something':"views.pyのinsert_something部分です。",
        'name':'Bashi',
        'test_titles': ['title 1', 'title 2', 'title 3'],  # 追加
    }
    return render(request, 'webtestapp/index.html', my_dict)
テンプレートではデータを表示するためforを使います。
<!doctype html>
<html lang="ja">
  <head>
    <meta charset="utf-8">
    <title>テストWebアプリ</title>
  </head>
  <body>
    <h1>index.html表示してます</h1>
    {{ insert_something }}
    <p>作成者は<b>{{ name }}</b>です。</p>
    <h2>タイトル表示</h2>
    <ul>
      {% for title in test_titles %}
        <li>{{ title }}</li>
      {% endfor %}
    </ul>
  </body>
</html>
Pythonのforと違うのはendforと終わりを書くところですが、大体同じように使えます。
テンプレートでの記法
{% %}と{{ }}というのが出てきて、間違いそうですが、以下のような違いがあります。
-
{{ }}はデータをテンプレートの中に埋め込んでほしい(画面に表示したい)ときに使う -
{% %}は、何かしら計算・処理をしてほしい(※画面に出力するのではない)ときに使う
細かくは触れませんがテンプレートで使える for は似てるだけでPythonのforより性能悪く、機能制限されているのでガッツリ処理をするようなものには使わない方がいいです。
テンプレートで if を使い、表示させるデータに条件を付ける
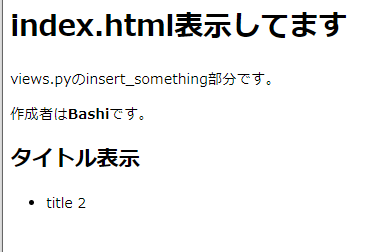
試しにtest_titlesのtitle 2だけ表示するようにしてます。
<!doctype html>
<html lang="ja">
  <head>
    <meta charset="utf-8">
    <title>テストWebアプリ</title>
  </head>
  <body>
    <h1>index.html表示してます</h1>
    {{ insert_something }}
    <p>作成者は<b>{{ name }}</b>です。</p>
    <h2>タイトル表示</h2>
    <ul>
      {% for title in test_titles %}
        {% if title == 'title 2'%}
          <li>{{ title }}</li>
        {% endif %}
      {% endfor %}
    </ul>
  </body>
</html>
elif, elseも使える
...
    <ul>
      {% for title in test_titles %}
        {% if title == 'title 2' %}
          <li>{{ title }}</li>
        {% elif title == 'title 3' %}
          <li>見せられないよ</li>
        {% else %}
          <li>xxxx</li>
        {% endif %}
      {% endfor %}
    </ul>
...
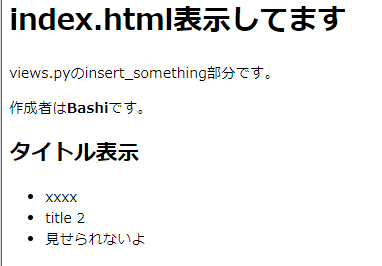
-
title 2はifの条件なので普通に表示 -
title 3はelifの条件なので「見せられないよ」 -
title 1はif, elifの条件に当てはまらないので「xxxx」
が、表示されています。
ついでに
※今回わざわざtemplatesフォルダの中にwebtestappフォルダを作ったのは、フォルダ分けできるというのを示したかったからです。
もしそんなにテンプレートの数が多くないというなら、webtestappを作る必要はなく、templatesフォルダ直下にindex.htmlをおいて、
return render(request, 'index.html')
でもOK。
 一連の記事
一連の記事
| 内容 | |
|---|---|
| part1 | 簡単な文字表示アプリを作る |
| part2 | HTMLテンプレート表示 ← ココ |
| part3 | "画像" "CSS" "Javascript"実装 |
| part4 | フォーム送信 |
| part5 | データベースの値取得・更新 |
| 番外編 | Django AWS デプロイ |
| APIサーバー編 | Django REST frameworkとReact #4 |
参考
この章のコードは以下です。確認やコピペでどうぞ

