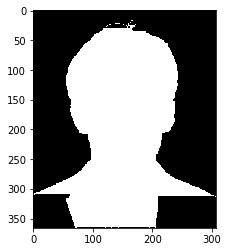
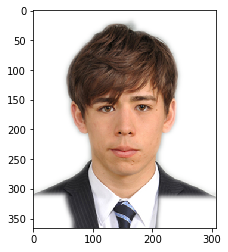
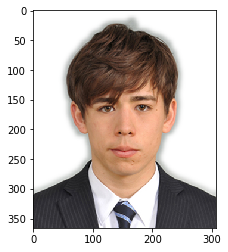
こちらのスタックオーバーフロー回答を元に作成
https://stackoverflow.com/a/29314286
githubで公開しているコードはこちら
https://github.com/AtomScott/background-remover
今回使用するライブラリ
import cv2
import numpy as np
import matplotlib.pyplot as plt
パラメータの設定
写真によって調整する必要がある
BLUR = 21
CANNY_THRESH_1 = 10
CANNY_THRESH_2 = 100
MASK_DILATE_ITER = 10
MASK_ERODE_ITER = 10
MASK_COLOR = (0.0,0.0,1.0) # In BGR format
画像を読み込む
img = cv2.imread('sample.jpg')
cv2.imwrite('cv.jpg', img)

plt.imshow(img)
plt.show()
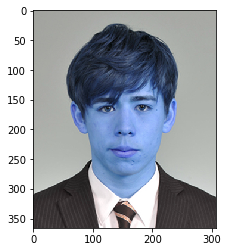
OpenCVはBGRで読み込むので、そのまま表示してみようとすると色が変なふうになってしまいます。
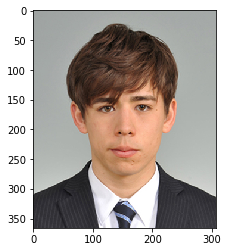
そのため、以下のように一工夫加えます。
plt.imshow(cv2.cvtColor(img, cv2.COLOR_BGR2RGB))
plt.show()
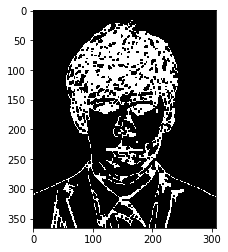
エッジを見つける
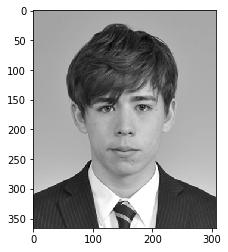
まず、グレースケールの画像を用意します。
gray = cv2.cvtColor(img,cv2.COLOR_BGR2GRAY)

plt.imshow(gray, cmap='gray')
plt.show()
# -- Edge detection -------------------------------------------------------------------
edges = cv2.Canny(gray, CANNY_THRESH_1, CANNY_THRESH_2)
edges = cv2.dilate(edges, None)
edges = cv2.erode(edges, None)

plt.imshow(edges, cmap='gray')
plt.show()
輪郭を見つける
contour_info = []
contours, _ = cv2.findContours(edges, cv2.RETR_LIST, cv2.CHAIN_APPROX_NONE)

for c in contours:
    contour_info.append((
        c,
        cv2.isContourConvex(c),
        cv2.contourArea(c),
    ))
contour_info = sorted(contour_info, key=lambda c: c[2], reverse=True)
max_contour = contour_info[0]
一番大きい輪郭を使ってマスクを作る
# -- Create empty mask, draw filled polygon on it corresponding to largest contour ----
# Mask is black, polygon is white
mask = np.zeros(edges.shape)
cv2.fillConvexPoly(mask, max_contour[0], (255))

plt.imshow(mask, cmap='gray')
plt.show()
マスクをスムージングさせ、3チャネルにする
mask = cv2.dilate(mask, None, iterations=MASK_DILATE_ITER)
mask = cv2.erode(mask, None, iterations=MASK_ERODE_ITER)
mask = cv2.GaussianBlur(mask, (BLUR, BLUR), 0)
mask_stack = np.dstack([mask]*3)    # Create 3-channel alpha mask

plt.imshow(mask_stack, cmap='gray')
plt.show()
Clipping input data to the valid range for imshow with RGB data ([0..1] for floats or [0..255] for integers).
マスクと背景を合体させる
mask_stack  = mask_stack.astype('float32') / 255.0          # Use float matrices,
img         = img.astype('float32') / 255.0                 #  for easy blending

masked = (mask_stack * img) + ((1-mask_stack) * MASK_COLOR) # Blend
masked = (masked * 255).astype('uint8')                     # Convert back to 8-bit

c_blue, c_green, c_red = cv2.split(img)

img_a = cv2.merge((c_red, c_green, c_blue, mask.astype('float32') / 255.0))

plt.imshow(img_a)
plt.show()
パラメータチューニング
結果を見て分かるとおり、パラメータの設定が上手くいっていないようなので、調整します。
これを簡単にするために、上記でやってきたことを一つの関数にまとめます。
def remove_bg(
    path,
    BLUR = 21,
    CANNY_THRESH_1 = 10,
    CANNY_THRESH_2 = 200,
    MASK_DILATE_ITER = 10,
    MASK_ERODE_ITER = 10,
    MASK_COLOR = (0.0,0.0,1.0),
):
    img = cv2.imread(path)
    gray = cv2.cvtColor(img,cv2.COLOR_BGR2GRAY)

    edges = cv2.Canny(gray, CANNY_THRESH_1, CANNY_THRESH_2)
    edges = cv2.dilate(edges, None)
    edges = cv2.erode(edges, None)

    contour_info = []
    contours, _ = cv2.findContours(edges, cv2.RETR_LIST, cv2.CHAIN_APPROX_NONE)
    for c in contours:
        contour_info.append((
            c,
            cv2.isContourConvex(c),
            cv2.contourArea(c),
        ))
    contour_info = sorted(contour_info, key=lambda c: c[2], reverse=True)
    max_contour = contour_info[0]

    mask = np.zeros(edges.shape)
    cv2.fillConvexPoly(mask, max_contour[0], (255))

    mask = cv2.dilate(mask, None, iterations=MASK_DILATE_ITER)
    mask = cv2.erode(mask, None, iterations=MASK_ERODE_ITER)
    mask = cv2.GaussianBlur(mask, (BLUR, BLUR), 0)
    mask_stack = np.dstack([mask]*3)    # Create 3-channel alpha mask

    mask_stack  = mask_stack.astype('float32') / 255.0          # Use float matrices,
    img         = img.astype('float32') / 255.0                 #  for easy blending

    masked = (mask_stack * img) + ((1-mask_stack) * MASK_COLOR) # Blend
    masked = (masked * 255).astype('uint8')                     # Convert back to 8-bit

    c_blue, c_green, c_red = cv2.split(img)

    img_a = cv2.merge((c_red, c_green, c_blue, mask.astype('float32') / 255.0))


    plt.imshow(img_a)
    plt.show()
    return img_a
img_fin = remove_bg(
    path = 'sample.jpg',
    BLUR = 21,
    CANNY_THRESH_1 = 5,
    CANNY_THRESH_2 = 70,
    MASK_DILATE_ITER = 10,
    MASK_ERODE_ITER = 6,
)
画像の保存
最後に画像を保存して終わりです。
fig = plt.figure(frameon=False)
ax = plt.Axes(fig, [0., 0., 1., 1.])
ax.set_axis_off()
fig.add_axes(ax)
ax = plt.Axes(fig, [0., 0., 1., 1.])
ax.set_axis_off()
fig.add_axes(ax)
ax.imshow(img_fin)
fig.savefig('fin.png')
