自分の勉強用のメモです。
AWS で EKS の Cluster Autoscaler を試してみる
全体の流れ
- AWS 上に EKS の Cluster を作成する
- Auto Scaling の 設定を編集する
- Auto Scaling の Policy を作成する
- cluster_autoscaler.yaml を作成する
- nginx の deployment を作成する
- スケールする
- スケールアウトする
1. AWS 上に EKS の Cluster を作成する
1-1. ssh でログインした Bastian ノードから以下のコマンドを実行し、EKS の Cluster を作成します。Worker ノード数は 2個にしておきます。( Node 数を指定しないと 2個作成される。)
eksctl create cluster --name test --region=us-east-1 --node-type t2.medium
1-2. Cluster の作成が終わったら、Node を確認します。
[user@**** ~]$ kubectl get nodes
NAME                   STATUS   ROLES    AGE     VERSION
****112.ec2.internal   Ready    <none>   8m21s   v1.14.7-eks-1861c5
****138.ec2.internal   Ready    <none>   8m15s   v1.14.7-eks-1861c5
[cloud_user@ip-10-192-10-138 ~]$
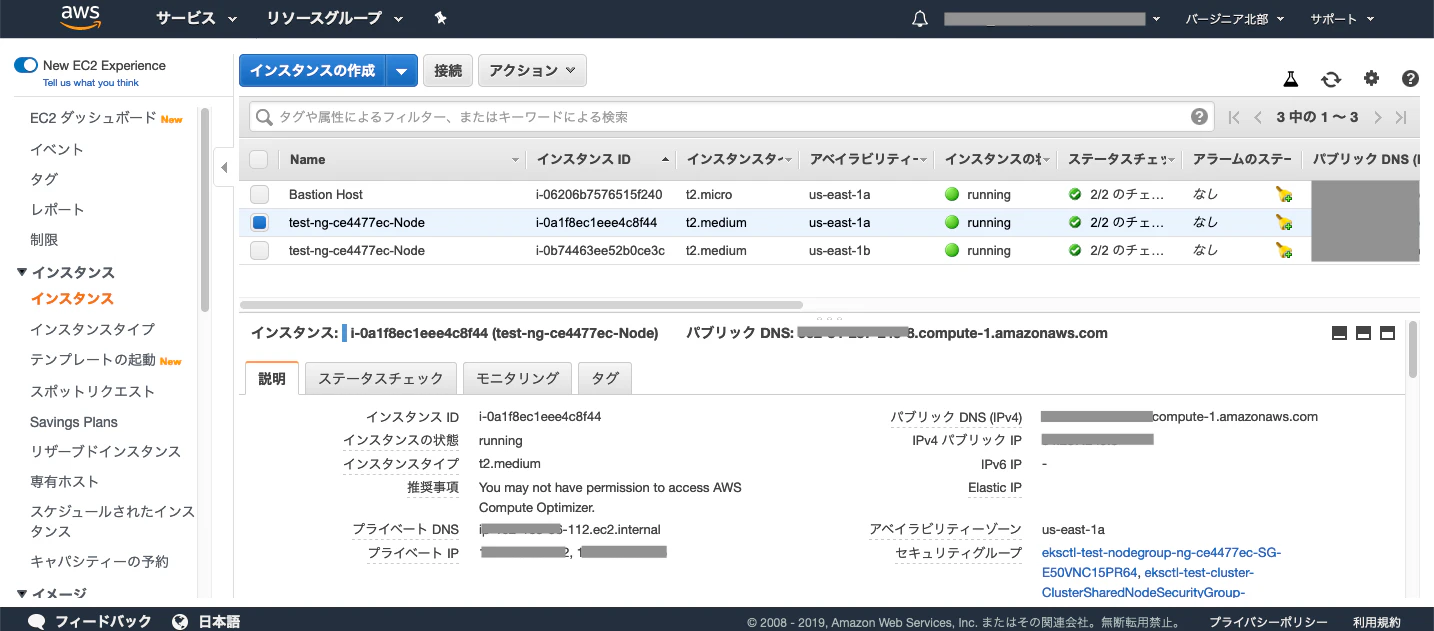
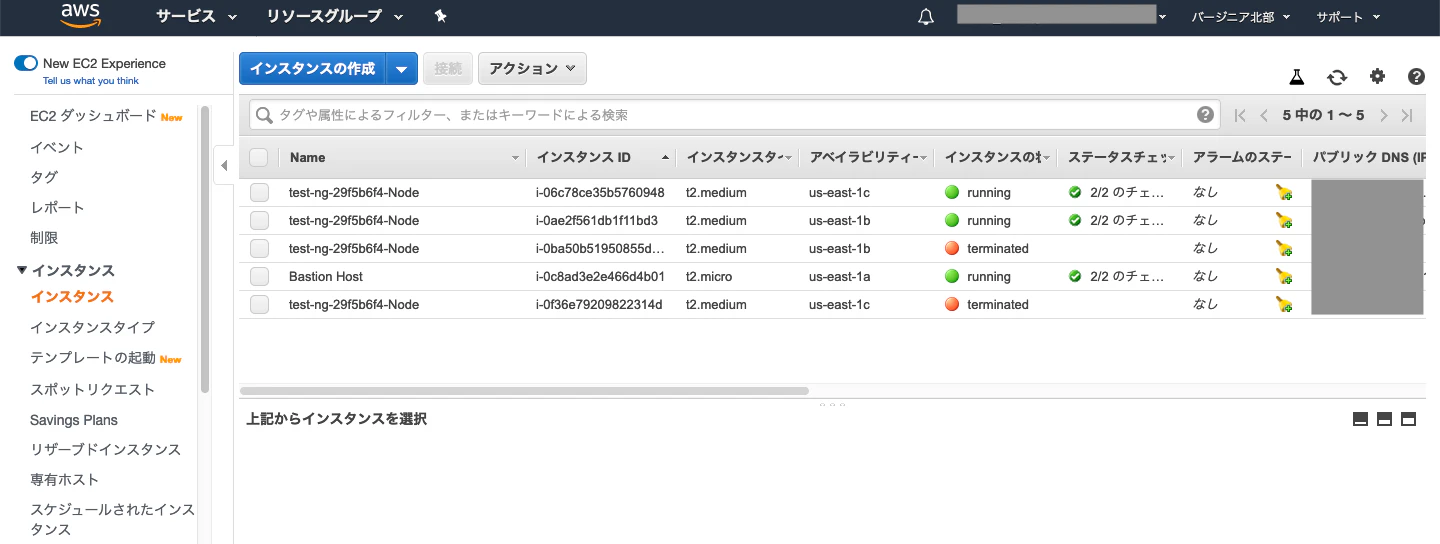
1-3. AWS の Webコンソール でも確認してみます。
コンピューティング > EC2 > インスタンス
Worker Node が 2 個あるのが確認できます。
参考記事
AWS で EKS の Cluster を作成する:
https://qiita.com/Asuka_Saito/items/7346d3fbc5ae241b5354
2. Auto Scaling の設定を編集する
2-1. AWS の Webコンソール にログインして、 AutoScaling の設定を編集します。
コンピューティング > EC2 > AUTO SCALING > Auto Scaling グループ
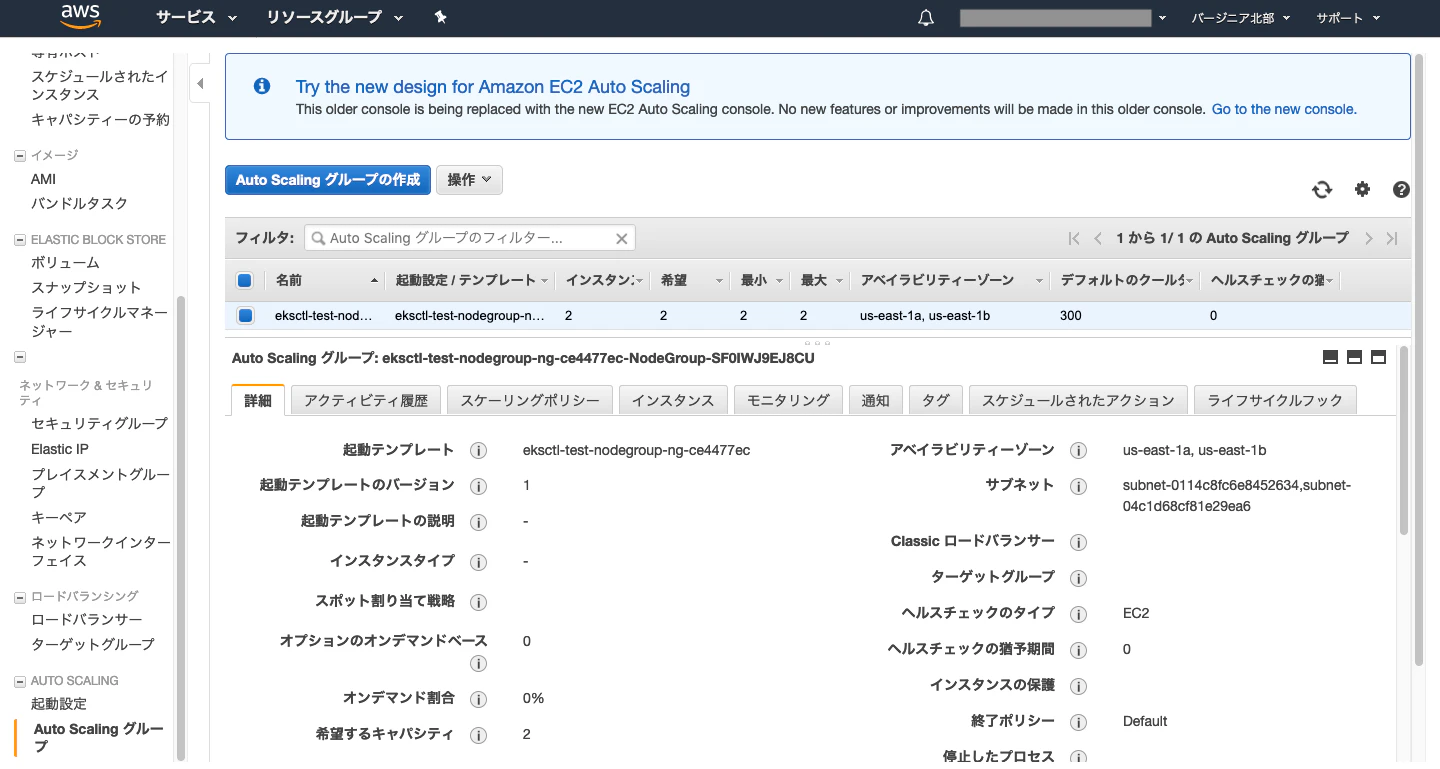
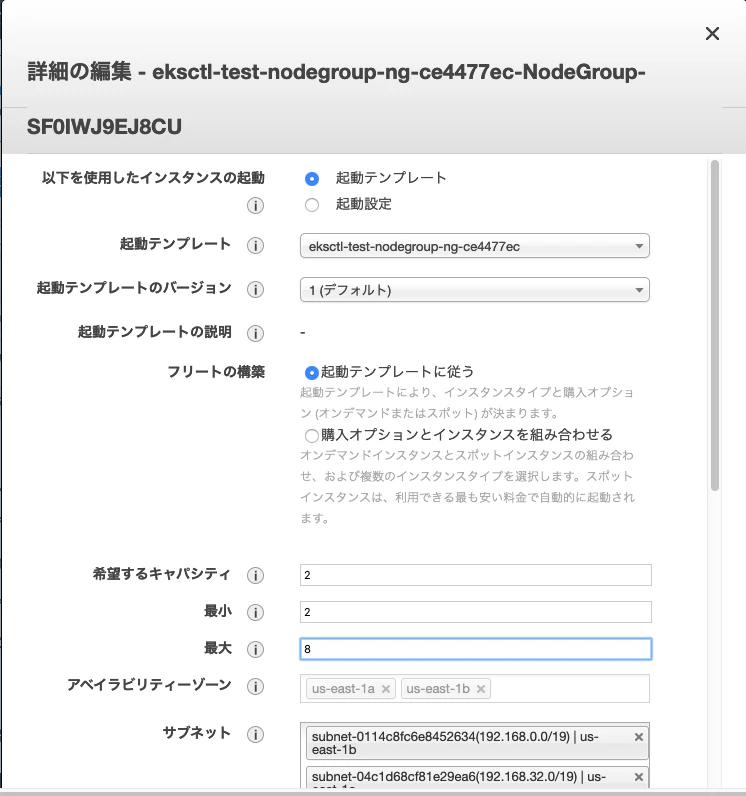
2-2. 操作 ボタンをクリックして「編集」を選択し、表示された画面で最小を 2 、最大を 8 に設定して下の方にある「保存」ボタンをクリックして保存します。
コマンドラインからも操作できます。
[user@**** ~]$ aws autoscaling update-auto-scaling-group --auto-scaling-group-name eksctl-test-nodegroup-ng-11e0720e-NodeGroup-1DZ33WIH5N6S6 --min-size 2 --max-size 8
[user@**** ~]$
3. Auto Scaling の Policyを作成する
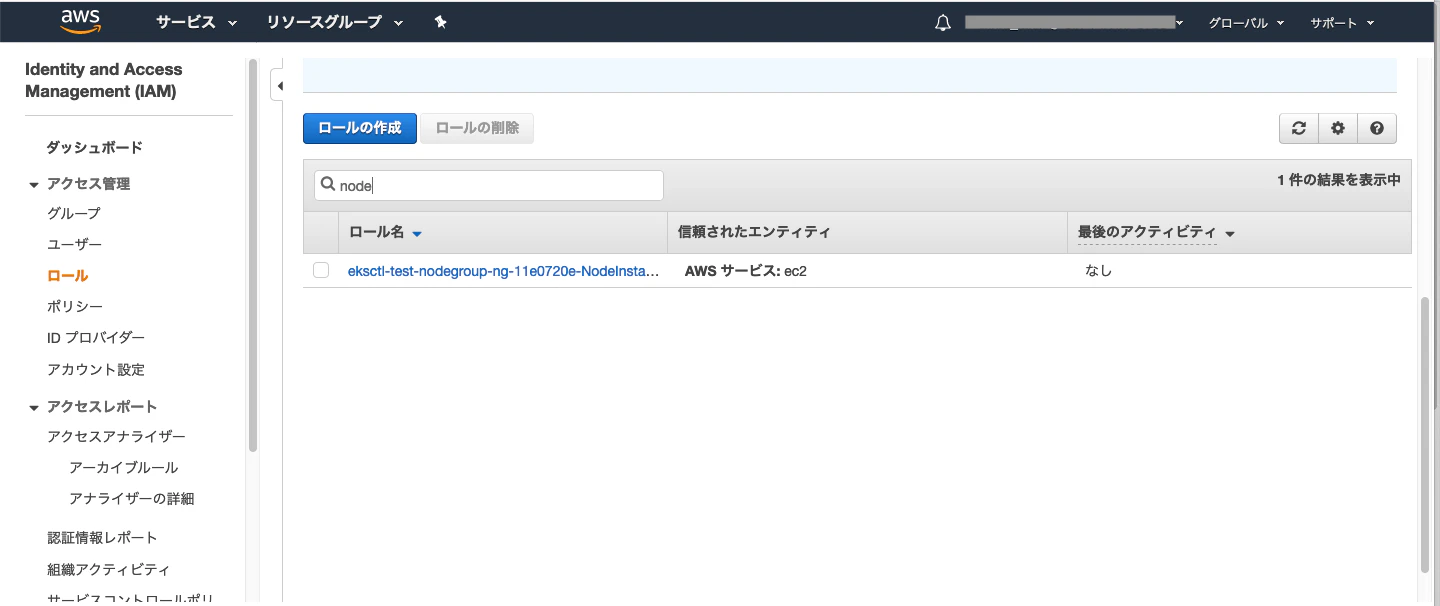
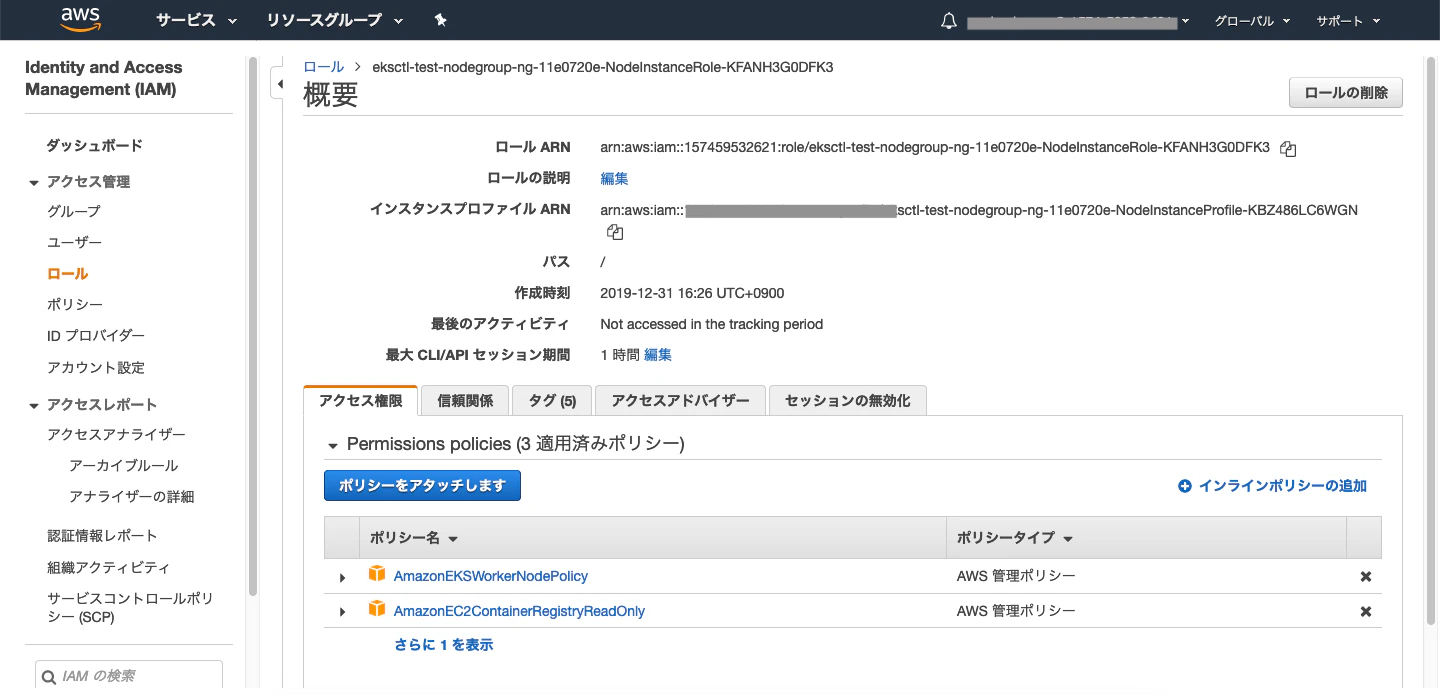
3-1. AWS の Webコンソール にログインして、IAM に Auto Scaling のポリシーを追加します。
セキュリティ、ID、およびコンプライアンス > IAM > アクセス管理 > ロール
node で絞り込みして表示されたロールをクリックします。
3-2. インラインポリシーの追加 をクリックします。
3-3. JSON タブをクリックします。
3-4. エディタ内に記載されている内容を消して、以下をペーストします。
{
  "Version": "2012-10-17",
  "Statement": [
    {
      "Effect": "Allow",
      "Action": [
        "autoscaling:DescribeAutoScalingGroups",
        "autoscaling:DescribeAutoScalingInstances",
        "autoscaling:SetDesiredCapacity",
        "autoscaling:TerminateInstanceInAutoScalingGroup",
        "autoscaling:DescribeTags"
      ],
      "Resource": "*"
    }
  ]
}
参考させていただいたサイト
Configure Cluster Autoscaler (CA) :
https://eksworkshop.com/beginner/080_scaling/deploy_ca/
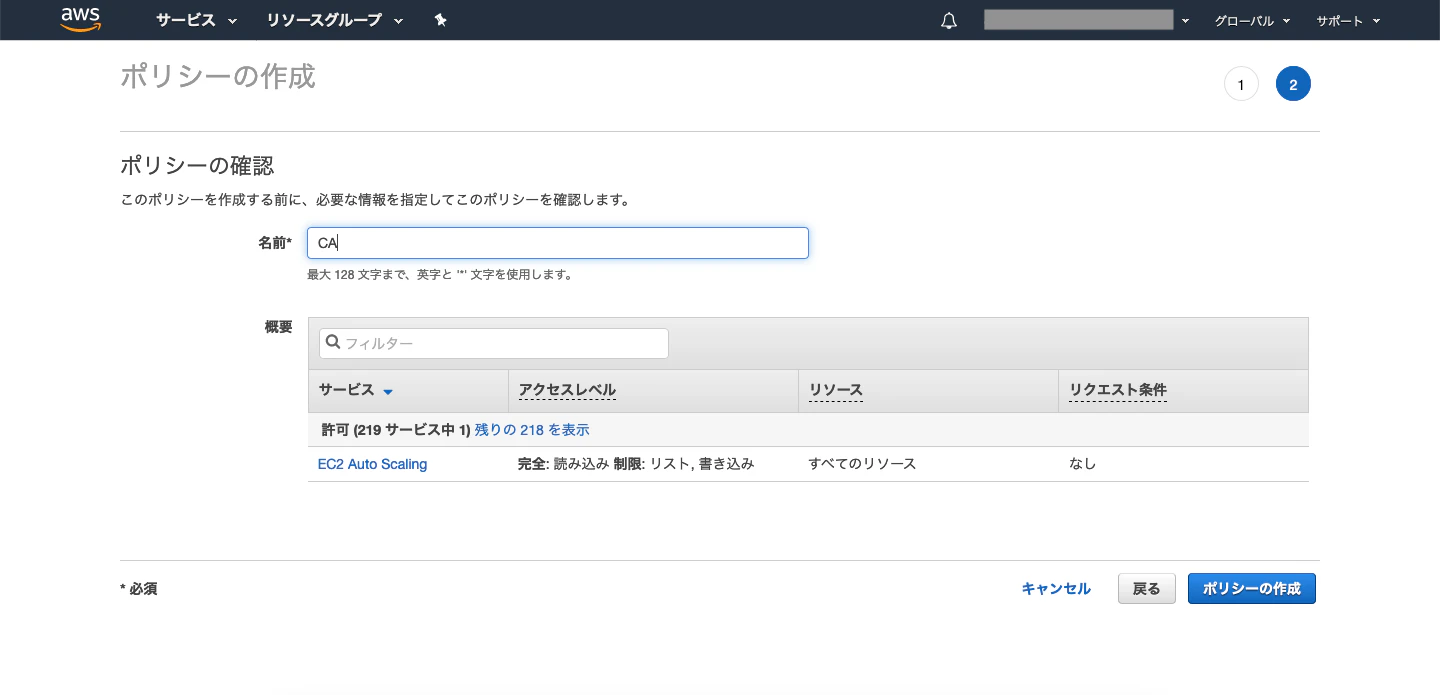
3-5. 「ポリシーの確認」ボタンをクリックします。
3-6. 名前を入力し「ポリシーの作成」ボタンをクリックします。
4. cluster_autoscaler.yaml を作成する
4-1. ssh でログインした Bastian ノードから以下を実行します。
curl -O https://eksworkshop.com/scaling/deploy_ca.files/cluster_autoscaler.yml
参考させていただいたサイト
Amazon EKS Workshop:
https://eksworkshop.com/
[user@**** ~]$ curl -O https://eksworkshop.com/scaling/deploy_ca.files/cluster_autoscaler.yml
  % Total    % Received % Xferd  Average Speed   Time    Time     Time  Current
                                 Dload  Upload   Total   Spent    Left  Speed
100  3766  100  3766    0     0  26152      0 --:--:-- --:--:-- --:--:-- 26152
[user@**** ~]$ ls
cluster_autoscaler.yml
[user@**** ~]$
4-2. cluster_autoscaler.yml を編集します。
cluster_autoscaler.yml 内の AUTOSCALING GROUP NAME の部分を Auto Scaling グループの名前に置き換えます。グループ名は AWS の Webコンソール にログインし、コンピューティング > EC2 > AUTO SCALING > Auto Scaling グループで確認することができます。(3-1参照)
AWS_REGION の value を使用するデータセンターの名前に変更します。
以下 cluster_autoscaler.yml の抜粋
          command:
            - ./cluster-autoscaler
            - --v=4
            - --stderrthreshold=info
            - --cloud-provider=aws
            - --skip-nodes-with-local-storage=false
            - --nodes=2:8:<AUTOSCALING GROUP NAME>
          env:
            - name: AWS_REGION
              value: us-east-1
4-3. cluster_autoscaler.yml をデプロイします。
[cuser@**** ~]$ kubectl apply -f cluster_autoscaler.yml
serviceaccount/cluster-autoscaler created
clusterrole.rbac.authorization.k8s.io/cluster-autoscaler created
role.rbac.authorization.k8s.io/cluster-autoscaler created
clusterrolebinding.rbac.authorization.k8s.io/cluster-autoscaler created
rolebinding.rbac.authorization.k8s.io/cluster-autoscaler created
deployment.apps/cluster-autoscaler created
[user@**** ~]$
5. nginx の deployment を作成する
5-1. nginx の deployment を作成します。
vi nginx.yaml
5-2. 以下の内容を記載して保存します。
apiVersion: apps/v1
kind: Deployment
metadata:
  name: nginx-to-scaleout
spec:
  replicas: 1
  selector:
    matchLabels:
      app: nginx
  template:
    metadata:
      labels:
        service: nginx
        app: nginx
    spec:
      containers:
      - image: nginx
        name: nginx-to-scaleout
        resources:
          limits:
            cpu: 500m
            memory: 512Mi
          requests:
            cpu: 500m
            memory: 512Mi
参考させていただいた記事
EKSのAuto Scalingを試してみた:
https://dev.classmethod.jp/cloud/aws/trying-auto-scaling-eksworkshop/
5-3. nginx.yaml をデプロイします。
[user@**** ~]$ kubectl apply -f nginx.yaml
deployment.apps/nginx-to-scaleout created
5-4. deployment と pod と node を確認します。
[user@**** ~]$ kubectl get deployment
NAME                READY   UP-TO-DATE   AVAILABLE   AGE
nginx-to-scaleout   1/1     1            1           30s
[user@**** ~]$ kubectl get pods
NAME                                 READY   STATUS    RESTARTS   AGE
nginx-to-scaleout-84f9cdbd84-rqzxq   1/1     Running   0          56s
[user@**** ~]$
[user@**** ~]$ kubectl get nodes
NAME                   STATUS   ROLES    AGE   VERSION
****85.ec2.internal    Ready    <none>   17m   v1.14.7-eks-1861c5
****210.ec2.internal   Ready    <none>   17m   v1.14.7-eks-1861c5
[user@**** ~]$
6. スケールする
6-1. 以下のコマンドを実行し、pod の数を 10 個にします。
[user@**** ~]$ kubectl scale --replicas=10 deployment/nginx-to-scaleout
deployment.extensions/nginx-to-scaleout scaled
[user@****  ~]$
6-2. pod の数を確認します。
[user@**** ~]$ kubectl get pods
NAME                                 READY   STATUS    RESTARTS   AGE
nginx-to-scaleout-84f9cdbd84-628hf   1/1     Running   0          13s
nginx-to-scaleout-84f9cdbd84-67kcp   1/1     Running   0          13s
nginx-to-scaleout-84f9cdbd84-9xqfl   0/1     Pending   0          13s
nginx-to-scaleout-84f9cdbd84-fsjkz   0/1     Pending   0          13s
nginx-to-scaleout-84f9cdbd84-k6pjz   0/1     Pending   0          13s
nginx-to-scaleout-84f9cdbd84-kvcl5   1/1     Running   0          13s
nginx-to-scaleout-84f9cdbd84-l9znr   1/1     Running   0          13s
nginx-to-scaleout-84f9cdbd84-lhqp5   1/1     Running   0          13s
nginx-to-scaleout-84f9cdbd84-rqzxq   1/1     Running   0          2m38s
nginx-to-scaleout-84f9cdbd84-tgtzm   0/1     Pending   0          13s
[user@**** ~]$
6-3. インスタンスが作成されつつあるか確認します。
コンピューティング > EC2 > インスタンス

6-4. 数分後再び pod を確認します。全て Running になっていれば、 node のスケールも終了しているはずです。
[user@**** ~]$ kubectl get pods
NAME                                 READY   STATUS    RESTARTS   AGE
nginx-to-scaleout-84f9cdbd84-628hf   1/1     Running   0          4m25s
nginx-to-scaleout-84f9cdbd84-67kcp   1/1     Running   0          4m25s
nginx-to-scaleout-84f9cdbd84-9xqfl   1/1     Running   0          4m25s
nginx-to-scaleout-84f9cdbd84-fsjkz   1/1     Running   0          4m25s
nginx-to-scaleout-84f9cdbd84-k6pjz   1/1     Running   0          4m25s
nginx-to-scaleout-84f9cdbd84-kvcl5   1/1     Running   0          4m25s
nginx-to-scaleout-84f9cdbd84-l9znr   1/1     Running   0          4m25s
nginx-to-scaleout-84f9cdbd84-lhqp5   1/1     Running   0          4m25s
nginx-to-scaleout-84f9cdbd84-rqzxq   1/1     Running   0          6m50s
nginx-to-scaleout-84f9cdbd84-tgtzm   1/1     Running   0          4m25s
[user@**** ~]$
6-5. node の数を確認します。 2 から 4 に増えています。
[user@**** ~]$ kubectl get nodes
NAME                   STATUS   ROLES    AGE     VERSION
****85.ec2.internal    Ready    <none>   24m     v1.14.7-eks-1861c5
****93.ec2.internal    Ready    <none>   3m45s   v1.14.7-eks-1861c5
****210.ec2.internal   Ready    <none>   24m     v1.14.7-eks-1861c5
****50.ec2.internal    Ready    <none>   3m49s   v1.14.7-eks-1861c5
[user@**** ~]$
7. スケールアウトする
7-1. 以下のコマンドを実行して pod を 2個に減らします。
[user@**** ~]$ kubectl scale --replicas=2 deployment/nginx-to-scaleout
deployment.extensions/nginx-to-scaleout scaled
[user@****  ~]$
7-2. しばらくしてから pod を確認します。
[user@**** ~]$ kubectl get pods
NAME                                 READY   STATUS    RESTARTS   AGE
nginx-to-scaleout-84f9cdbd84-628hf   1/1     Running   0          17m
nginx-to-scaleout-84f9cdbd84-rqzxq   1/1     Running   0          20m
[user@**** ~]$
7-3. しばらくしてから node を確認します。
node も 2個になり、減っていることが確認できました。
[user@**** ~]$ kubectl get nodes
NAME                   STATUS   ROLES    AGE   VERSION
****85.ec2.internal    Ready    <none>   45m   v1.14.7-eks-1861c5
****210.ec2.internal   Ready    <none>   45m   v1.14.7-eks-1861c5
[user@**** ~]$
AWS の Webコンソールで確認すると、node が terminated になっていることがわかります。
増えたり減ったり自在にできてこれはめちゃ良いですね。
![]()
![]()
![]()
![]()