開発環境
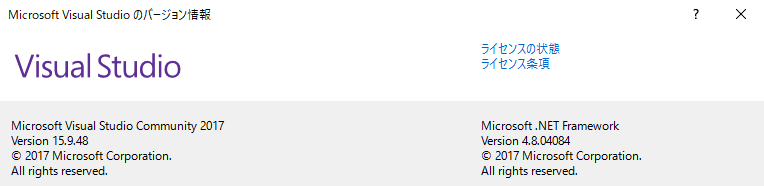
1.Microsoft Visual Studio Community 2017
無償ライセンスです。
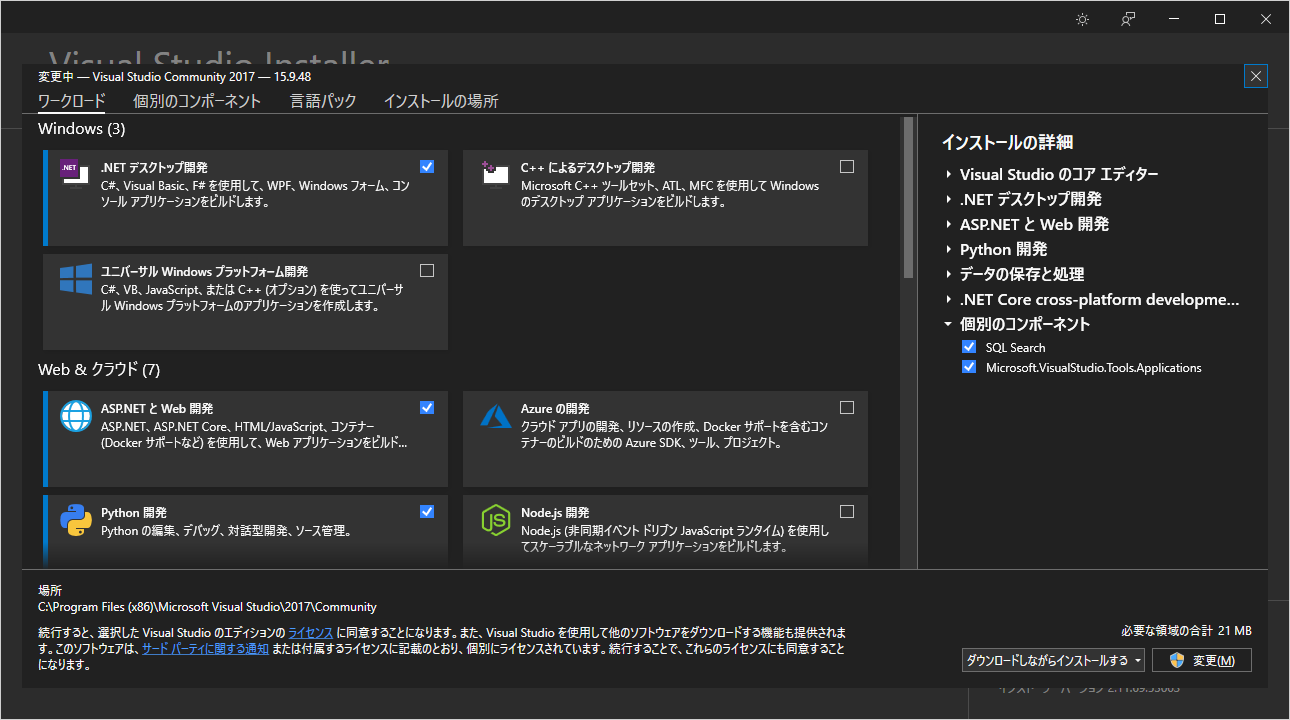
2.Visual Studio Installer から、「Python開発」をインストールしてます。
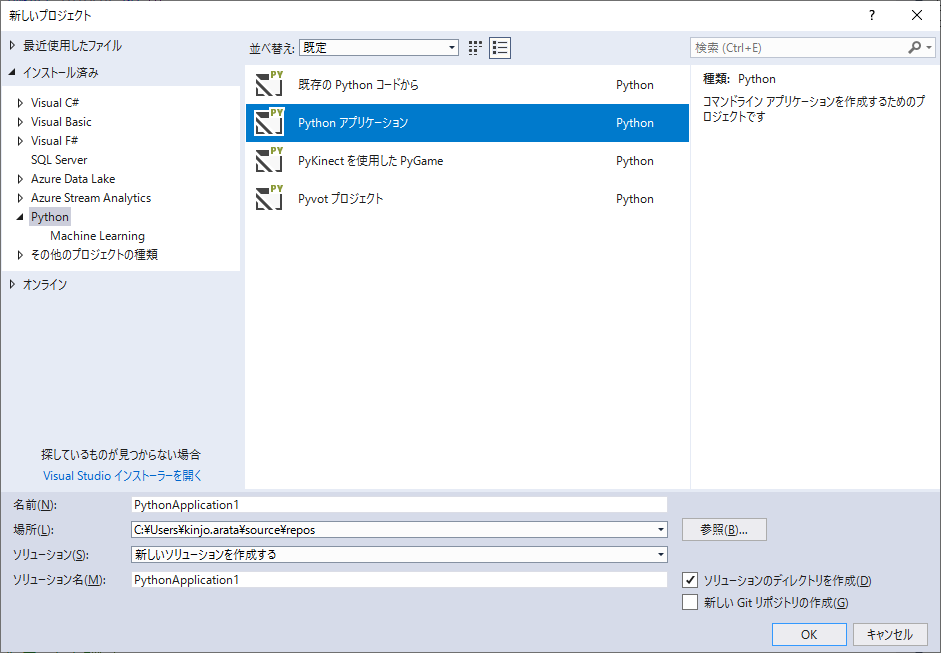
3.インストールすると、Pythonアプリケーションが選択できるようになります。
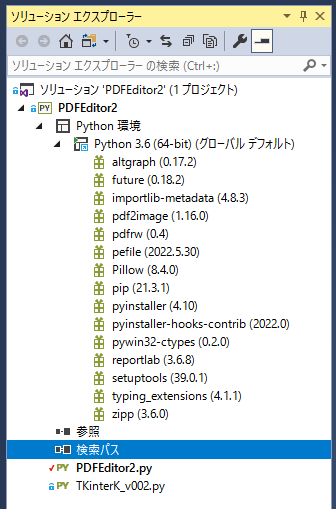
4.Pythonのバージョンについて
Python 3.6 を使用して、開発・実行を行いました。
5.その他使用したPythonモジュールについて
すいません、色々 [pip install] しており、もう覚えてません。
エラーが出たらググって [pip install] するか、連絡ください・・・。
参考サイト
「PDFの編集機能」
だえうホームページ
https://daeudaeu.com/python_pdf_editor/
このサイトがないと、このアプリは出来てません!!
独学では、PDFをcanvasにPDFを開くまでは出来ても、文字や線等をcanvasに追加し、PDFに変換するまでは出来ませんでした。
私では、本気でやって3ヶ月は必要だったと言い切れます。
だえう様のソースコードを流用して、本アプリを作成しております。
私はTwitter経由でソースコード公開の許可を頂きました。
改めて、だえう様に感謝申し上げます。m(_ _)m
「PDFファイルを保存後に開く方法」
https://office54.net/python/app/subprocess-explorer-folder#section3
「Tkinter ボタンコマンドに引数を渡す方法」
https://www.delftstack.com/ja/howto/python-tkinter/how-to-pass-arguments-to-tkinter-button-command/
「PythonのPDFライブラリ「ReportLab」の使い方(直線、矩形、円、楕円、丸囲みの矩形の描画)」
https://symfoware.blog.fc2.com/blog-entry-770.html
「Pythonでウィンドウを全画面表示にする方法【初心者向け】」
https://techacademy.jp/magazine/21497
「【Python】テキストボックス(Tkinter.Entry)の作成・出力・入力」
https://pg-chain.com/python-tkinter-entry
「条件に一致するファイルやディレクトリの一覧を取得する」
https://www.javadrive.jp/python/file/index14.html
「python2系でのcsv出力文字化け」
https://qiita.com/f_t812/items/e9242d1d79c5cd950bf8
「Python: BOMつきUTF-8のCSVファイルを読み込む」
https://blog.panicblanket.com/archives/6052
インポート情報
#### インポート
import os
import tkinter as tk
import tkinter.ttk as ttk

import TKinterK_v002 as tkk

from tkinter import messagebox
from tkinter import filedialog
from PIL import Image, ImageTk

from pathlib import Path
from pdf2image import convert_from_path

from pdfrw import PdfReader
from pdfrw.buildxobj import pagexobj
from pdfrw.toreportlab import makerl
from reportlab.pdfgen import canvas
from reportlab.pdfbase.cidfonts import UnicodeCIDFont
from reportlab.pdfbase.ttfonts import TTFont
from reportlab.pdfbase import pdfmetrics
from reportlab.lib.units import mm

from functools import partial

import csv
import glob
import subprocess
・UI系のtkinter → 独自に作ったFramework TKinterK
・PDF変換のpdf2image ,pdfrw , reportlab
・tkinterのButtonに引数付きの関数を設定するfunctools
・csv読み書き用の、csv
・フォルダ内のファイル検索用の、glob
・出力したPDFを開く、subprocess
定数関連
# キャンバスのサイズ設定
CANVAS_HEIGHT = 1000
CANVAS_WIDTH = 1600

# PDFのDPI設定
PDF_DPI = 250

# 図形の色の設定
DEF_COLOR = "black"

# フォント設定
TEXT_FONT  = "GenSenRounded-M"
FONT_PATH  = "./font/GenSenRounded-M.ttc"

# 座標の切り捨て処理
CUT_PIXEL = 5

# poppler/binを環境変数PATHに追加する
poppler_dir = Path(__file__).parent.absolute() / "poppler/bin"
os.environ["PATH"] += os.pathsep + str(poppler_dir)
POPPLER_PATH = poppler_dir
定数を修正することで、様々な設定が行なえます。
・キャンバスのサイズ設定
→キャンバスサイズの解像度を指定します。
・PDFのDPI設定
→PDFのDPI(抽出解像度)設定
・図形の色の設定
→デフォルト色ですが、各図形で色を変えられるため、あまり必要ないかも。
・フォント設定
→文字をPDF出力するためのフォントを設定します。
→フォント名と、PDFに追加するフォントのパスを指定します。
・座標の切り捨て処理
→描画時に、ある程度ずれても補正できるように5ピクセル以下は切り捨ててます。
・poppler(PDF→画像)のパス設定
→bin以下をパスに指定しないと動作しません。
クラス関連
class Figure():
    '''図形を描画するクラス'''
#
# 略
#
class Text(Figure):
    '''テキストを描画するクラス'''
#
# 略
#
class Line(Figure):
    '''線を描画するクラス'''
#
# 略
#
class Rect(Figure):
    '''長方形を描画するクラス'''
#
# 略
#
class Arc(Figure):
    '''円を描画するクラス'''
#
# 略
#
class PdfEditor():
    '''
    図形編集アプリクラス
    '''
#
# 略
#
class Pdf():
    '''
    PDFに関する処理を行うクラス
    '''
#
# 略
#
ボタン制御関数
# 各種ボタンの制御を実施
# ファイル操作関連
def setActive(status):
    if status == 1:
        # 初期
        pdf_read_button.set_active(1)
        csv_read_button.set_active(0)
        prev_button.set_active(0)
        next_button.set_active(0)
        rect_button.set_active(0)
        line_button.set_active(0)
        arc_button.set_active(0)
        text_button.set_active(0)
        back_button.set_active(0)
        save_button.set_active(0)
        write_button.set_active(0)
        batch_button.set_active(0)
        clear_button.set_active(0)

    if status == 2:
        # 読み込み後
        pdf_read_button.set_active(0)
        csv_read_button.set_active(1)
        rect_button.set_active(1)
        line_button.set_active(1)
        arc_button.set_active(1)
        text_button.set_active(1)
        back_button.set_active(1)
        save_button.set_active(1)
        write_button.set_active(1)
        batch_button.set_active(1)
        clear_button.set_active(1)

    if status == 3:
        # 読み込み後(線)
        rect_button.set_active(0)
        line_button.set_active(1)
        arc_button.set_active(0)
        text_button.set_active(0)

    if status == 4:
        # 読み込み後(図)
        rect_button.set_active(1)
        line_button.set_active(0)
        arc_button.set_active(0)
        text_button.set_active(0)

    if status == 5:
        # 読み込み後(テキスト)
        rect_button.set_active(0)
        line_button.set_active(0)
        arc_button.set_active(0)
        text_button.set_active(1)

    if status == 6:
        # 読み込み後(円)
        rect_button.set_active(0)
        line_button.set_active(0)
        arc_button.set_active(1)
        text_button.set_active(0)
フレームワーク側(TKinterK)に、関数を追加してます。
この関数を使用して、stasusと、色を変えてます。
class ButtonK(tk.Button):
    pass

    COLOR_ACTIVE = '#FFFFFF'
    COLOR_DISABLE = '#7D7D7D'

    def __init__(self):
        super(ButtonK, self).__init__()
        self.layout = None
        self["highlightthickness"] = 1
        self.config(highlightcolor= "red")

    def set_active(self, stasus):
        if stasus == 1:
            self["bg"] = self.COLOR_ACTIVE
            self["state"] = "active"
        if stasus == 0:
            self["bg"] = self.COLOR_DISABLE
            self["state"] =  "disable"
画面構成イメージ
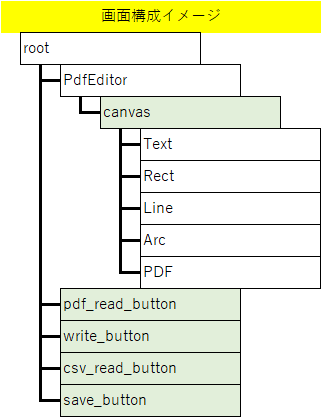
緑の部分が画面に作成されているオブジェクトになります。
※ ボタン等は略してます。
メソッド解説(Pdf.write)
    def write(self, out_path, text_info_list, line_info_list, rect_info_list, arc_info_list):
        '''
        PDFに図形を描画してファイル保存するメソッド
        out_path:保存するPDFのファイルパス
        text_info_list:テキストの情報を格納したリスト
        line_info_list:線の情報を格納したリスト
        rect_info_list:長方形の情報を格納したリスト
        arc_info_list :円形の情報を格納したリスト
        '''

        # PDFを読み込む
        self.pdf = PdfReader(self.pdf_path, decompress=False)

        # ページリスト取得
        self.pages = self.pdf.pages

        # PDFデータ作成
        cc = canvas.Canvas(out_path)

        # フォントを登録
        pdfmetrics.registerFont(TTFont(TEXT_FONT, FONT_PATH))

        i = 0
        for page in self.pages:

            # PDFデータにページを展開
            pp = pagexobj(page)
            rl_obj = makerl(cc, pp)
            cc.doForm(rl_obj)

            for text_info in text_info_list[i]:
                # フォント設定
                cc.setFont(TEXT_FONT, int(text_info["size"] * pp.h / self.images[0].height()) + int(text_corect.get()))

                # 座標を取得
                sx, sy, ex, ey = text_info["place"]

                x1 = min(sx, ex)
                x2 = max(sx, ex)
                y1 = min(sy, ey) + text_info["size"]
                y2 = 0

                # PDFの座標に変換
                # Y座標の計算が異なるため。
                # Python: 上が Y=0
                # PDF   : 下が Y=0
                target_x1 = x1 * pp.w / self.images[0].width()
                target_y1 = (self.images[0].height() - y1) * pp.h / self.images[0].height()

                # テキストの色を設定
                cc.setFillColor(text_info["color"])

                # テキスト描画
                cc.drawString(target_x1, target_y1, text_info["obj"].get())


            for line_info in line_info_list[i]:

                # 座標を取得
                x1, y1, x2, y2 = line_info["place"]

                # PDFの座標に変換
                target_x1 = x1 * pp.w / self.images[0].width()
                target_x2 = x2 * pp.w / self.images[0].width()
                target_y1 = (self.images[0].height() - y1) * pp.h / self.images[0].height()
                target_y2 = (self.images[0].height() - y2) * pp.h / self.images[0].height()

                # 線の色を設定
                cc.setStrokeColor(line_info["color"])

                # 線描画
                cc.line(target_x1, target_y1, target_x2, target_y2)


            for rect_info in rect_info_list[i]:

                # 座標取得
                sx, sy, ex, ey = rect_info["place"]

                x1 = min(sx, ex)
                x2 = max(sx, ex)
                y1 = max(sy, ey)
                y2 = min(sy, ey)

                # PDFの座標に変換
                target_x1 = x1 * pp.w / self.images[0].width()
                target_y1 = (self.images[0].height() - y1) * pp.h / self.images[0].height()

                width = (x2 - x1) * pp.w / self.images[0].width()
                height = (y1 - y2) * pp.h / self.images[0].height()

                # 線の色を設定
                cc.setStrokeColor(rect_info["color"])

                # 長方形描画
                cc.rect(target_x1, target_y1, width, height)

            for arc_info in arc_info_list[i]:

                # 座標取得
                sx, sy, ex, ey = arc_info["place"]

                x1 = min(sx, ex)
                x2 = max(sx, ex)
                y1 = max(sy, ey)
                y2 = min(sy, ey)

                # PDFの座標に変換
                target_x1 = x1 * pp.w / self.images[0].width()
                target_y1 = (self.images[0].height() - y1) * pp.h / self.images[0].height()

                target_x2 = x2 * pp.w / self.images[0].width()
                target_y2 = (self.images[0].height() - y2) * pp.h / self.images[0].height()

                # 線の色を設定
                cc.setStrokeColor(arc_info["color"])

                # 円形描画
                cc.ellipse(target_x1, target_y1, target_x2, target_y2)

            # ページ確定
            cc.showPage()
            i += 1

        # 確定したページをPDF保存
        try:
            cc.save()
        except:
            root.MsgBox("ファイル保存時にエラーが発生しました。","エラー",root.CONST_MSG_ICON_ERROR,root.CONST_MSG_ICON_INFO)
canvasに保存されている変数をそれぞれをPDFに描画していきます。
・canvas.text のリスト
・canvas.rect のリスト
・canvas.line のリスト
・canvas.arc のリスト
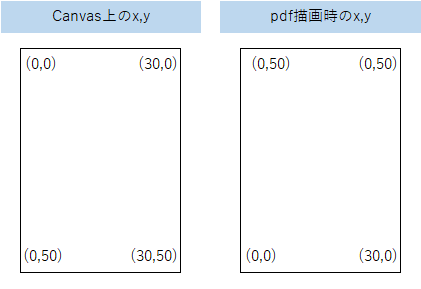
「気をつける点1」
Canvasのy座標と、pdf描画時のy座標が反転します。
これに気付かずに微調整してたら、全然変な感じになったので、戸惑いました。
「気をつける点2」
Canvas描画時のフォントサイズと、PDF描画時のフォントサイズが違う。
Canvas描画時には、縮小して画面に表示しているため、フォントサイズを補正しても、うまくいかないことがあります。
これは全体的なフォントサイズに補正が必要だと考え、補正値を画面に用意しました。
# フォント設定
cc.setFont(TEXT_FONT, int(text_info["size"] * pp.h / self.images[0].height()) + int(text_corect.get()))
画面Frameworkについて
これは自作の画面フレームワークTKinterKを使用してます。
TKinterを継承したTKinterKクラスを作成し、Excelのような感じでオブジェクトを配置することが出来ます。
今回のPDFEditor2で、verを上げているので、Gitからそのまま使用してください。
詳しくは、以下ページで確認ください。
「PythonのTKinterを使ったGUI構築について」
https://qiita.com/ArataKinjo/items/14d7aa9a0200b8b3bd88
ソースコード、ダウンロードはGitから
【重要】
画面ディスプレイの解像度をフルHD(1920x1080)を想定して作成しております。
ここからダウンロードできますが、環境設定が必要となります。
https://github.com/kinjoarata/PDFEditor2/tree/main/PDFEditor2
関連記事(全4個)
PythonでPDFの上に文字とか乗っけるアプリを作った!-1.はじめに、成果物紹介-
https://qiita.com/ArataKinjo/items/1e83810623ee15259b0a
PythonでPDFの上に文字とか乗っけるアプリを作った!-2.機能説明-
https://qiita.com/ArataKinjo/items/f934812de7b471b352a8
PythonでPDFの上に文字とか乗っけるアプリを作った!-3.ソースコード解説-
(この記事です)
PythonでPDFの上に文字とか乗っけるアプリを作った!-4.今後について-
https://qiita.com/ArataKinjo/items/c71492569bd9bb76d092