はじめに
OBS Studio は、配信や録画に使える OSS です。OBS はプラグインで機能を拡張することができ、映像や音声に独自の処理を追加できます。
この記事では、Windows の Visual Studio 2022 Community で、OBS プラグイン制作を開始できる環境を作るところまでを紹介します。簡単なプラグインをビルドしてみて、OBS 上で機能することを確認します。
本記事の実行環境は OBS Studio 32. 系です。なお、公式テンプレート obs-plugintemplate は内部で取得する OBS ソースのバージョンが必ずしも 32 系と一致しない場合があります。
新しい OBS 向けにビルドしたプラグインは古い OBS ではロードされないことがあるため、動作確認の OBS は 32. 系に揃えてください。
OBS プラグインは、最初の環境構築でつまずきやすいです。そこで本記事では、OBS 公式のテンプレートリポジトリ obs-plugintemplate を使います。このテンプレートは、Windows 用の CMake preset (windows-x64) を用意しており、まずはビルドが通る状態を作りやすいです。
obs-plugintemplate は GPL-2.0 ライセンスで公開されているため、テンプレを土台にして配布物を作る場合は 派生物のライセンス整合 (GPL 互換) を必ず確認してください。OBS Studio 自体も GPL 系のライセンスで配布されているので、バイナリ配布時はライセンス文面・著作権表示・ソース公開方法を同梱する運用が安全です。同梱するシェーダ・画像・フォント・外部ライブラリなどの第三者コンテンツのライセンスも別途確認し、再配布条件に合うものだけを含めてください。
この記事でやること
- obs-plugintemplate を使った OBS プラグインのビルド環境の準備
- テンプレをビルドし、OBS でロードできることを確認
- 簡単な映像フィルタ (Tint Filter) を実装して動作確認
対象読者
- OBS で「フィルタ」を触ったことはあるが、プラグイン制作は初めての人
- C は詳しくなくてもOK (コードは丸ごと貼れるようにします)
検証環境
- OS:
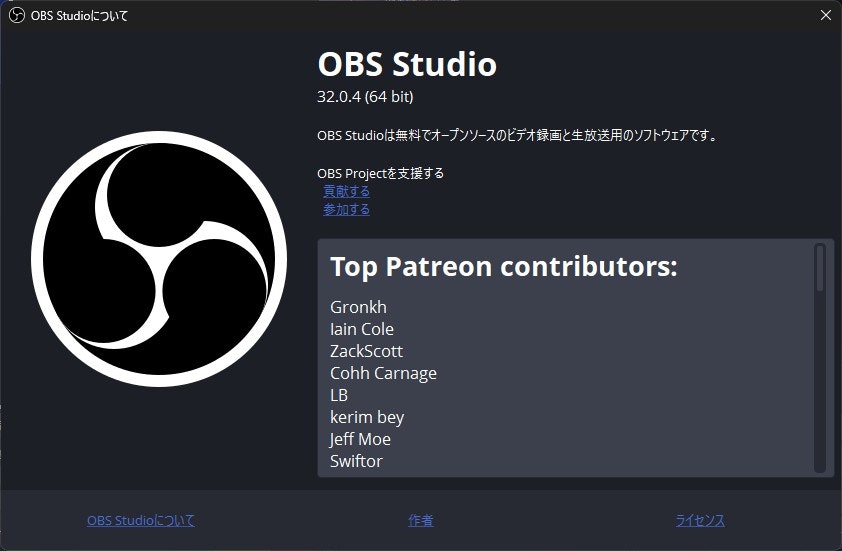
Windows 11 - OBS Studio:
32.0.4(32. 系) - Visual Studio:
Visual Studio 2022 Community - Windows 11 SDK: 10.0.22621.0
- MSVC ビルドツール: v143
- CMake:
4.2.1 - Git:
2.52.0.windows.1
CMake のインストール
obs-plugintemplate は CMake preset を使ってビルドします。まずは CMake をインストールし、どこからでも cmake コマンドが実行できる状態にします。
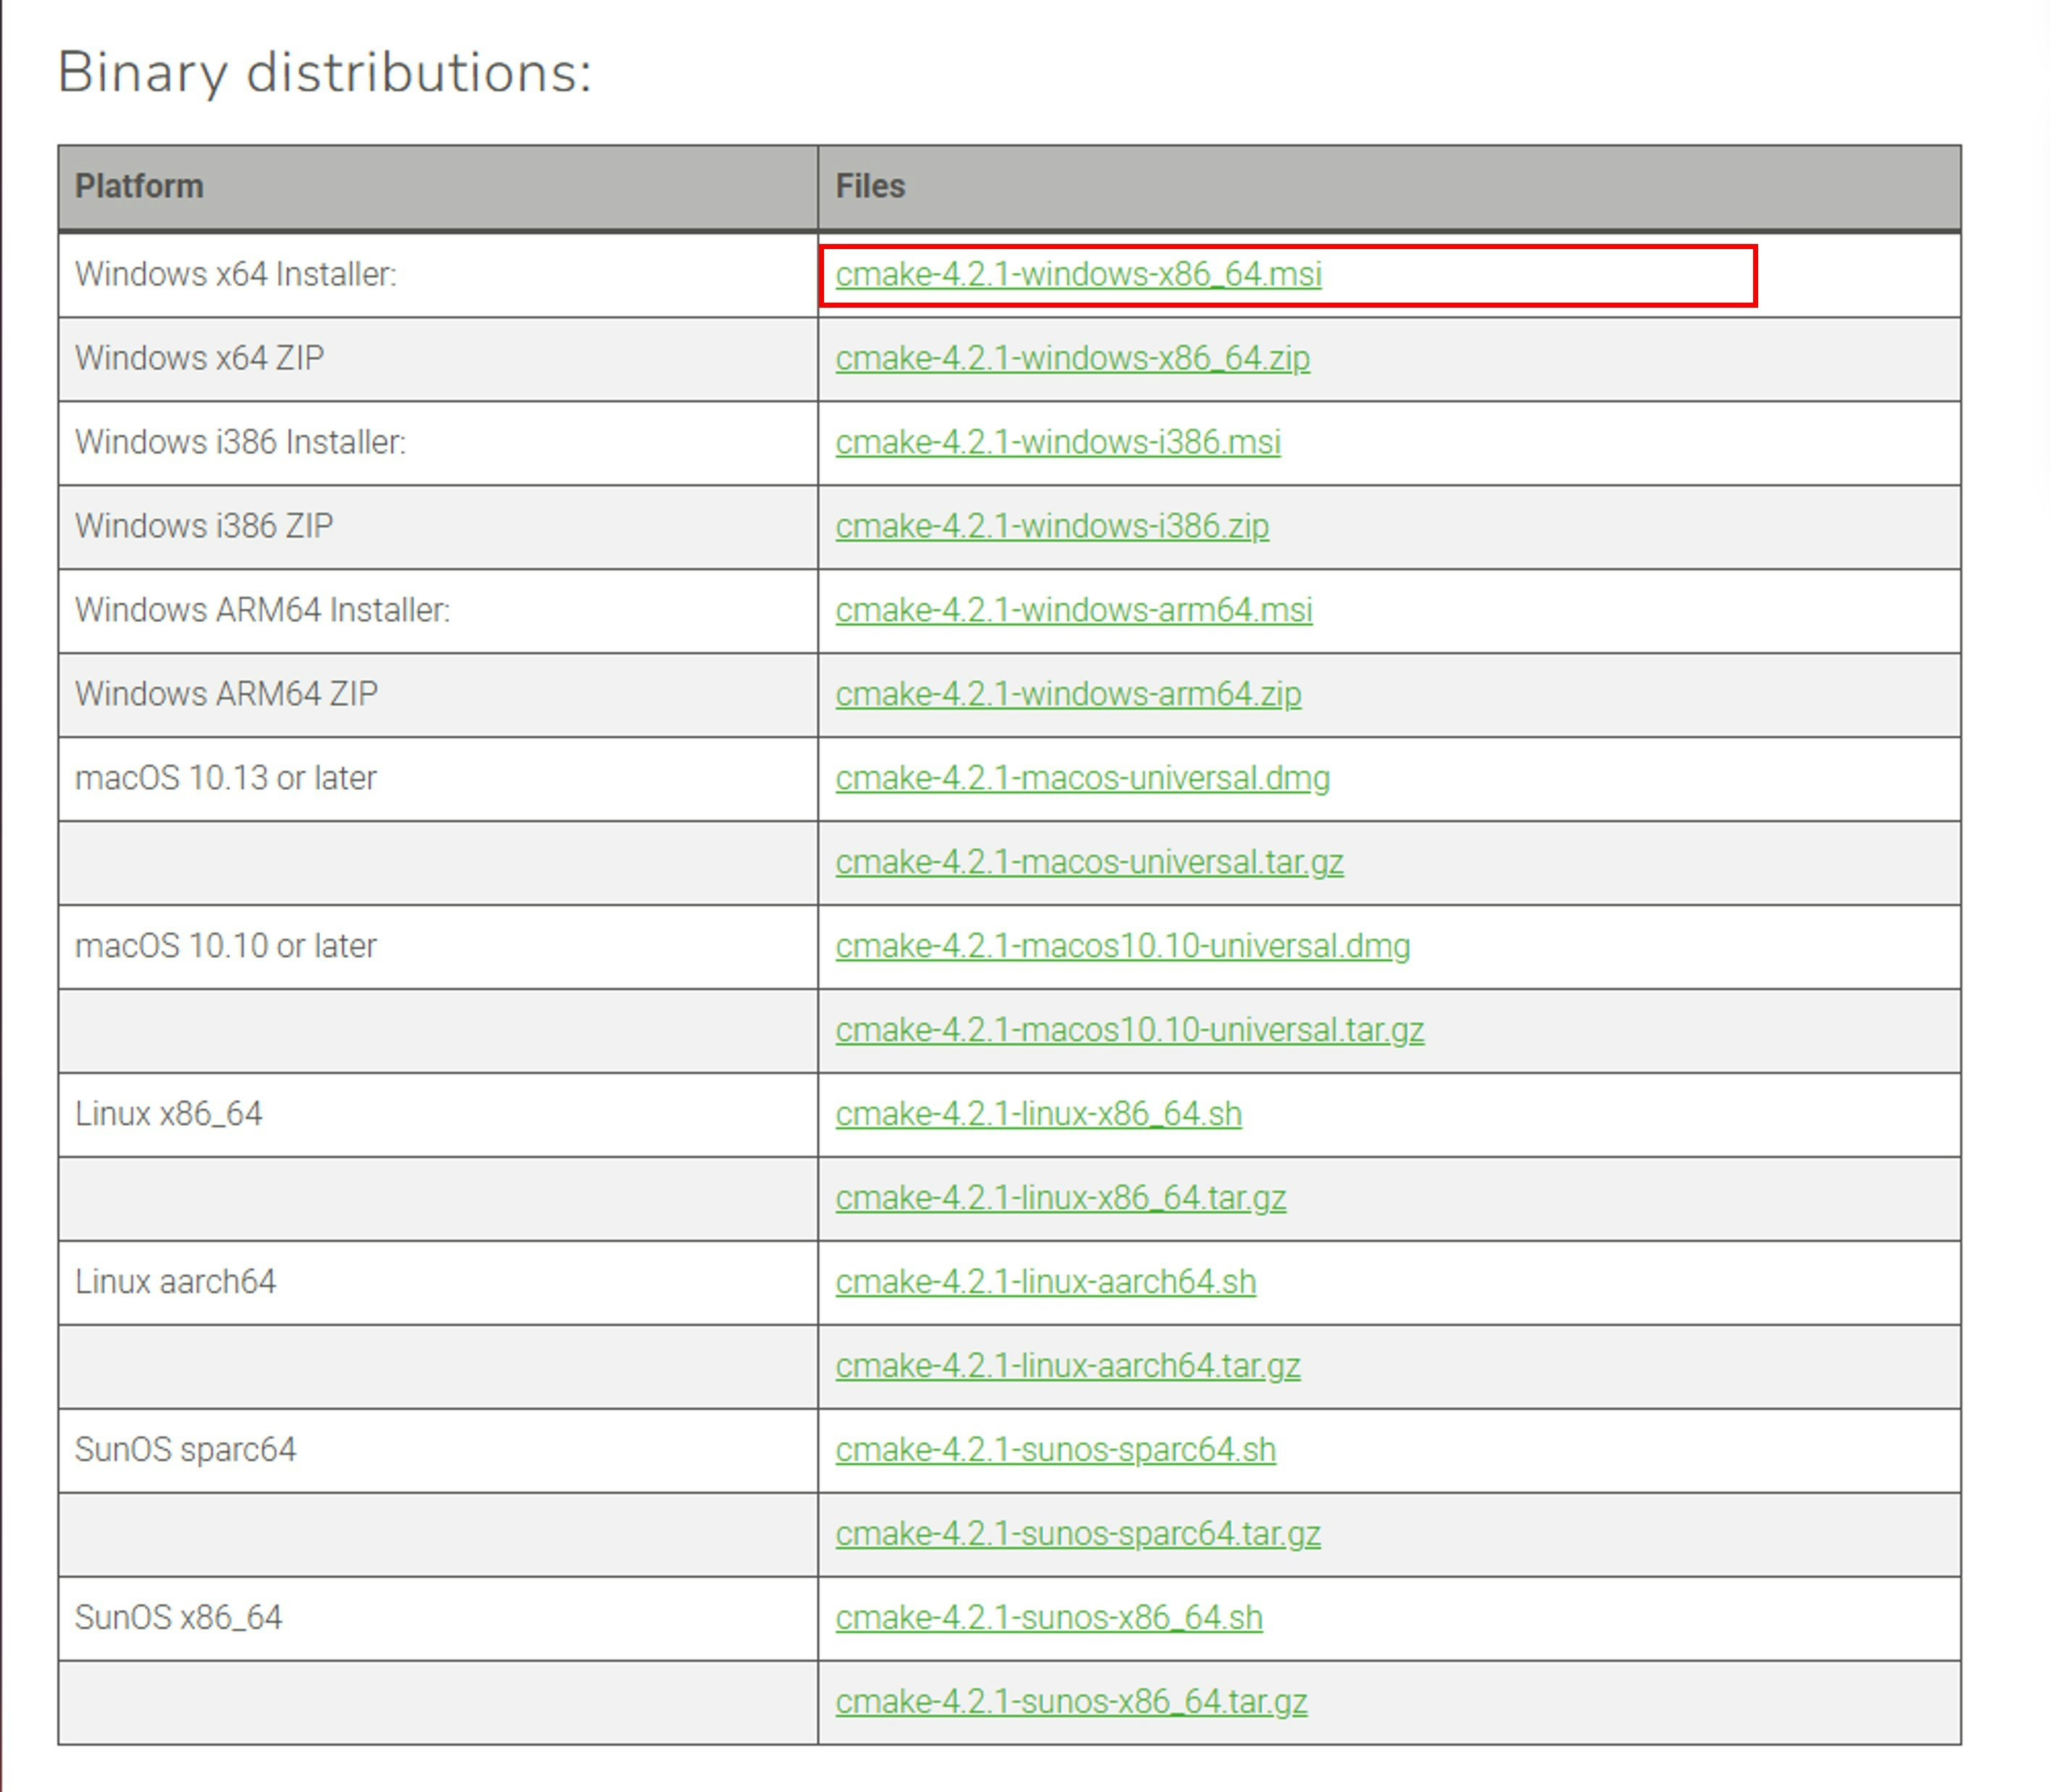
1. インストーラをダウンロードする
CMake 公式サイトの Download ページ を開き、Windows x64 Installer をダウンロードします。
2. インストール時に PATH へ追加する
ダウンロードしたインストーラを実行し、途中のオプションで CMake を PATH に追加します。ここを有効にしておくと、PowerShell や Git Bash から cmake を実行できます。

のちの手順で cmake コマンドが not found になる場合は PATH が通っていない可能性があります。 Windows のシステム環境変数の編集画面を開き、システム環境変数 > Path に <cmake をインストールしたフォルダー>\bin を設定してください。


3. インストール結果を確認する
PowerShell を開き、CMake のバージョンを確認します。
cmake --version
cmake version 4.2.1 のように表示されれば OK です。
もし古いバージョンが表示される場合は、別の CMake が Path 設定の上位に存在している可能性があります。その場合は Get-Command cmake で参照先を確認し、意図した CMake が呼ばれるように Path を確認します。
PS % Get-Command cmake

CommandType     Name                                               Version    Source
-----------     ----                                               -------    ------
Application     cmake.exe                                          4.2.1.0    C:\home\programs\cmake\bin\cmake.exe
Visual Studio 2022 のインストール
Windows 向けの OBS プラグインをビルドするには、C++ コンパイラと Windows SDK が必要です。Visual Studio 2022 Community をインストールし、C++ 開発に必要なコンポーネントを追加します。
1. Visual Studio Installer を起動する
Visual Studio 2022 Community をインストールしていない場合は、 配布ページ からインストーラを取得し実行します。

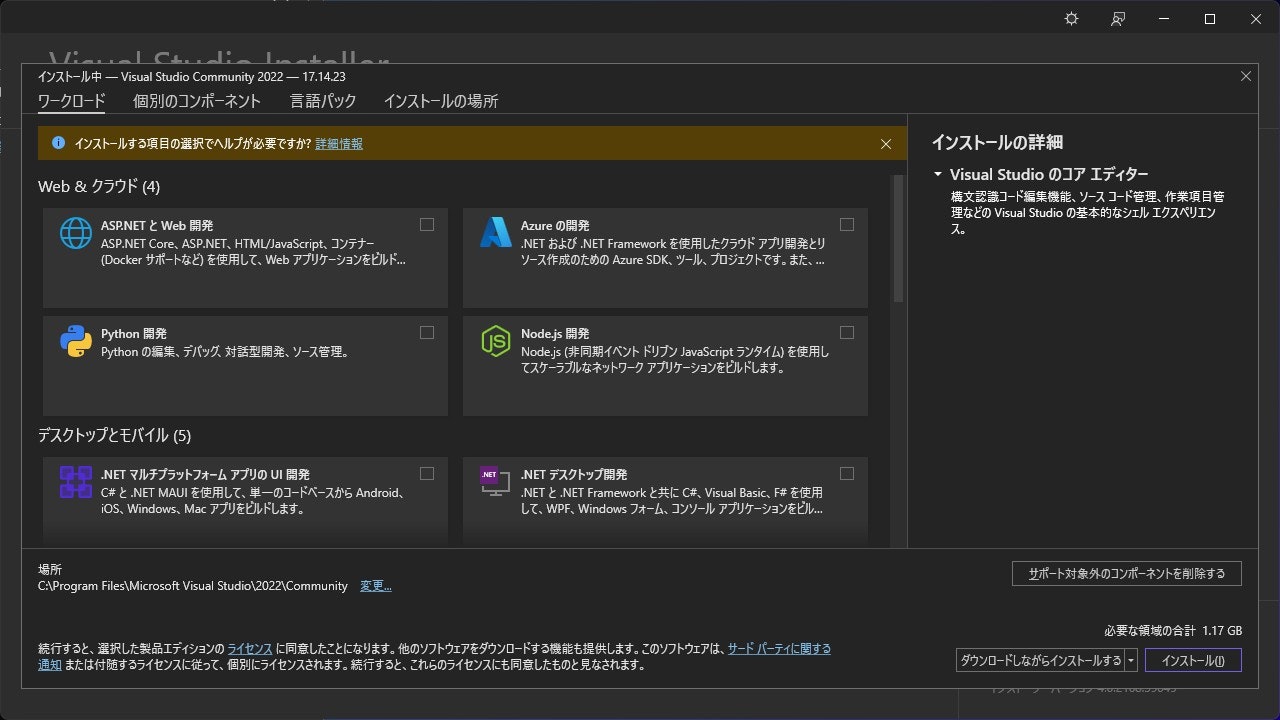
2. ワークロードとコンポーネントを選択する
ワークロードの一覧から C++ によるデスクトップ開発 を選びます。 インストールの詳細 で、 Windows 11 SDK 10.0.22621.0 にチェックを入れます。
下記にチェックが入っていれば OK です。
- MSVC v143
- Windows 11 SDK 10.0.22621.0
- Windows 用 C++ CMake ツール
Windows 11 SDK 10.0.26100.7175 の有無はどちらでも大丈夫です。最小限の構成で進めたい場合はチェックを外してもかまいません。


問題なければ インストール を押します。
Visual Studio のバージョンや Windows 11 SDK のバージョンが異なるとき、のちの手順で次のようなエラーメッセージが表示されます。
CMake Error at \path\to\obs-plugintemplate\CMakeLists.txt:5 (project):
  Generator

    Visual Studio 17 2022

  given platform specification with

    version=10.0.22621

  field, but no Windows SDK with that version was found.		C:\home\work\obs-plugintemplate\CMakeLists.txt	5
この場合、適切なバージョンの Visual Studio および Windows SDK を再度インストールします。
3. インストール完了を確認する
インストールが完了したら Visual Studio 2022 を起動し、スタート画面が表示されることを確認します。

テンプレートの取得
1. Git をインストールする
Git for Windows をインストールします。

インストーラを実行します。すべてデフォルトで Next としても良いですが、もし VSCode を常用している場合は editor を VSCode にしておくと使いやすいかもしれません。

インストールが完了したら、 Git Bash が使えることを確認します。


2. リポジトリを clone する
作業用フォルダーに移動します。
Git Bash では、Windows で普段使用する C:\ パスは /c/ と表現されます。例えば「ドキュメント」フォルダーは /c/Users/<ユーザー名>/Documents/ と表現されます。目的のフォルダーに移動するには cd コマンドを使用します。ファイル・フォルダー名の入力中に TAB キーを押すと、(一意に決まる場合は) 最後までファイル・フォルダー名を打たなくても補完が効きます。
例えば C:\Users\AllegroMoltoV\Documents\Works を作業用フォルダーとすると、コマンドラインウインドウ内では次のように作業用フォルダーに移動します。
cd /c/Users/Alleg (ここで TAB キーを押す)
cd /c/Users/AllegroMoltoV/Docu (ここで TAB キーを押す)
cd /c/Users/AllegroMoltoV/Documents/Wo (ここで TAB キーを押す)
cd /c/Users/AllegroMoltoV/Documents/Works/
作業用フォルダーに移動したら、 obs-plugintemplate リポジトリをクローンします。
git clone --recursive https://github.com/obsproject/obs-plugintemplate.git
--recursive オプションを付けるのが重要です。付けないとビルドに必要な submodule が取得されません。
次のような出力が得られれば OK です。
Cloning into 'obs-plugintemplate'...
remote: Enumerating objects: 1110, done.
remote: Counting objects: 100% (373/373), done.
remote: Compressing objects: 100% (161/161), done.
remote: Total 1110 (delta 278), reused 212 (delta 212), pack-reused 737 (from 1
Receiving objects: 100% (1110/1110), 323.36 KiB | 20.21 MiB/s, done.
Resolving deltas: 100% (566/566), done.
クローンしたリポジトリの中に移動します。
cd obs-plugintemplate/
エクスプローラーでクローンしてきたリポジトリの中身を見るとこのような形です。

ソリューションのビルド
Visual Studio で開く .sln ファイルを CMake コマンドで作成します。obs-plugintemplate フォルダー直下で、CMake preset を使って構成します。CMake preset は CMakePresets.json に定義されており、Windows では windows-x64 と windows-ci-x64 が用意されています。
-
windows-x64: ローカル開発向け -
windows-ci-x64: CI 向け。警告をエラー扱いにするなど、ビルド条件が厳しめ
今回はローカルで試すだけなので windows-x64 を使います。
cmake --preset windows-x64
出力例
-- Selecting Windows SDK version 10.0.22621.0 to target Windows 10.0.26200.
-- The C compiler identification is MSVC 19.44.35222.0
-- The CXX compiler identification is MSVC 19.44.35222.0
-- Detecting C compiler ABI info
-- Detecting C compiler ABI info - done
-- Check for working C compiler: C:/Program Files/Microsoft Visual Studio/2022/Community/VC/Tools/MSVC/14.44.35207/bin/Hostx64/x64/cl.exe - skipped
-- Detecting C compile features
-- Detecting C compile features - done
-- Detecting CXX compiler ABI info
-- Detecting CXX compiler ABI info - done
-- Check for working CXX compiler: C:/Program Files/Microsoft Visual Studio/2022/Community/VC/Tools/MSVC/14.44.35207/bin/Hostx64/x64/cl.exe - skipped
-- Detecting CXX compile features
-- Detecting CXX compile features - done
-- Setting up Pre-Built obs-deps (x64)
-- Downloading https://github.com/obsproject/obs-deps/releases/download/2025-07-11/windows-deps-2025-07-11-x64.zip
-- Downloading https://github.com/obsproject/obs-deps/releases/download/2025-07-11/windows-deps-2025-07-11-x64.zip - done
-- Setting up Pre-Built obs-deps (x64) - done
-- Setting up Pre-Built Qt6 (x64)
-- Downloading https://github.com/obsproject/obs-deps/releases/download/2025-07-11/windows-deps-qt6-2025-07-11-x64.zip
-- Downloading https://github.com/obsproject/obs-deps/releases/download/2025-07-11/windows-deps-qt6-2025-07-11-x64.zip - done
-- Setting up Pre-Built Qt6 (x64) - done
-- Setting up OBS sources (x64)
-- Downloading https://github.com/obsproject/obs-studio/archive/refs/tags/31.1.1.zip
-- Downloading https://github.com/obsproject/obs-studio/archive/refs/tags/31.1.1.zip - done
cmake -E tar: warning: skipping symbolic link "obs-studio-31.1.1/.github/scripts/build-macos" -> "./.build.zsh".
cmake -E tar: warning: skipping symbolic link "obs-studio-31.1.1/.github/scripts/build-ubuntu" -> "./.build.zsh".
cmake -E tar: warning: skipping symbolic link "obs-studio-31.1.1/.github/scripts/package-macos" -> "./.package.zsh".
cmake -E tar: warning: skipping symbolic link "obs-studio-31.1.1/.github/scripts/package-ubuntu" -> "./.package.zsh".
cmake -E tar: warning: skipping symbolic link "obs-studio-31.1.1/build-aux/run-clang-format" -> ".run-format.zsh".
cmake -E tar: warning: skipping symbolic link "obs-studio-31.1.1/build-aux/run-gersemi" -> ".run-format.zsh".
cmake -E tar: warning: skipping symbolic link "obs-studio-31.1.1/build-aux/run-swift-format" -> ".run-format.zsh".
-- Setting up OBS sources (x64) - done
-- Configure OBS sources (x64)
CMake Warning (dev) at cmake/finders/FindDetours.cmake:65 (message):
  Failed to find detours version.
Call Stack (most recent call first):
  plugins/win-capture/graphics-hook/CMakeLists.txt:3 (find_package)
This warning is for project developers.  Use -Wno-dev to suppress it.

CMake Warning at plugins/win-dshow/virtualcam-module/CMakeLists.txt:14 (message):
  Empty Virtual Camera GUID set.


                      _                   _             _ _
                 ___ | |__  ___       ___| |_ _   _  __| (_) ___
                / _ \| '_ \/ __|_____/ __| __| | | |/ _` | |/ _ \
               | (_) | |_) \__ \_____\__ \ |_| |_| | (_| | | (_) |
                \___/|_.__/|___/     |___/\__|\__,_|\__,_|_|\___/

OBS:  Application Version: 31.1.1 - Build Number: 1
==================================================================================


------------------------       Enabled Features           ------------------------
 - Direct3D 11 renderer
 - OpenGL renderer
------------------------       Disabled Features          ------------------------
 - Plugin Support
 - User Interface
----------------------------------------------------------------------------------
-- Configure OBS sources (x64) - done
-- Build OBS sources (Debug - x64)
-- Build OBS sources (Debug - x64) - done
-- Build OBS sources (Release - x64)
-- Build OBS sources (Reelase - x64) - done
-- Install OBS sources (x64)
-- Install OBS sources (x64) - done
-- Performing Test CMAKE_HAVE_LIBC_PTHREAD
-- Performing Test CMAKE_HAVE_LIBC_PTHREAD - Failed
-- Looking for pthread_create in pthreads
-- Looking for pthread_create in pthreads - not found
-- Looking for pthread_create in pthread
-- Looking for pthread_create in pthread - not found
-- Found Threads: TRUE
-- Configuring done (62.8s)
-- Generating done (0.1s)
-- Build files have been written to: C:/home/work/obs-plugintemplate/build_x64
成功すると、CMakePresets.json の binaryDir 定義どおり、build_x64 フォルダーが生成されます。
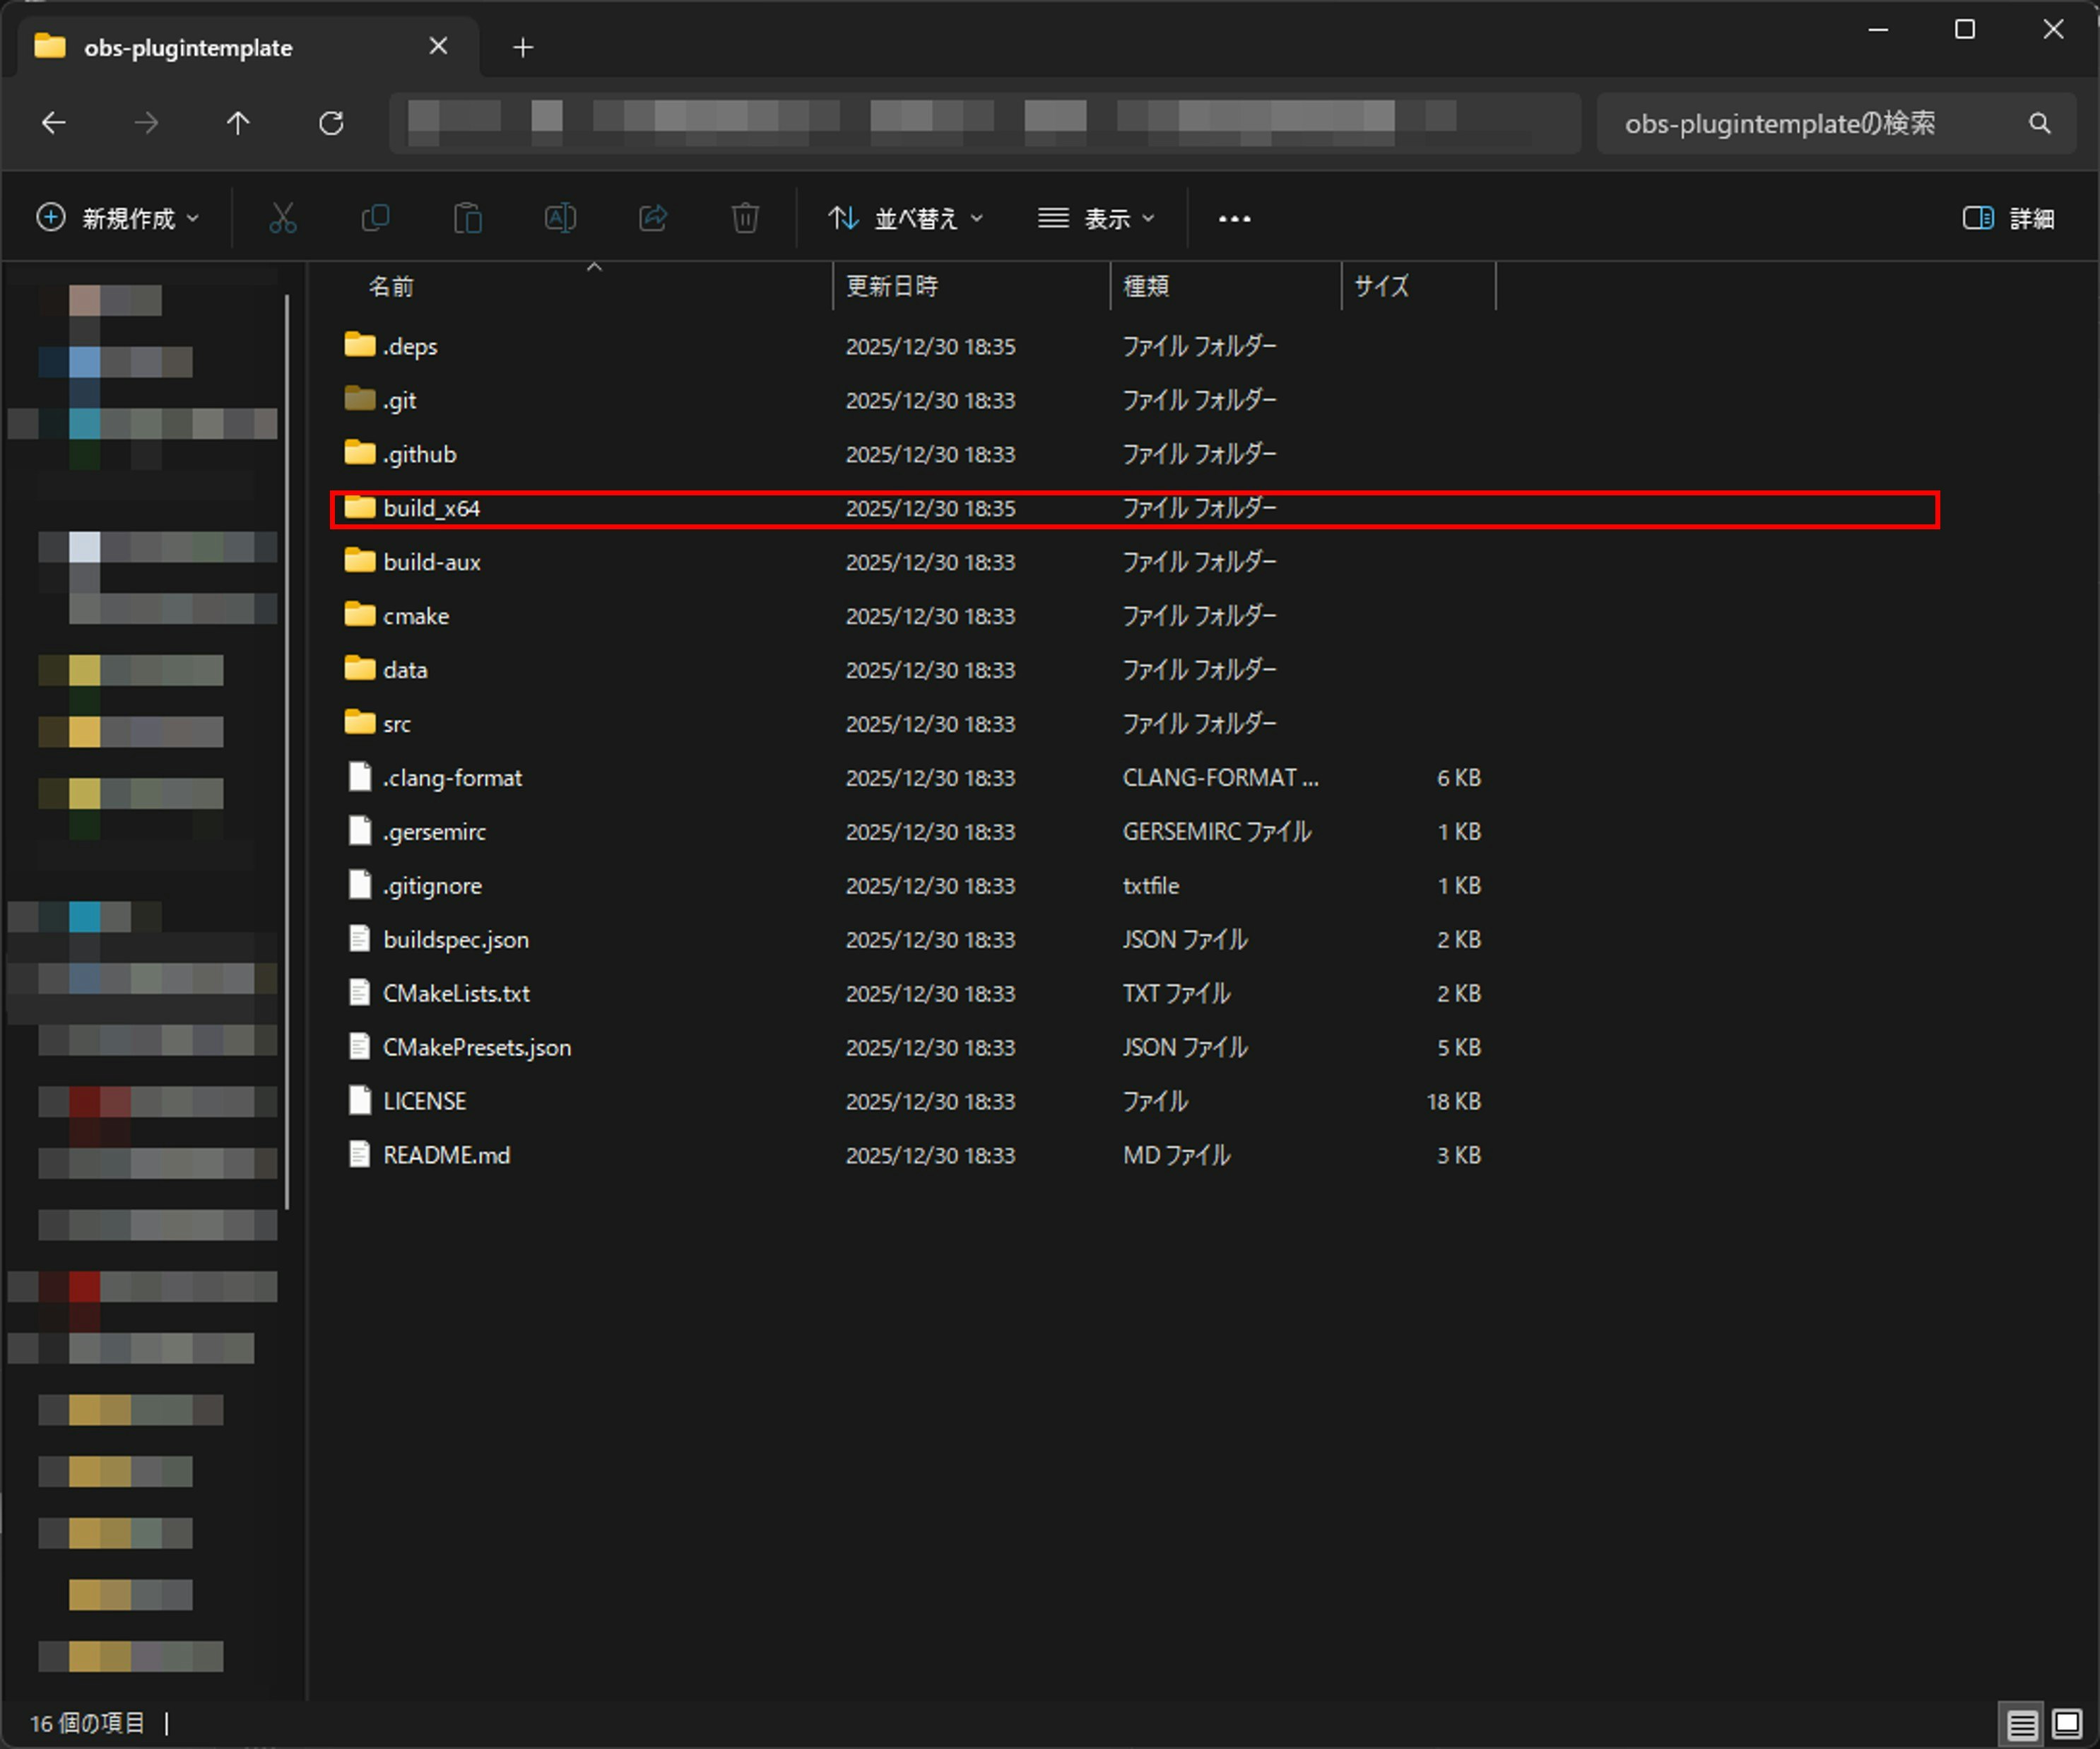
build_x64 配下には plugintemplate-for-obs.sln が生成されています。これを Visual Studio で開いていきます。

プラグインのビルド
1. 生成されたソリューションを Visual Studio 2022 で開く
Visual Studio 2022 を起動し、スタート画面から プロジェクトまたはソリューションを開く を選びます。次に、build_x64 配下に生成された plugintemplate-for-obs.sln を開きます。

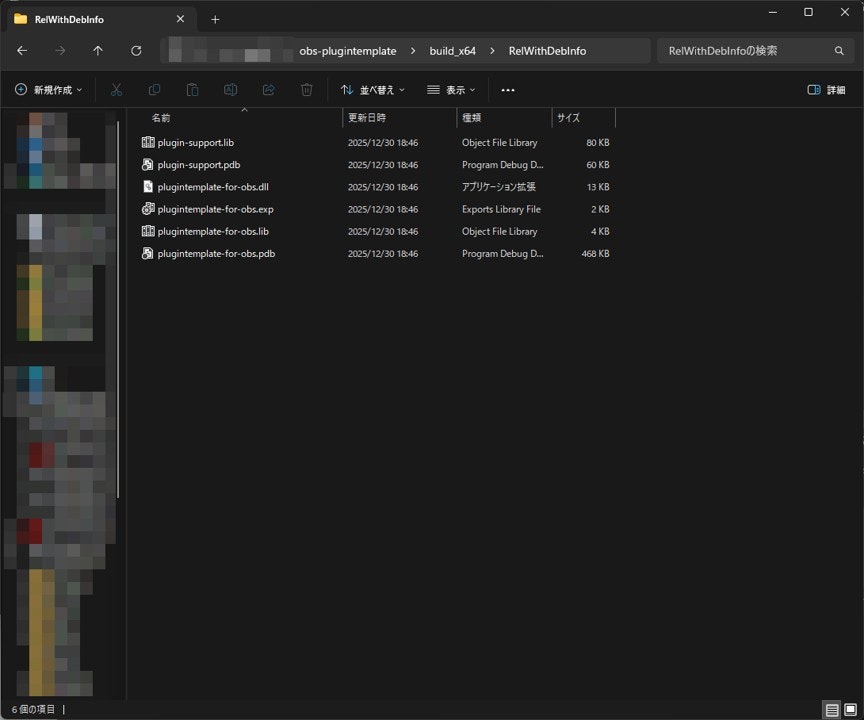
2. RelWithDebInfo でビルドする
構成を RelWithDebInfo、プラットフォームを x64 に設定してビルドします。

ビルド → ソリューションのビルド を選択します。

build_x64/RelWithDebInfo/ 配下に .dll が生成されます。
OBS でロード確認
1. cmake --install でプラグインをインストールする
obs-plugintemplate は cmake --install を使って、ビルド成果物 ( .dll と data ファイル ) を OBS のプラグイン配置先へコピーします。
まずは、Git Bash で次を実行します。
cmake --install build_x64 --config RelWithDebInfo
ところが、環境によっては次のエラーが出ます。
CMake Error at build_x64/cmake_install.cmake:5 (set):
  ...
  when parsing string

    C:\ProgramData/obs-studio/plugins

  Invalid character escape '\P'.
これは build_x64/cmake_install.cmake が自動生成される際に、インストール先の Windows パスが C:\... のような形式になってしまい、CMake のスクリプト解釈で \P がエスケープシーケンス扱いになって落ちている状態です。
build_x64/cmake_install.cmake は生成物です。ファイルを直接編集しても、cmake --preset ... をやり直したタイミングで上書きされます。恒久的に対応するには、生成元を直します。
CMAKE_INSTALL_PREFIX を C:/... のようにスラッシュ区切りで指定し直します。これを CMakeUserPresets.json に記載しておくと、テンプレート更新や再生成でも壊れにくくなります。
obs-plugintemplate フォルダー直下に CMakeUserPresets.json を作成し、次の内容で保存します。
{
  "version": 8,
  "configurePresets": [
    {
      "name": "windows-x64-local",
      "inherits": "windows-x64",
      "cacheVariables": {
        "CMAKE_INSTALL_PREFIX": "C:/ProgramData/obs-studio/plugins"
      }
    }
  ]
}

次に、この preset で構成を作り直します (既に build_x64 がある場合も上書き更新されます)。
cmake --preset windows-x64-local
出力例
-- Selecting Windows SDK version 10.0.22621.0 to target Windows 10.0.26200.
-- Setting up Pre-Built obs-deps (x64)
-- Setting up Pre-Built obs-deps (x64) - skipped
-- Setting up Pre-Built Qt6 (x64)
-- Setting up Pre-Built Qt6 (x64) - skipped
-- Setting up OBS sources (x64)
-- Setting up OBS sources (x64) - done
-- Configure OBS sources (x64)
CMake Warning (dev) at cmake/finders/FindDetours.cmake:65 (message):
  Failed to find detours version.
Call Stack (most recent call first):
  plugins/win-capture/graphics-hook/CMakeLists.txt:3 (find_package)
This warning is for project developers.  Use -Wno-dev to suppress it.

CMake Warning at plugins/win-dshow/virtualcam-module/CMakeLists.txt:14 (message):
  Empty Virtual Camera GUID set.


                      _                   _             _ _
                 ___ | |__  ___       ___| |_ _   _  __| (_) ___
                / _ \| '_ \/ __|_____/ __| __| | | |/ _` | |/ _ \
               | (_) | |_) \__ \_____\__ \ |_| |_| | (_| | | (_) |
                \___/|_.__/|___/     |___/\__|\__,_|\__,_|_|\___/

OBS:  Application Version: 31.1.1 - Build Number: 3
==================================================================================


------------------------       Enabled Features           ------------------------
 - Direct3D 11 renderer
 - OpenGL renderer
------------------------       Disabled Features          ------------------------
 - Plugin Support
 - User Interface
----------------------------------------------------------------------------------
-- Configure OBS sources (x64) - done
-- Build OBS sources (Debug - x64)
-- Build OBS sources (Debug - x64) - done
-- Build OBS sources (Release - x64)
-- Build OBS sources (Reelase - x64) - done
-- Install OBS sources (x64)
-- Install OBS sources (x64) - done
-- Configuring done (11.8s)
-- Generating done (0.1s)
-- Build files have been written to: C:/home/work/obs-plugintemplate/build_x64
ここまでできたら、あらためて install を実行します。
cmake --install build_x64 --config RelWithDebInfo
出力例
-- Installing: C:/ProgramData/obs-studio/plugins/plugintemplate-for-obs/bin/64bit/plugintemplate-for-obs.dll
-- Installing: C:/ProgramData/obs-studio/plugins/plugintemplate-for-obs/bin/64bit/plugintemplate-for-obs.pdb
-- Installing: C:/ProgramData/obs-studio/plugins/plugintemplate-for-obs/data
-- Installing: C:/ProgramData/obs-studio/plugins/plugintemplate-for-obs/data/locale
-- Installing: C:/ProgramData/obs-studio/plugins/plugintemplate-for-obs/data/locale/en-US.ini
2. インストールを Visual Studio のビルド直後に走らせる
cmake --install では、ビルド成果物を CMAKE_INSTALL_PREFIX 配下へ file(INSTALL ...) でコピーしています。build_x64/cmake_install.cmake を見ると、.dll や .pdb、data/locale などをインストール先へ順にコピーしています。毎回 cmake --install ... を手で叩くのは面倒なので、プラグインのビルドが終わった直後に install を自動実行するようにします。
ここで注意点として、 .vcxproj を Visual Studio の UI で直接変更しないようにします。これは、 cmake --preset による再生成によって設定が消えてしまうためです。設定が消えないよう、 CMakeLists.txt に POST_BUILD を書いて、生成されるソリューションにビルド後の動作を加えます。
リポジトリ直下の CMakeLists.txt の末尾に、次を追加します。
# ビルド直後に cmake --install を実行する (Windows 開発用)
option(ENABLE_POST_BUILD_INSTALL "Run cmake --install after build" ON)

if(WIN32 AND ENABLE_POST_BUILD_INSTALL)
  add_custom_command(
    TARGET ${CMAKE_PROJECT_NAME}
    POST_BUILD
    COMMAND "${CMAKE_COMMAND}" --install "${CMAKE_BINARY_DIR}" --config "$<CONFIG>"
    COMMENT "Installing OBS plugin (cmake --install)"
    VERBATIM
  )
endif()
これで、Visual Studio から plugintemplate-for-obs プロジェクトがビルドされたタイミングで install が実行されます。
CMakeLists.txt を変更しただけでは、既に生成済みの .sln / .vcxproj に反映されません。Git Bash で再度ソリューションを生成します。
cmake --preset windows-x64-local
Visual Studio を開き直し、これまで通り RelWithDebInfo / x64 で ソリューションのビルド を実行します。ビルド出力に、次のような -- Installing: -- Up-to-date: が出ていれば成功です。
-- Installing: C:/ProgramData/obs-studio/plugins/plugintemplate-for-obs/bin/64bit/plugintemplate-for-obs.dll
-- Installing: C:/ProgramData/obs-studio/plugins/plugintemplate-for-obs/bin/64bit/plugintemplate-for-obs.pdb
-- Up-to-date: C:/ProgramData/obs-studio/plugins/plugintemplate-for-obs/data
-- Up-to-date: C:/ProgramData/obs-studio/plugins/plugintemplate-for-obs/data/locale
-- Up-to-date: C:/ProgramData/obs-studio/plugins/plugintemplate-for-obs/data/locale/en-US.ini

CMakeUserPresets.json は「手元環境の差分を置く」用途のファイルです。チームで共有したい場合は CMakePresets.json 側へ寄せるか、共有用の preset 名を決めて運用してください。
3. OBS でプラグインをロード確認する
OBS を起動し直します。起動中だった場合はいったん終了して再起動します。次に、OBS のメニューから ヘルプ > ログファイル > ログファイルを表示 でログを開きます。
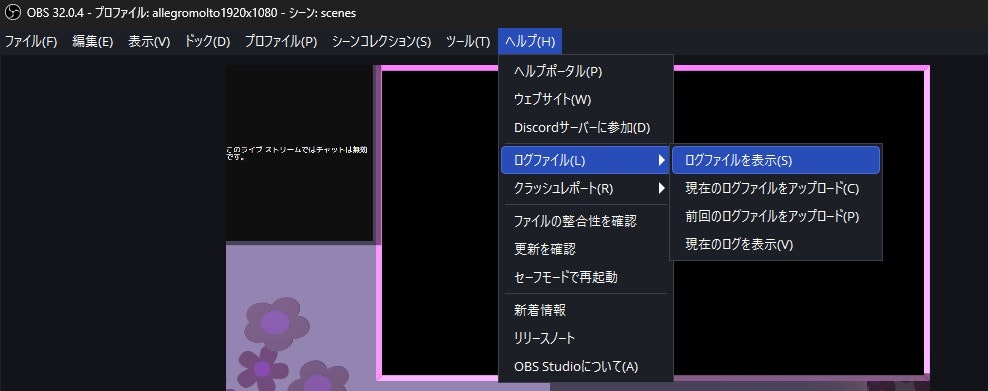
開いたログ内で plugintemplate-for-obs を検索し、プラグインがロードされている記録が出ていることを確認します。
プラグインの種類によっては、UI 上で分かりやすいメニュー項目が増えないことがあります。まずは「ログにロード痕跡があること」を優先して確認します。

映像フィルタを実装する
ここからは、実際に OBS 上で見た目が変わるプラグインを 1 つ作ります。
OBS のフィルタは、映像ソースに後段で適用する処理です。実装上は、フィルタも source の一種として登録します。描画時に obs_source_process_filter_begin() と obs_source_process_filter_end() を使い、レンダリングの流れに介入します。
今回は最小構成として、元の映像に対して色味を乗算し、強さ (strength) でブレンドする Tint Filter を実装します。色の計算自体は OBS の .effect (シェーダー) で行います。
ファイル追加と Visual Studio 表示の考え方
obs-plugintemplate の data/ は、プラグインが実行時に読むリソース置き場です。一方で、Visual Studio のソリューションエクスプローラーに見える Resources は、実ファイル・実フォルダーではありません。 CMake がプロジェクトに関連付けたファイルが、仮想的に並びます。
そこでこの記事では、次の方針とします。
-
src/とdata/には実ファイルとして作成 -
CMakeLists.txtでは、src/*.cとdata/**をワイルドカードで拾う - ビルド時は
ZERO_CHECKが走るため、ファイル追加を検知して CMake が再実行される想定
この方針にしておくと、以降は data/effects/ に .effect を置くだけで、インストールと表示の両方に反映できます。
1. 追加するファイルと編集するファイル
この手順では、次の 3 つの新規ファイルを追加し、2 つの既存ファイルを編集します。
追加する新規ファイルは、data/ と src/ に実ファイルとして作成します。
-
data/effects/tint.effect(シェーダー) -
src/tint-filter.c(フィルタ本体) -
data/locale/ja-JP.ini(表示名の追加)
編集する既存ファイルは、次の 2 つです。
-
src/plugin-main.c(登録処理を追加) -
data/locale/en-US.ini(表示名の追加)
2. 空ファイルを作ってから Visual Studio で編集できる状態にする
まずは空ファイルを作ります。ここでは Git Bash を使います。
mkdir -p data/effects
touch data/effects/tint.effect
touch src/tint-filter.c
touch data/locale/ja-JP.ini
次に CMakeLists.txt を編集し、src/ と data/ 配下のファイルをワイルドカードで拾うようにします。これをやると、ソリューションエクスプローラー上でも data/effects/tint.effect が見えるようになります。
いまは src/plugin-main.c だけが target_sources() に入っています。これを差し替えて、src/*.c と data/** をまとめて登録します。
CMakeLists.txt の修正箇所
# 既存の target_sources(${CMAKE_PROJECT_NAME} PRIVATE src/plugin-main.c) を置き換える

# src/ と data/ を自動で拾う (追加のたびに CMakeLists.txt を編集しないため)
file(GLOB PLUGIN_SOURCES CONFIGURE_DEPENDS
  "${CMAKE_CURRENT_SOURCE_DIR}/src/*.c"
)

file(GLOB_RECURSE PLUGIN_RESOURCES CONFIGURE_DEPENDS
  "${CMAKE_CURRENT_SOURCE_DIR}/data/*.effect"
  "${CMAKE_CURRENT_SOURCE_DIR}/data/locale/*.ini"
)

target_sources(${CMAKE_PROJECT_NAME} PRIVATE
  ${PLUGIN_SOURCES}
  ${PLUGIN_RESOURCES}
)

# Solution Explorer のツリー表示を実ディレクトリに揃える
source_group(TREE "${CMAKE_CURRENT_SOURCE_DIR}" FILES
  ${PLUGIN_SOURCES}
  ${PLUGIN_RESOURCES}
)
ここまで保存したら、Visual Studio 側で ソリューションのビルド を実行します。ビルドの先頭で ZERO_CHECK が走るため、.vcxproj が自動で更新されます。更新後にプロジェクトを再読み込みするかどうか聞かれたら、「すべて再読み込み」します。

先に追加したファイルがソリューションエクスプローラー上でも見られる状態になったことを確認します。

追加したファイルが反映されない場合は cmake --preset windows-x64-local を再実行して再生成してください。
3. tint.effect を実装する
data/effects/tint.effect を開き、次の内容で保存します。
uniform float4x4 ViewProj;
uniform texture2d image;

uniform float4 tint_color = {1.0, 0.5, 0.5, 1.0};
uniform float strength = 0.35;

sampler_state defaultSampler {
    Filter   = Linear;
    AddressU = Clamp;
    AddressV = Clamp;
};

struct VertInOut {
    float4 pos : POSITION;
    float2 uv  : TEXCOORD0;
};

VertInOut VSDefault(VertInOut v_in)
{
    VertInOut v_out;
    v_out.pos = mul(float4(v_in.pos.xyz, 1.0), ViewProj);
    v_out.uv  = v_in.uv;
    return v_out;
}

float4 PSTint(VertInOut v_in) : TARGET
{
    float4 c = image.Sample(defaultSampler, v_in.uv);

    float3 tinted = c.rgb * tint_color.rgb;
    c.rgb = lerp(c.rgb, tinted, strength);

    return c;
}

technique Draw
{
    pass
    {
        vertex_shader = VSDefault(v_in);
        pixel_shader  = PSTint(v_in);
    }
}
この .effect は、元の映像である image を受け取り、色味を乗算した結果を strength でブレンドして返します。フィルタ側は、描画直前に tint_color と strength をシェーダーへ渡します。
4. tint-filter.c を実装する
次に src/tint-filter.c を開き、次の内容で保存します。 tint-filter.c は、obs_module_file("effects/tint.effect") で data/ 配下のファイルを参照します。また、レンダリングを obs_source_process_filter_begin() と obs_source_process_filter_end() の枠に収めます。
#include <obs-module.h>
#include <graphics/effect.h>

struct tint_filter_data {
    obs_source_t *context;

    gs_effect_t *effect;
    gs_eparam_t *param_tint_color;
    gs_eparam_t *param_strength;

    struct vec4 tint_color;
    float strength;
};

static const char *tint_filter_get_name(void *unused)
{
    UNUSED_PARAMETER(unused);
    return obs_module_text("TintFilterName");
}

static void tint_filter_update(void *data, obs_data_t *settings)
{
    struct tint_filter_data *f = data;

    uint32_t rgba = (uint32_t)obs_data_get_int(settings, "tint_color");
    vec4_from_rgba(&f->tint_color, rgba);

    f->strength = (float)obs_data_get_double(settings, "strength");
}

static obs_properties_t *tint_filter_properties(void *unused)
{
    UNUSED_PARAMETER(unused);

    obs_properties_t *props = obs_properties_create();
    obs_properties_add_color(props, "tint_color", obs_module_text("TintColor"));
    obs_properties_add_float_slider(
        props, "strength", obs_module_text("Strength"), 0.0, 1.0, 0.01);

    return props;
}

static void *tint_filter_create(obs_data_t *settings, obs_source_t *source)
{
    struct tint_filter_data *f = bzalloc(sizeof(*f));
    f->context = source;

    obs_enter_graphics();

    char *path = obs_module_file("effects/tint.effect");
    f->effect = gs_effect_create_from_file(path, NULL);
    bfree(path);

    if (f->effect) {
        f->param_tint_color = gs_effect_get_param_by_name(f->effect, "tint_color");
        f->param_strength  = gs_effect_get_param_by_name(f->effect, "strength");
    }

    obs_leave_graphics();

    tint_filter_update(f, settings);
    return f;
}

static void tint_filter_destroy(void *data)
{
    struct tint_filter_data *f = data;

    obs_enter_graphics();
    if (f->effect) {
        gs_effect_destroy(f->effect);
    }
    obs_leave_graphics();

    bfree(f);
}

static void tint_filter_render(void *data, gs_effect_t *unused)
{
    UNUSED_PARAMETER(unused);
    struct tint_filter_data *f = data;

    if (!f->effect) {
        obs_source_skip_video_filter(f->context);
        return;
    }

    if (!obs_source_process_filter_begin(
            f->context, GS_RGBA, OBS_ALLOW_DIRECT_RENDERING)) {
        return;
    }

    gs_effect_set_vec4(f->param_tint_color, &f->tint_color);
    gs_effect_set_float(f->param_strength, f->strength);

    obs_source_process_filter_end(f->context, f->effect, 0, 0);
}

static struct obs_source_info tint_filter_info = {
    .id = "tint_filter",
    .type = OBS_SOURCE_TYPE_FILTER,
    .output_flags = OBS_SOURCE_VIDEO,
    .get_name = tint_filter_get_name,
    .create = tint_filter_create,
    .destroy = tint_filter_destroy,
    .update = tint_filter_update,
    .get_properties = tint_filter_properties,
    .video_render = tint_filter_render,
};

void register_tint_filter(void)
{
    obs_register_source(&tint_filter_info);
}
このファイルは obs_module_load() を持たないため、このファイルを追加しただけでは OBS からロードされません。src/plugin-main.c から register_tint_filter() を呼び出す必要があります。
5. plugin-main.c でフィルタ登録を呼ぶ
src/plugin-main.c を開き、register_tint_filter() を呼び出します。対応は次の 2 行だけです。
-
register_tint_filter()の宣言を追加 -
obs_module_load()内で 1 回呼び出す
既存の実装に対し以下のように追加します。
#include <obs-module.h>
#include <plugin-support.h>

OBS_DECLARE_MODULE()
OBS_MODULE_USE_DEFAULT_LOCALE(PLUGIN_NAME, "en-US")

void register_tint_filter(void); // ←ここに追加

bool obs_module_load(void)
{
    register_tint_filter();  // ←ここに追加
	obs_log(LOG_INFO, "plugin loaded successfully (version %s)", PLUGIN_VERSION);
	return true;
}

void obs_module_unload(void)
{
	obs_log(LOG_INFO, "plugin unloaded");
}
ソースに日本語が含まれているときビルド時にエラーとなる場合があります。その場合は、「←ここに追加」の部分を削除してください。または、ソースを UTF-8(BOM) で保存すると回避できることがあります。
6. ロケール (表示名) を追加する
data/locale/en-US.ini と data/locale/ja-JP.ini に、次の 3 行を追記します。
TintFilterName="Tint Filter"
TintColor="Tint color"
Strength="Strength"
7. ビルドしてインストール結果を確認する
ビルド > ソリューションのリビルド でリビルドします。ビルド出力に、次のようなログが出ていれば、POST_BUILD で cmake --install が実行されています。
Installing OBS plugin (cmake --install)-
-- Installing:または-- Up-to-date:

プラグインをロード済みの OBS を起動したままビルドすると失敗するため注意してください。
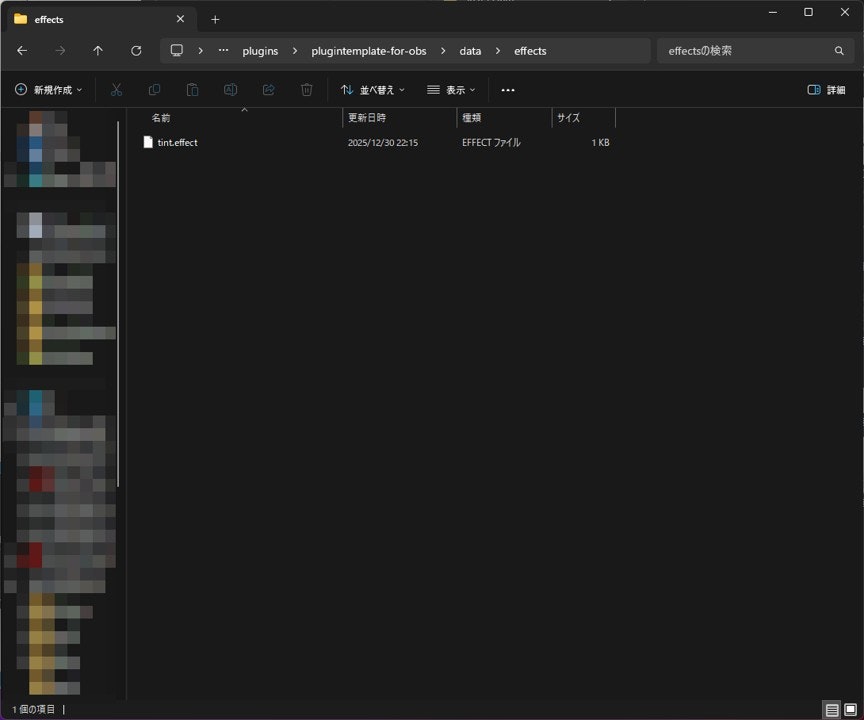
また、インストール先である C:/ProgramData/obs-studio/plugins/plugintemplate-for-obs/data/effects/ に tint.effect がコピーされていることを確認します。
8. OBS でフィルタを追加する
OBS を再起動し、任意の映像ソースを右クリックして フィルタ を開きます。エフェクトフィルタ 側に Tint Filter が表示されるのを確認します。

下記の操作ができることを確認します。
-
Tint colorで色味変更 -
Strengthで効果の強さ変更

まとめ
obs-plugintemplate を使うと、OBS プラグイン開発の初期セットアップを CMake preset で素早く進められます。CMakeUserPresets.json で CMAKE_INSTALL_PREFIX を調整し、Visual Studio ビルド後に cmake --install を自動実行すると反復が楽になります。最後に .effect を使った簡単な映像フィルタ (Tint Filter) を実装し、OBS 上で動作することを確認しました。
次回 は、buildspec.json 変更によるプラグイン名/バージョン名変更から、GitHub Releases を使った zip の配布方法までを解説します。