はじめに
Qiita初投稿です!
巷によく聞くCircleCIを触ってみたくて簡単なアプリで実装してみた忘備録です。
遭遇したエラーを解決していく形で実装していきます。
間違いや修正点がありましたらご指摘いただけるとありがたいです!!
こちらの記事を参考にさせていただきました!
→ https://qiita.com/rentama/items/477d3dcae423373f7c0d
環境
- Rails: 5.2.3
概要
- Railsアプリケーションと雛形の作成
- rspecを用いたテストコードの記述
- CircleCIでコミット時の自動テスト
1.Railsアプリケーションと雛形の作成
まずはアプリケーションを立ち上げましょう!
$ rails _5.2.3_ new test-app -d mysql
今回は名前とテキストを持った商品テーブルを作成していきます
$ rails db:create
$ rails g scaffold Item name:string text:string
$ rails db:migrate
$ rails s
http://localhost:3000/items/new で新規投稿ができるようになっています。
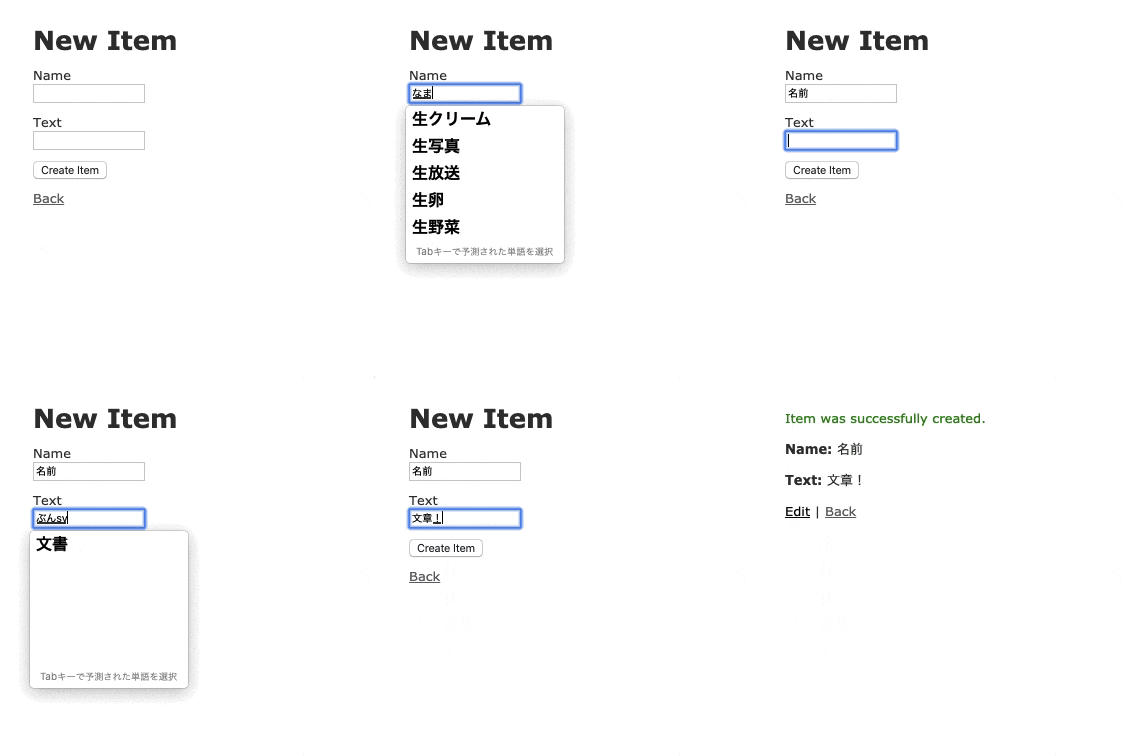
基本的なアプリは完成しました!
ここからrspecを使用してテストコードを書いていきます。
2. rspecを用いたテストコードの記述
まずはモデルにValidationをかけておきます。
実用的ではありませんが練習ということで…
  validates :name,   presence: true
  validates :text,   presence: true, length: {minimum: 5, maximum: 20}
次にrspecの設定を行っていきます
最初にGemをインストール
gem 'rspec-rails'
bundle installしてRSpec用の設定ファイルを作成
$ bundle install
$ rails g rspec:install
rspec用のファイルが作成されたと思います
      create  .rspec
      create  spec
      create  spec/spec_helper.rb
      create  spec/rails_helper.rb
specディレクトリ以下にmodelsディレクトリを作成しitem_spec.rbにモデルのテストを書いていきます…
require 'rails_helper'

RSpec.describe Item, type: :model do
  it 'name存在し,textが5文字以上存在する時保存される' do
    item = Item.new(name: 'name', text: '12345')
    expect(item).to be_valid
  end
  it 'nameが存在しないので保存されない' do
    item = Item.new(text: '12345')
    expect(item).not_to be_valid
  end
  it 'textが存在しないので保存されない' do
    item = Item.new(name: 'name')
    expect(item).not_to be_valid
  end
  it 'textが5文字未満なので保存されない' do
    item = Item.new(name: 'name', text: '1234')
    expect(item).not_to be_valid
  end
end
テストコードが動いているか確認
$ bundle exec rspec
2020-01-29 20:42:29 WARN Selenium [DEPRECATION]

Finished in 0.02331 seconds (files took 1.94 seconds to load)
4 examples, 0 failures
準備オッケー!いよいよ本題です!
3. CircleCIでコミット時の自動テスト
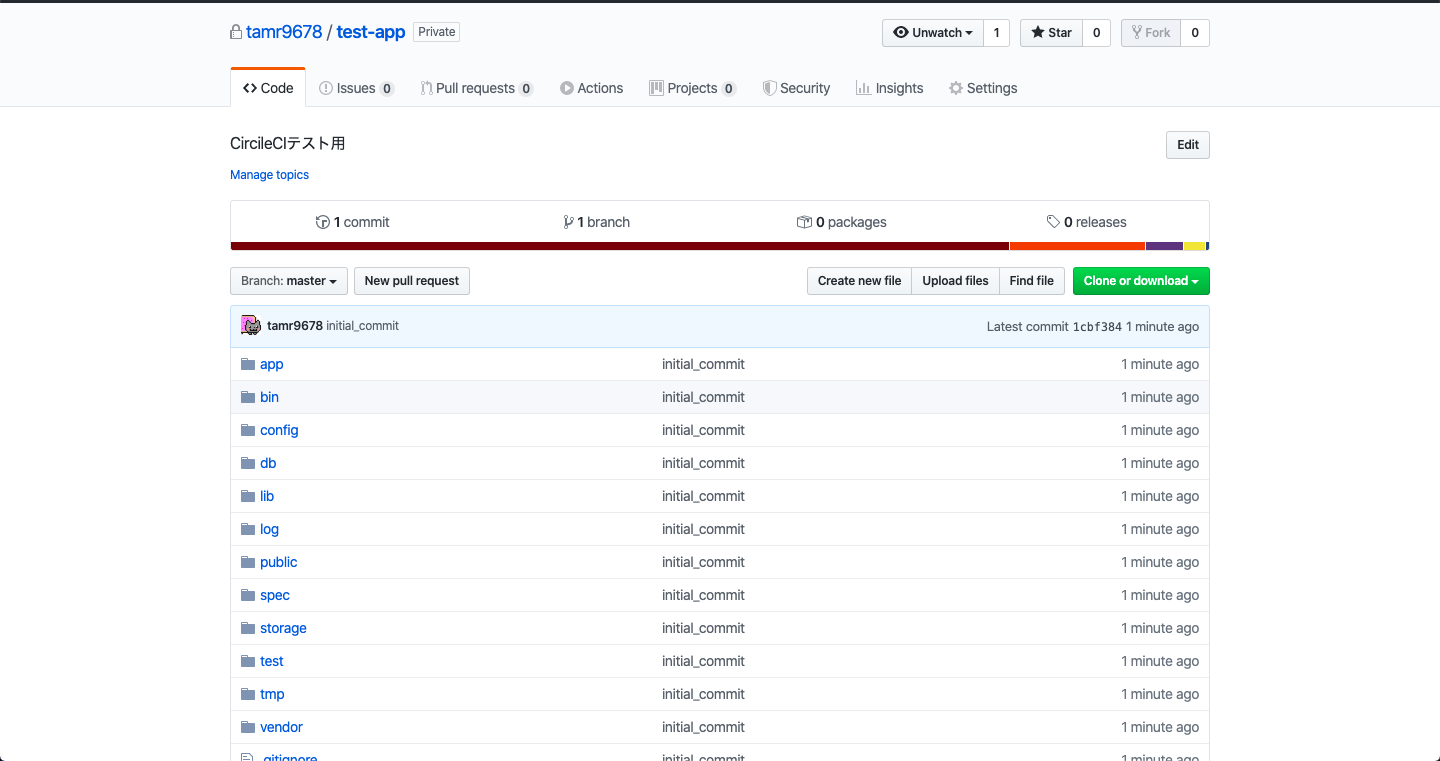
最初に作成したアプリケーションをGitリポジトリに登録しておきましょう
次にこちらからCircleCIにサインアップして、GitHubと提携させます。
提携が終わったらサイドメニューの'ADD PROJECT'から作成したリポジトリを選択して設定しましょう
使用している言語を選択してStart Building!!
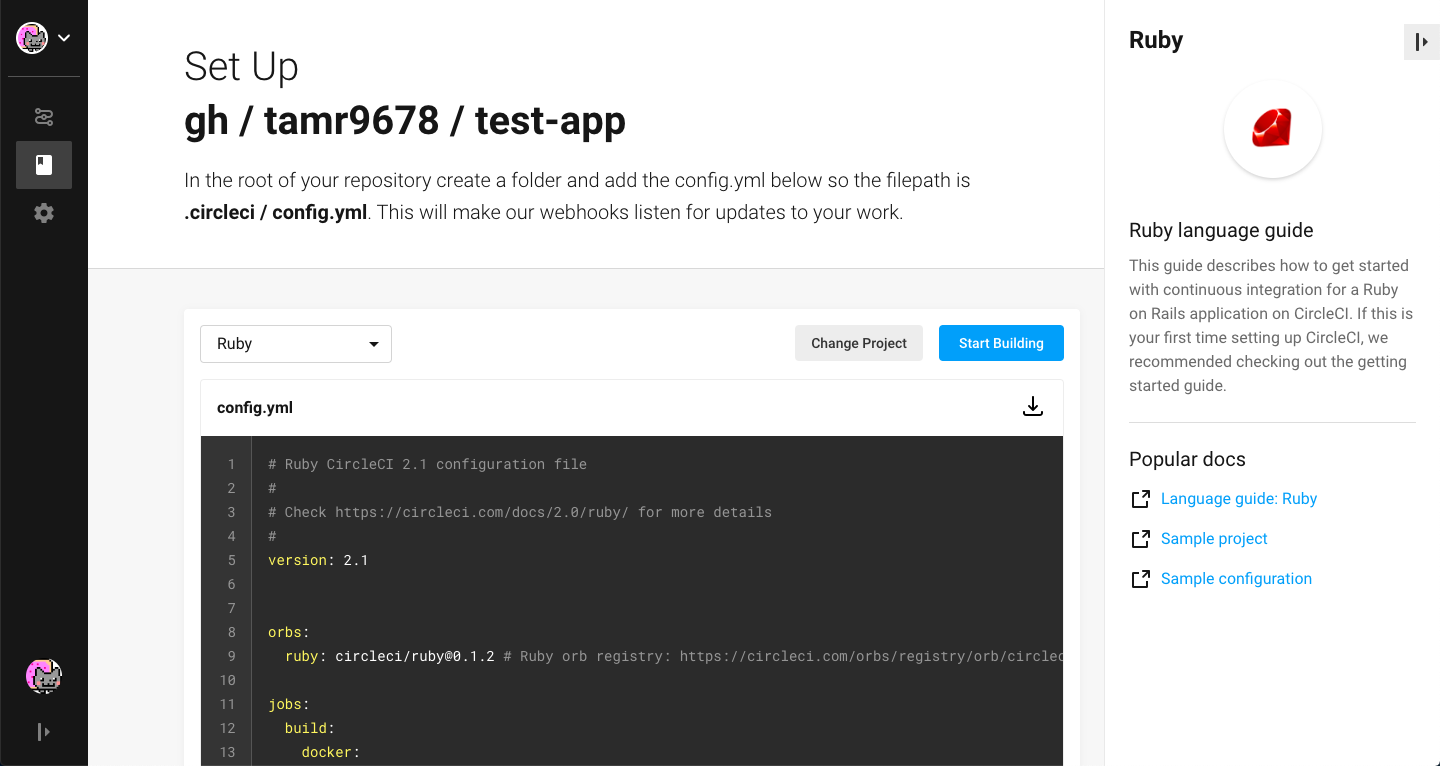
config.ymlファイルもう作った??みたいなこと聞かれますが無視してビルドしてみます
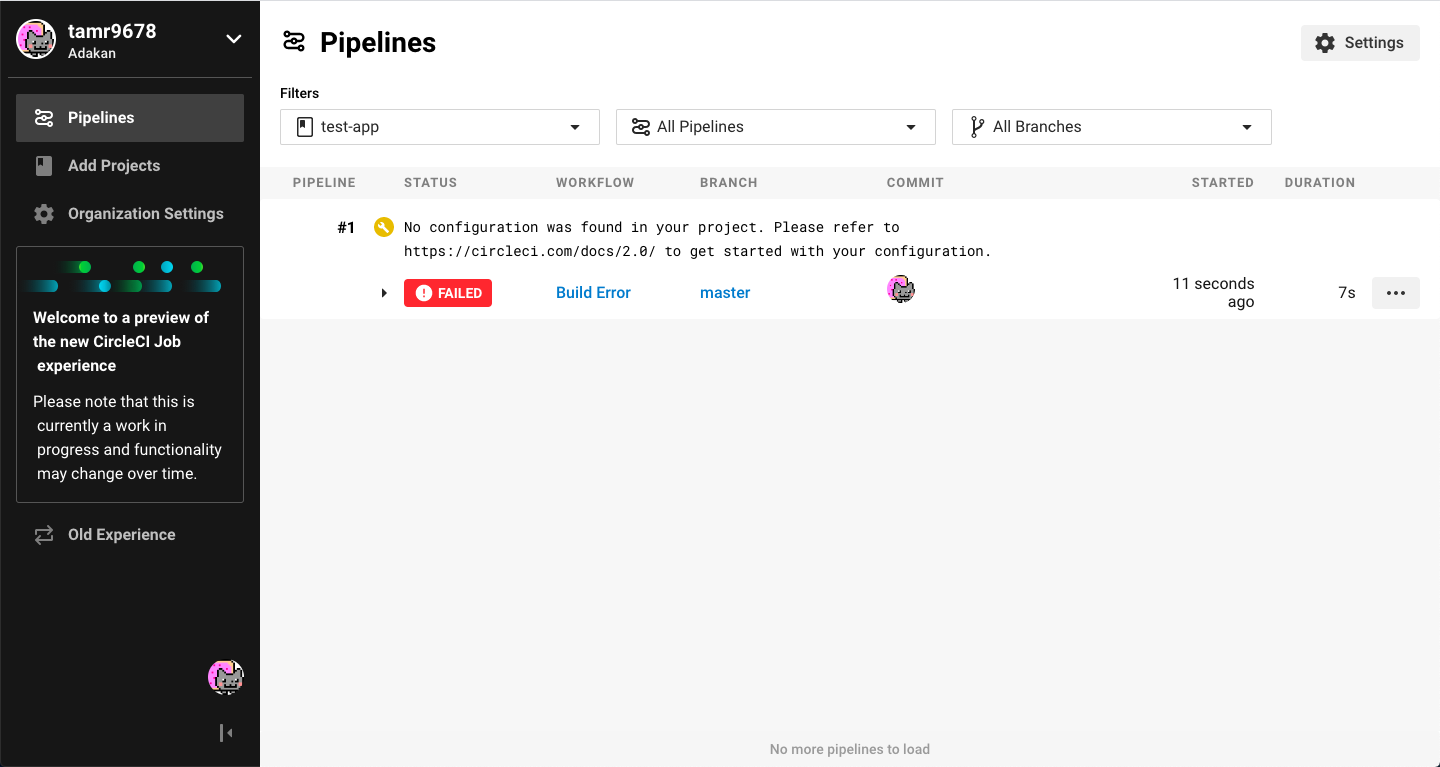
当たり前ですが失敗しました…
エラーを見に行ってみましょう。
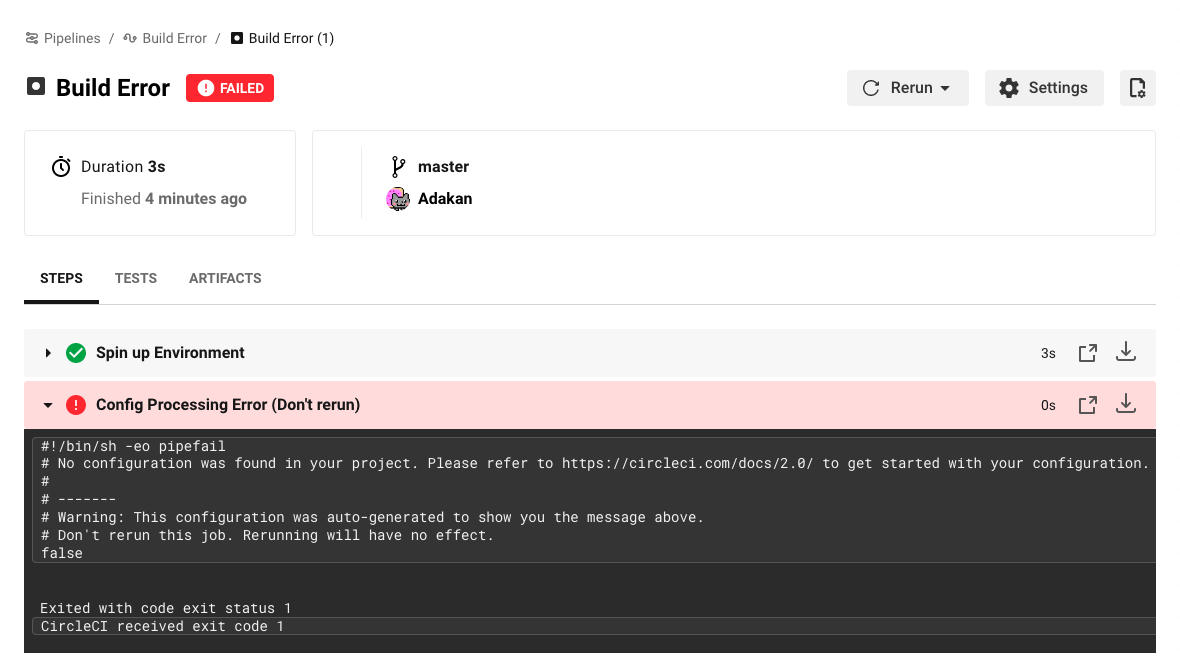
案の定設定ファイルがないと怒られました…
言われた通りCircleCIの設定ファイルを作っていきましょう。
アプリケーションのルートディレクトリに.circleic/config.ymlを作成して設定ファイルを記述します。
内容はこちらの記事を参考にさせていただきました
# Ruby CircleCI 2.0 configuration file
#
# Check https://circleci.com/docs/2.0/language-ruby/ for more details
#
version: 2
jobs:
  build:
    docker:
      # specify the version you desire here
      - image: circleci/ruby:2.5.1-node-browsers
        environment:
          RAILS_ENV: test
          MYSQL_HOST: 127.0.0.1
          MYSQL_USERNAME: 'root'
          MYSQL_PASSWORD: ''
          MYSQL_PORT: 3306
      - image: circleci/mysql:5.7.18
        environment:
          MYSQL_ALLOW_EMPTY_PASSWORD: true
          MYSQL_ROOT_PASSWORD: ''
          MYSQL_DATABASE: circle_ci_test-test

      # Specify service dependencies here if necessary
      # CircleCI maintains a library of pre-built images
      # documented at https://circleci.com/docs/2.0/circleci-images/
      # - image: circleci/postgres:9.4

    working_directory: ~/circle-ci-test

    steps:
      - checkout

      # Download and cache dependencies
      - restore_cache:
          keys:
            - v1-dependencies-{{ checksum "Gemfile.lock" }}
            # fallback to using the latest cache if no exact match is found
            - v1-dependencies-

      - run:
          name: install dependencies
          command: |
            bundle install --jobs=4 --retry=3 --path vendor/bundle

      - save_cache:
          paths:
            - ./vendor/bundle
          key: v1-dependencies-{{ checksum "Gemfile.lock" }}

      # Database setup
      - run:
          name: waiting for stating database
          command: dockerize -wait tcp://127.0.0.1:3306 -timeout 1m
      - run: bundle exec rake db:create
      - run: bundle exec rake db:schema:load

      # run tests!
      - run:
          name: Run rspec in parallel
          command: |
            bundle exec rspec --profile 10 \
                              --format RspecJunitFormatter \
                              --out test_results/rspec.xml \
                              --format progress \
                              $(circleci tests glob "spec/**/*_spec.rb" | circleci tests split --split-by=timings)

      # collect reports
      - store_test_results:
          path: /tmp/test-results
      - store_artifacts:
          path: /tmp/test-results
          destination: test-results
ファイルを追加したらcommit&pushしてあげましょう!
またマスターにプッシュされるとまたCircleCIが走ってくれます。
しかしまたエラー…
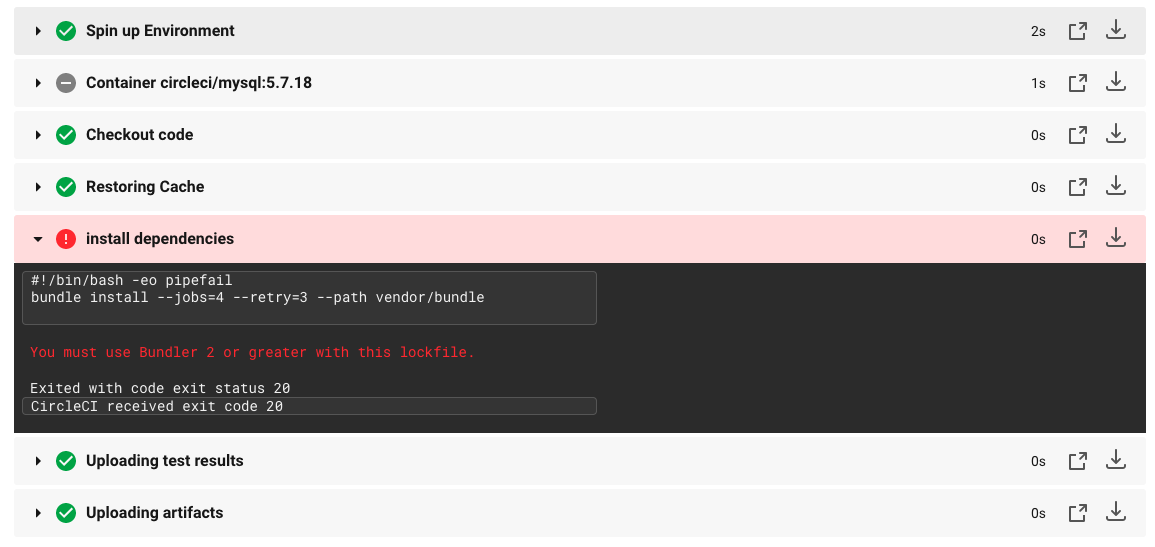
bundlerのバージョンが2以上じゃないとダメみたいですね
bundler2.1.0をインストールしてバージョン指定して実行するようにしました
jobs:
  build:
    docker:
      # specify the version you desire here
      - image: circleci/ruby:2.5.1-node-browsers
        environment:
          RAILS_ENV: test
          MYSQL_HOST: 127.0.0.1
          MYSQL_USERNAME: 'root'
          MYSQL_PASSWORD: ''
          MYSQL_PORT: 3306
          # 追記
          BUNDLER_VERSION: 2.1.0

# 省略

# 以下を変更
      - run:
          name: install dependencies
          command: |
            gem install bundler:2.1.0
            bundle _2.1.0_ install --jobs=4 --retry=3 --path vendor/bundle
コミット、プッシュしてみると今度はMySQLのエラー…

mysql.sockがない?
こちらの記事を参考にdatabase.ymlにhostを設定してあげました!
~~

default: &default
  adapter: mysql2
  encoding: utf8
  pool: <%= ENV.fetch("RAILS_MAX_THREADS") { 5 } %>
  username: root
  password:
  socket: /tmp/mysql.sock
# 追記
  host: <%= ENV['MYSQL_HOST'] %>

~~
Database setupは通った!!
しかし、rspecでエラー

'rspec_junit_formatter'がないようです。
circleicでrspecを使うにはgemが必要になるみたいです。
言われた通り以下のgemを追加しましょう!
gem 'rspec_junit_formatter'
bundle installしてもう一度コミットプッシュ!
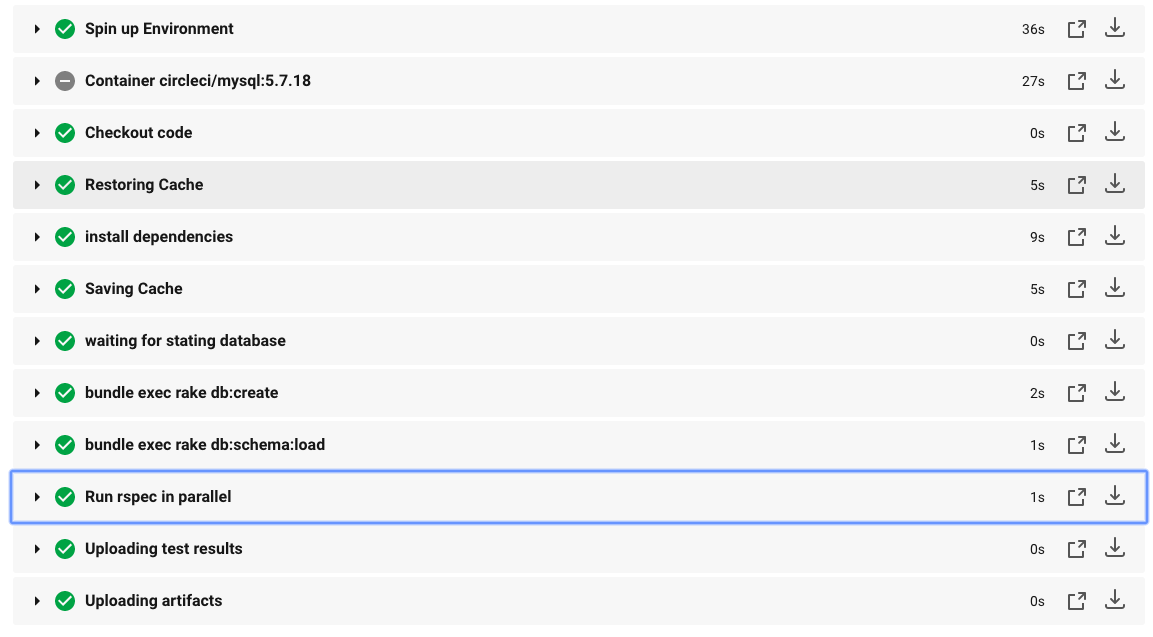
完走!!!
そして…
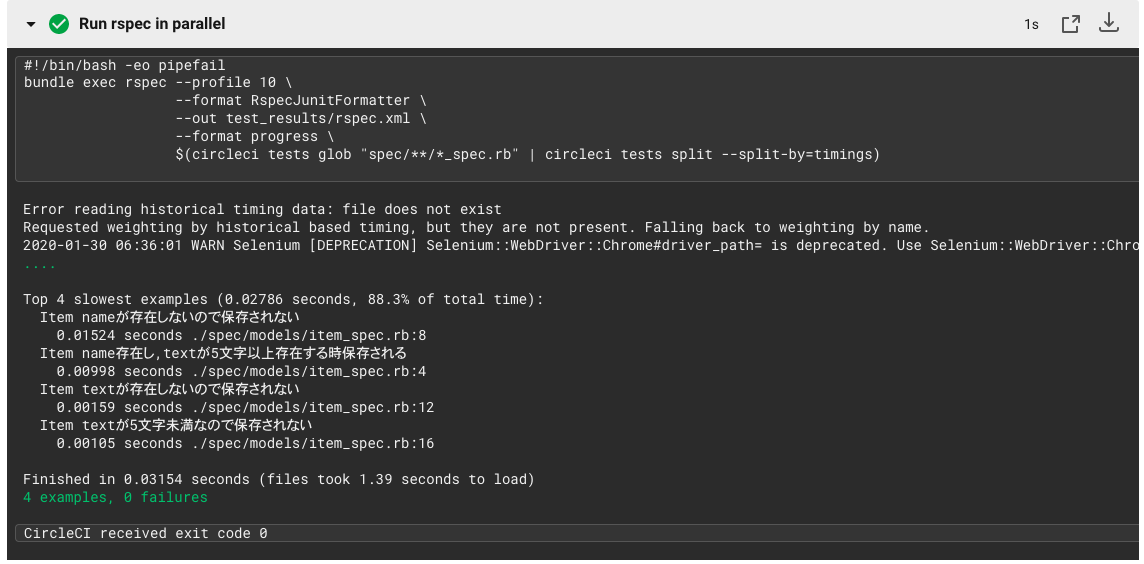
テストも通ってる!!!!
しかし…
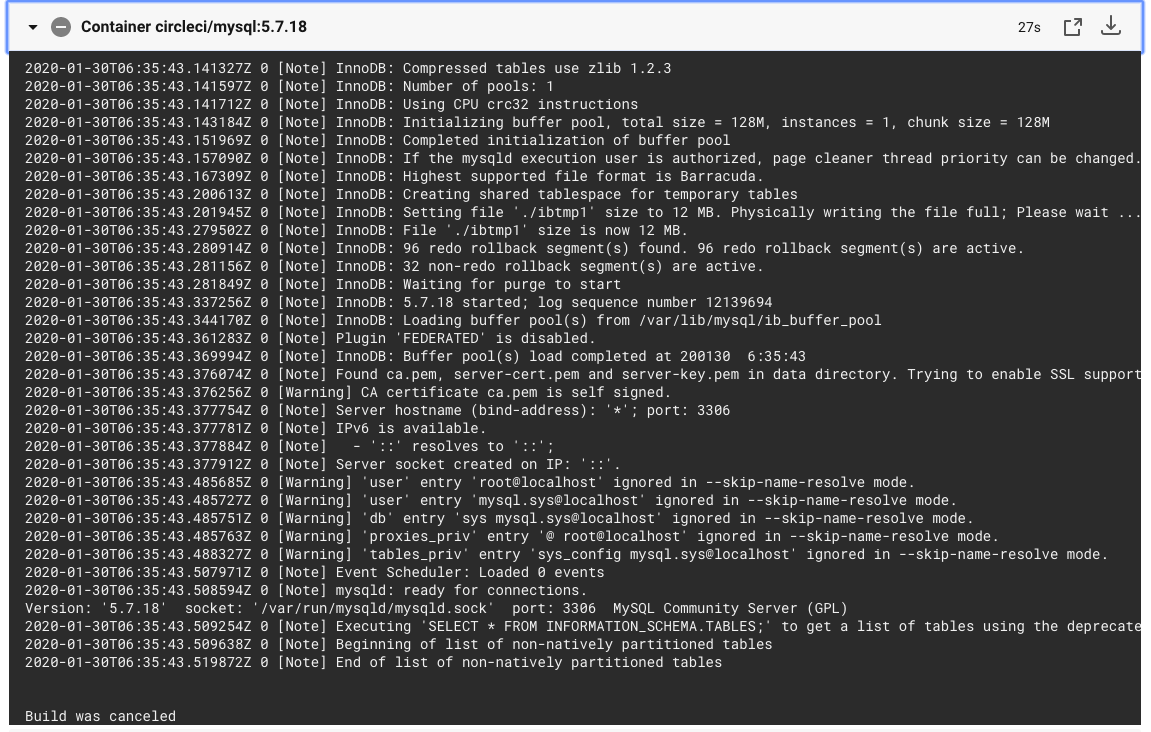
MySQLのコンテナがビルドされていない?
おわりに
ゼロ知識でCircleCiを使ってみましたがなかなか苦戦しました。
コンテナ技術ありきなのでDockerはじめコンテナとインフラ知識があればスムーズにconfigも書けそうですね。
課題を残して終わってしまったので解決したら追記していこうと思います。
最後まで読んでいただきありがとうございました!!
参考にさせていただいた記事
はじめてのCircleCI。Railsプロジェクトで試してみる。
https://qiita.com/rentama/items/477d3dcae423373f7c0d
CircleCIでRails+MySQLプロジェクトの自動テストを行うための最低限の設定
https://qiita.com/t-izaki/items/c6ef3239176f9c6697f2
