プログラミングスクールのチーム開発で、
カテゴリーに親・子・孫の関係をもたせたいと思った時のお話です。
Railsのgem 'ancestry'を導入することで実現することができました。
ancestryのgithub
https://github.com/stefankroes/ancestry
開発環境
Ruby 2.5.1
Rails 5.2.3
やりたかったこと
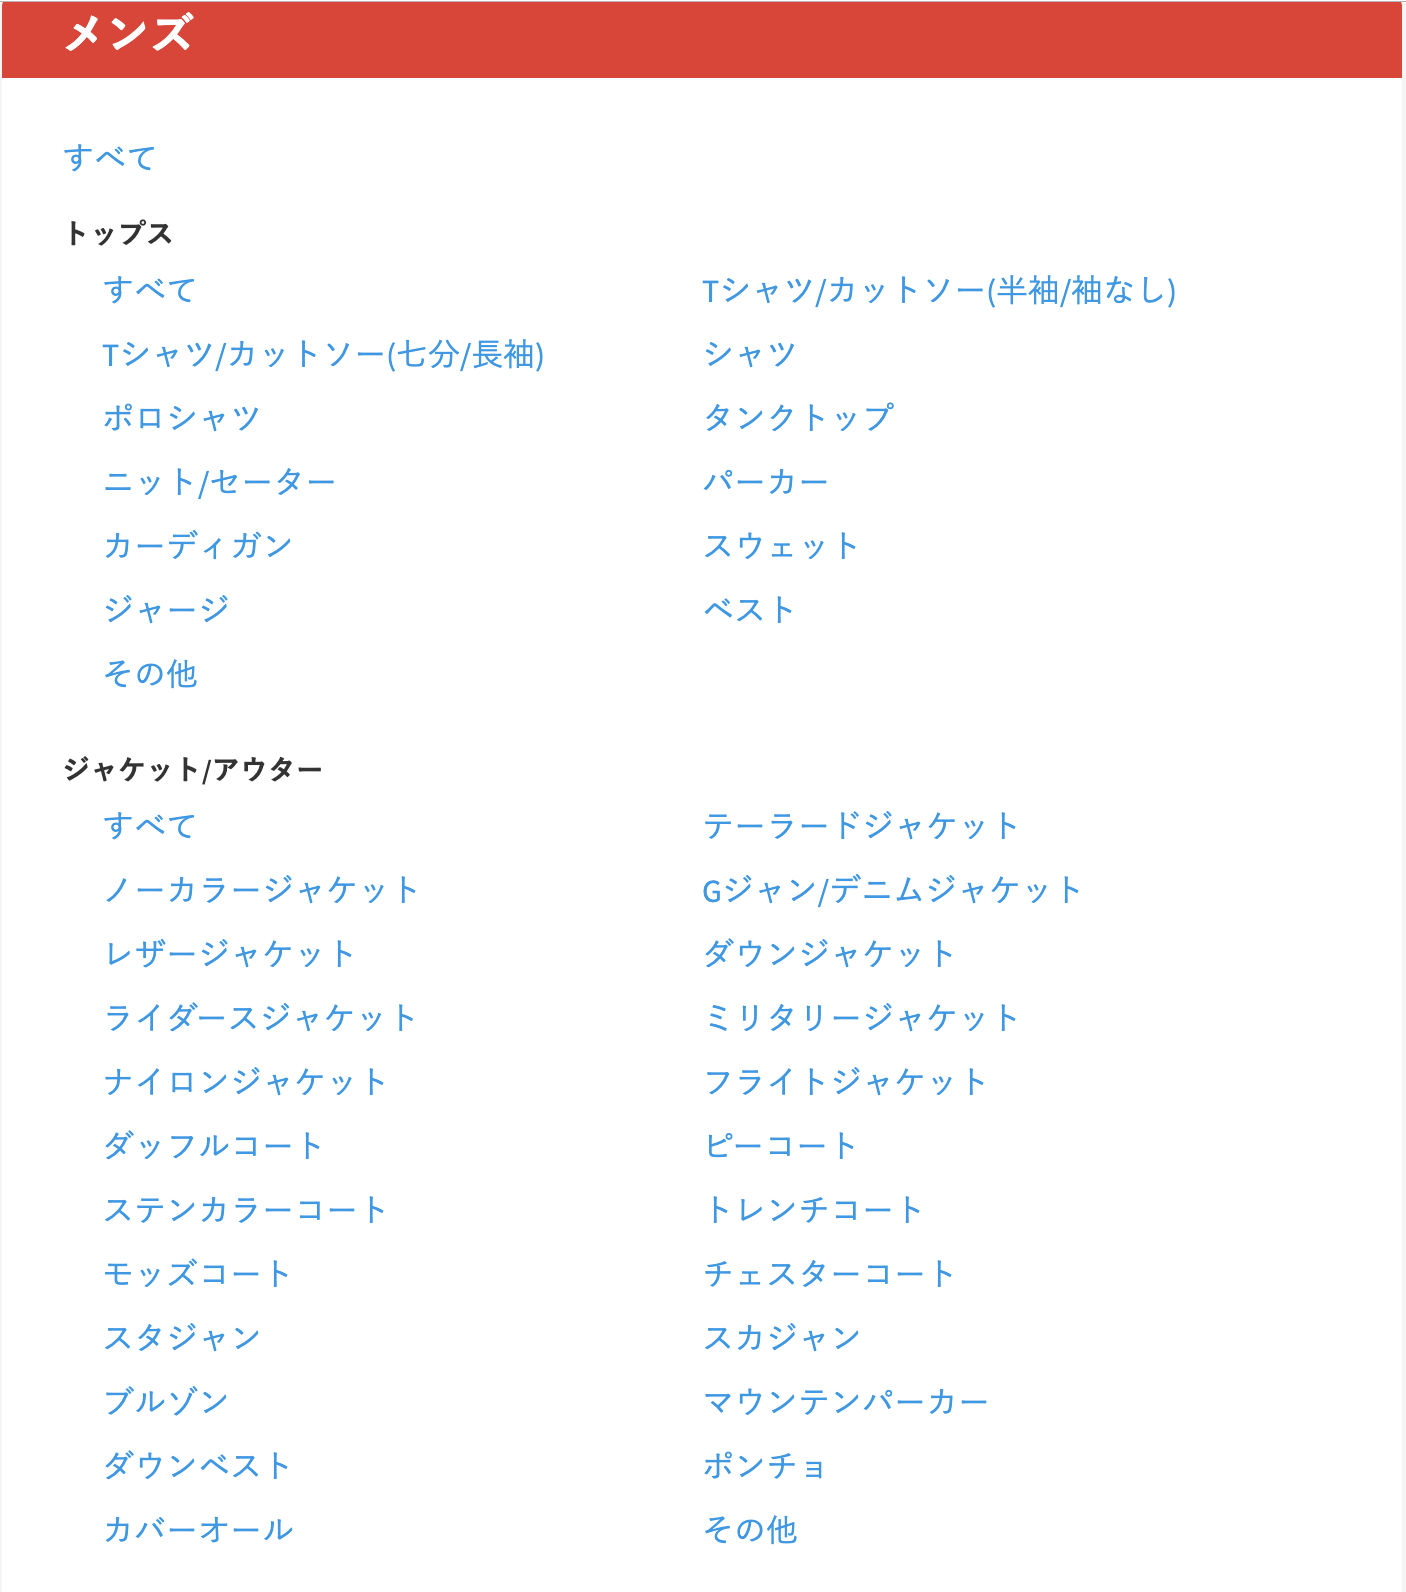
下記の写真のように、(一部抜粋)
・親:メンズ
・子:トップス
・孫:すべて, Tシャツ/カットソー(半袖/袖なし), Tシャツ/カットソー(七分/長袖)...
カテゴリーの項目に対して、関係性をもたせる。

ancestry導入でできること
概略をいうと、以下のテーブルのように、レコードごとの関係性を示すパス(カラム名:ancestry。gemのREADMEにのっとり、名前を決めています)を簡単に作成することができます。
また、データの取り出しも、パスを使うことで簡単に行うことができます。
| id | name | ancestry |
|---|---|---|
| 1 | メンズ | nil |
| 2 | トップス | 1 |
| 3 | すべて | 1/2 |
| 4 | Tシャツ/カットソー(半袖/袖なし) | 1/2 |
| 5 | Tシャツ/カットソー(七分/長袖) | 1/2 |
・親のパス(ancestry)はnil
・子のパスは、親のid
・孫のパスは、(親のid)/(子のid)
となります。
実際に上記のDBを作るまで
まずはじめに、
| id | name |
|---|---|
| のテーブルを作成してください。 |
ancestryの下準備
下記のREADMEに従えば大丈夫です
https://github.com/stefankroes/ancestry
Gemfile
Gemfileに記述を追加
gem 'ancestry'
ターミナル上で、下記のコードを実行
$ bundle install
$ rails g migration add_ancestry_to_category ancestry:string:index
categoriesテーブルにancestryのカラムを作成
class AddAncestryToCategory < ActiveRecord::Migration[5.2]
  def change
    add_column :categories, :ancestry, :string
    add_index :categories, :ancestry
  end
end
categoryモデルにancestryを明示
class Category < ApplicationRecord
   ~省略~
   has_ancestry
end
これで、テーブルの準備は整いました。
ancestryのメソッドを用いてデータ挿入
カテゴリーデータは、アプリの初期データとして欲しかったので、seedを使いました。
seedを使って、すべてのデータを作成したお話は、別の機会に。
https://qiita.com/ATORA1992/items/617088f885117532454e
今回は、例で出したテーブルの作成に絞ってお話します。
ancestryを導入すると、便利なメソッドを使うことができます。(一部抜粋)
| method | return value |
|---|---|
children |
子供のレコードを取り出せます |
すべてのメソッドは
https://github.com/stefankroes/ancestry
のNavigating your treeを参照してください。
上記のメソッドは、データの取り出しだけではなく、作成時にも使うことができます。
これらを使うと、、、
mens = Category.create(:name=>"メンズ")

mens_tops = mens.children.create(:name=>"トップス")

mens_tops.children.create([{:name=>"すべて"}, {:name=>"Tシャツ/カットソー(半袖/袖なし)"},{:name=>"Tシャツ/カットソー(七分/長袖)"}])
とすることで、勝手にancestryにパスのデータも作成してくれます。
| id | name | ancestry |
|---|---|---|
| 1 | メンズ | nil |
| 2 | トップス | 1 |
| 3 | すべて | 1/2 |
| 4 | Tシャツ/カットソー(半袖/袖なし) | 1/2 |
| 5 | Tシャツ/カットソー(七分/長袖) | 1/2 |
細かく見ていくと
親カテゴリーをまずは作成
mens = Category.create(:name=>"メンズ")
作成した親レコードに対して、".children"メソッドで、子供であることを明示し、子カテゴリーを作成
mens_tops = mens.children.create(:name=>"トップス")
同様に、作成した子レコードに対して、".children"メソッドで、子供の子(孫)であることを明示し、孫カテゴリーを作成
mens_tops.children.create([{:name=>"すべて"}, {:name=>"Tシャツ/カットソー(半袖/袖なし)"},{:name=>"Tシャツ/カットソー(七分/長袖)"}])
まとめ
多階層構造を作るなら、ancestryが便利です。
一つのテーブル内で関係性をもたせることができるので、中間テーブルとか、外部キーとかもいらないですしね。
今回は、データの保存に関してのみ書きましたが、取り出しも、メソッドを使うと簡単に行うことができます。
それに関しては、別記事にまとめたいと思います。
参考
https://github.com/stefankroes/ancestry
https://qiita.com/Sotq_17/items/120256209993fb05ebac
https://qiita.com/NAKANO_Akihito/items/d42a6ceae40933af2352