「Youtube生配信中に家族が乱入するあるある」の防止には「ONAIRランプ」ですね。(ホントか?)
というわけで、いつものESPrDeveloperでWebServerをたててスイッチをON/OFFするのを作り出したんですが、以前挫折したEspalexaで動いている記事をみつけたので、リベンジしてみることにしました。
fauxmoESPが動かなくて以降、ESPrDeveloper直でのalexa連携は挫折していた(っていうかマイブームじゃなくなっていた)ので、ひさびさの復活です。
準備したもの
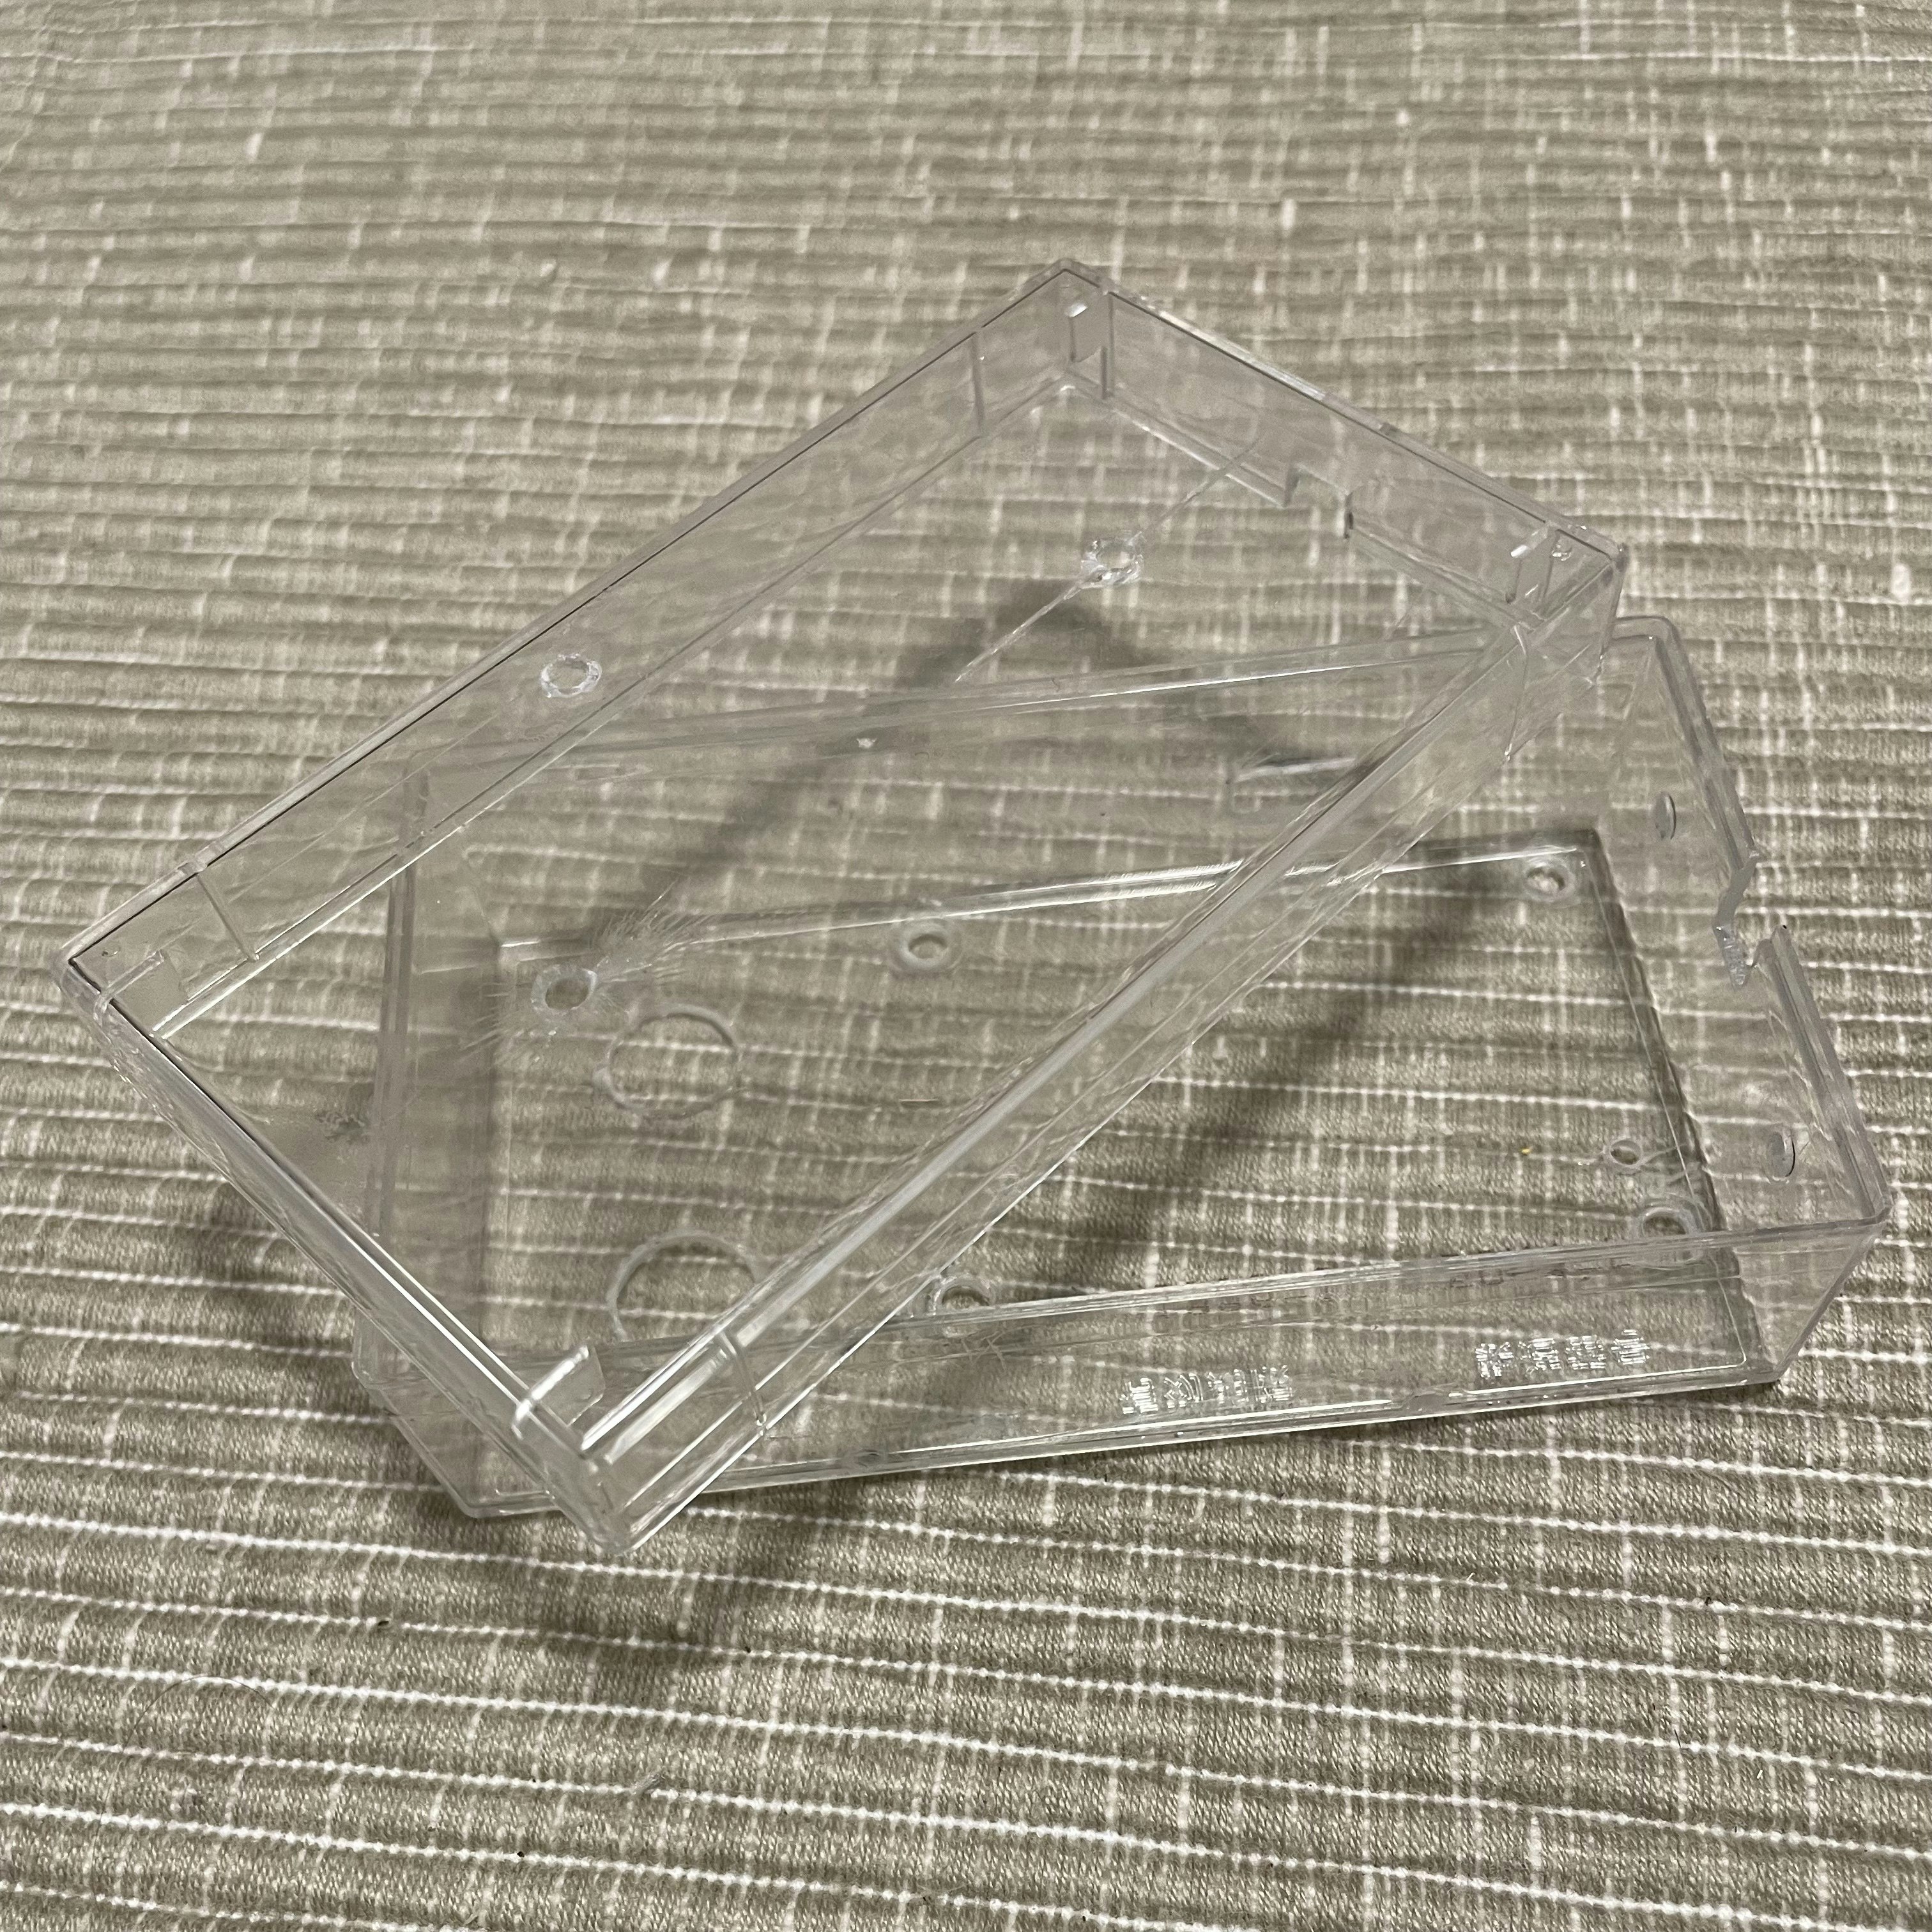
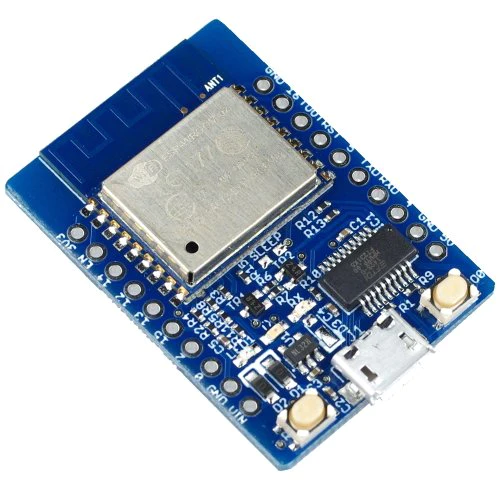
- 透明なケース → 過去にいろいろ使って余っていたケースを探してきました(なので穴だらけ)
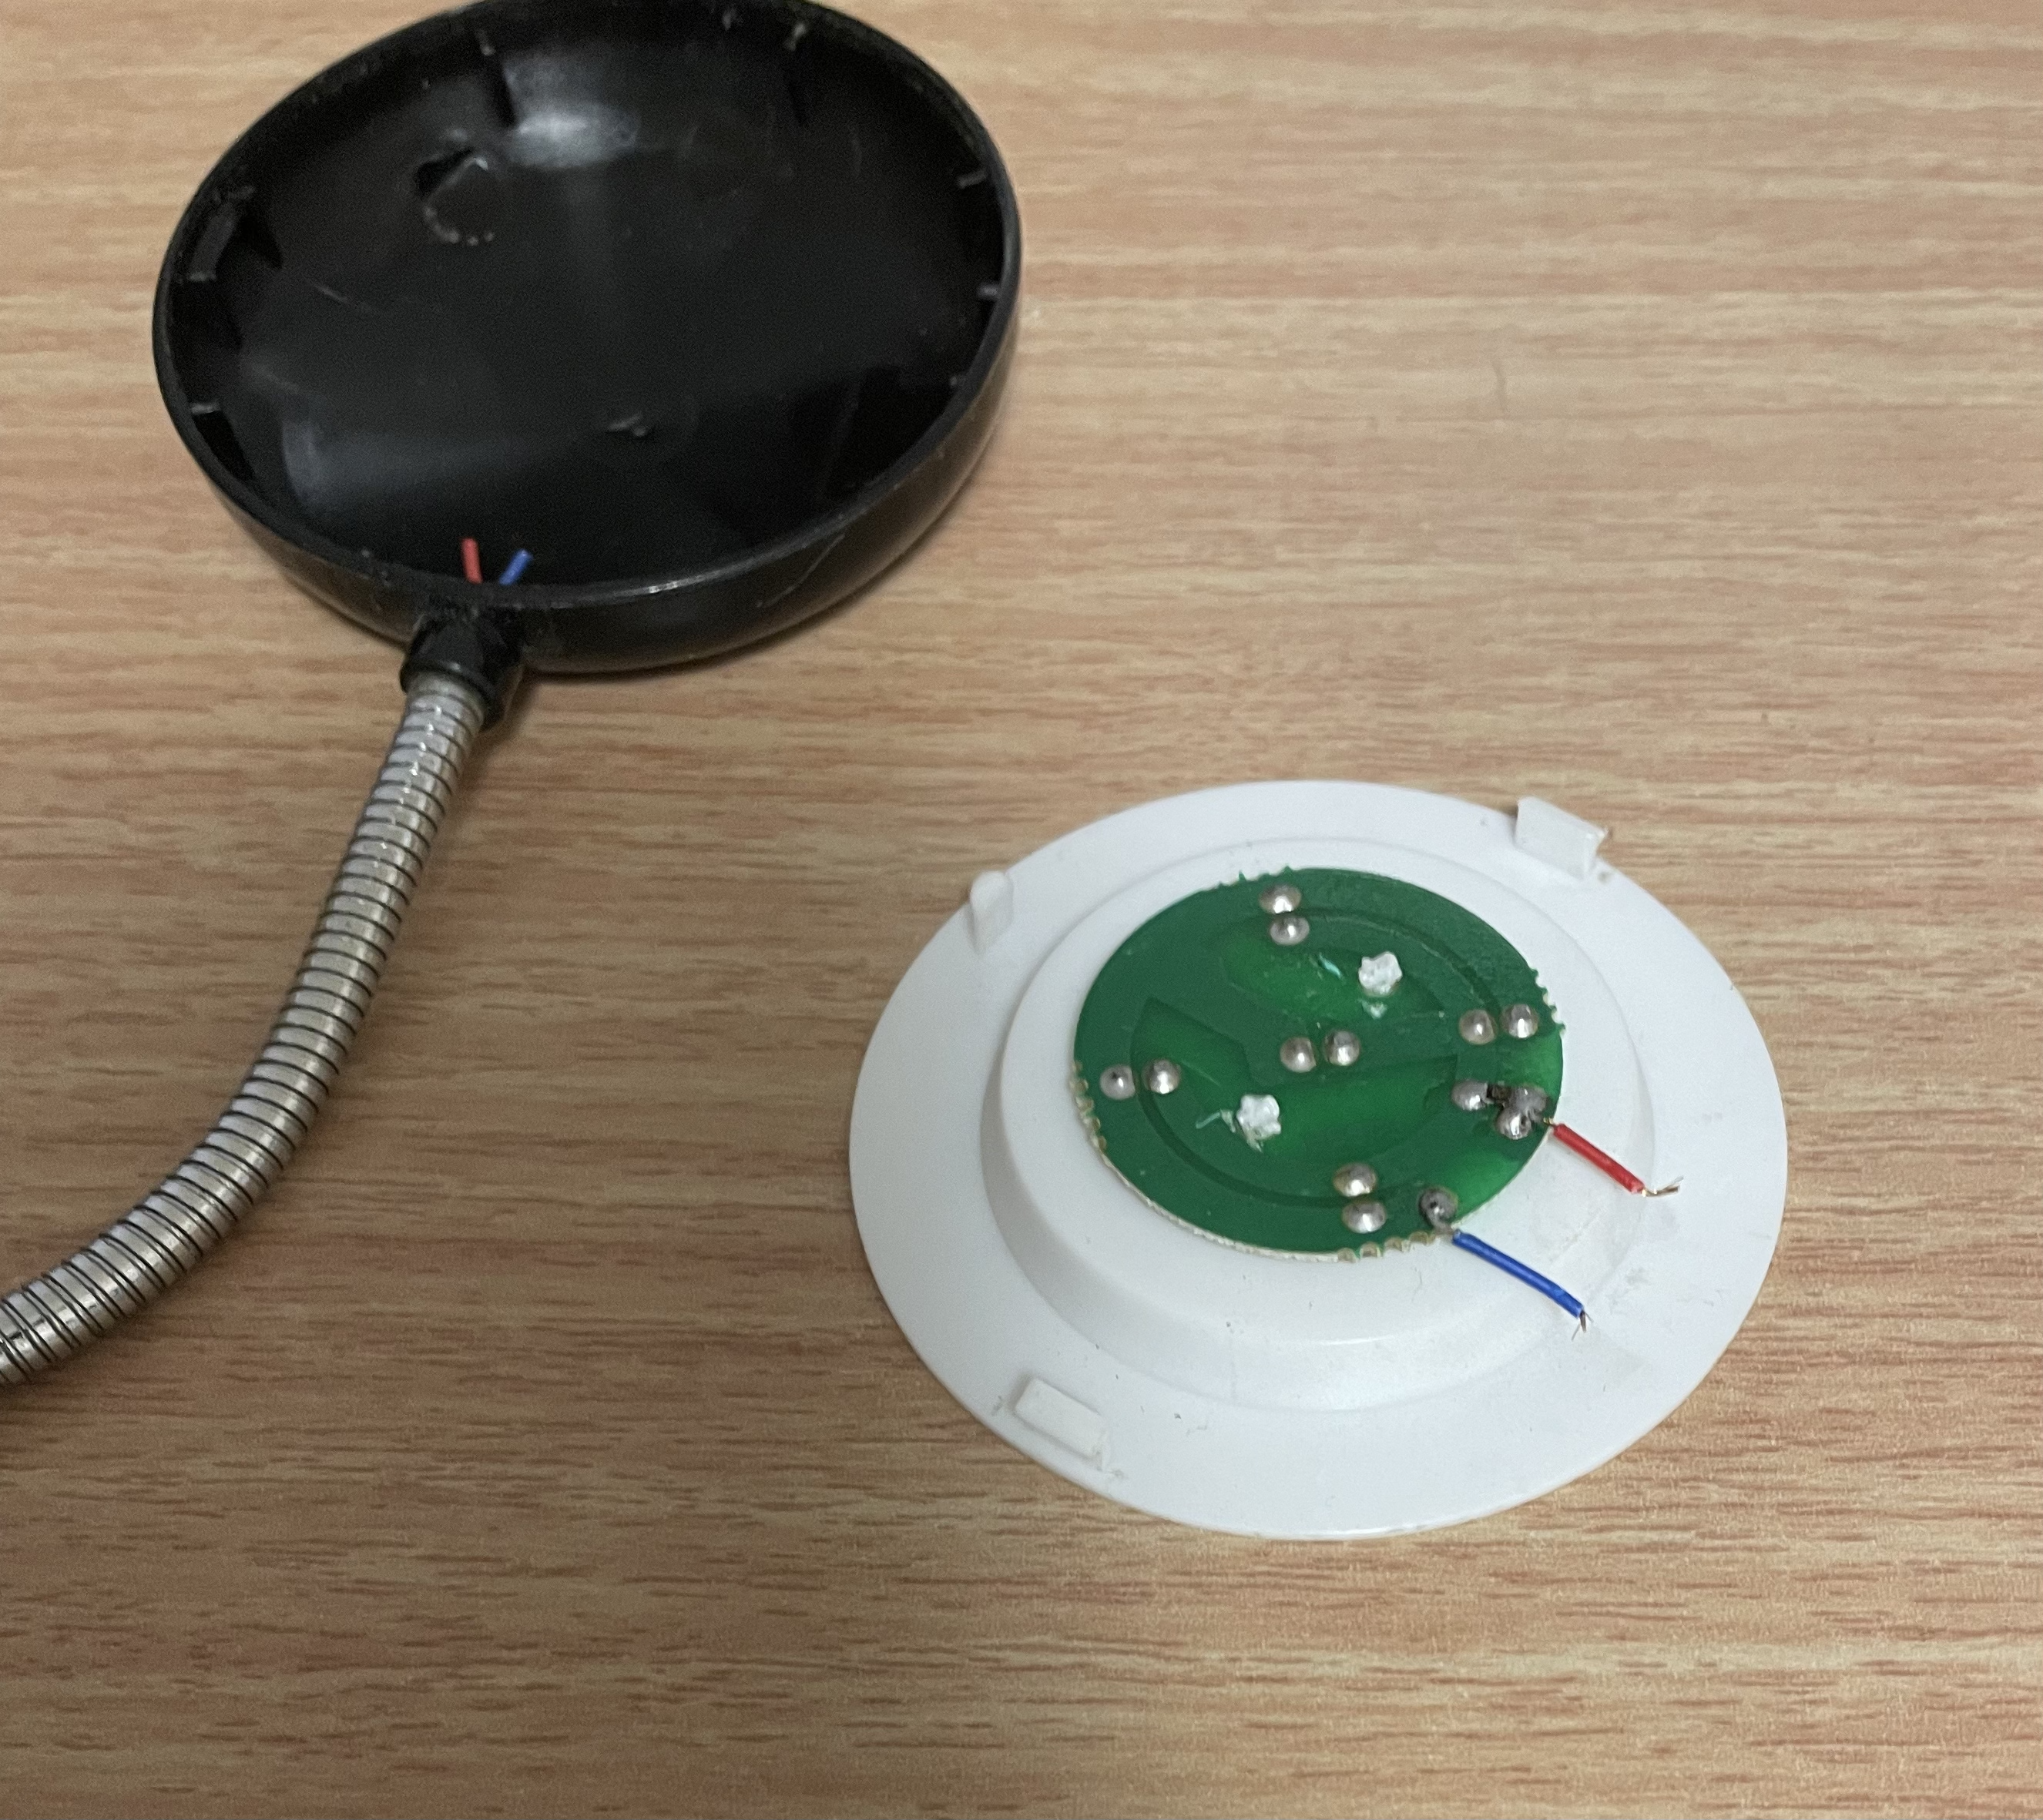
* LED →ダイソーのLEDランプが余っていたので分解して再利用しました

-
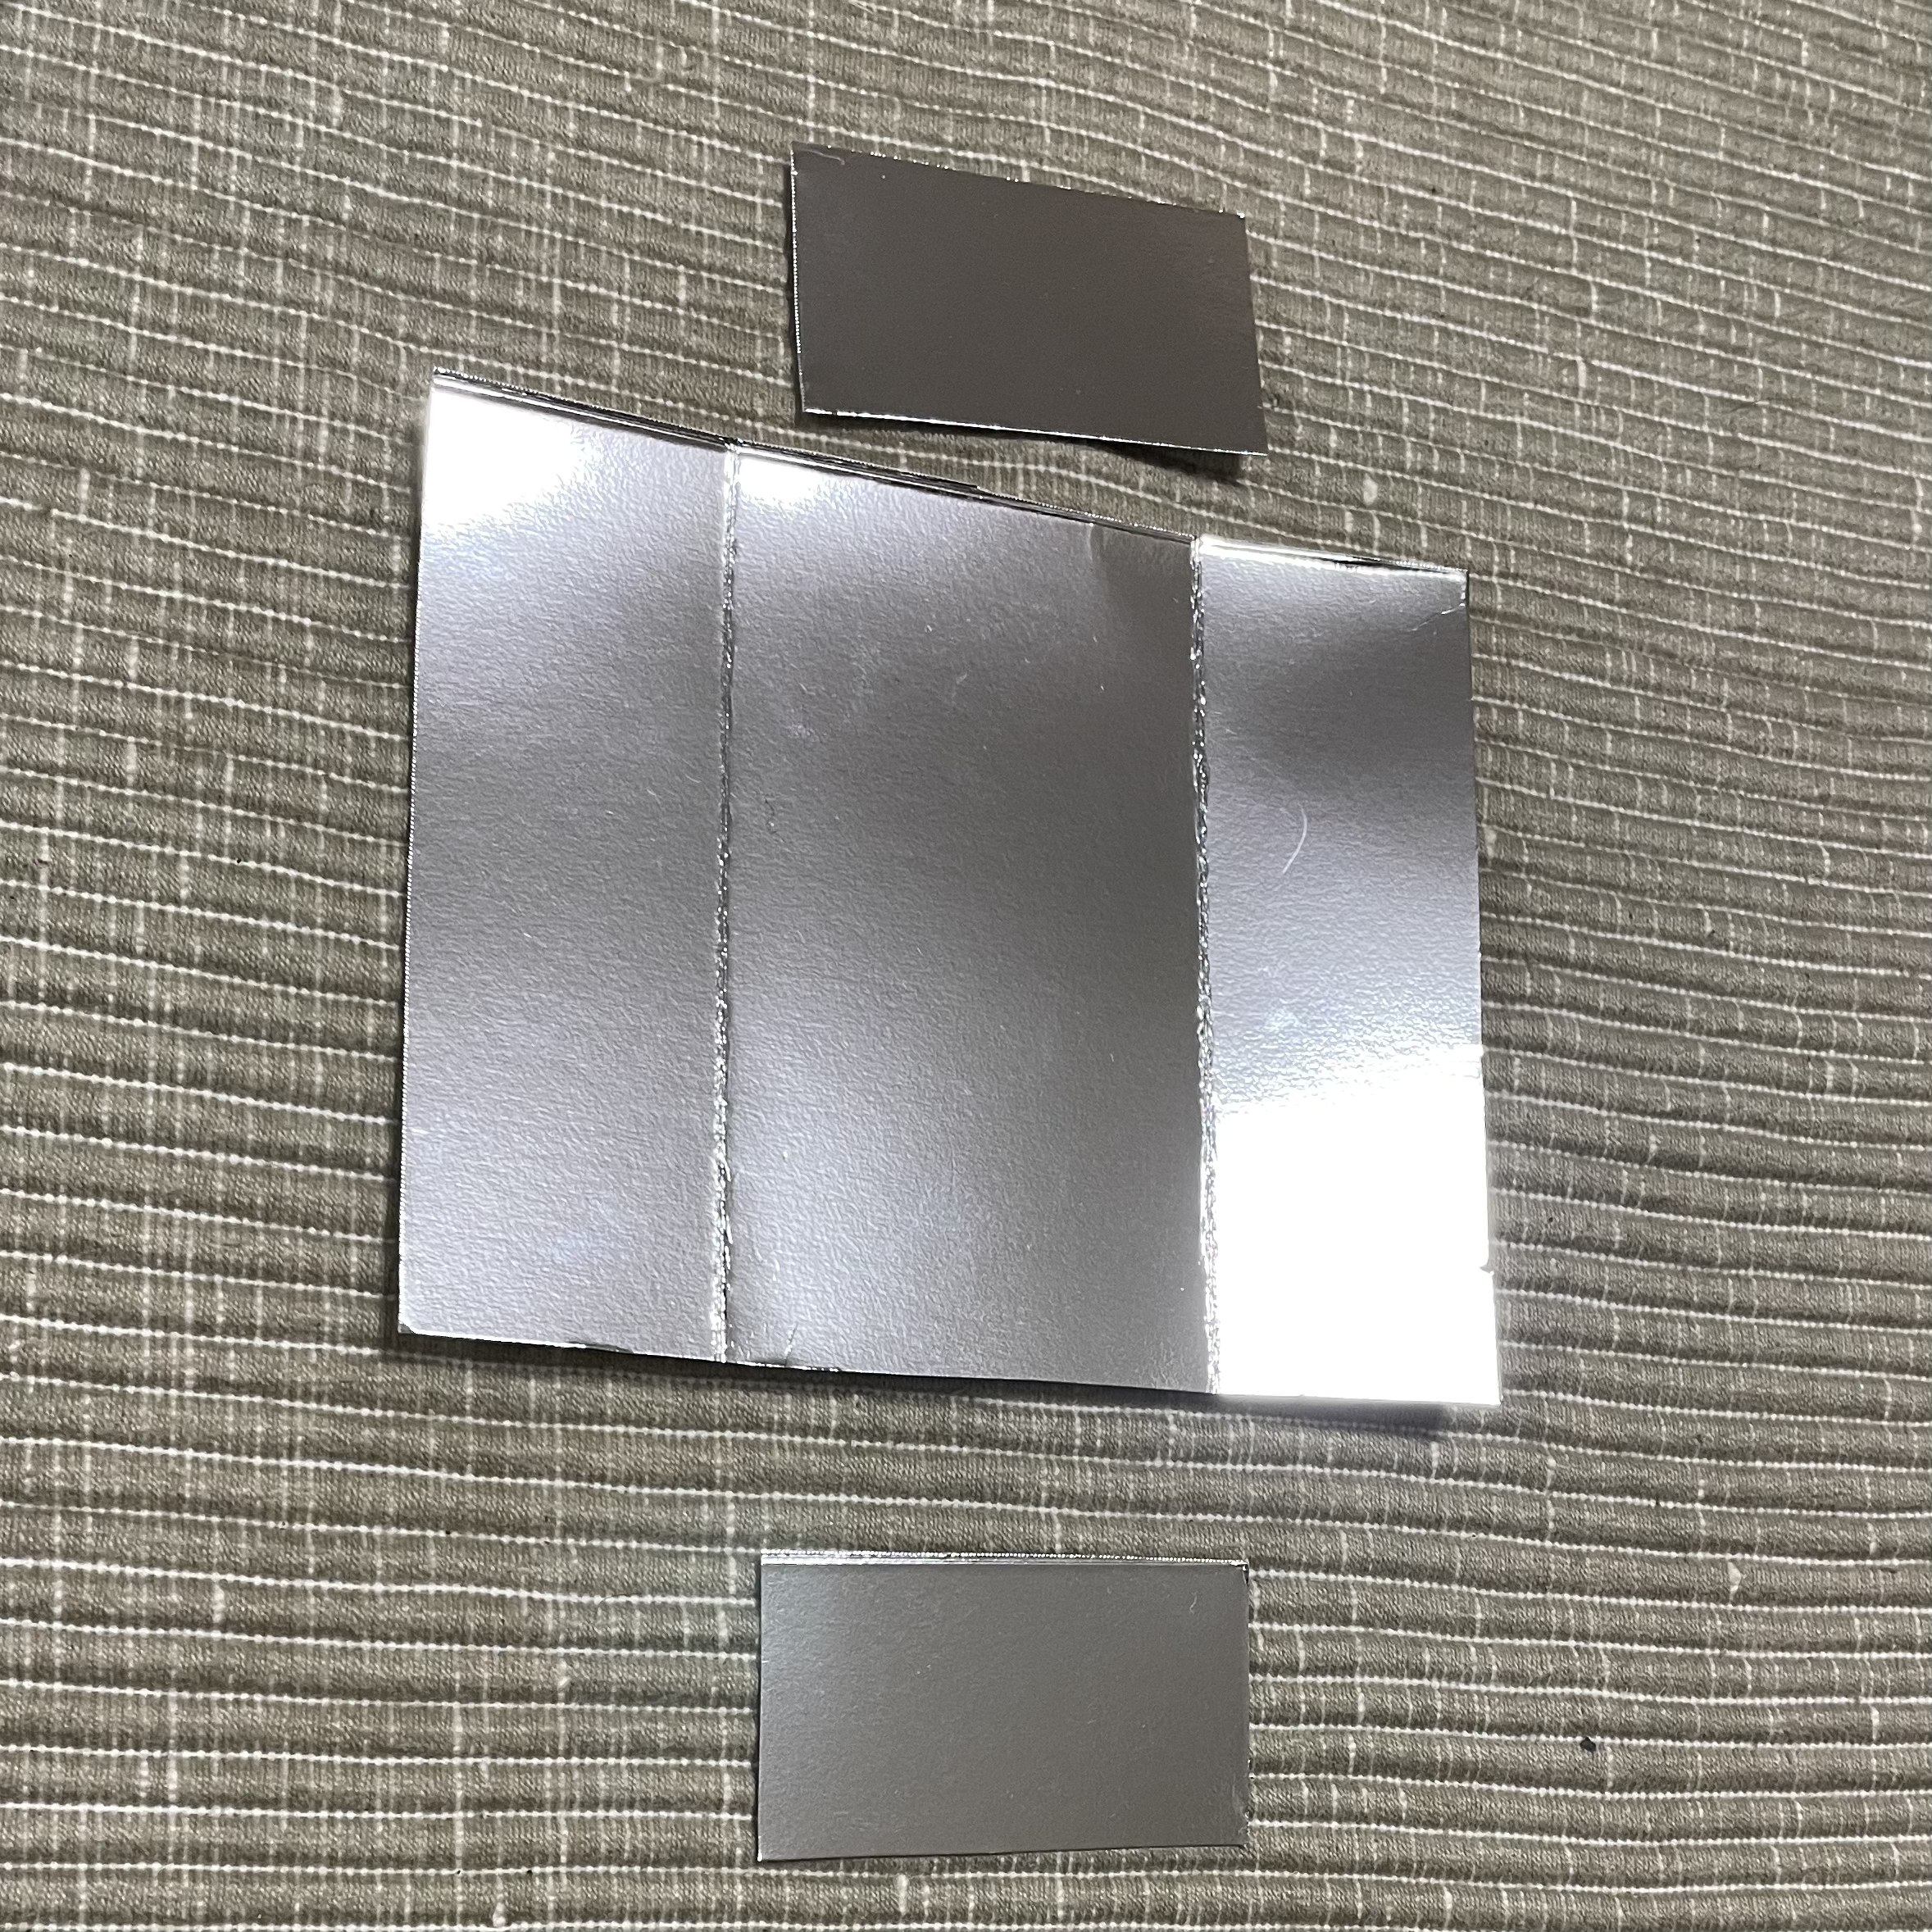
銀色の紙 →これも、余っていたもの。なんとなく反射させたいと思ったです。ケースにあわせてカットしました。
-
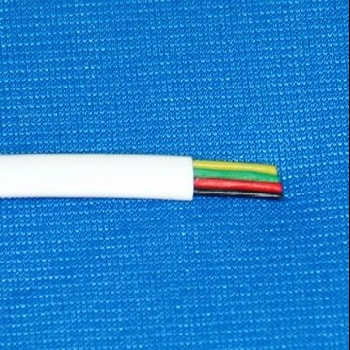
配線(4芯電話線) →これも余っていた4Pの電話線が壁の色と同じ白ってことで、再利用(ブラグを切って4芯のうち2芯だけ利用)
-
ESPrDeveloper(ESP-WROOM-02) →過去に使ったものの使い回し
ケースの組み立て
配線とLEDをハンダ付け
4芯のケーブルのうち、2芯をハンダ付けしました。
銀紙を貼る
両面テープで内部に貼り付けます。
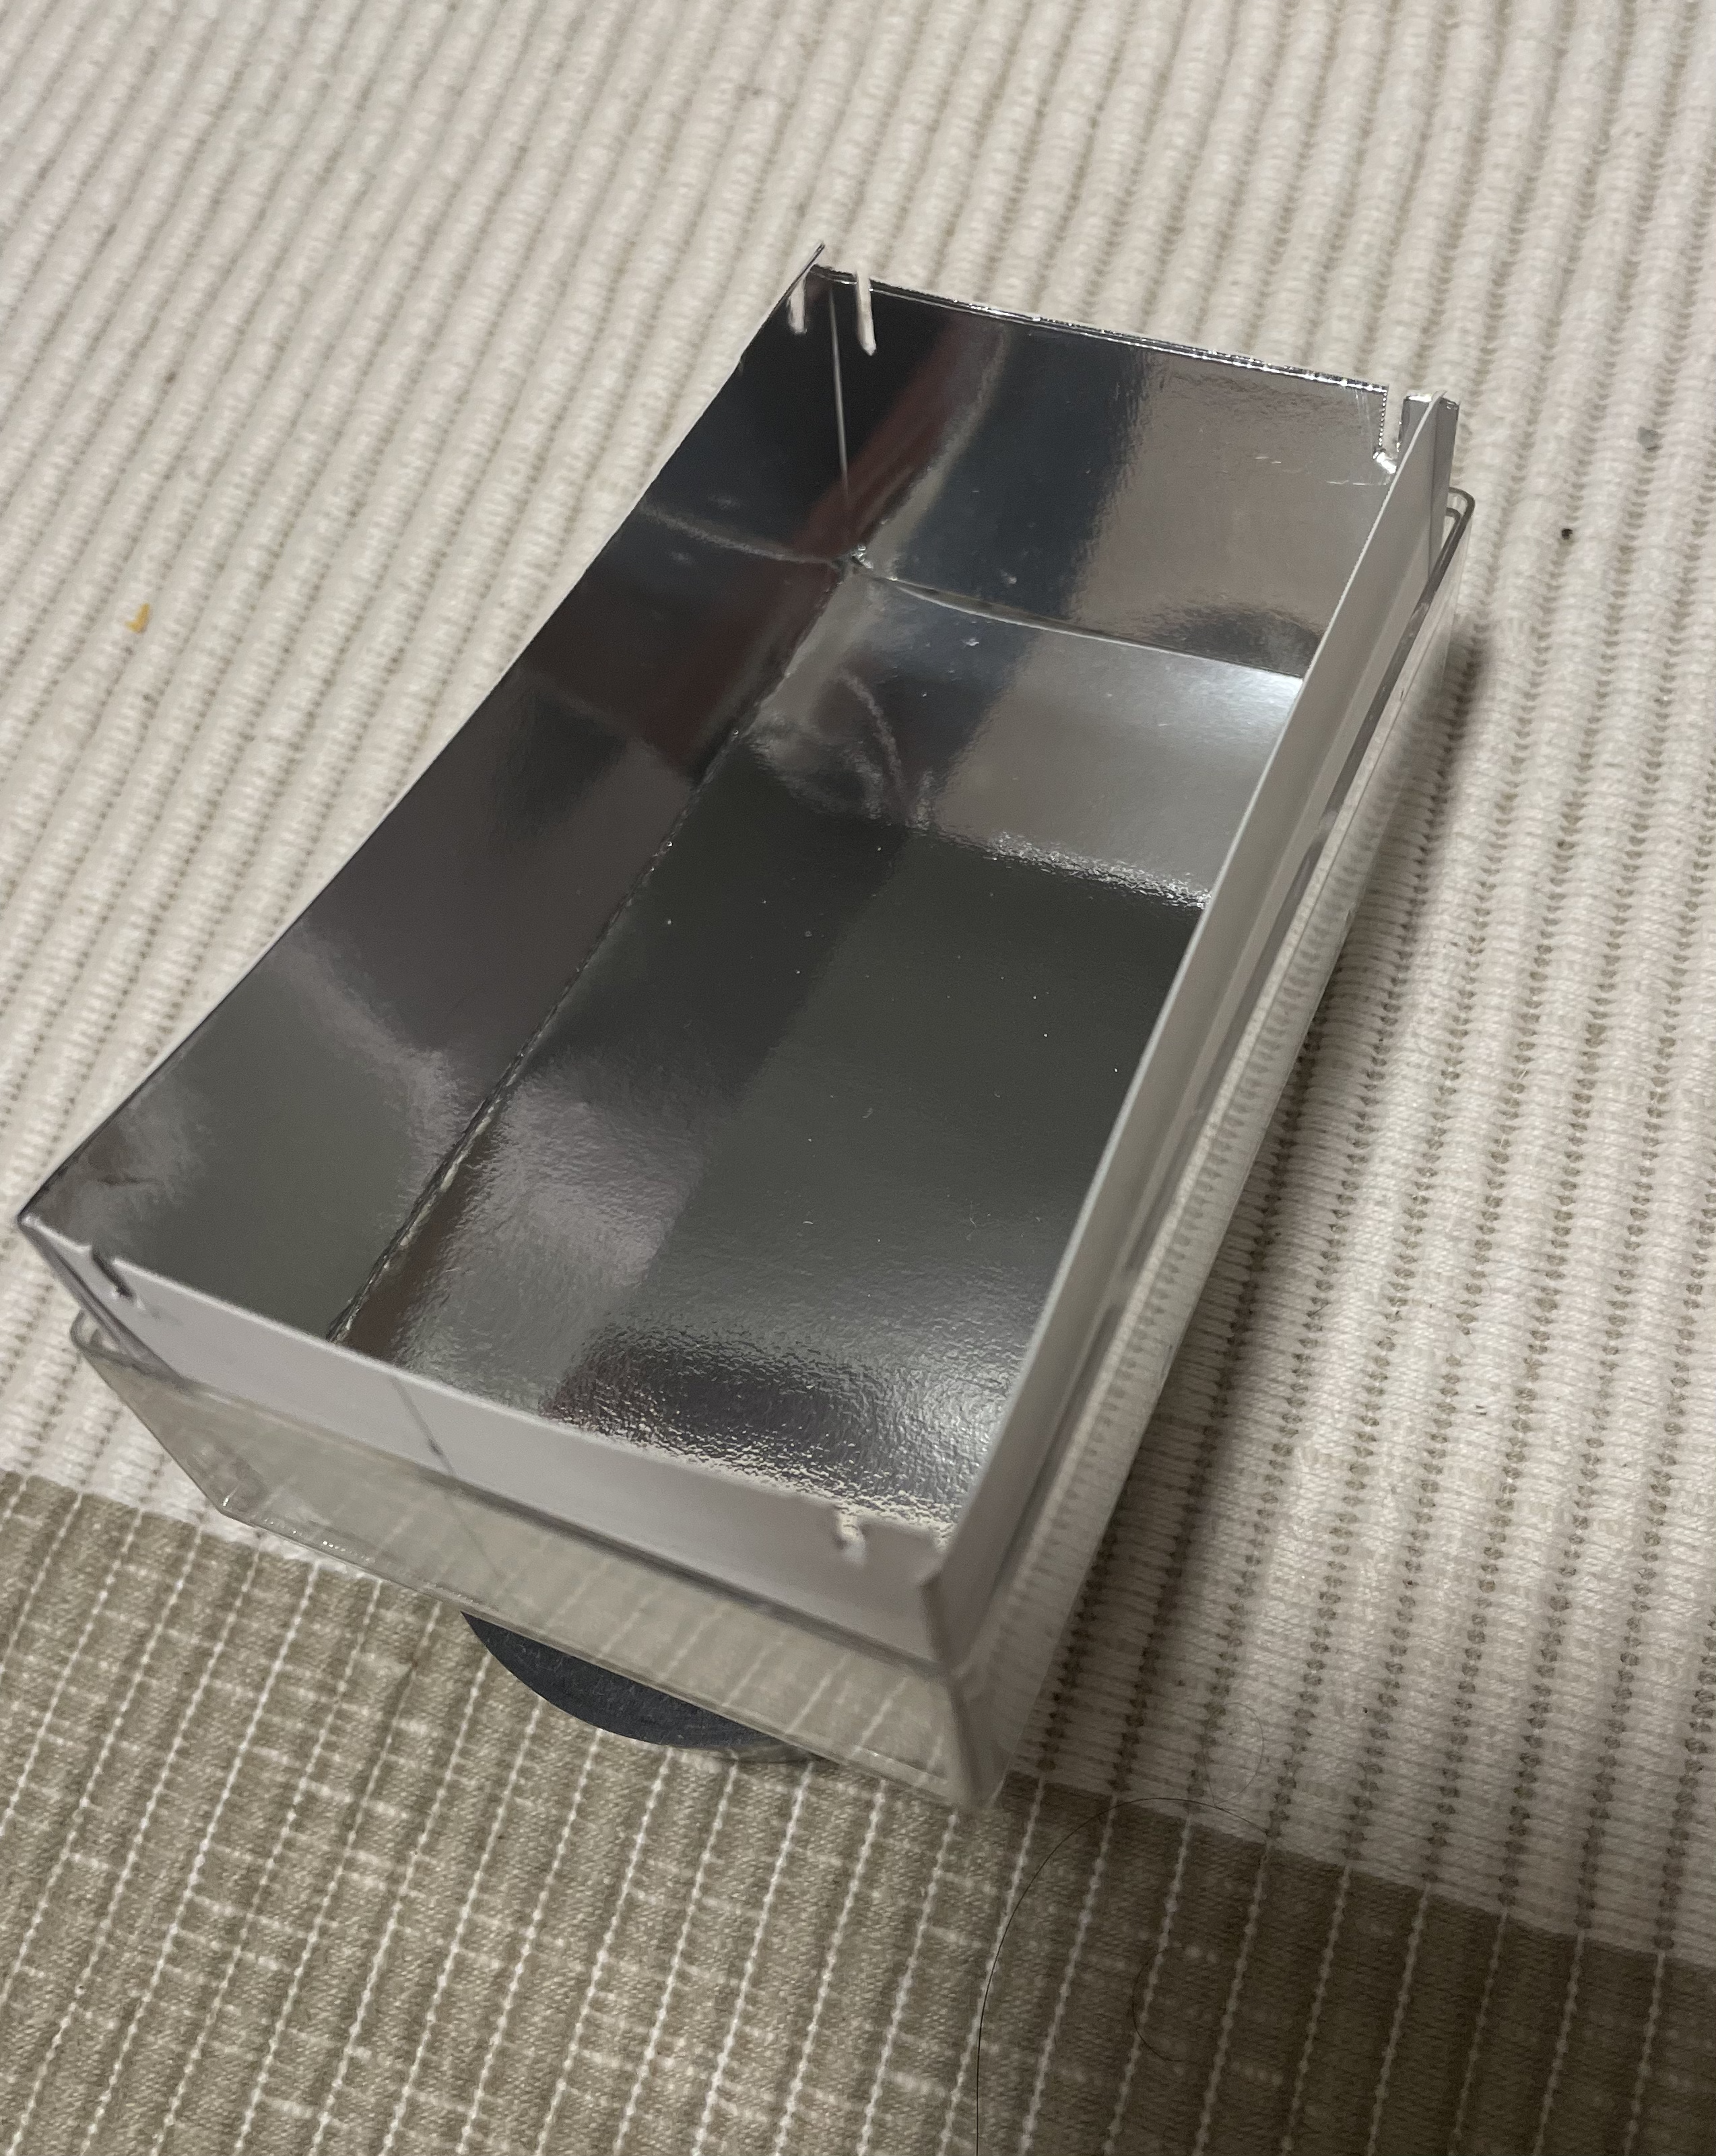
LEDパーツをつける
両面テープで貼り付けて、穴からケーブルを引き出します。
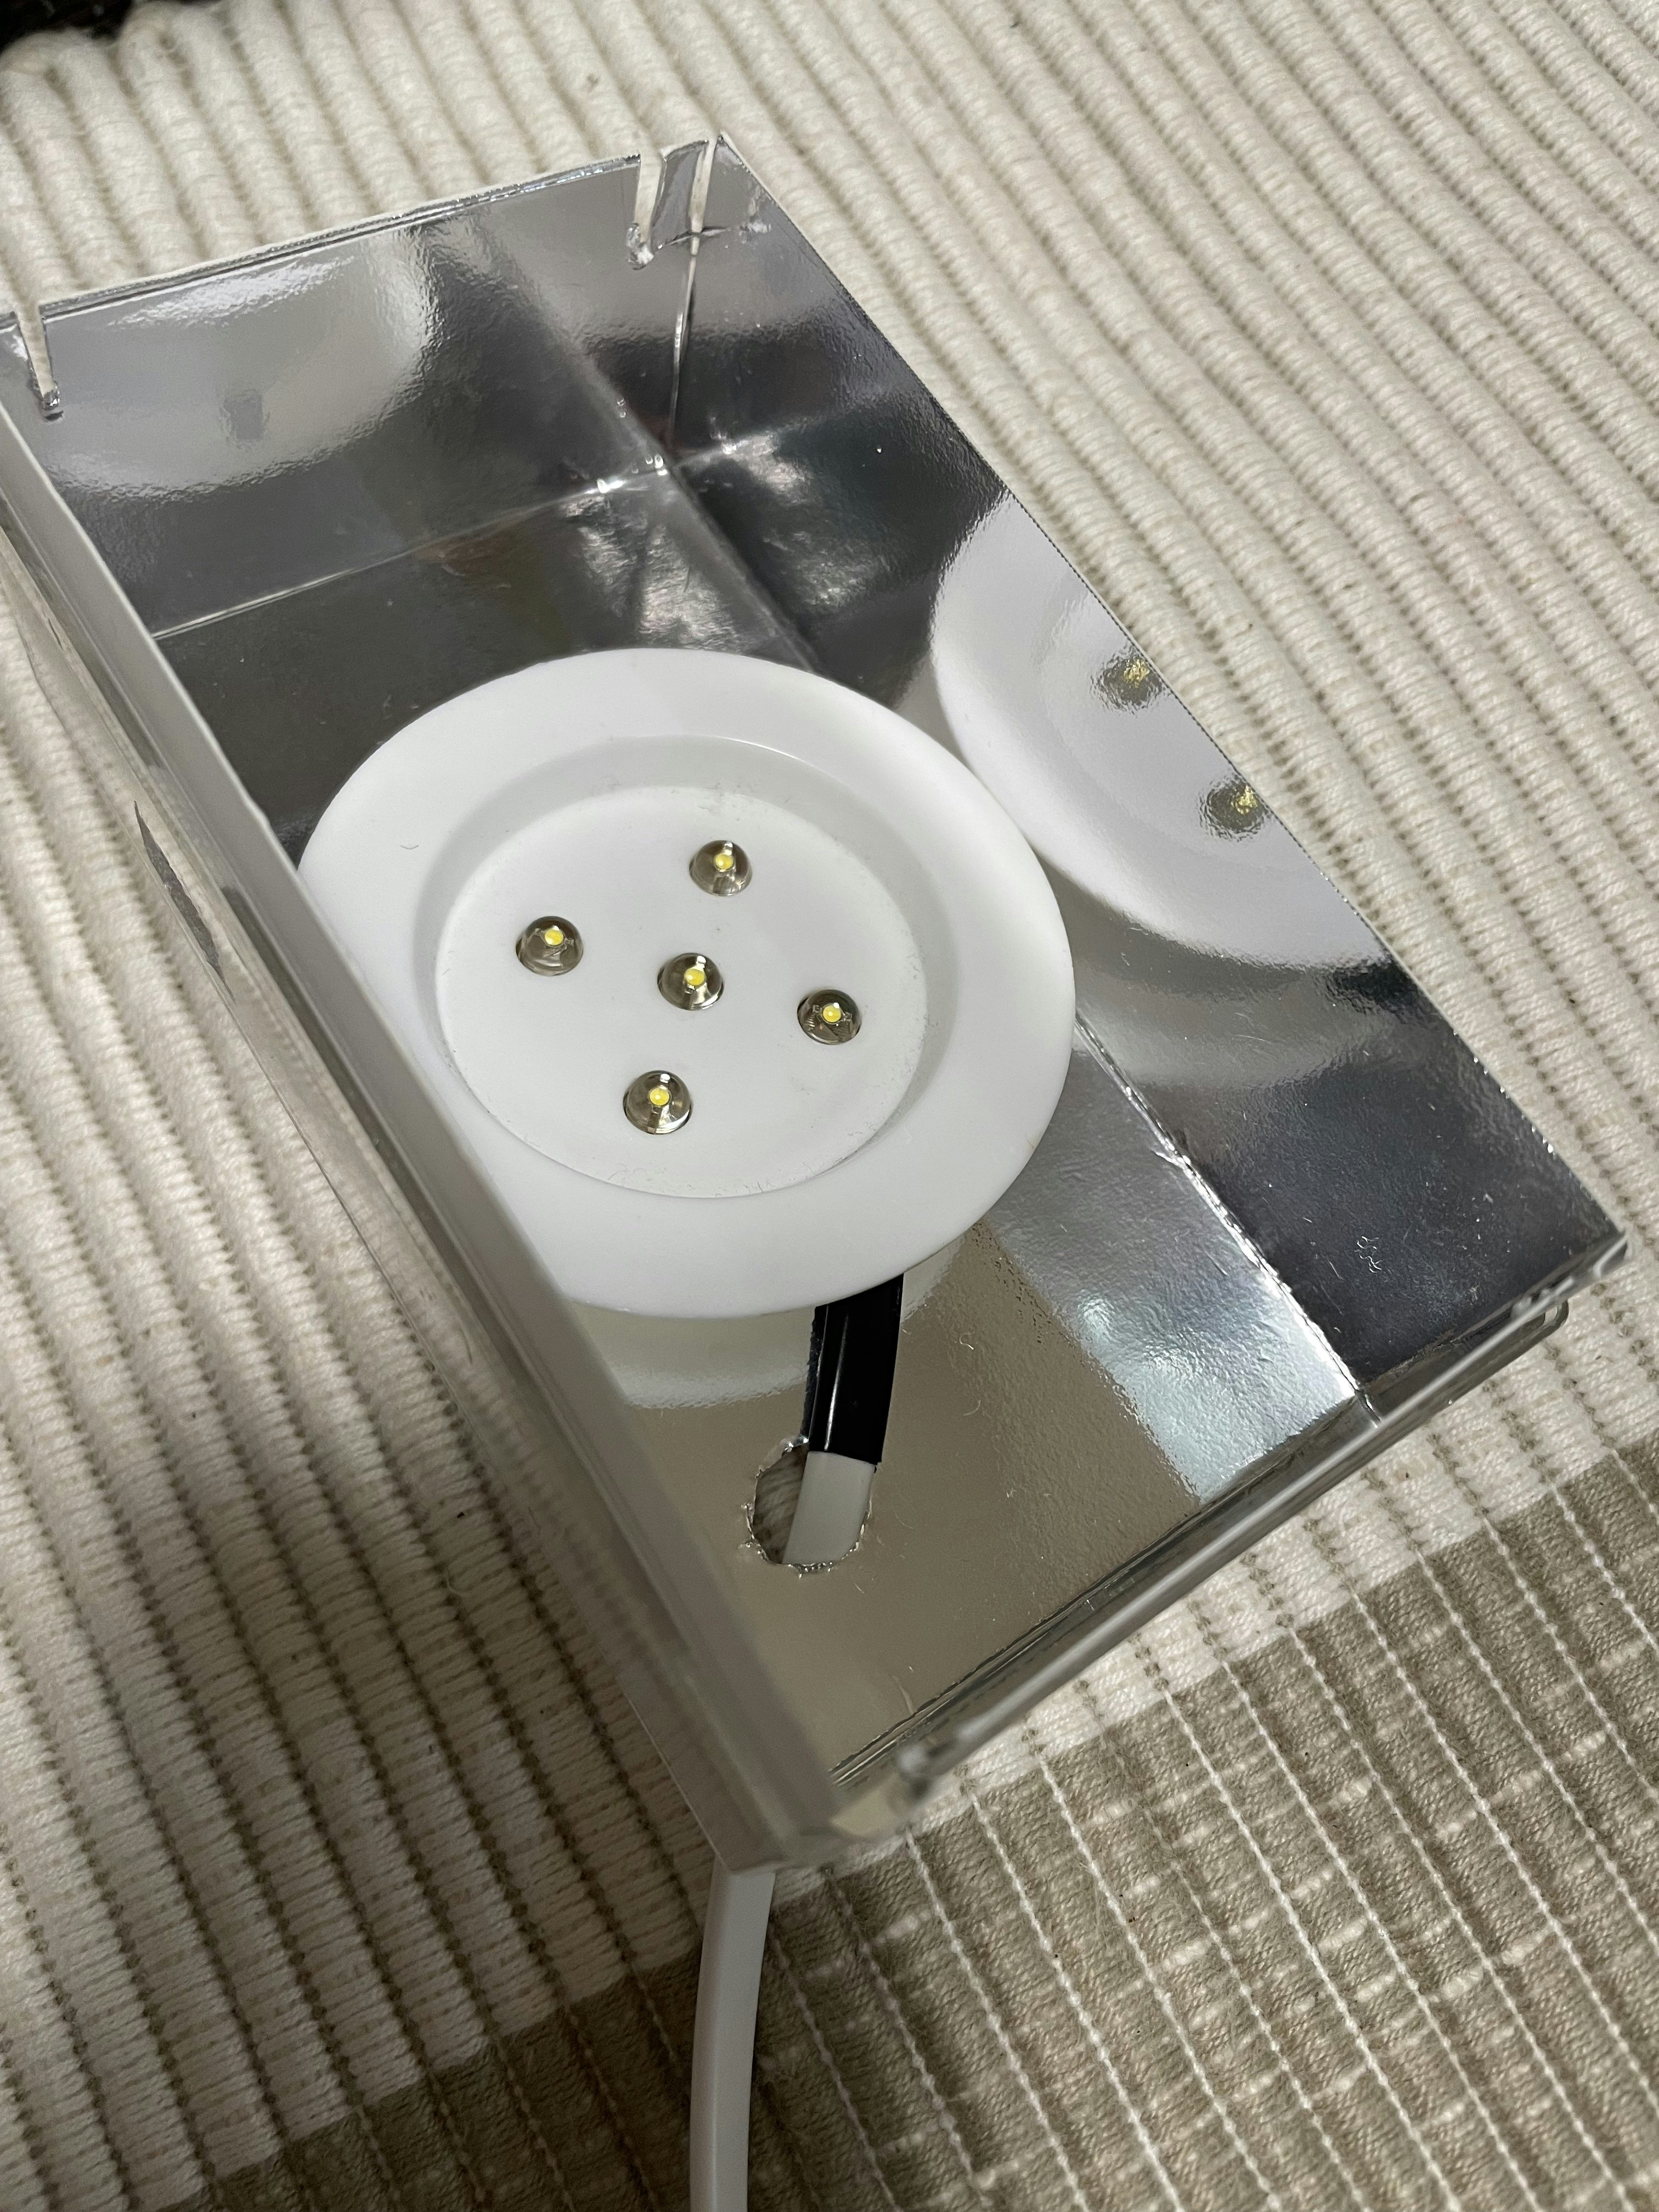
台紙の作成
ケースの大きさにあわせて、下記のようなものをGoogleスライド上で作成して、紙に印刷しました。

蓋をしたら台紙を巻きつける
折り紙な感じで巻き付けました。

ESPrDeveloper配線
写真わすれましたが、13ピンに緑LED(+抵抗)、15ピンに青LED(+抵抗)、16ピンにケースのLEDから延ばした電話線のプラス側、マイナス側をGNDに結線しました。
適当な箱に入れて完成です。
プログラミング開始
ところが・・
Auduino自体も久々だったのですが、まずは、こっちでハマりました。
ちなみにMac(Intel)です。
コンパイルもできないし、ESPrDeveloperに書き込みもできないのです。
Timed out waiting for packet header
シリアル画面の表示はされているのでつながってないことはないのですが、書き込みだけダメなようで・・
ネットで検索してる対策はそもそも原因が違うので、よくわからず・・・
こまったあげく、1.8.10で使っていたIDEを最新2.3.2にして(アプリも変わっていました)、設定を見直しながら、四苦八苦。(最初どうやったか忘れちゃったし・・)
でも、コンパイルは通るようになったんだけど、やっぱり、書き込みができず。
で、動いた設定はこちらです(備忘録)
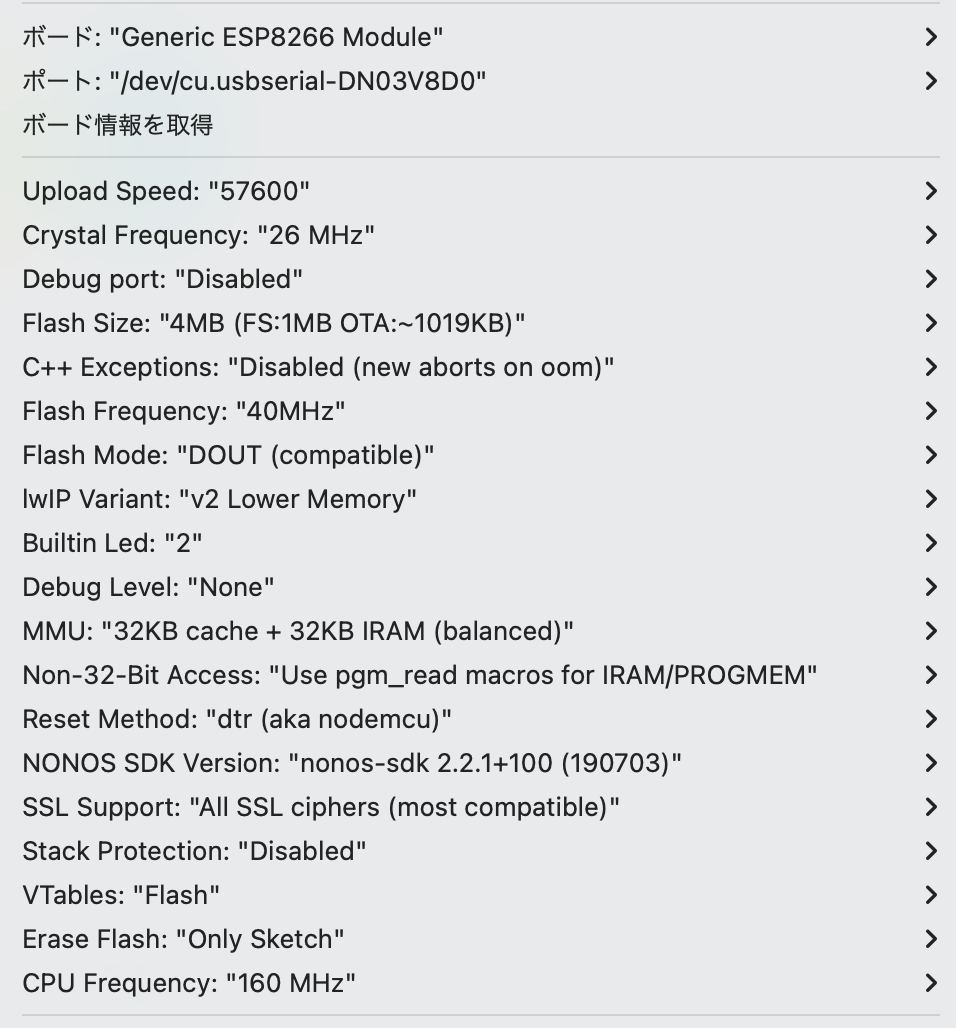
ESP8266ボードはv3.1.2です。
Uploadでエラーになるので、速度を下げてます。
でも、これでも時々エラーになります。USB-A→USB-Cの変換とか、ケーブルの問題かなぁ?
Espalexa
下記が公式サイトです。
例によって、ちゃんと読まないで始めたので、ハマりました。
https://github.com/Aircoookie/Espalexa
コピペ元のスケッチ
お風呂スイッチのfauxmoESPバージョンを書き換えて作ることにしました。
https://qiita.com/ABK28/items/0681be13afca40687dff
Espalexa のコードをなんとなく追加 →失敗
スケッチ例にあったコードをfauxmoESPと置き換えました。
Webでの操作はできるんだけど、alexaで認識しません。
記憶喪失で覚えていませんが、前も同じことやって失敗してると思います。(ちゃんと読まないでやるのがよくないです)
Espalexa With WebServer
あらためて、githubをみたら、ESP8266WebServerと同時利用のときは、ちょっといろいろあるみたい。
ポイント
上から、
-
#define ESPALEXA_MAXDEVICES 20を記載 -
server.begin()は書かない -
server.on()のあとに、下記を記載
  server.onNotFound([](){
	if (!espalexa.handleAlexaApiCall(server.uri(),server.arg(0)))
	{
		server.send(404, "text/plain", "Not found");
	}
  });
-
espalexa.begin()は、espalexa.begin(&server)にする - loop関数に
server.handleClient();は書かない
ついでにおまけプログラム
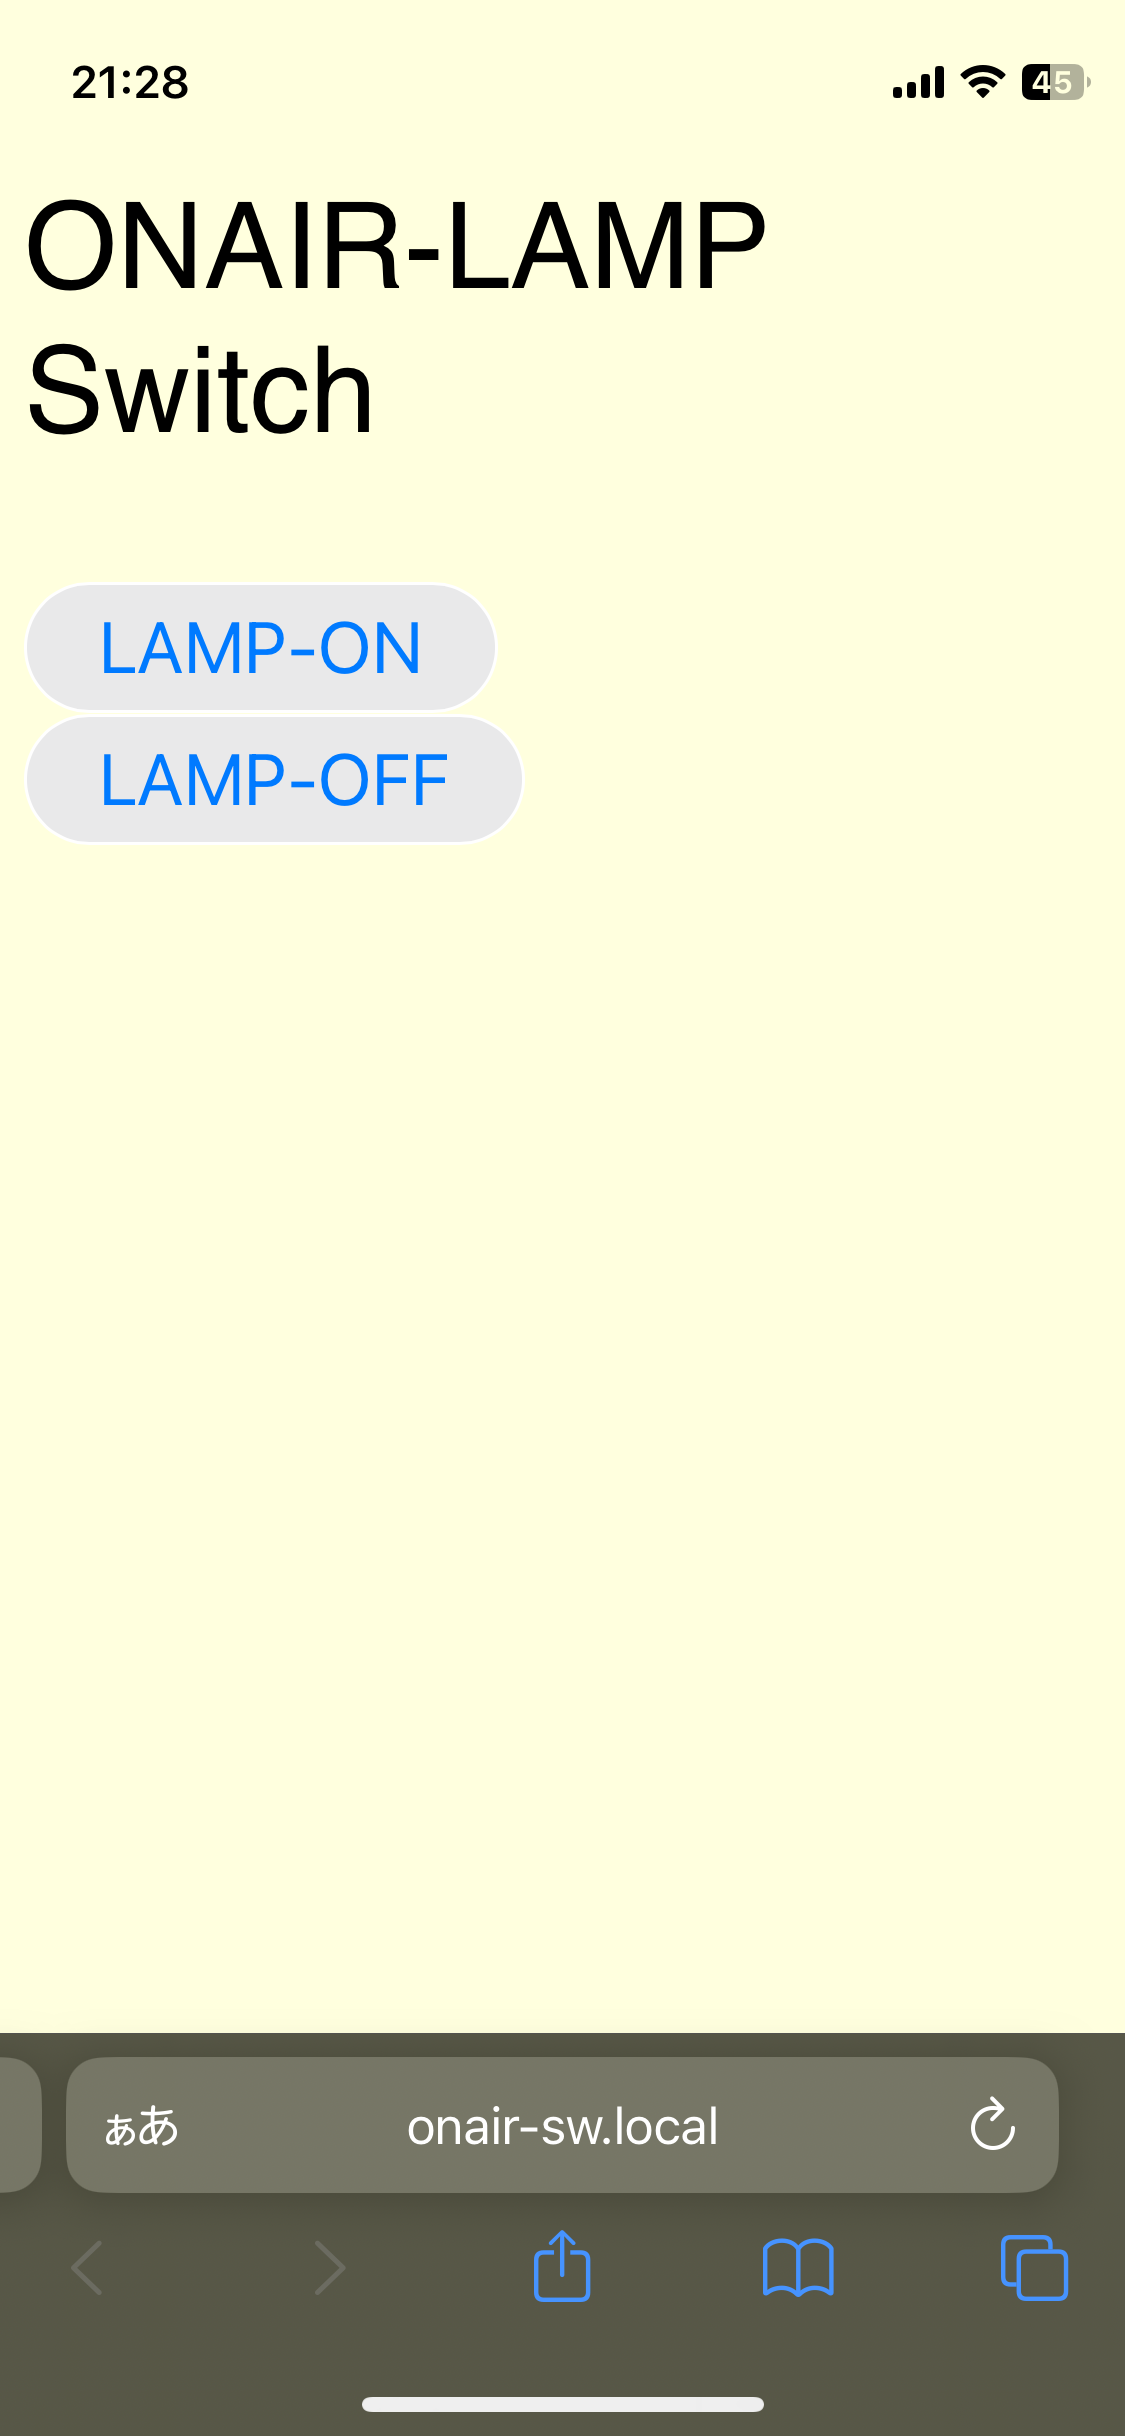
- いつもは
<a href=なんですが、今回は<input type="button"にしました - ボタンを押したときにBeep音がなるJavascriptのコードを昔どこから拾ってきたものがローカルにあったので試しに追加(参照元を控えてなかったのでどこから拾ったかがわかんなくなってます。ごめんなさい)。ちなみにスマホだと音はでなかったです。
コード
というわけで、下記が、プログラムコードです。
ちゃんと考えてないので、不要なヘッダーファイルや不要なコードがたくさん埋め込まれてますが、まぁ、いっかってことで・・
#include <ESP8266WiFi.h>
#include <ESP8266WebServer.h>
#include <ESP8266HTTPClient.h>
#include <DNSServer.h>
#include <WiFiManager.h>
#include <ESP8266mDNS.h>
#include <WiFiClient.h>

//#define ESPALEXA_DEBUG  → ハマったときにデバッグモードにした(^^;
#define ESPALEXA_MAXDEVICES 20
#include <Espalexa.h>

#define SERIAL_SPEED 115200

// WiFi
const char* ssid="****";
const char* password="****";

// mDNS
static const char* mdns_name = "onair-sw";

// Alexa
Espalexa espalexa;

// Pin No
const int GreenLEDPin = 13;
const int BlueLEDPin = 15;
const int LampLEDPin = 16;

// Web page (Port 80)
ESP8266WebServer server(80);
static const char* cpResponse200 = "<HTML>"
 "<HEAD>"
 "<meta name=""viewport"" content=""width=device-width, initial-scale=1.0"">"
 "<style> input{ font-size: 24px; } </style>"
 "<script>"
  "const beep = options => new Promise(resolve => {"
   "options         = options           || {};"
   "const type      = options.type      == null ? 'sine' : options.type;"
   "const frequency = options.frequency == null ? 440    : options.frequency;"
   "const time      = options.time      == null ? 0.1    : options.time;"
   "const volume    = options.volume    == null ? 0.1    : options.volume;"
   "const audioContext = new window.AudioContext();"
   "const oscillator = audioContext.createOscillator();"
   "const gain = audioContext.createGain();"
   "oscillator.connect(gain);"
   "gain.connect(audioContext.destination);"
   "oscillator.type = type;"
   "oscillator.frequency.value = frequency;"
   "gain.gain.value = volume;"
   "oscillator.onended = () => {"
   "  gain.disconnect(audioContext.destination);"
   "  oscillator.disconnect(gain);"
   "  resolve();"
   "};"
   "oscillator.start(audioContext.currentTime);"
   "oscillator.stop(audioContext.currentTime + time);"
  "});"
  "const dit = () => beep({ time: .2 });"
 "</script>"
 "</HEAD>"
 "<BODY style='background-color:#ffffde;font-family:sans-serif;font-size:40px;'>"
 "<p>"
 "ONAIR-LAMP Switch"
 "</p>"
 "<p>"
  "<input type=""button"" value=""LAMP-ON"" onclick=""location.href='/cmd?POS=on';dit();""><br>"
  "<input type=""button"" value=""LAMP-OFF"" onclick=""location.href='/cmd?POS=off';dit();"">"
 "</p>"
 "</BODY></HTML>\r\n";

void setup() {
  Serial.begin(SERIAL_SPEED);
  Serial.println("");

  // LED
  pinMode(GreenLEDPin, OUTPUT);
  pinMode(BlueLEDPin, OUTPUT);
  digitalWrite(GreenLEDPin, LOW);
  digitalWrite(BlueLEDPin, LOW);
  // LampLED
  pinMode(LampLEDPin, OUTPUT);
  digitalWrite(LampLEDPin, LOW);

  // WiFi
  WiFi.mode(WIFI_STA);
  WiFi.begin(ssid,password);
  while(WiFi.status() != WL_CONNECTED){
    delay(300);
    Serial.print(".");
  }

  Serial.println("");
  Serial.println("WiFi Connected.");
  Serial.print("SSID: ");
  Serial.println(WiFi.SSID());
  Serial.print("IP address: ");
  Serial.println(WiFi.localIP());
  Serial.println("");
  Serial.println("");
  digitalWrite(GreenLEDPin, HIGH);

  // Set up mDNS responder:
  if (!MDNS.begin(mdns_name)) {
    Serial.println("Error setting up MDNS responder!");
    while (1) {
      delay(1000);
    }
  }
  Serial.println("mDNS responder started");
  Serial.println("");

  // WebServer
  server.on("/cmd", WebCommand);
  //server.begin();
  server.onNotFound([](){ if (!espalexa.handleAlexaApiCall(server.uri(),server.arg(0))) server.send(404, "text/plain", "Not found"); });
  Serial.println("Web Server started");

  // Define Alexa Devices
  espalexa.addDevice("ONAIR-LAMP", LampChanged, EspalexaDeviceType::onoff);
  espalexa.begin(&server);
  Serial.println("ESPAlexa started");
  Serial.println("");

  // Add service to MDNS-SD
  MDNS.addService("http", "tcp", 80);

}

void WebCommand() {
  String cmd = server.arg("POS");
  if (cmd == "off")  lamp_off();
  else if (cmd == "on") lamp_on();
  server.send(200, "text/html", cpResponse200);
}

void loop() {
  MDNS.update();
  delay(1);
  espalexa.loop();
  delay(1);
  //server.handleClient();
  //delay(1);
}

void lamp_on() {
  digitalWrite(BlueLEDPin, HIGH);
  digitalWrite(LampLEDPin, HIGH);
  Serial.println("Lamp on ...");
}

void lamp_off() {
  digitalWrite(BlueLEDPin, LOW);
  digitalWrite(LampLEDPin, LOW);
  Serial.println("Lamp off ...");
}

void LampChanged(EspalexaDevice *d) {
    if (d == nullptr) return;
    Serial.print("Value=");
    Serial.println(d->getValue());
    if (d->getValue()) lamp_on();
    else lamp_off();
}
Alexa登録
スマホのAlexaアプリでデバイスとして追加します。
- アプリの”デバイス”をクリック
- ⊕をクリック
- “その他”をクリック
- “デバイスを検出”をクリック
何回か失敗したかもです。しばらくすると検出されます。
音声認識
最初は「オンエアー」にしたんですが、発音が難しいのか、なかなか判断してくれません。なので、「表示」にしました。
「アレクサ! 表示をつけて」
WEB
動作写真
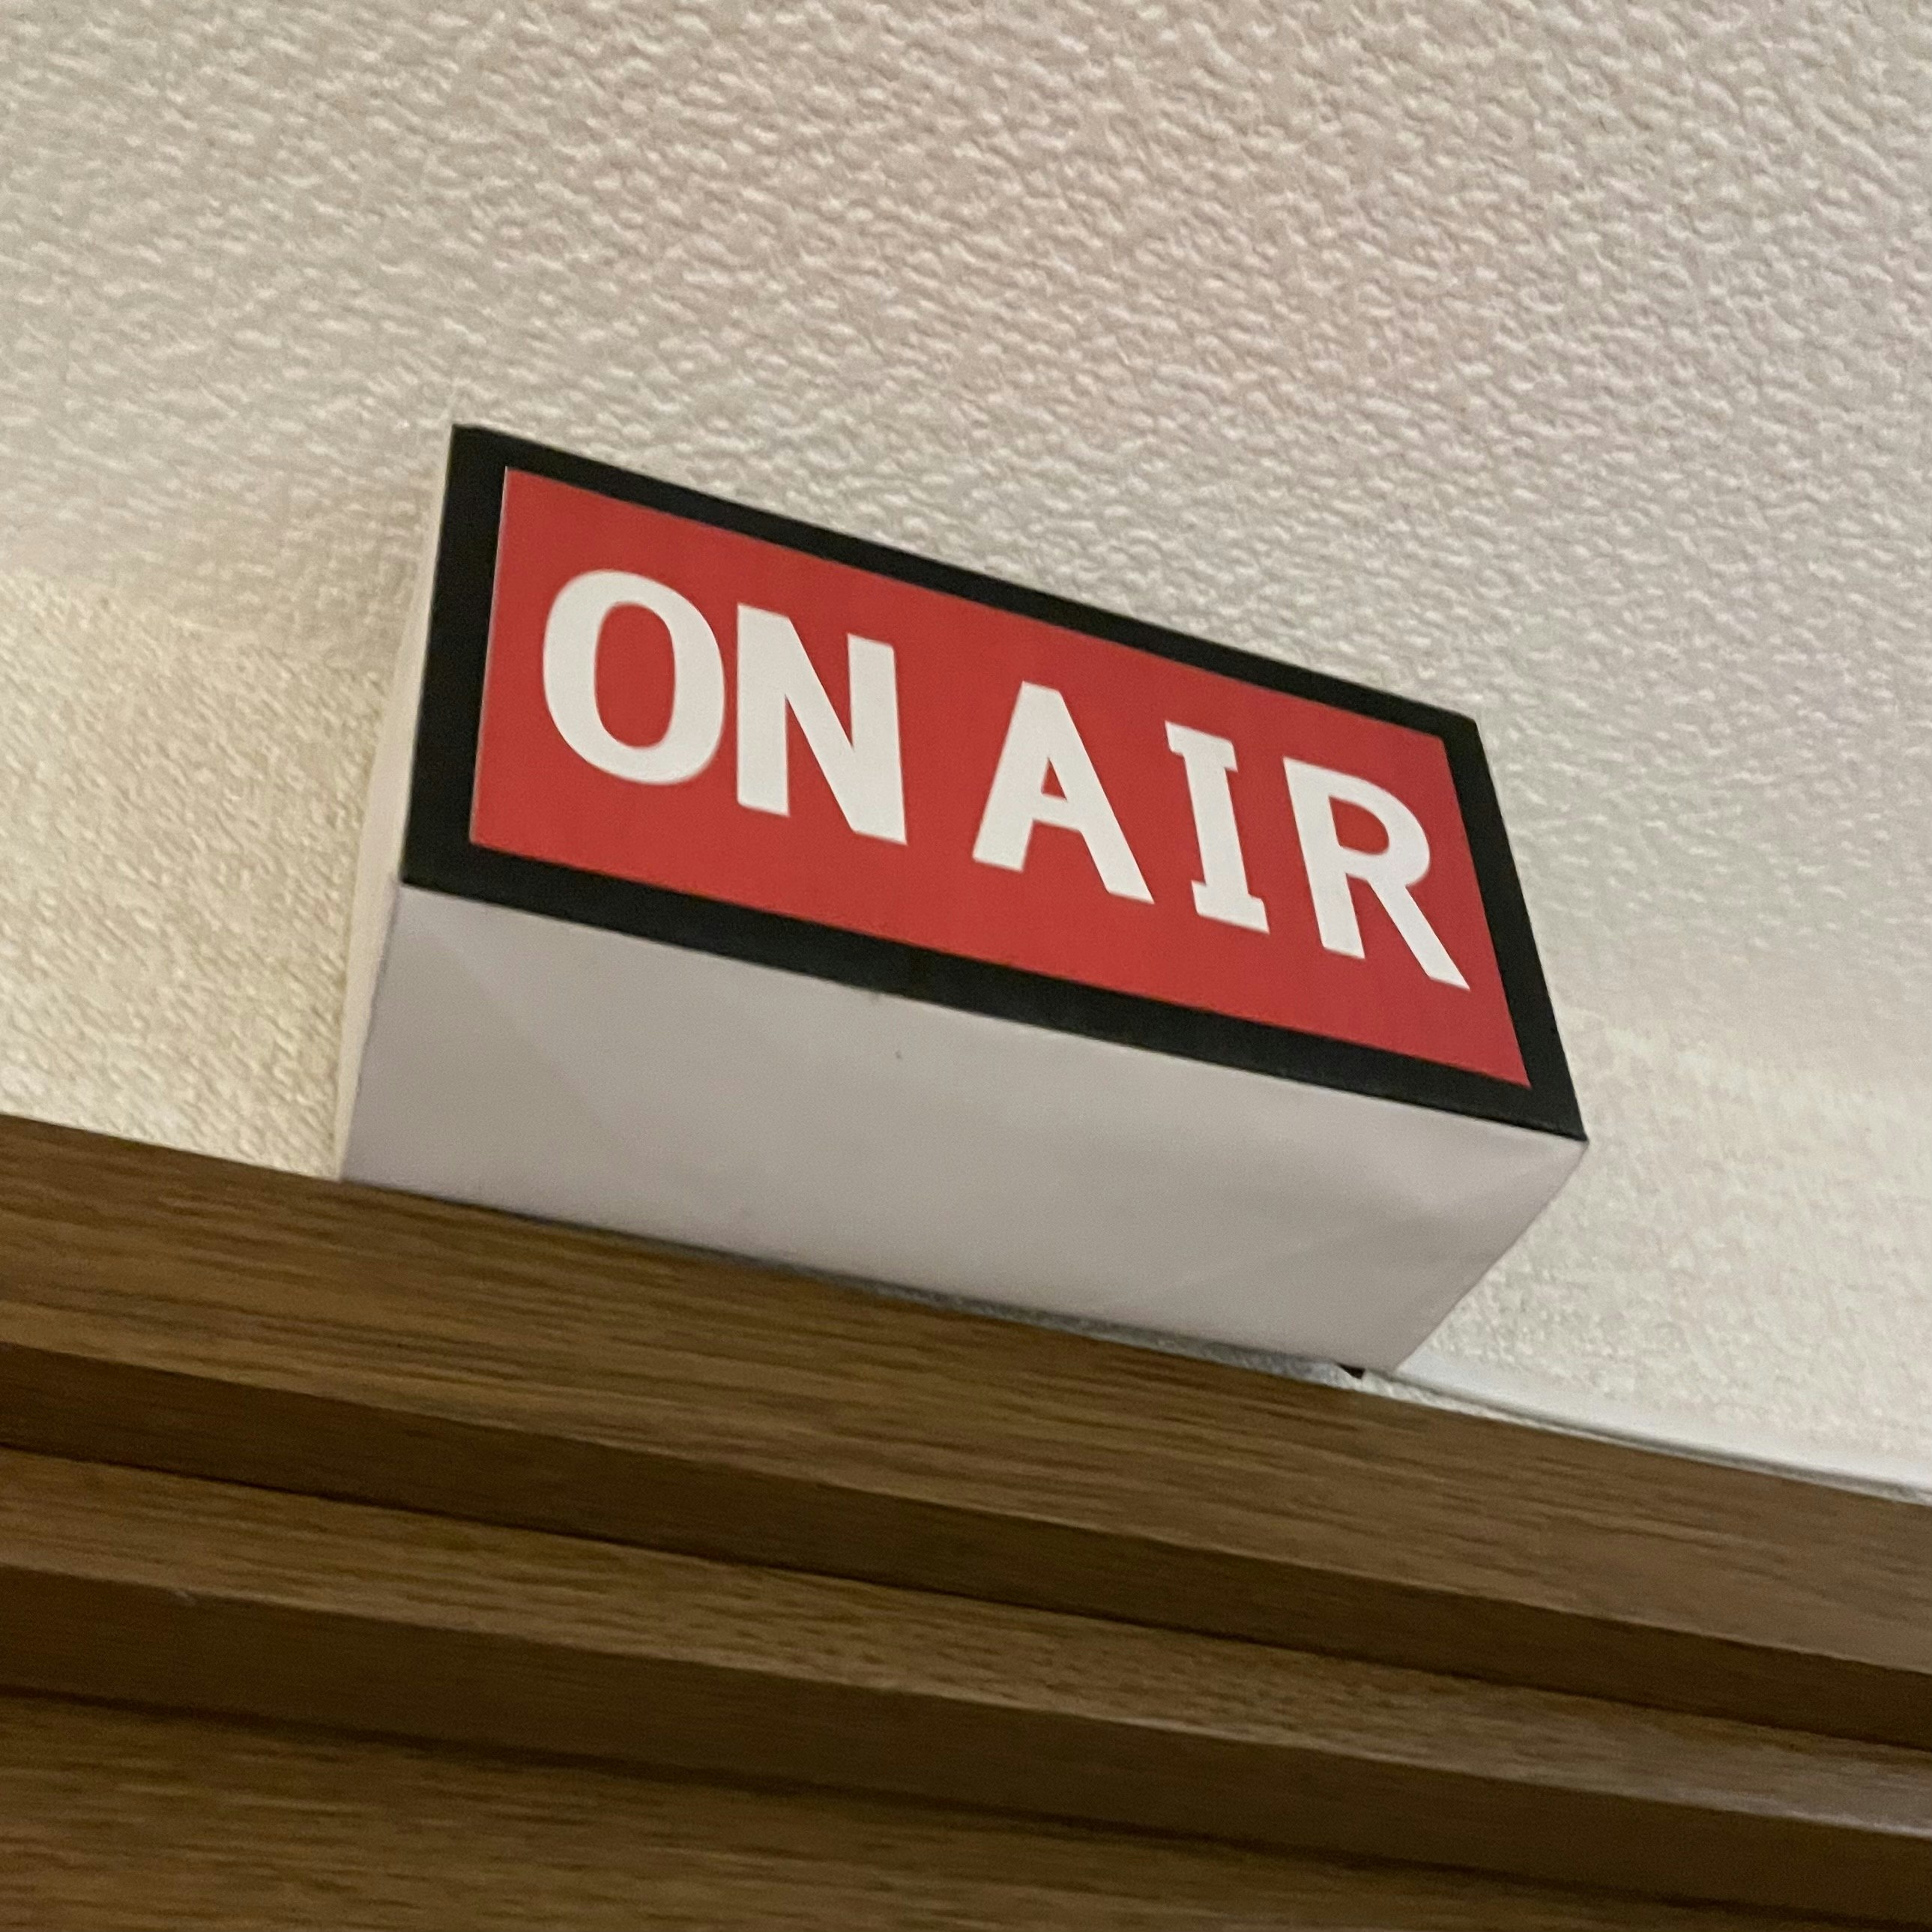
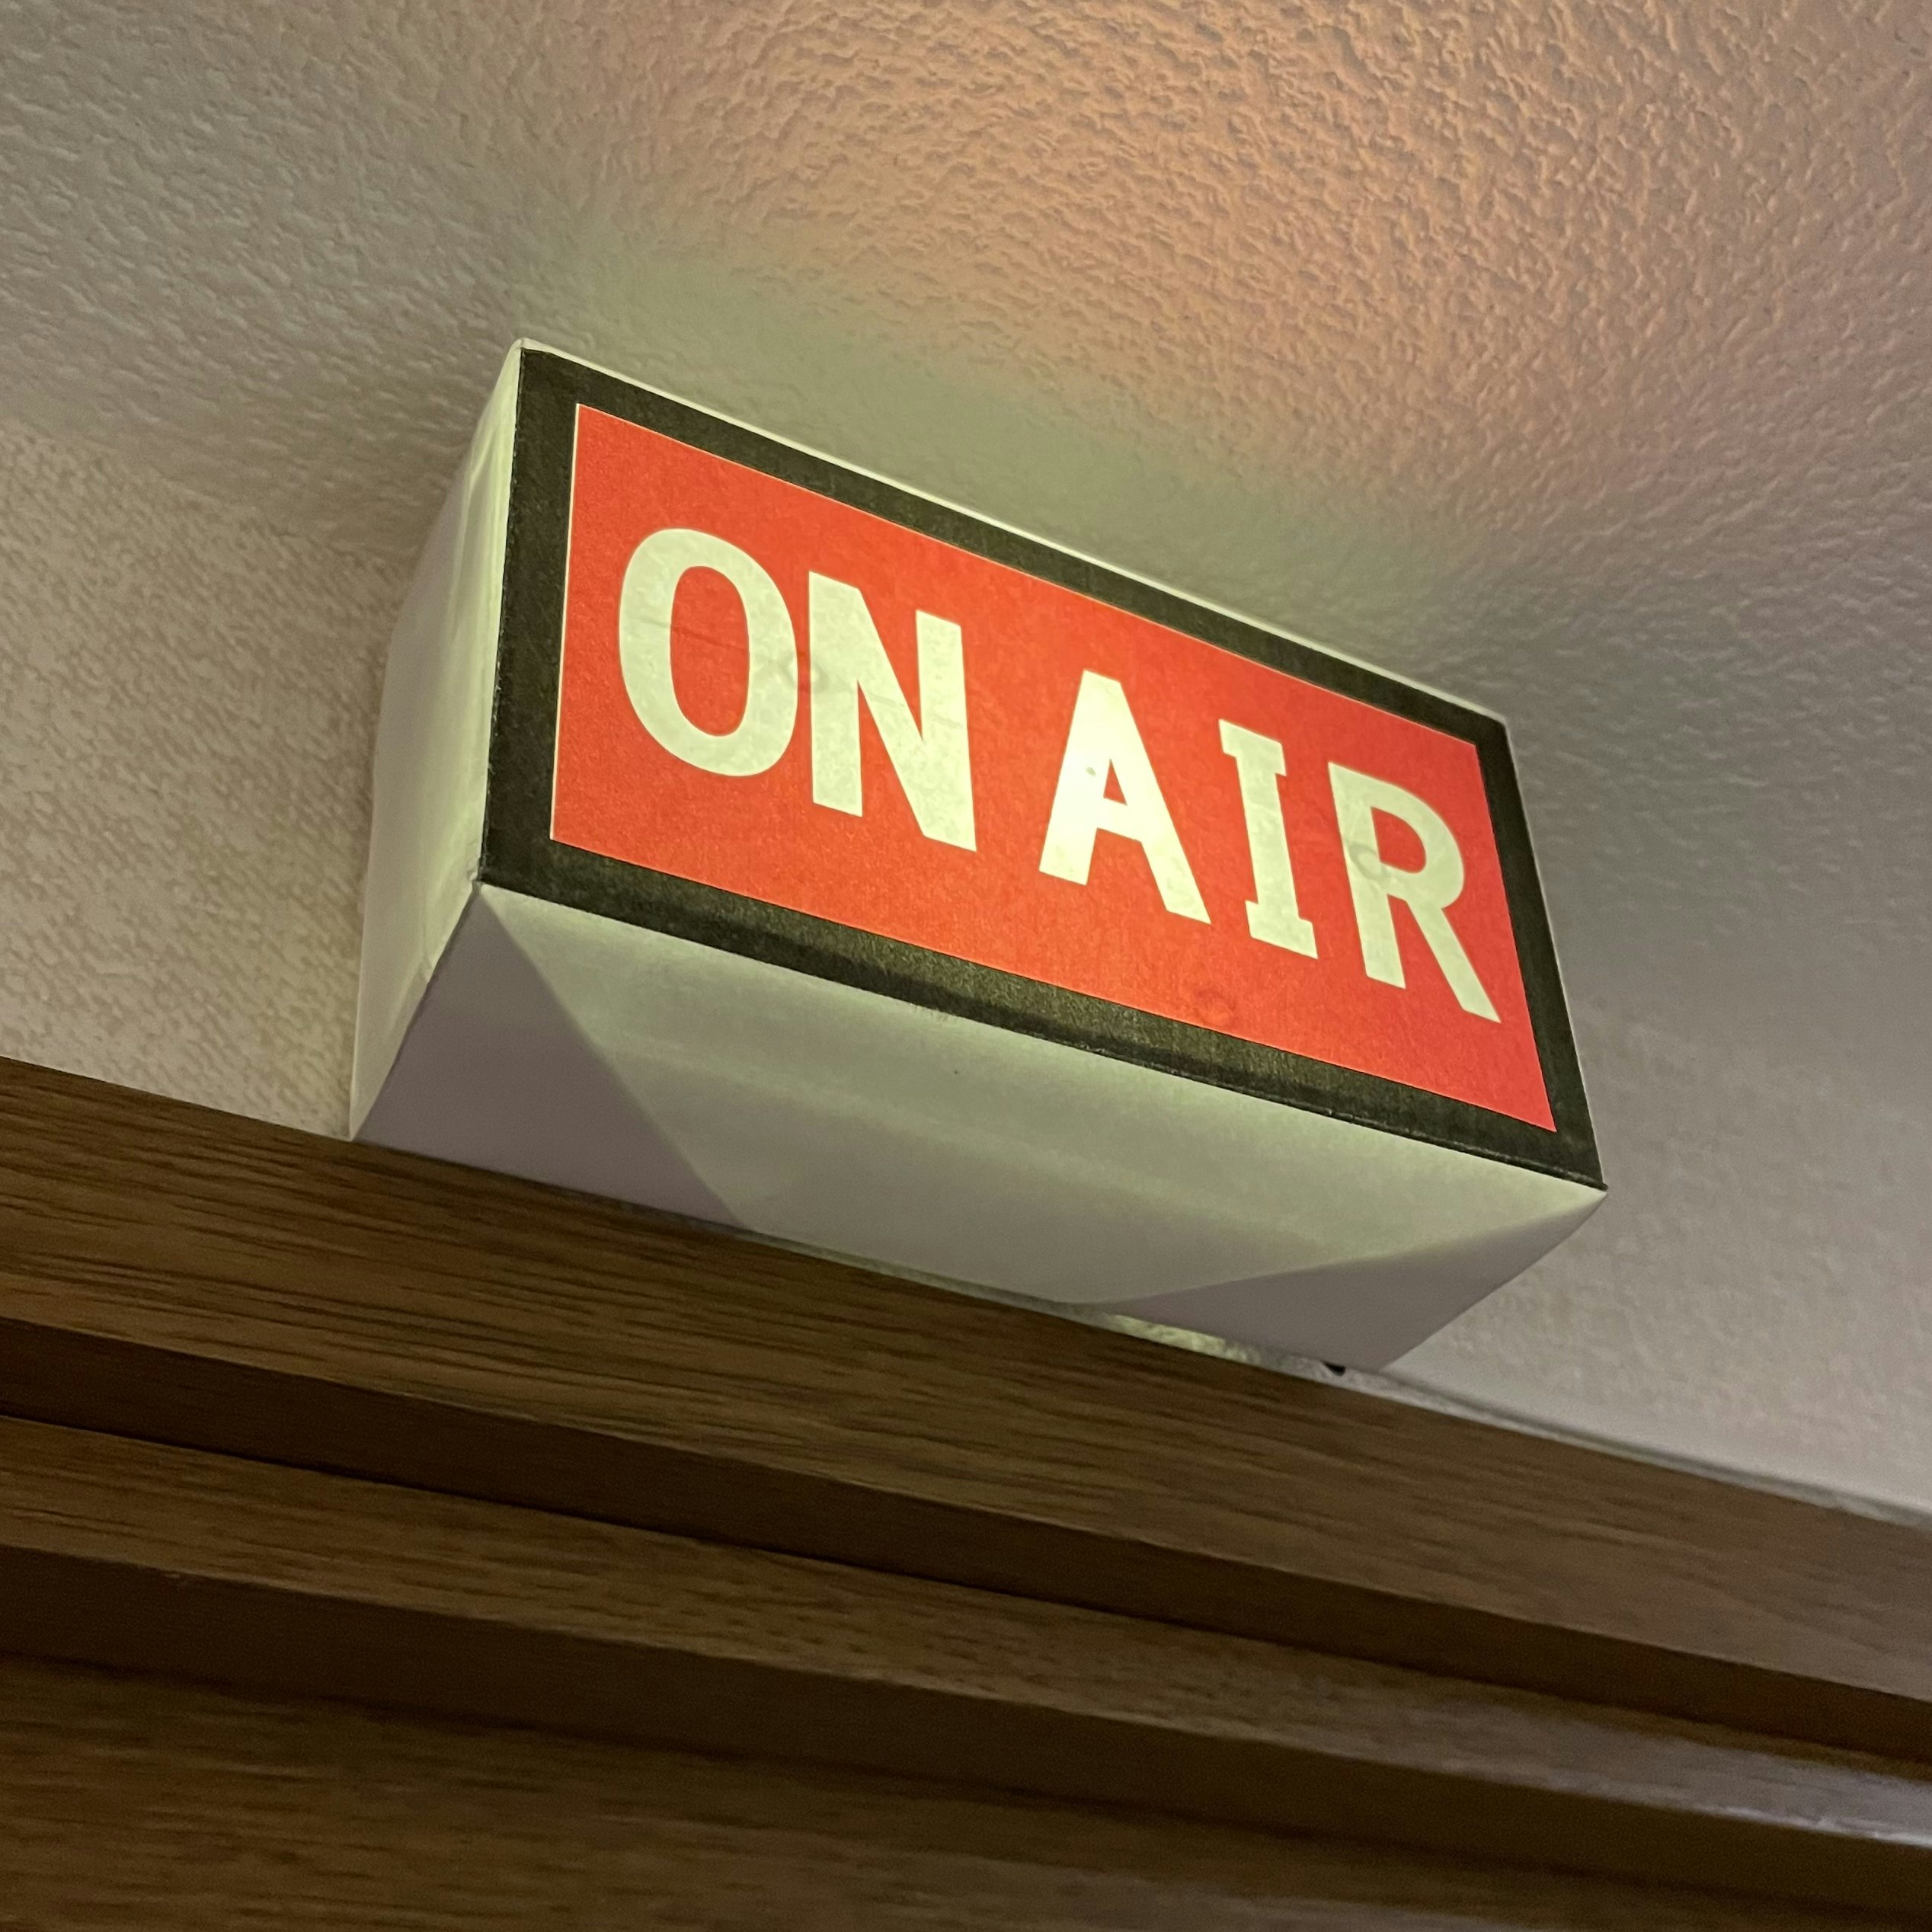
完成
めでたしめでたし