環境
Mac Mojave 10.14.6
Unity 2019.3.9f1
Rider 2019.3.4
gRPC is 何?
そもそもgRPCとは「初めまして」の状態だったので、こちらの記事で概要を把握。
環境構築
gRPCのインストール
公式ページからgRPC.ToolsをUnityのプロジェクトに追加する方法もあるようだが、homebrew経由の方が良さそう。
$ brew tap grpc/grpc
$ brew install grpc
protobufのインストール
こちらもhomebrewからインストール。
$ brew install protobuf
プロジェクトにgRPCパッケージを追加
Unityプロジェクトを作成する。
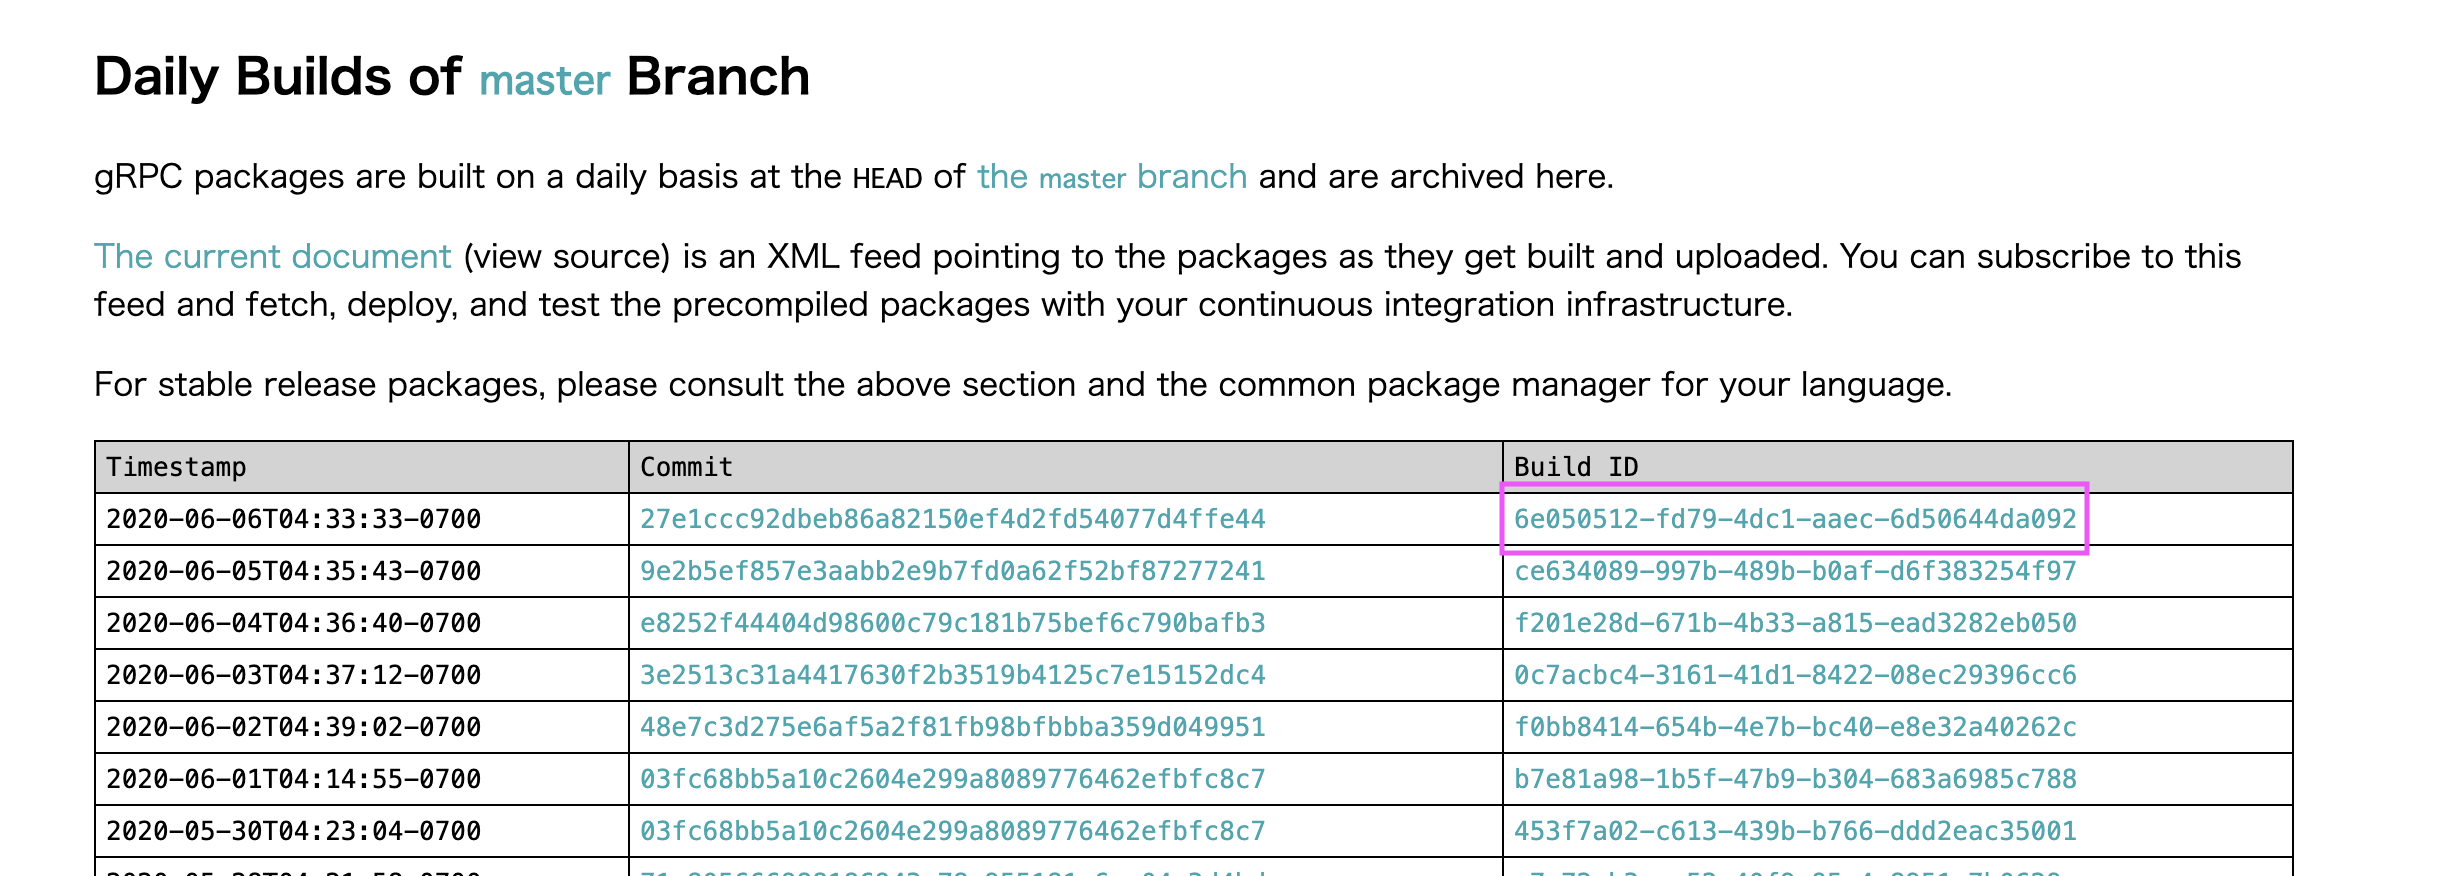
こちらのDaily Builds of master BranchのBuild IDの最新をクリック。
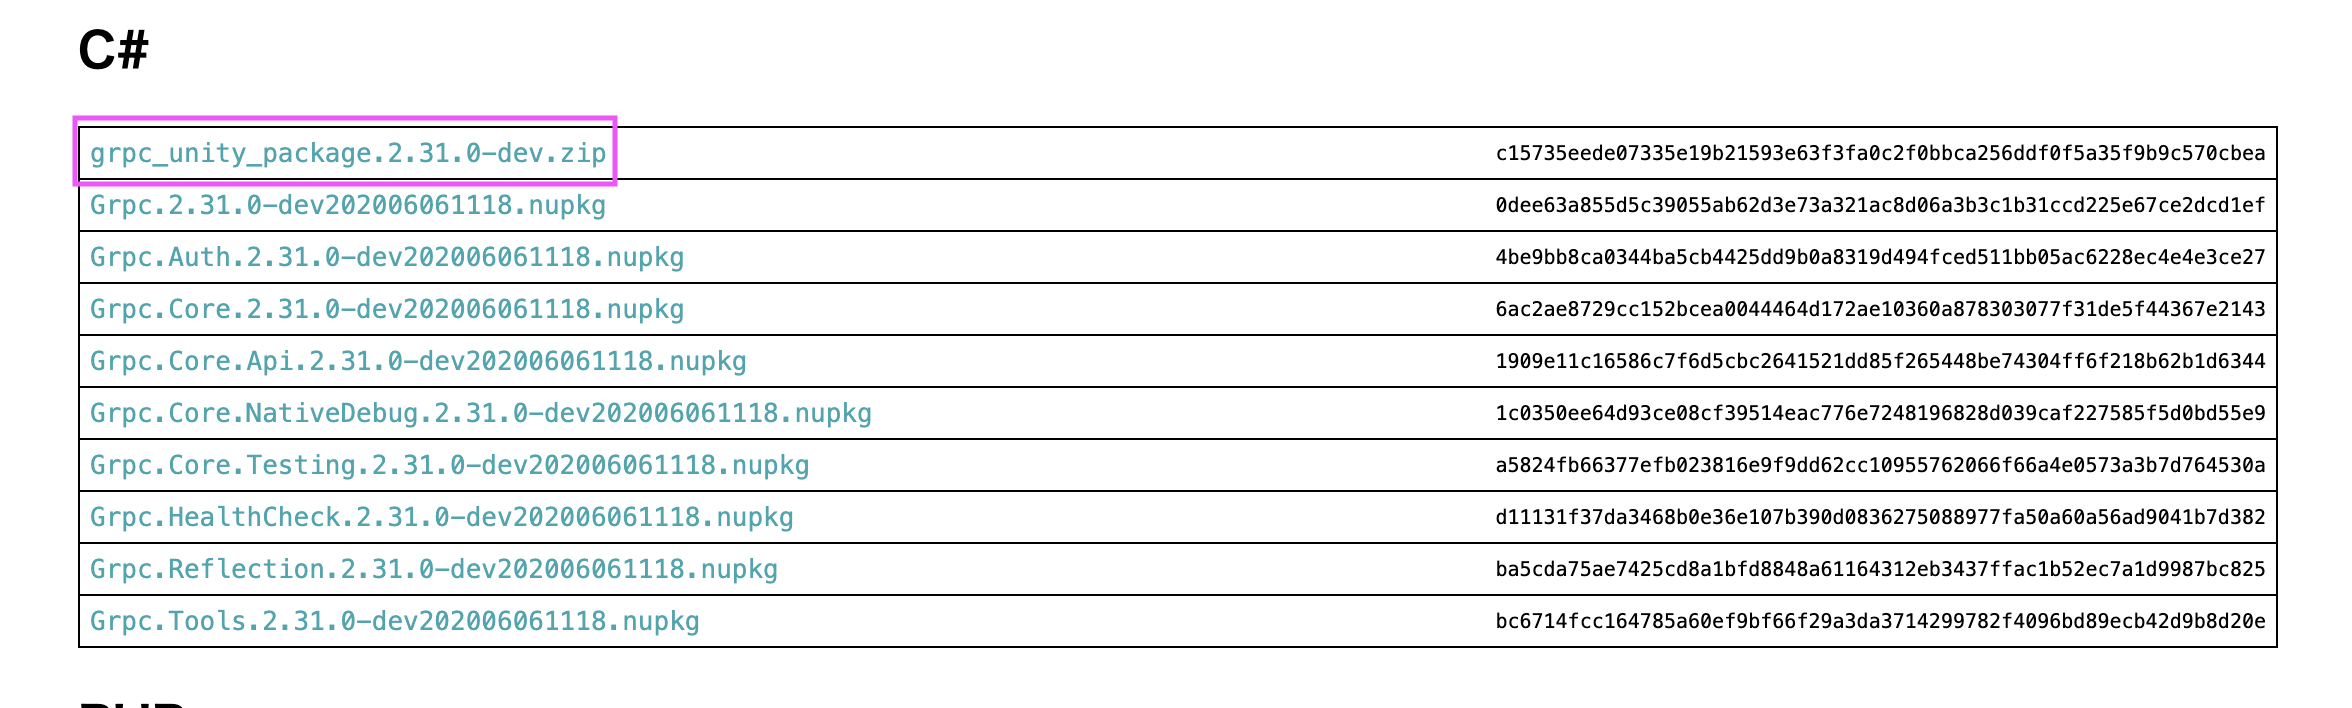
C#の一番上にgrpc_unity_package.v.v.v-dev.zipがあるのでダウンロードする。
zipを解凍するとPluginsフォルダが生成されるので、これをプロジェクトのAssets配下に追加する。
protobufのバージョンを下げる
最新(2020/06/05時点)のgRPCパッケージを追加すると、警告+エラーが発生する。

こちらの記事を参考にProtobufのバージョンを3.9.1にする。Download Packageをクリックすると
google.protobuf.3.9.1.nupkgがダウンロードされるので、.nupkgを.zipに変更して解凍する。Assets/Plugins/Google.Protobuflib/net45/を解凍後のlib/net45/に置き換える。
.protoの作成
公式ページを参考にしてこんな感じの.protoを作成。
gRPCによりHelloServiceのサーバー用、クライアント用メソッドがそれぞれ書き出される。
syntax = "proto3";

message Request{
    string name = 1;
}

message Response{
    string hello = 1;
}

// Requestを引数に渡してSayHelloを呼び出すと、Responseが返ってくる
service HelloService {
    rpc SayHello(Request) returns (Response) {}
}
.protoをコンパイル
以下のコマンドを実行すると、指定したディレクトリにHello.csとHelloGrpc.csが生成される。
$ protoc -I .protoファイルがあるディレクトリ --csharp_out=Hello.csの出力先 --grpc_out=HelloGrpc.csの出力先 --plugin=protoc-gen-grpc=/usr/local/bin/grpc_csharp_plugin .protoファイル名
クライアントの実装
クライアント用のSayHelloメソッドが用意されている。これにリクエストを渡すことで、サーバーからのレスポンスを受け取れるようになっている。
ちなみに非同期メソッドSayHelloAsyncも用意されている。
using Grpc.Core;
using UnityEngine;

public class TestClient : MonoBehaviour
{
    void Start()
    {
        var channel = new Channel("localhost:50051", ChannelCredentials.Insecure);
        var client = new HelloService.HelloServiceClient(channel);

        // リクエストを送信してレスポンスをもらう
        var response = client.SayHello(new Request() { Name = "TOM"});
        Debug.Log(response.Hello);
    }
}
詳しい事は公式を参照。
サーバーの実装
HelloServiceBaseを継承したクラス
コマンドで生成されたHelloGrpc.csにあるHelloServiceBaseクラスを継承したクラスを作成する。このHelloServiceBaseクラスにはvirtualなSayHelloメソッドが用意されているのでオーバーライドして、サーバーとしての処理を実装する。
using System.Threading.Tasks;
using UnityEngine;
using Grpc.Core;

public class TestServer : MonoBehaviour
{
    private void Start()
    {
        var server = new Server()
        {
            Services = { HelloService.BindService(new TestServerService())},
            Ports = { new ServerPort("localhost", 50051, ServerCredentials.Insecure) }
        };
        server.Start();
    }
}
// HelloServiceBaseを継承したクラス
public class TestServerService : HelloService.HelloServiceBase
{
    public override Task<Response> SayHello(Request request, ServerCallContext context)
    {
        // リクエストを受けて値を返却する
        var hello = $"Hello {request.Name}";
        var response = new Response{Hello = hello};
        return Task.FromResult(response);
    }
}
詳しくは公式を参照。
試してみる
サーバーサイドのアプリをビルド
TestServer.csを適当なゲームオブジェクトにアタッチしたシーンをMacのアプリとしてビルドする。ビルド出来たら起動しておく。
クライアントの実行
TestClient.csを適当なゲームオブジェクトのアタッチしてUnityEditorを再生する。
結果
クライアントから送った値がサーバーで加工されて返ってくることが確認できた。

ハマった点
brew install protobufのタイミングによっては、コンパイルされたコードでGOOGLE_PROTOBUF_REFSTRUCT_COMPATIBILITY_MODEという定義が無いためにエラーが発生した。
homebrewでインストールするprotobuf、サイトからダウンロードするgrpc_unity_package.v.v.v-dev.zipのバージョンにズレが生じたっぽい。
今回は下記を参考にして古いバージョンのprotobufをインストールすることで解決した。
Homebrewで過去バージョンのパッケージをインストールする方法
参考
https://note.com/npaka/n/n050b1aba7772
https://qiita.com/muroon/items/4e12dde47b9e8b1e94d3
https://qiita.com/nikaera/items/fdcad59bd9a0ebf6a792
https://github.com/grpc/grpc/tree/master/examples/csharp/HelloworldUnity#build