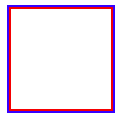
どうも7noteです。2重線を引くいろいろな方法を紹介
基本的にborderの指定は1要素につき上下左右それぞれ1線しか指定できません。
そうなった場合2重にborderを付けることができません。
なので、2重にborderを付けたい場合に使える様々な方法を紹介していければと思います。
方法その① doubleで2重線を引く
<div class="doubleline">
  <!-- 中身 -->
</div>
.doubleline {
  width: 100px;
  height: 100px;
  border: double 4px #000;  /* 2重線を引く */
}
一番簡単に2重線を引く方法です。
注意点
・指定は必ず2px以上でないと反映されない(2pxもくっついて1本になるので)
・2本とも同じ色にしかできない
・線と線の間は調整できない
・線の太さや右側だけ2重にするなどの多様性はない。
方法その② 影を使う
<div class="doubleline">
  <!-- 中身 -->
</div>
.doubleline {
  width: 100px;
  height: 100px;
  border: solid 2px #f00;     /* 内側の線 */
  box-shadow: 0 0 0 2px #00f; /* 外側の線に見える影 */
}
影を使った方法です。あまり多様性はない。
注意点
・線と線の間は常にくっつく。
・あまり多様性はない。四角形もしくは直線を2重にしたい時に使うくらい。
方法その③ 疑似要素を使う
<div class="doubleline">
  <!-- 中身 -->
</div>
.doubleline {
  width: 100px;
  height: 100px;
  border: solid 2px #f00; /* 内側の線 */
  position: relative;     /* 基準値とする */
}

.doubleline::before {
  content: "";              /* 疑似要素には必須 */
  display: block;           /* ブロック要素にする */
  width: calc(100% + 8px);  /* 適度な大きさを指定 */
  height: calc(100% + 8px); /* 適度な大きさを指定 */
  border: solid 2px #00f;   /* 外側の線 */
  position: absolute;       /* 相対位置に指定 */
  top: -6px;                /* 大きさに合わせて微調整 */
  left: -6px;               /* 大きさに合わせて微調整 */
}
注意点
・ソースも短く、多様性があり使いやすい。
・大きさの調整は計算してもいいし、目分量でいい感じにする。
afterも使って3重にすることも可能。
方法その④ 要素を2重にする
<div class="fst_line">
  <div class="sec_line">
    <!-- 中身 -->
  </div>
</div>
.fst_line {
  width: 100px;
  height: 100px;
  border: solid 2px #f00; /* 外側の線 */
  padding: 3px;
  box-sizing: border-box; /* paddingとborderの計算を簡単にする */
}

.sec_line {
  width: 100%;
  height: 100%;
  border: solid 2px #00f; /* 内側の線 */
  box-sizing: border-box; /* paddingとborderの計算を簡単にする */
}
無理に1つの要素で作らずに、2つのdiv要素を用意する。
この方がタグは増えるが綺麗に作れるし多様性もある
注意点
・ソースが少しだけ長くなる。
・意味のない装飾用のタグになってしまう。
おまけ
線をずらして重ねてオシャレに配置する方法
<div class="doubleline">
  <!-- 中身 -->
</div>
.doubleline {
  width: 100px;
  height: 100px;
  border: solid 2px #f00; /* 1本目の線 */
  position: relative;     /* 基準値とする */
}

.doubleline::before {
  content: "";            /* 疑似要素には必須 */
  display: block;         /* ブロック要素にする */
  width: 100%;            /* 適度な大きさを指定 */
  height: 100%;           /* 適度な大きさを指定 */
  border: solid 2px #00f; /* 2本目の線 */
  position: absolute;     /* 相対位置に指定 */
  top: 4px;               /* 大きさに合わせて微調整 */
  left: 4px;              /* 大きさに合わせて微調整 */
}

.doubleline::after {
  content: "";            /* 疑似要素には必須 */
  display: block;         /* ブロック要素にする */
  width: 100%;            /* 適度な大きさを指定 */
  height: 100%;           /* 適度な大きさを指定 */
  border: solid 2px #0f0; /* 3本目の線 */
  position: absolute;     /* 相対位置に指定 */
  top: 12px;               /* 大きさに合わせて微調整 */
  left: 12px;              /* 大きさに合わせて微調整 */
}
まとめ
単に1本線を引くよりも、ちょっとアクセントがあってオシャレにできるかも。
直線にも応用できるので、使ってください。
おそまつ!
~ Qiitaで毎日投稿中!! ~
【初心者向け】WEB制作のちょいテク詰め合わせ


