前回は、Windows 10 Pro の Hyper-V 上に Ubuntu を導入しビットコイン・ウォレットをコンテナとして構築しました。
この環境は Confidential Computing ではないので、root や Hypervisor 管理者であればビットコイン・ウォレット の seed を盗み出すことが可能であることを検証しました。
今回は、IBM が提供する Confidential Computing の サーバー環境である「IBM Hyper Protect Virtual Servers」に「Secure Build Server」という仕組みでビットコイン・ウォレットのコンテナを稼働されます。
ここでのポイントは3つです
- Hypervisor 管理者がメモリー内の情報に技術的にアクセスできない
- root ユーザーによるアクセスが技術的にできない
- コンテナイメージの改変を技術的に許さない
「1. Hypervisor 管理者がメモリー内の情報に技術的にアクセスできない」ことは IBM Hyper Protect Virtual Servers 上でアプリケーションを稼働させることで技術的に担保します。
「2.root ユーザーによるアクセスが技術的にできない」「3.コンテナイメージの改変を技術的に許さない」を担保するのが、Secure Build Server の機能です。
IBM Hyper Protect Virtual Servers
IBM Hyper Protect Virtual Servers (以下 HPVS と記します) は IBM LinuxONE 上に構築され、IBM Cloud環境で実行される Linux on Z 環境です。
IBM の Blog には、このよう記載されています。
以下に記述するIBM Cloud Hyper Protect Servicesの全ての機能はIBM LinuxONE上に構築され、IBM Cloud環境で実行されます。そして、データ、ワークロード、暗号鍵に対する完全な権限を顧客に提供することは、セキュリティー面で重要な差別化要因となります。IBM Cloudの管理者であっても、IBM Cloud Hyper Protect Servicesに対するアクセス権限を持てないのです。
- IBM Cloud Hyper Protect Crypto Servicesは、鍵管理およびクラウド・ハードウェア・セキュリティー・モジュール(HSM)のサービスです。IBM Cloud Hyper Protect Crypto Servicesは、FIPS 140-2レベル4認定ハードウェアで構築された業界唯一のサービスであり、暗号鍵を排他的に制御できます。 IBMでは、この機能をKeep Your Own Key(KYOK)と呼んでいます。
- IBM Cloud Hyper Protect DBaaSは、パブリッククラウド内の機密性の高いデータに対して、安全性が高いデータベース環境を提供します。現在は、PostgreSQLとMongoDB EEがサポートされています。
- IBM Cloud Hyper Protect Virtual Serversは、機密データや知的財産を用いたワークロードが稼動するLinuxONE上の仮想サーバーへの、完全な権限を顧客に提供します。
HPVS は他の IBM Cloud のサービスと同様にポータルや CLI から構築することが可能です。
ポータルから構築した HPVS は root アクセス可能な通常の Linux on Z として提供されます。

上のイメージでプランが「無料」になっている通り、一番小さなインスタンスであれは 2 インスタンスまで無料で使うことができます。
ただし、インスタンスをポータルから削除し、ポータルに表示されなくたってもインスタンスの作成に失敗することがあるので注意が必要です。
これは、ポータルから削除しても一定期間は復活できるように、内部でインスタンスを保持しているためです。
無料の 2 インスタンスには、この内部保持されているインスタンスもカウントされています。
内部保持している資源は下記の IBM Cloud CLI コマンドで確認できます。
ibmcloud resource reclamations
保持期間を待たずに、削除するには下記の IBM Cloud CLI コマンドを使います。
ibmcloud resource reclamation-delete <RECLAMATION-ID>
「ibmcloud resource reclamations」何度か実行して「No reclamation found」となれば、完全に削除されています。
チュートリアル Step by Step
では、下記のチュートリアルを実行しましょう。
github 上のアプリケーションの情報はこちらです。チュートリアルに記載されていない情報もありますので、参照されるといいかもしれません。
なお、ここからの「Step X」の表記はチュートリアル上の「Step X」に対応しています。
Before you begin / 事前準備
-
x64 の Ubuntu 環境
今回は x64 の Ubuntu 環境で構築作業を行います。
インターネットにアクセス可能な Ubuntu 環境を用意します。 -
IBM Cloud CLI の導入
用意した Ubuntu 環境に IBM Cloud CLI を導入します。
root になっておきます。
sudo -s
cd
IBM Cloud CLI を導入します。
curl -sL https://ibm.biz/idt-installer | bash
-
GPG の導入
ここから GPG をUbuntu に導入します。 -
GitHub に ssh の公開鍵を登録
Ubuntu の ssh の公開鍵を GitHub に 登録します。
手順は「GitHub に SSH で接続する」を確認ください。 -
GitHub のアクセストークンを生成
GitHub のアクセストークンを生成します。
手順は「GitHub に SSH で接続する」を確認ください。
Step 1: Set up the IBM Container Registry
1. Use the following commands to log in to IBM Cloud
IBM Cloud CLI でログインします。
ibmcloud login --sso
下記のメッセージが出ます。
root@u2004:~# ibmcloud login --sso
API endpoint: https://cloud.ibm.com

Get a one-time code from https://identity-1.ap-north.iam.cloud.ibm.com/identity/passcode to proceed.
Open the URL in the default browser? [Y/n] > n
One-time code >
GUI が利用できる環境であれば「Y」でブラウザーを開きます。
GUI が利用できない環境であれば「n」で応答して「https://identity-1.ap-north.iam.cloud.ibm.com/identity/passcode 」を開きます。
IBM Cloud の ID でログインするとワンタイム・パスコードが表示されるので、コピー&ペーストで入力します。
IBM ID が複数の IBM Cloud のアカウントに紐づいている場合、選択が求められたます。
操作先のリージョンが聞かれますが、今回は Enter でスキップして構いません。
Select a region (or press enter to skip):
1. au-syd
2. in-che
3. jp-osa
4. jp-tok
5. kr-seo
6. eu-de
7. eu-gb
8. ca-tor
9. us-south
10. us-south-test
11. us-east
12. br-sao
Enter a number>
2. Run the following command to create an API key for your user ID.
API キーを作成します。
下記を実行します。
ibmcloud iam api-key-create myapikey -d "API key for SBS tutorial"
作成されました。
root@u2004:/home/user01# ibmcloud iam api-key-create myapikey -d "API key for SBS tutorial"
Creating API key myapikey under cda7cf7172a34233a5edc160633ae793 as ONODA@example.com...
OK
API key myapikey was created

Please preserve the API key! It cannot be retrieved after it's created.

ID            ApiKey-12f8d510-2d6d-48a9-9aa5-152e8d906c78
Name          myapikey
Description   API key for SBS tutorial
Created At    2022-06-07T07:23+0000
API Key       XXXXXXXXXXXXXXXXXXXXXXXXXXXXXXXXXXXXXXXXXXXXXX
Locked        false
3. Run the following commands to install the container registry CLI plug-in and to create a new namespace
コンテナレジストリーのCLIプラグインを導入し、コンテナレジストリーのリージョンを「us-south」に設定します。
ibmcloud plugin install container-registry
ibmcloud cr region-set us-south
コンテナレジストリーにネームスペースを追加します。
チュートリアルでは、このようになっています。
ibmcloud cr namespace-add secureimages
しかし、失敗するはずです。
これは、他のユーザーが us.icr.io 内で「secureimages」というネームスペースをすでに利用しているためです。
root@u2004:/home/user01# ibmcloud cr namespace-add secureimages
No resource group is targeted. Therefore, the default resource group for the account ('Default') is targeted.

Adding namespace 'secureimages' in resource group 'Default' for account ONODA in registry us.icr.io...

FAILED
The requested namespace is already in use in registry 'us.icr.io'.
Choose a different namespace.
ユニークなネームスペース名を指定します。
ibmcloud cr namespace-add [ユニークな名前]
今回は「secureimages-20220607」という名前にしてみました。
ibmcloud cr namespace-add secureimages-20220607
今度は正常に作成されました。
root@u2004:/home/user01# ibmcloud cr namespace-add secureimages-20220607
No resource group is targeted. Therefore, the default resource group for the account ('Default') is targeted.

Adding namespace 'secureimages-20220607' in resource group 'Default' for account ONODA  in registry us.icr.io...

Successfully added namespace 'secureimages-20220607'

OK
Step 2: Set up the Secure Build Server
ここでは、Secure Build Server のセットアップを行います
Secure Build Server は HPVS の安全・安心なコンテナをビルドするために作られた専用のコンテナで、やはり HPVS 上で稼働します。
1. Install the IBM Cloud CLI HPVS plug-in by running the following command:
IBM Cloud CLI の HPVS プラグインを導入します。
ibmcloud plugin install hpvs
導入されました。
root@u2004:~# ibmcloud plugin install hpvs
Looking up 'hpvs' from repository 'IBM Cloud'...
Plug-in 'hpvs 1.4.17' found in repository 'IBM Cloud'
Attempting to download the binary file...
 12.89 MiB / 12.89 MiB [===============================================================================================] 100.00% 0s
13513877 bytes downloaded
Installing binary...
OK
Plug-in 'hpvs 1.4.17' was successfully installed into /root/.bluemix/plugins/hpvs. Use 'ibmcloud plugin show hpvs' to show its details.
2. Install python3 and pip3, by running the following commands:
python3 と pip3 と導入します。
sudo apt-get update && sudo apt-get install python3 python3-pip && python3 -m pip install -U pip
3. Use the following commands to install the Secure Build Server CLI on your workstation:
Secure Build Server CLI をクライアントとして使う Ubuntu に導入します。
Secure Build Server CLI は HPVS 上に導入・構築される Secure Build Server を操作するためも CLI です。
git clone git@github.com:ibm-hyper-protect/secure-build-cli.git
cd secure-build-cli
pip3 install -r requirements.txt
※「git@github.com: Permission denied (publickey).」で git clone が失敗する場合、GitHub に ssh の公開鍵が正しく登録されていません。登録後、再実行してください。
4. Create the Secure Build Server configuration.
Secure Build Server の構成ファイルを「sbs-config.json」という名前で作ります。
構成ファイルには、Secure Build Server の情報だけではない、ビルとするアプリケーションを取得する GitHub リポジトリ情報や ビルドしたイメージ保存する イメージ・レジストリの情報も指定されています。
チュートリアルから「sbs-config.json」をコピーします。
{
  "HOSTNAME": "sbs.example.com",
  "CICD_PORT": "443",
  "IMAGE_TAG": "1.3.0.5",
  "CONTAINER_NAME": "SBContainer",
  "GITHUB_KEY_FILE": "~/.ssh/id_rsa",
  "GITHUB_URL": "git@github.com:IBM/secure-bitcoin-wallet.git",
  "GITHUB_BRANCH": "master",
  "IMAGE_TAG_PREFIX": "s390x-v1",
  "REPO_ID": "sbs",
  "DOCKER_REPO": "<リポジトリ・ネームスペース>/secure-bitcoin-wallet",
  "DOCKER_USER": "iamapikey",
  "DOCKER_PASSWORD": "<your api key>",
  "DOCKER_RO_USER": "iamapikey",
  "DOCKER_RO_PASSWORD": "<your api key>",
  "DOCKER_CONTENT_TRUST_BASE": "False",
  "DOCKER_CONTENT_TRUST_BASE_SERVER": "",
  "DOCKER_BASE_SERVER": "us.icr.io",
  "DOCKER_PUSH_SERVER": "us.icr.io",
  "DOCKER_CONTENT_TRUST_PUSH_SERVER": "https://notary.us.icr.io",
  "ENV_WHITELIST":  ["ZHSM", "APIKEY", "INSTANCE_ID", "IAM_ENDPOINT"],
  "ARG": {
    "NO_GRPC_BUILD": "1",
    "ACCESS_TOKEN": "********"
  }
}
変更するのは、下記の 4 か所です。
-
"DOCKER_REPO": "<リポジトリ・ネームスペース>/secure-bitcoin-wallet",
チュートリアルの「secureimages」を、今回作成したリポジトリのネームスペースに置き換えます。 -
"DOCKER_PASSWORD": "<your api key>",
-
"DOCKER_RO_PASSWORD": "<your api key>",
「<your api key>」に「Step 1: Set up the IBM Container Registry」の「2. Run the following command to create an API key for your user ID.」で作成した API キーを設定します。
- "ACCESS_TOKEN": "********"
「********」に GitHub の アクセストークンを指定します。
5. Create the client certificate and client CA by running the following command:
クライアント証明書とクライアント CA を作成します。
./build.py create-client-cert --env sbs-config.json
作成されました。
root@u2004:/home/user01/secure-build-cli# ./build.py create-client-cert --env sbs-config.json
INFO:__main__:parameter file sbs-config.json renamed to sbs-config.json.2022-06-07_09-21-50.085159
INFO:root:client_certificate: generating client CA and certificate
sbs-config.json に UUID と SECRET が追加されています。
.SBContainer-.d のディレクトリーが作成され証明書やキーが保存されました。
6. Create the server certificate and server KEY by running the following command:
サーバー証明書とサーバーキーを作成します。
./build.py create-server-cert --env sbs-config.json
作成されました。
root@u2004:/home/user01/secure-build-cli# ./build.py create-server-cert --env sbs-config.json
INFO:root:server_certificate: using supplied pem files cert_directory=.SBContainer-7775fa6f-4dfb-4369-aac4-9b42c6ed086f capath=./.SBContainer-7775fa6f-4dfb-4369-aac4-9b42c6ed086f.d/client-ca.pem cakeypath=./.SBContainer-7775fa6f-4dfb-4369-aac4-9b42c6ed086f.d/client-ca-key.pem
INFO:root:server_certificate: Generating server certificate
INFO:root:server_certificate: Successfully generated server CSR
INFO:root:server_certificate: Successfully generated server certificate
7. Run the following command to display the client certificate and CA, server certificate and KEY in base64-encoding:
クライアント証明書、CA、サーバー証明書やキーをbase64でエンコードした値を表示します。
./build.py instance-env --env sbs-config.json
非常に長い文字列が表示されます。

「-e CLIENT_CRT=」以降をコピーしておきます。
8. Provision the Secure Build Server instance
Secure Build Server インスタンスの定義ファイルを下記から「secure_build.asc」の名前で保管します。
このファイルは、暗号化および署名された登録定義ファイルです。リポジトリ名や、HyperProtect仮想サーバーインスタンスにSBSイメージをプルしてデプロイするためのクレデンシャルなどのメタデータが含まれています。
インスタンスの定義ファイルを使ってSecure Build Server インスタンスをプロビジョニングします。
「-e CLIENT_CRT」以降は、前のステップでコピーしておいた文字列です。
ibmcloud hpvs instance-create SBContainer lite-s dal13 --rd-path "secure_build.asc" -i 1.3.0.5 --hostname sbs.example.com -e CLIENT_CRT=... -e CLIENT_CA=... -e SERVER_CRT=... -e SERVER_KEY=...
「lite-s」により無料のインスタンスを使用します。
インスタンスのプロビジョニングが開始されました。
OK
Provisioning request for service instance 'crn:v1:bluemix:public:hpvs:dal13:a/cda7cf7172a34233a5edc160633ae793:a19d149c-ae59-4369-b146-fdcda1fa67cc::' was accepted.
 To check the provisioning status run:
 ibmcloud hpvs instance crn:v1:bluemix:public:hpvs:dal13:a/cda7cf7172a34233a5edc160633ae793:a19d149c-ae59-4369-b146-fdcda1fa67cc::
9. Display your Secure Build Server instance.
Secure Build Server インスタンスの状態を確認します。
ibmcloud hpvs instances
「Cloud state」は「provisioning」です。まだ利用可能ではありません。
root@u2004:/home/user01/secure-build-cli# ibmcloud hpvs instances

Getting instances ...


Name                     SBContainer
CRN                      crn:v1:bluemix:public:hpvs:dal13:a/cda7cf7172a34233a5edc160633ae793:a19d149c-ae59-4369-b146-fdcda1fa67cc::
Location                 dal13
Cloud tags
Cloud state              provisioning
Server status            not available
Plan                     not available
Public IP address        not available
Internal IP address      not available
Boot disk                not available
Data disk                not available
Memory                   not available
Processors               not available
Image type               not available
Image OS                 not available
Image name               not available
Public key fingerprint   not available
Last operation           create in progress
Last image update        not available
Created                  not available
しばらく待ったのちに「ibmcloud hpvs instances」を実行し「Cloud state」が「running」になれば Secure Build Server インスタンスの準備は完了です。
root@u2004:/home/user01/secure-build-cli# ibmcloud hpvs instances

Getting instances ...


Name                  SBContainer
CRN                   crn:v1:bluemix:public:hpvs:dal13:a/cda7cf7172a34233a5edc160633ae793:a19d149c-ae59-4369-b146-fdcda1fa67cc::
Location              dal13
Cloud tags
Cloud state           provisioning
Server status         running
Plan                  Free
Public IP address     52.116.0.241
Internal IP address   172.18.152.18
Boot disk             25 GiB
Data disk             25 GiB
Memory                2048 MiB
Processors            1 vCPUs
Image type            self-provided
Image OS              self-defined
Image name            de.icr.io/zaas-hpvsop-prod/secure-docker-build:1.3.0.5
Environment           SERVER_KEY=LS0tLS1CRUdJTiBQR1AgTUVTU0FHR...
(以下略)
10. Update the /etc/hosts file
「8. Provision the Secure Build Server instance」で「--hostname sbs.example.com」のように指定しました。
今回のインスタンスは「sbs.example.com」としてアクセスすること想定して作成されています。
そして、先ほどの出力で「Public IP address」に「52.116.0.241」が表示されました。
「sbs.example.com」が「52.116.0.241」を示すように Ubuntu クライアントの hosts を編集します。
127.0.0.1 localhost
127.0.1.1 u2004

52.116.0.241 sbs.example.com

# The following lines are desirable for IPv6 capable hosts
::1     ip6-localhost ip6-loopback
fe00::0 ip6-localnet
ff00::0 ip6-mcastprefix
ff02::1 ip6-allnodes
ff02::2 ip6-allrouters
Step 3: Build the application image by using the Secure Build Server
ここでは Secure Build Server を使って、ビットコイン・ウォレットのアプリケーションをビルドします。
1. Check the status of your Secure Build Server instance.
Secure Build Server インスタンスの状態を確認します。
./build.py status --env sbs-config.json
「"status": ""」が返ってくれば正常です。Secure Build Server インスタンスに接続できて状態が取得できています。
root@u2004:~/secure-build-cli# ./build.py status --env sbs-config.json
INFO:__main__:status: response={
    "status": ""
}
2. Initialize the configuration for your Secure Build Server instance.
Secure Build Server インスタンスを初期化します。
./build.py init --env sbs-config.json
初期化されました。
root@u2004:~/secure-build-cli# ./build.py init --env sbs-config.json
INFO:__main__:init: response={
    "status": "OK"
}
3. Build the application image.
アプリケーションをビルドします。
./build.py build --env sbs-config.json
非同期モードでビルドが開始されました。
root@u2004:~/secure-build-cli# ./build.py build --env sbs-config.json
INFO:__main__:build: response={
    "status": "OK: async build started"
}
4. Check the status of your build.
ビルドの状態をチェックします。
./build.py status --env sbs-config.json
ビルド中は下記のような出力になり、状況が確認できます。
root@u2004:~/secure-build-cli# ./build.py status --env sbs-config.json
INFO:__main__:status: response={
    "build_image_tag": "1.3.0.5",
    "build_name": "",
    "image_tag": "",
    "manifest_key_gen": "",
    "manifest_public_key": "",
    "status": "github cloned"
}
5. Check the build log.
ビルドのログを確認するには、下記を実行します、
./build.py log --log build --env sbs-config.json
GitHub のアクセストークンの指定を忘れると、このようなエラーになります。
INFO:__main__:2022-06-07 08:29:57,352  run                      INFO    run: Step INFO    run: Step 33/51 : RUN sed --in-place "s|dev-local|dev-${LARAVEL_ELECTRUM_BRANCH}|" composer.json &&     composer config --global github-oauth.github.com ${ACCESS_TOKEN} &&     composer -vv install &&     php artisan ui vue --auth &&     npm install &&     mv .env.example .env &&     php artisan key:generate &&     ./env.sh &&     php artisan make:migration create_user &&     sed --in-place "s|App\\\Providers\\\RouteServiceProvider::class,|App\\\Providers\\\RouteServiceProvider::class,\n        AraneaDev\\\Electrum\\\ElectrumServiceProvider::class,|" config/app.php &&     sed --in-place "s|Vue.component('example-component', require('./components/ExampleComponent.vue').default);|Vue.component('electrum-wallet', require('$APP_ROOT/vendor/araneadev/laravel-electrum/src/resources/assets/js/Electrum.vue').default);|" $APP_ROOT/resources/js/app.js &&     sed --in-place "s|'Your wallet created! Please load your wallet after recording your seed.'|response.data.msg|" vendor/araneadev/laravel-electrum/src/resources/assets/js/Electrum.vue &&     sed --in-place "s|/home|/electrum|" app/Providers/RouteServiceProvider.php &&     npm install ajv &&     npm install clipboard --save-dev &&     npm install moment --save-dev &&     npm install vue2-bootstrap-modal --save-dev &&     npm install vue-qrcode-component --save-dev &&     npm install --save-dev prettier@1.12.0 &&     npm install bootstrap-vue --save-dev &&     npm install vue-loader@^15.9.5 --save-dev --legacy-peer-deps &&     npm run dev &&     composer -vv clearcache &&     npm cache clear --force &&     php artisan optimize
INFO    run:  ---> Running in 4b1b44bf0c1b
INFO    run:
INFO    run: In ConfigCommand.php line 776:
INFO    run:
INFO    run:   Too many arguments, expected only one token
INFO    run:
INFO    run:
INFO    run: config [-g|--global] [-e|--editor] [-a|--auth] [--unset] [-l|--list] [-f|--file FILE] [--absolute] [-j|--json] [-m|--merge] [--append] [--source] [--] [<setting-key> [<setting-value>...]]
INFO    run:
INFO    run: The command '/bin/sh -c sed --in-place "s|dev-local|dev-${LARAVEL_ELECTRUM_BRANCH}|" composer.json &&     composer config --global github-oauth.github.com ${ACCESS_TOKEN} &&     composer -vv install &&     php artisan ui vue --auth &&     npm install &&     mv .env.example .env &&     php artisan key:generate &&     ./env.sh &&     php artisan make:migration create_user &&     sed --in-place "s|App\\\Providers\\\RouteServiceProvider::class,|App\\\Providers\\\RouteServiceProvider::class,\n        AraneaDev\\\Electrum\\\ElectrumServiceProvider::class,|" config/app.php &&     sed --in-place "s|Vue.component('example-component', require('./components/ExampleComponent.vue').default);|Vue.component('electrum-wallet', require('$APP_ROOT/vendor/araneadev/laravel-electrum/src/resources/assets/js/Electrum.vue').default);|" $APP_ROOT/resources/js/app.js &&     sed --in-place "s|'Your wallet created! Please load your wallet after recording your seed.'|response.data.msg|" vendor/araneadev/laravel-electrum/src/resources/assets/js/Electrum.vue &&     sed --in-place "s|/home|/electrum|" app/Providers/RouteServiceProvider.php &&     npm install ajv &&     npm install clipboard --save-dev &&     npm install moment --save-dev &&     npm install vue2-bootstrap-modal --save-dev &&     npm install vue-qrcode-component --save-dev &&     npm install --save-dev prettier@1.12.0 &&     npm install bootstrap-vue --save-dev &&     npm install vue-loader@^15.9.5 --save-dev --legacy-peer-deps &&     npm run dev &&     composer -vv clearcache &&     npm cache clear --force &&     php artisan optimize' returned a non-zero code: 1
INFO    run: return code = 1
ERROR   exiting due to a non-zero return value: 1, cmd: docker build --disable-content-trust=true  --build-arg NO_GRPC_BUILD=1 --build-arg ACCESS_TOKEN='********' -t us.icr.io/secureimages-20220607/secure-bitcoin-wallet:latest .
6. Wait until the build completes.
ビルドが完了するまで状況の確認を繰り返しま。
./build.py status --env sbs-config.json
完了しました。
root@u2004:/home/user01/secure-build-cli# ./build.py status --env sbs-config.json
INFO:__main__:status: response={
    "build_image_tag": "1.3.0.5",
    "build_name": "us.icr.io.secureimages-20220607.secure-bitcoin-wallet.s390x-v1-941893e.2022-06-07_09-38-54.028557",
    "image_tag": "s390x-v1-941893e",
    "manifest_key_gen": "soft_crypto",
    "manifest_public_key": "manifest.us.icr.io.secureimages-20220607.secure-bitcoin-wallet.s390x-v1-941893e.2022-06-07_09-38-54.028557-public.pem",
    "status": "success"
}
IBM Cloud のリポジトリー内に作成しておいたネームスペース内にイメージが push されています。

7. Download the manifest file.
生成された manifest ファイルをダウンロードします。
この manifest ファイルは、イメージの正当性の確認に使われます。
./build.py get-manifest --env sbs-config.json --verify-manifest
ダウンロードされました。
root@u2004:/home/user01/secure-build-cli# ./build.py get-manifest --env sbs-config.json  --verify-manifest
INFO:__main__:get-manifest manifest_name: manifest.us.icr.io.secureimages-20220607.secure-bitcoin-wallet.s390x-v1-941893e.2022-06-07_09-38-54.028557
INFO:__main__:verify_manifest: manifest_name=manifest.us.icr.io.secureimages-20220607.secure-bitcoin-wallet.s390x-v1-941893e.2022-06-07_09-38-54.028557 test=0
INFO:__main__:verify=OK
ダウンロードした、manifest ファイルを確認します。
ls -l manifest*
root@u2004:/home/user01/secure-build-cli# ls -l manifest*
-rw-r--r-- 1 root root     451 Jun  7 09:45 manifest.us.icr.io.secureimages-20220607.secure-bitcoin-wallet.s390x-v1-941893e.2022-06-07_09-38-54.028557-public.pem
-rw-rw-rw- 1 root root     512 Jun  7 09:38 manifest.us.icr.io.secureimages-20220607.secure-bitcoin-wallet.s390x-v1-941893e.2022-06-07_09-38-54.028557.sig
-rw-r--r-- 1 root root 3033467 Jun  7 09:45 manifest.us.icr.io.secureimages-20220607.secure-bitcoin-wallet.s390x-v1-941893e.2022-06-07_09-38-54.028557.sig.tbz
-rw-rw-rw- 1 root root 3019152 Jun  7 09:38 manifest.us.icr.io.secureimages-20220607.secure-bitcoin-wallet.s390x-v1-941893e.2022-06-07_09-38-54.028557.tbz
8. Extract the manifest file.
チュートリアルでは「.sig.tbz」の拡張子を持つファイルから「.sig」「.tbz」のファイルを取り出すようにガイドがあります。
すでに、存在しますが、ここでは手順に従いましょう。
tar -xvf manifest.us.icr.io.secureimages-20220607.secure-bitcoin-wallet.s390x-v1-941893e.2022-06-07_09-38-54.028557.sig.tbz
ファイル名は、環境固有のものです。ご自身の環境に合わせてください。
root@u2004:/home/user01/secure-build-cli# tar -xvf manifest.us.icr.io.secureimages-20220607.secure-bitcoin-wallet.s390x-v1-941893e.2022-06-07_09-38-54.028557.sig.tbz
manifest.us.icr.io.secureimages-20220607.secure-bitcoin-wallet.s390x-v1-941893e.2022-06-07_09-38-54.028557.tbz
manifest.us.icr.io.secureimages-20220607.secure-bitcoin-wallet.s390x-v1-941893e.2022-06-07_09-38-54.028557.sig
さらに「.tbz」ファイルから build.json を含む git ディレクトリー や data ディレクトリーを展開します。
tar -xvf manifest.us.icr.io.secureimages-20220607.secure-bitcoin-wallet.s390x-v1-941893e.2022-06-07_09-38-54.028557.tbz
9. Retrieve the state image.
ステートイメージを取得します。
./build.py get-state-image --env sbs-config.json
取得されました。
root@u2004:/home/user01/secure-build-cli# ./build.py get-state-image --env sbs-config.json
INFO:__main__:state:name: us.icr.io.secureimages-20220607.secure-bitcoin-wallet.s390x-v1-941893e.2022-06-07_09-38-54.028557
Step 4: Deploy your application by using Hyper Protect Virtual Servers BYOI and run the application in a secure environment
作成した自分のアプリケーションを Hyper Protect Virtual Server にデプロイします。
アプリケーションは、root によるアクセスができない安全な環境で実行されます。
1. Retrieve the encrypted registration file
まず、アプリケーション・コンテナ・イメージの暗号化登録ファイルをダウンロードします。
ファイルを署名する GPG キーをユニークな名前で生成します。
例えば「manifest.us.icr.io.secureimages-20220607.secure-bitcoin-wallet.s390x-v1-941893e.2022-06-07_09-38-54.028557.tbz」ここの部分を使ってもいいでしょう。
./build.py get-config-json --env sbs-config.json --key-id secure-build-XXXXXXX-1
3度、パスフレーズを聞かれます。最初の2回はパスフレーズの設定のため、3度目は署名のためです。

root@u2004:/home/user01/secure-build-cli# ./build.py get-config-json --env sbs-config.json --key-id secure-build-941893e-1
INFO:__main__:a json config file has been written to sbs.enc.
2. Create the Hyper Protect Virtual Servers instance for your application.
作成した自分のアプリケーションを Hyper Protect Virtual Server にデプロイします。
image_tag=s390x-v1-941893e
ibmcloud hpvs instance-create securewallet lite-s dal13 --rd-path sbs.enc --hostname sbs.example.com -i $image_tag
プロビジョニングが開始されました。
root@u2004:/home/user01/secure-build-cli# image_tag=s390x-v1-941893e
root@u2004:/home/user01/secure-build-cli# ibmcloud hpvs instance-create securewallet lite-s dal13 --rd-path sbs.enc --hostname sbs.example.com -i $image_tag
OK
Provisioning request for service instance 'crn:v1:bluemix:public:hpvs:dal13:a/cda7cf7172a34233a5edc160633ae793:25d65870-646f-46c7-80c5-ee9499f2e555::' was accepted.
 To check the provisioning status run:
 ibmcloud hpvs instance crn:v1:bluemix:public:hpvs:dal13:a/cda7cf7172a34233a5edc160633ae793:25d65870-646f-46c7-80c5-ee9499f2e555::
状況を確認します。
ibmcloud hpvs instance
Secure Build Server も稼働しているため、状態を確認するインスタンスの指定が求められます。
root@u2004:/home/user01/secure-build-cli# ibmcloud hpvs instance

Select a virtual server:
1. SBContainer - crn:v1:bluemix:public:hpvs:dal13:a/cda7cf7172a34233a5edc160633ae793:a19d149c-ae59-4369-b146-fdcda1fa67cc::
2. securewallet - crn:v1:bluemix:public:hpvs:dal13:a/cda7cf7172a34233a5edc160633ae793:25d65870-646f-46c7-80c5-ee9499f2e555::
Enter a number> 2

Getting instance details for securewallet (crn:v1:bluemix:public:hpvs:dal13:a/cda7cf7172a34233a5edc160633ae793:25d65870-646f-46c7-80c5-ee9499f2e555::) ...

Operation is in progress.
 There is an operation in progress, so not all instance details can be displayed.
 You may want to retry later.


Name                     securewallet
CRN                      crn:v1:bluemix:public:hpvs:dal13:a/cda7cf7172a34233a5edc160633ae793:25d65870-646f-46c7-80c5-ee9499f2e555::
Location                 dal13
Cloud tags
Cloud state              provisioning
Server status            not available
Plan                     not available
Public IP address        not available
Internal IP address      not available
Boot disk                not available
Data disk                not available
Memory                   not available
Processors               not available
Image type               not available
Image OS                 not available
Image name               not available
Public key fingerprint   not available
Last operation           create in progress
Last image update        not available
Created                  not available
下記ですべてのインスタンスを表示することもできます。
ibmcloud hpvs instances
CRN名 を直接指定することもできます。
ibmcloud hpvs instance <CRN名>
実行状態になるまで定期的に確認します。
実行状態になると、今回作成したビットコインのウォレットアプリケーションのIPが表示されます。
root@u2004:/home/user01/secure-build-cli# ibmcloud hpvs instance

Select a virtual server:
1. SBContainer - crn:v1:bluemix:public:hpvs:dal13:a/cda7cf7172a34233a5edc160633ae793:a19d149c-ae59-4369-b146-fdcda1fa67cc::
2. securewallet - crn:v1:bluemix:public:hpvs:dal13:a/cda7cf7172a34233a5edc160633ae793:25d65870-646f-46c7-80c5-ee9499f2e555::
Enter a number> 2

Getting instance details for securewallet (crn:v1:bluemix:public:hpvs:dal13:a/cda7cf7172a34233a5edc160633ae793:25d65870-646f-46c7-80c5-ee9499f2e555::) ...


Name                  securewallet
CRN                   crn:v1:bluemix:public:hpvs:dal13:a/cda7cf7172a34233a5edc160633ae793:25d65870-646f-46c7-80c5-ee9499f2e555::
Location              dal13
Cloud tags
Cloud state           active
Server status         running
Plan                  Free
Public IP address     52.116.0.254
Internal IP address   172.18.152.19
Boot disk             25 GiB
Data disk             25 GiB
Memory                2048 MiB
Processors            1 vCPUs
Image type            self-provided
Image OS              self-defined
Image name            us.icr.io/secureimages-20220607/secure-bitcoin-wallet:s390x-v1-941893e
Last operation        create succeeded
Last image update     -
Created               2022-06-07
3. Run and use the Secure Bitcoin Wallet application.
表示された IP アドレスにアクセスします。
https://<your instance's public IP address>/electrum
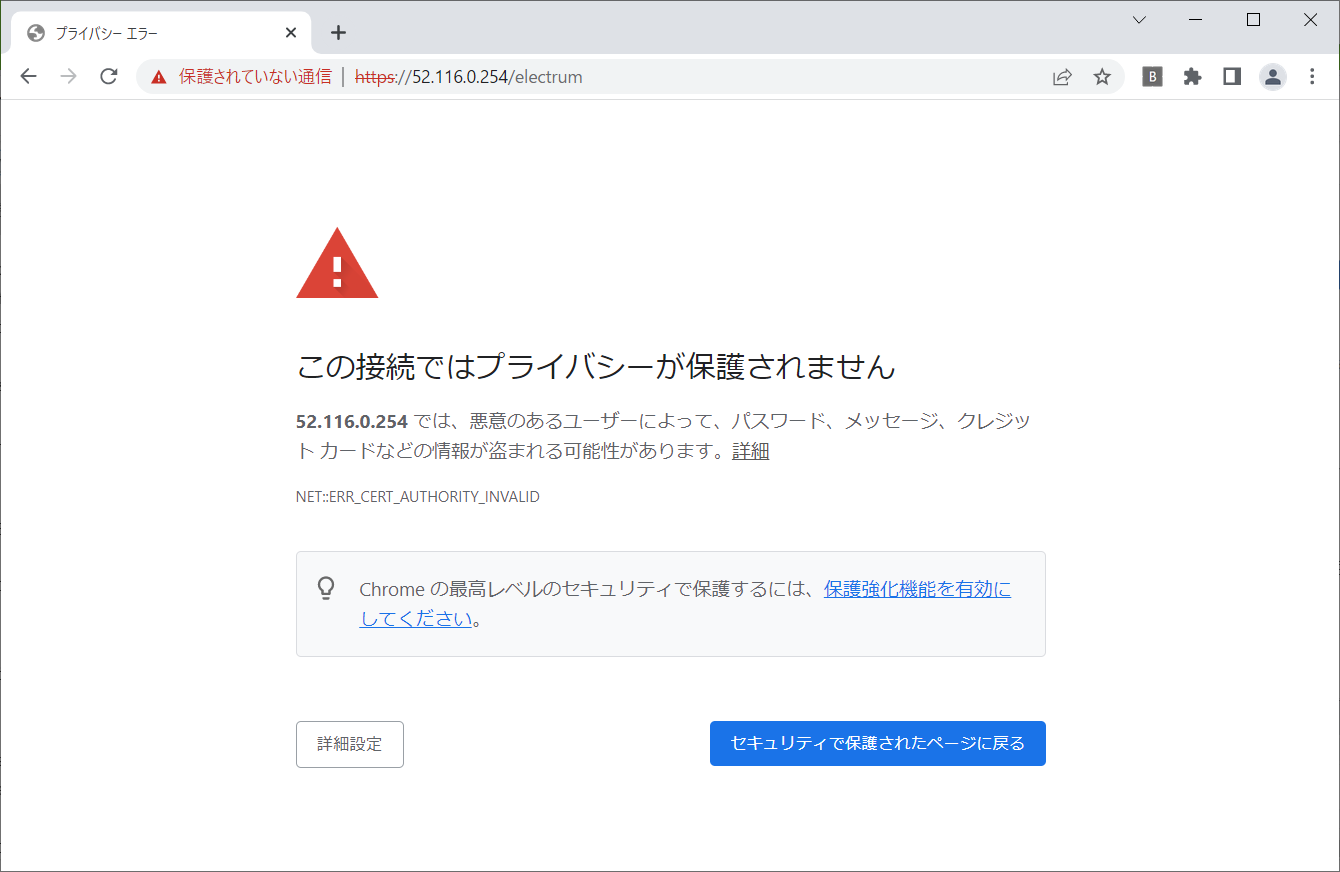
「詳細設定」をクリックし「アクセスする」を選びます。
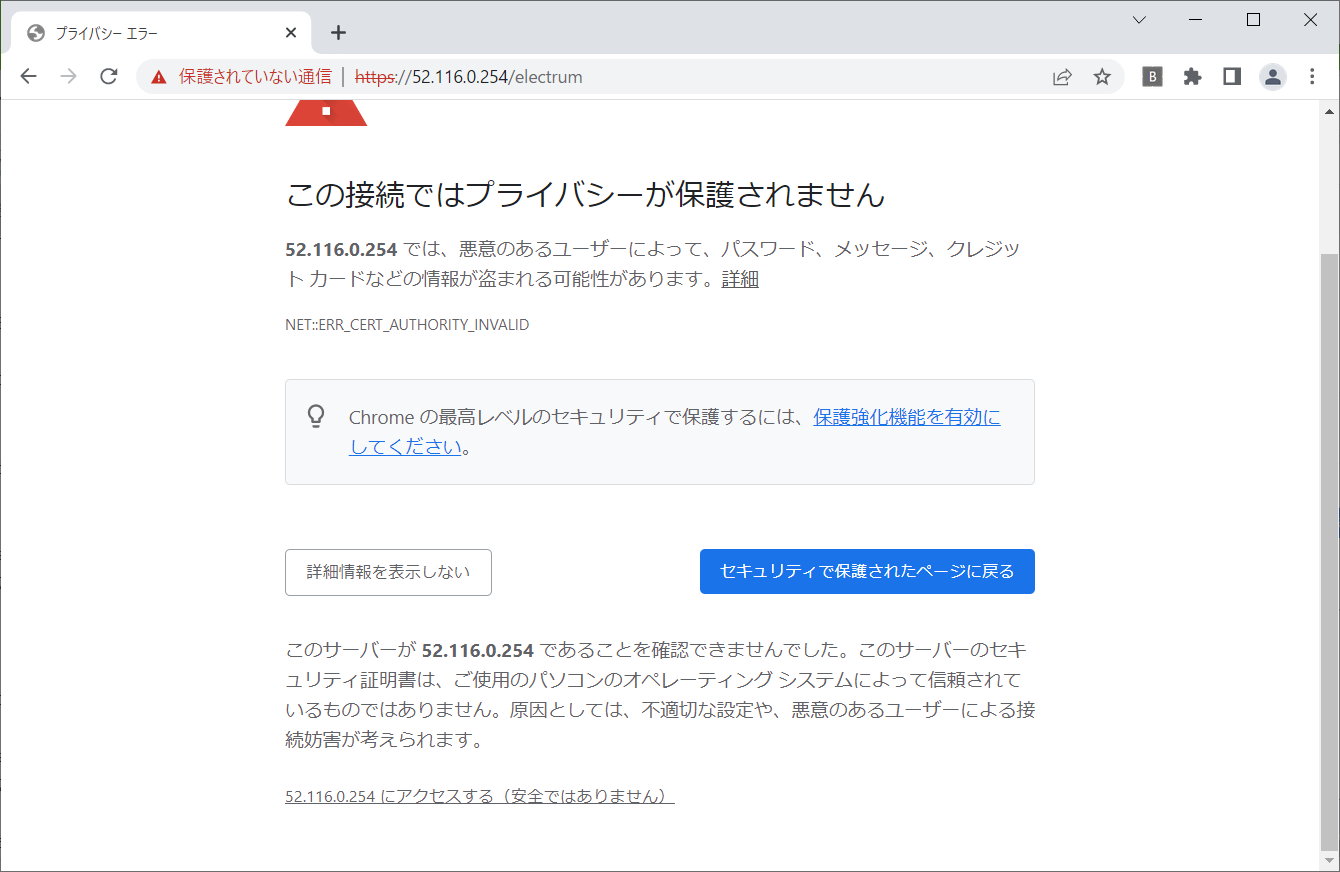
ログイン画面がでます。前回、試してきた Secure Bitcoin Wallet と同様にユーザーを登録すれば Bitcoin Wallet アプリケーションが利用できます。
