はじめに
CAP Service SDK for Javaを使用して、App Routerを使用してプロジェクトを作成していたのですが、仕様上、アクセス方法がApp RouterからSAP Build Work Zone, standard edition(以降、Build Work Zone。旧名:LaunchPad Service)に変更することになりました。
Build Work Zoneを前提にプロジェクトを一から作成する方法はたくさん記事が挙がっておりますが、App Routerを使用する前提でプロジェクトを作成していたものを、Build Work Zone仕様に変更する記事が見当たらなかったため、当記事に記載します。
CAP Service SDK for Javaのみでなく、SAP Fioriのプロジェクトにおいて、同様の内容で躓いている方がおられましたら、対処方法のヒントにもなるかもしれませんので、是非最後まで読んでいただけますと幸いです。
前提
当記事においては、下記の内容を前提としております。
・App Router使用時の認証方法はBasic Authenticationであること
・フロントエンドからバックエンドへの接続方法はAjaxを使用していること
修正対象
下記の6つが修正対象となります。
①ui_deployer
②app-router
③manifest.json
④mta.yaml
⑤xs-app.json
⑥controller.js
以下に、修正箇所の詳細を記載します。
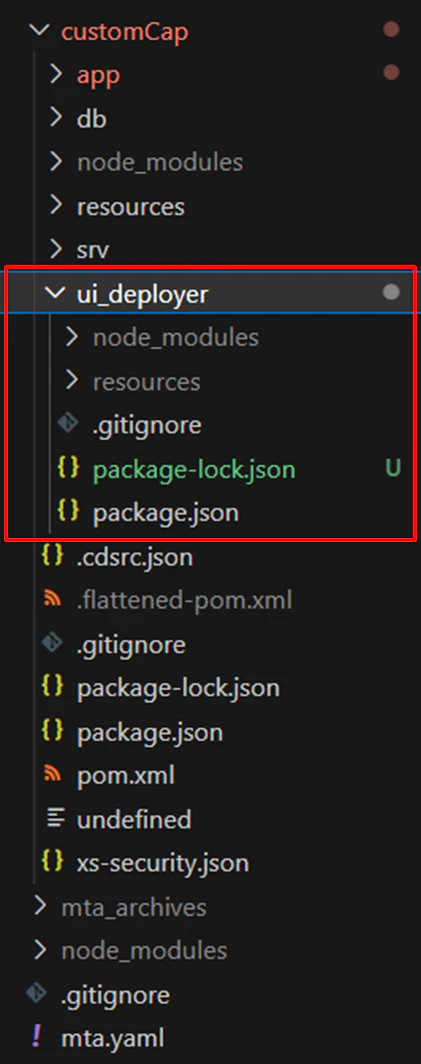
①ui_deployer
プロジェクト配下に"ui_deployer"のフォルダを作成し、package.jsonを追加し、npmをインストールするコマンドを実行します。
$ npm install
②app-router
LaunchPad Serviceが提供しているApp Routerを使用するので、app-routerのフォルダは削除します。
③manifest.json
⑴crossNavigationを追加
Build Work Zoneのタイルにタイトル、サブタイトル、説明、アイコンを表示するためのパラメータを設定するために、"sourceTemplate"と"dataSources"の間に、下記の"crossNavigation"の内容を追加します。
"crossNavigation": {
   "inbounds": {
       "intent1": {
           "signature": {
               "parameters": {},
               "additionalParameters": "allowed"
           },
           "semanticObject": "project2",
           "action": "request",
           "title": "{{appTitle}}",
           "info": "{{info}}",
           "subTitle": "{{appSubTitle}}",
           "icon": "sap-icon://add-coursebook"
       }
   }
},
appTitle、info、appSubTitleの内容は、i18n.propertiesにて指定してください。
⑵sap.cloudを追加
"sap.app"と"sap.ui"の間に、下記の"sap.cloud"の内容を追加します。
"sap.cloud": {
  "public": true,
  "service": "capDemo.app"
},
"service"の"capDemo.app"は、④⑴destination-serviceの変更時に必要になります。
④mta.yaml
⑴destination-serviceの変更
認証方法が"Basic Authentication"から"OAuth2UserTokenExchange"になるため、下記の内容に変更します。
※pathについては、適宜修正お願いします。
・modules
- name: sample-app-content
  type: com.sap.application.content
  path: customCap
  requires:
  - name: cap-demo
  - name: sample-destination-service
    parameters:
      content-target: true
  - name: sample-repo-host
    parameters:
      service-key:
        name: sample-repo-host-key
  - name: xs-security
    parameters:
      service-key:
        name: xs-security-key
  parameters:
    content:
      instance:
        destinations:
          - Authentication: OAuth2UserTokenExchange
            Name: cap_project
            TokenServiceInstanceName: xs-security
            TokenServiceKeyName: xs-security-key
            URL: '~{cap-demo/srv-url}'
          - Name: Dest_html5-repo-host
            ServiceInstanceName: sample-repo-host
            ServiceKeyName: sample-repo-host-key
            sap.cloud.service: capDemo.app
          - Authentication: OAuth2UserTokenExchange
            Name: cap-xs-security
            ServiceInstanceName: xs-security
            ServiceKeyName: xs-security-key
            sap.cloud.service: capDemo.app
        existing_destinations_policy: update
  build-parameters:
    no-source: true
・resources
- name: sample-destination-service
  type: org.cloudfoundry.managed-service
  parameters:
    config:
      HTML5Runtime_enabled: true
      version: 1.0.0
      init_data:
        instance:
          destinations:
          - Name: cap_project
            Type: HTTP
            ProxyType: Internet
          existing_destinations_policy: update
    service: destination
    service-name: sample-destination-service
    service-plan: lite
build-parametersについては上記で変更しましたので、下記の内容は削除します。
build-parameters:
  build-result: resources
  requires:
  - artifacts:
    - project2.zip
    name: project2
    target-path: resources/
⑵ui_deployerの作成
①ui_deployerで作成したものについて、mta.yamlに記載していきます。
・modules
- name: ui_deployer
  type: com.sap.html5.application-content
  path: customCap/ui_deployer
  requires:
    - name: sample-repo-host
  build-parameters:
    requires:
      - artifacts:
        - project2.zip
        name: project2
        target-path: resources
⑶app-routerを削除
②app-routerでフォルダを削除したので、下記の"app-router"に関するmta.yamlの記載も削除します。
- name: sample-app-router
  type: nodejs
  path: customCap/approuter
  requires:
  - name: sample_html5_repo_runtime
  - name: xs-security
  - name: sample-destination-service
  - name: cap-demo
    group: destinations
    properties:
      forwardAuthToken: true
      name: cap-demo
      url: ~{srv-url}
  parameters:
    disk-quota: 256M
    memory: 256M
⑤xs-app.json
②app-routerでrouteに関する情報を削除したので、app > 〇〇画面 > xs-app.jsonの"routes"の配下に下記の内容を追加します。
※"source"に記載している「^」を忘れないように!
"routes": [
  {
    "source": "^/odata/v2/(.*)$",
    "target": "/odata/v2/$1",
    "authenticationType": "xsuaa",
    "destination": "cap_project",
    "csrfProtection": false
  }
⑥controller.js
バックエンドに接続するURLを下記の"appModulePath"の内容に変更します。
var appId = this.getOwnerComponent().getManifestEntry("/sap.app/id");
var appPath = appId.replaceAll(".", "/");
var appModulePath = sap.ui.require.toUrl(appPath);

jQuery.ajax({
    url: appModulePath + "/odata/v4/BookService/Books",
    method: "GET",
    async: true,
    dataType: "json",
    contentType: "application/json",
    success: function (oData) {
    },
    error: function (e) {
    }
});
さいごに
App RouterからBuild Work Zoneに変更する際の修正点を取り上げることにより、App RouterとLaunchPad Serviceの場合との細かい実装の違いを把握するきっかけになりました。
当記事の件で修正しているのに上手く動作しない方や、両者の実装の違いを学びたい方がおられましたら、参考にしていただますと幸いです。