これは、Data Augmentation(以下、データ拡張)用ライブラリAlbumentationを紹介し、ライブラリには無いような特殊な拡張をしたい場合にTensorFlow2.x環境でImageDataGeneratorを通して自作のデータ拡張を実装してみるまでの記事です。
お急ぎの方はこちら
→ https://colab.research.google.com/drive/1vEYHqrWkhXF_kb9iN6lYGEwSLuYc_ScZ
対象読者
画像系のタスクで、今のところデータ拡張はライブラリ標準のもの1しか使ったことがないが、もう少し凝ったこともしてみたい人。
「学習用データを見ていると、精度向上に効きそうなデータ拡張を思い付いたけど試し方がわからない」
「CNNを使いたいので無理やり画像化した2次元データ。標準のデータ拡張を使うのは適切でないような気がしているけどどうすれば良いんだろう」
まずはAlbumentationでなんとかならないか考える
前提として(勉強のためではない場合、)自作しなくて済む方がコストの面でお得です。
Albumentationは、GitHubの#image-augmentaionタグで2番目にスター数の多い2データ拡張用ライブラリです。
TensorFlow標準のImageDataGeneratorだと、データ拡張としては平行移動・回転・せん断・拡大縮小・反転ぐらいの処理しか出来ませんが、Albumentationではブラーやガンマ補正など簡単に思い付きそうなことは既に実装されています。
公式のデータ拡張リストと、各拡張に対して例画像を作っているQiita記事「Albumentationsのaugmentationをひたすら動かす」@kurilabを紹介しておきます。ライブラリがカバーする範囲の雰囲気が掴めるかもしれません。
実際に動かしてみるためのコードも公式のexampleがあります。PyTorchとTensorFlow両対応です。
Albumentationを使ってみる
「公式のexampleがあるのでそれを見てやってください」だけでは寂しいので、なるべく最小構成にした動くコードを例示してみます。
と、その前に、TensorFlowのImageDataGenerator()の引数preprocessing_functionは「画像を渡して画像が返る関数」が渡されることを期待しているので、今回はこれに沿ったものを作るようにします。
Generatorを自作する方法もありますが、TensorFlowに慣れていてImageDataGeneratorを使ったことがある人はこちらを経由したほうがとっつきやすいと思います。
preprocessing_function:
function that will be applied on each input. The function will run after the image is resized and augmented. The function should take one argument: one image (Numpy tensor with rank 3), and should output a Numpy tensor with the same shape.
cf. tf.keras.preprocessing.image.ImageDataGenerator
ただし、この方法はTensorFlowのドキュメントにあるようにinputとoutputのshapeが一致している必要があります。
「256x256の画像を受け取り、224x224の画像を返す」のような処理をしたい場合は公式サンプルのTensorFlow版のようにGeneratorも自作する必要があります。
from albumentations import (
    Compose,
    Rotate,
    RandomBrightness,
    HorizontalFlip,
)

transforms = Compose([
    # 処理順にデータ拡張の種類を書く
    Rotate(limit=10),
    RandomBrightness(limit=0.1),
    HorizontalFlip(p=0.5),
])

def wrap_compose(input_image):
    return transforms(image=input_image)["image"]
この例では、
- データ拡張のリスト(augmentations.transforms)から、Rotate(), HorizontalFlip()などを選んで処理順にリストに格納したものをCompose()に渡す。
- すると、あるキーワード引数(今回は
image)で画像を受け取り、そのキーワードをKeyとするDictを返してくる関数が得られる(transforms)。 - 「画像を渡して画像が返る関数」にするために
wrap_compose()でラップする。
を行っています。
本当に機能するのか、CIFAR-10の画像でデータ拡張後の画像を覗いてみます。
import tensorflow as tf
(x_train, y_train), (x_test, y_test) = tf.keras.datasets.cifar10.load_data()

import matplotlib as plt
plt.imshow(x_train[0])
plt.imshow(wrap_compose(x_train[0])
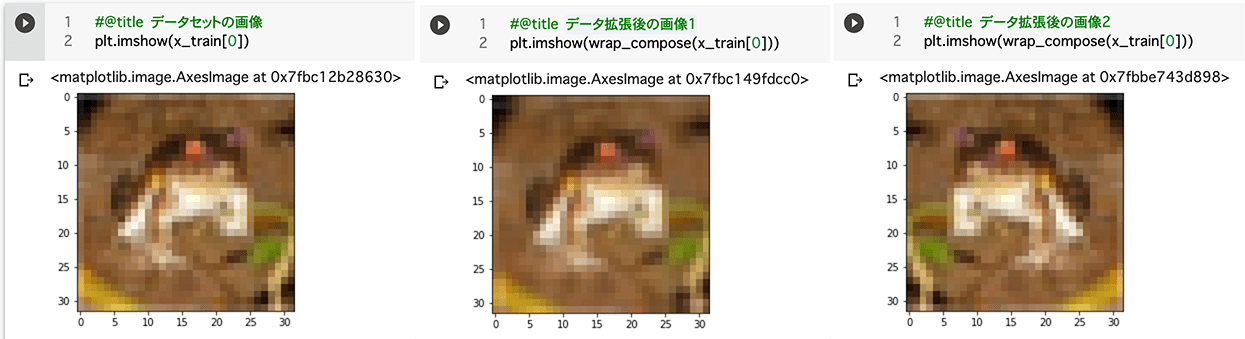
wrap_compose()の実行の度に得られるデータが変わっていることが分かります。
続いて、ImageDataGeneratorで学習用データのGeneratorを作って実際に学習するコードを示します。
from math import ceil, floor
VALIDATION_SPLIT = 0.2
BATCH_SIZE = 128

datagen = tf.keras.preprocessing.image.ImageDataGenerator(
    preprocessing_function=wrap_compose,
    validation_split=VALIDATION_SPLIT
)

x_train_aug = datagen.flow(
    x_train, y_train, batch_size=BATCH_SIZE, subset="training"
)
x_val_aug = datagen.flow(
    x_train, y_train, batch_size=BATCH_SIZE, subset="validation"
)
train_steps = floor(len(x_train)*(1-VALIDATION_SPLIT) / BATCH_SIZE)
val_steps = ceil(len(x_train)*VALIDATION_SPLIT / BATCH_SIZE)

history = base_model.fit(
    x_train_aug,
    validation_data=x_val_aug,
    steps_per_epoch=train_steps,
    validation_steps=val_steps,
    epochs=30
)
ステップ数の丸め方について
train_stepsはmath.floor、val_stepsはmath.ceilで丸めています。
切り捨ては、データセットがバッチサイズで割り切れない場合、エポックの最後のバッチが他のバッチより小さくなり、1サンプルが持つモデルの重み更新への影響度がそのバッチだけ大きくなってしまうことを避けたものです。
学習ではなく検証時はこの影響は関係がないので、データを全て使えるように切り上げとしています。
コードを実行すると学習が進んでいることが分かります。
補足: TensorFlow 2.1からModel.fit_generator()はDEPRECATEDに
Model.fit()の引数xがgeneratorを受け付けるようになったので、多くの場合でfit_generator()をfit()に変えるだけでも動作します。
(引数xがgeneratorのとき、引数yは不要です)
cf. tf.keras.Model | TensorFlow Core v2.3.0
TensorFlowで自作のデータ拡張を作る
Albumentationで「画像を渡して画像が返る関数」を作ってImageDataGeneratorへ渡せました。
扱うデータ次第ではライブラリに無いような特殊なデータ拡張が有効なこともあります。
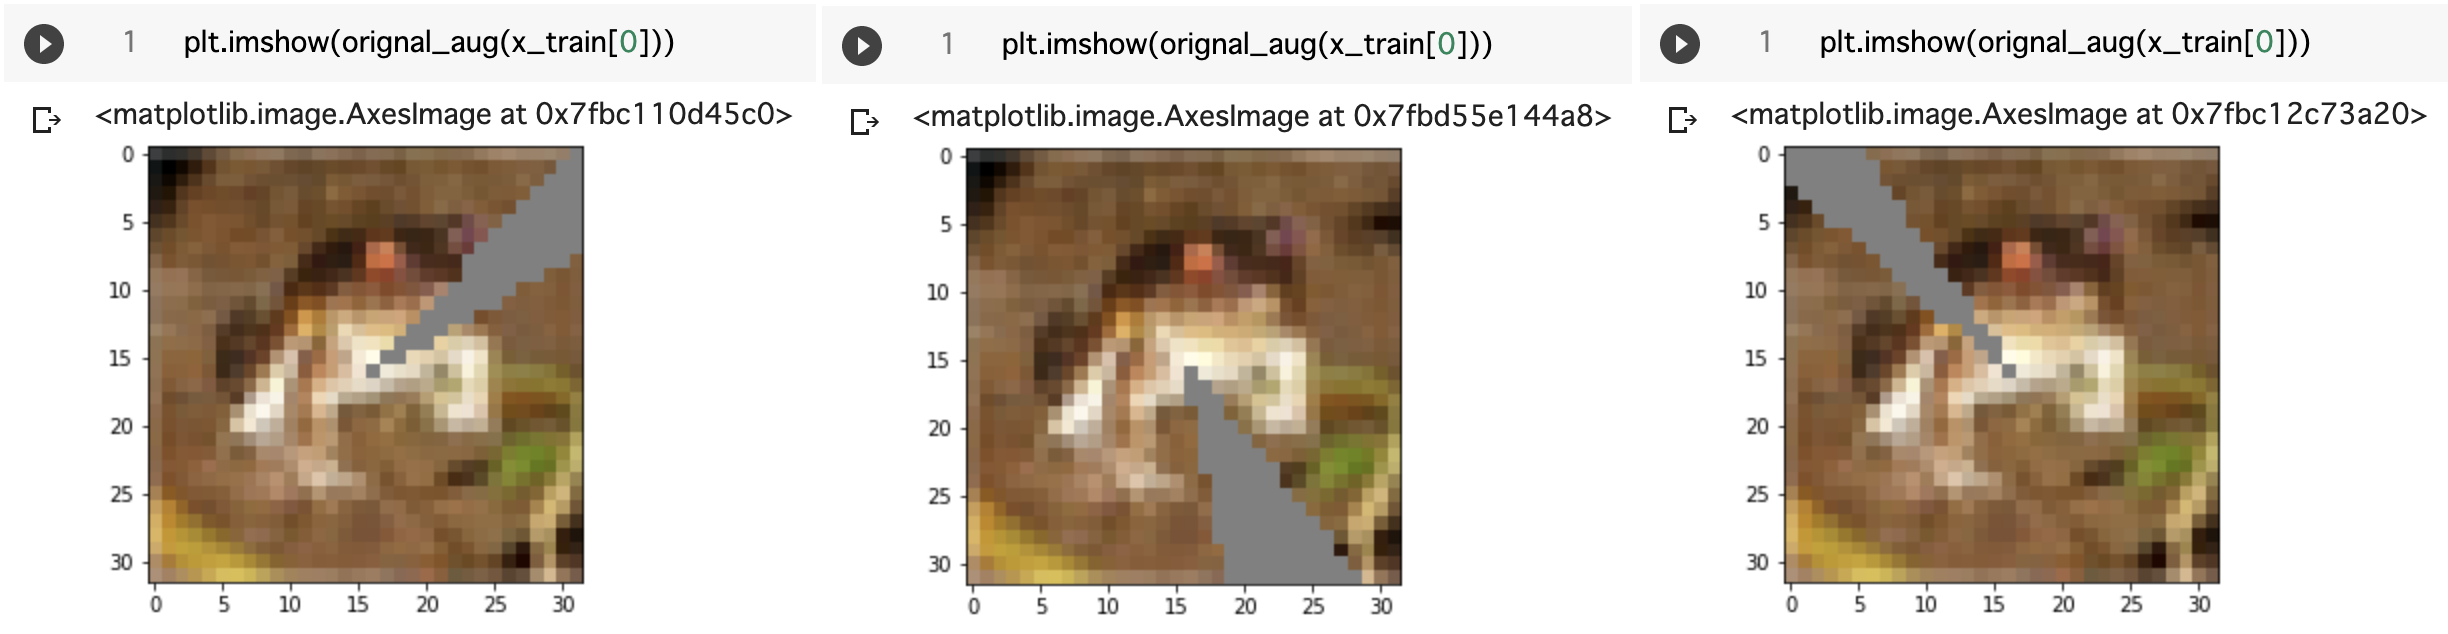
今回は例として「画像中心から扇形に最大30度の角度をグレーで塗り潰す」という拡張を考えます。
関数を作ってImageDataGeneratorへ渡すまでのコードを示します。
import cv2
import random

def orignal_aug(img):
    CENTER = (16, 16)
    GLAY = (128, 128, 128)
    SIZE = (23, 23)
    start_angle = random.randint(0, 359)
    angle = random.randint(0, 30)
    auged = cv2.ellipse(img, CENTER, SIZE, 0, start_angle, start_angle+angle, GLAY, thickness=-1)
    return cv2.UMat.get(auged)

datagen = tf.keras.preprocessing.image.ImageDataGenerator(
    preprocessing_function=orignal_aug,
    validation_split=VALIDATION_SPLIT
)
TensorFlowとの接続部分は、ImageDataGeneratorのpreprocessing_functionに渡す関数がwrap_composeからorignal_augに変わっているだけです。
orignal_augを書き換えれば、今示した以外にも様々な自作データ拡張ができます。
実際に動かしてorignal_aug()が正しく動いていることを確認できました。
ImageDataGenerator標準のデータ拡張と組み合わせる
preprocessing_functionに関数が渡されていてもwidth_shift_rangeやzoom_rangeのようなImageDataGenerator標準のデータ拡張用の引数は引き続き有効です。
ただし、「The function will run after the image is resized and augmented.」とあるように、標準のデータ拡張が行われてから自作のデータ拡張が実行される順番になっていることに注意しなければなりません。
まとめ
いままでのコードが含まれたipynbファイルのColaboratoryのリンクを改めて貼っておきます。
https://colab.research.google.com/drive/1vEYHqrWkhXF_kb9iN6lYGEwSLuYc_ScZ
自作のデータ拡張をなるべく簡単に書く方法を紹介しました。
「画像とは別に何かの引数(現在のエポック数や損失関数の値)を受け取り、それに応じて拡張する」のような、さらに凝ったことをする場合は今回紹介した方法は使えません。
この記事が「とりあえず一回作ってみる」程度の足がかりになれば幸いです。
-
PyTorchならtorchvision.transforms、TensorFlowならImageDataGenerator、など。ただしAlbumentationはPyTorchのエコシステムに組み込まれている。 ↩
-
2020年11月現在
ちなみに、スター数が1番多いのはaleju/imgaugで、Albumentationはimgaugを内部で用いています。 ↩