この記事は UT-virtaul Advent Calendar 2019 の1日目として書かれたものです。
波って良くないですか?
唐突なんですけど、波っていいですよね。最近授業で波に関わる内容をたくさん扱っているのもあって、ちょっと気になっています。
あと、作品を作る際に何らかのインタラクションが欲しいなあって気分になるんですが、物理法則に則った動きが欲しいなとも思っていました。その時に、波のような動きとかちょっと面白いんじゃないかって思ったんです。
ということで、Unityで波のシミュレーションをしたくなったわけです。
シミュレーション何が必要か
というわけで、シミュレーションに何が必要か考えました。その結果、コアになりそうなのは以下だなあと思いました。
- 波動方程式の離散化
- 離散化した波動方程式をシミュレーション領域でリアルタイムに計算しきるための並列計算
1つ目は純粋に数学をやるという話なのですが、2番目はもうちょっと細分化して考える必要がありそうです。何かないかなーと思っていたところ、Unity Graphics Programming なるちょうどいい本を見つけたので、これに載っていた ComputeShader と GPU Instancing を使ってGPUでゴリゴリ頑張る方法を試してみることにしました。
波動方程式の離散化
ネットで検索するとこれとか、結構たくさん資料があります。それを参考にしつつ、軽く解説します。
まず、連続な波動方程式はこれです。

これを、離散化することを考えます。
2階微分の離散化は、テイラー展開を使って考えることができるようです。まずは、以下のように分解します。

そして、その2式を足してあげると、下のような式が出てきます。

これで、2階微分を離散化することができました。
xについても同様にしてあげて、最初の式に代入し整理してあげると、今回使う式が出てきます。

2階微分に関しては、t と t-δt という2ステップ前までのデータがあれば計算を進めることができます。
今回はこれの2次元版を使っていきます。
ComputeShaderを使った並列計算
今回必要なスクリプトは
- 実際に並列計算をする ComputeShader の
ComputeWave.compute - ComputeShader に ComputeBuffer を渡してシミュレーションを始めさせる
ComputeWave.cs - GPU Instancing での描画を担う
RenderWave.shader - 計算結果を受け取って、シェーダーに渡し、GPU Instancing をする
RenderWave.cs
の4つです。
ComputeWave.cs
using UnityEngine;
using System.Runtime.InteropServices;

public class ComputeWave : MonoBehaviour
{
    //グループのスレッド数
    const int SIMULATION_BLOCK_SIZE = 256;
    //シミュレーションするエリアの広さ
    public Vector2 simulationSizes = Vector2.one * 10;
    //シミュレーションで使うキューブの数
    public Vector2Int simulationResolutions = Vector2Int.one * 256;
    public int simulationResolution { get; private set; }
    //キューブの幅
    public Vector2 positionStep { get; private set; }

    //時間の幅:1/60sで固定
    float timeStep;

    //波速
    [SerializeField] float velocity = 1f;

    //シミュレーションエリア
    public Vector3 wallCenter { get; private set; }
    public Vector3 wallSize { get; private set; }

    //シミュレーションを行うComputeShader
    [SerializeField] ComputeShader WaveCS;

    //0ステップ前の変位のバッファ
    public ComputeBuffer _currentDisplacement { get; private set; }
    //1ステップ前の変位のバッファ
    ComputeBuffer _pastDisplacement;

    private void Start()
    {
        FixParameters();
        InitBuffer();
    }

    private void FixedUpdate()
    {
        Simulate();
    }

    private void OnDestroy()
    {
        ReleaseBuffer();
    }

    //パラメータの初期化
    void FixParameters()
    {
        positionStep = simulationSizes / simulationResolutions;
        simulationResolution = simulationResolutions.x * simulationResolutions.y;
        timeStep = Time.fixedDeltaTime;
        wallCenter = Vector3.zero;
        wallSize = new Vector3(simulationSizes.x, 8f, simulationSizes.y);
    }

    //バッファの初期化
    void InitBuffer()
    {
        _currentDisplacement = new ComputeBuffer(
            simulationResolution,
            Marshal.SizeOf(typeof(float)));
        _pastDisplacement = new ComputeBuffer(
            simulationResolution,
            Marshal.SizeOf(typeof(float)));

        var currentDisplacementArray = new float[simulationResolution];
        var pastDisplacementArray = new float[simulationResolution];
        for(int i = 0; i < simulationResolution; i++)
        {
            currentDisplacementArray[i] = 0f;
            pastDisplacementArray[i] = 0f;
        }
        //とりあえずエリアの真ん中にちょっと値を入れてみる
        for(int i = 0; i < 2; i++)
        {
            for(int j = 0; j < 2; j++)
            {
                currentDisplacementArray[simulationResolutions.x * (simulationResolutions.y / 2 - i) + simulationResolutions.x / 2 - j] = .2f;
            }
        }
        _currentDisplacement.SetData(currentDisplacementArray);
        _pastDisplacement.SetData(pastDisplacementArray);
        currentDisplacementArray = null;
        pastDisplacementArray = null;
    }

    //毎フレーム実行するシミュレーション本体
    void Simulate()
    {
        ComputeShader cs = WaveCS;
        int id = -1;

        //スレッドグループの数を求める
        int threadGroupSize = Mathf.CeilToInt(simulationResolution / SIMULATION_BLOCK_SIZE);

        //各パラメータをComputeShaderにセット
        id = cs.FindKernel("Compute");
        cs.SetInt("_Res", simulationResolution);
        cs.SetInt("_ResX", simulationResolutions.x);
        cs.SetInt("_ResY", simulationResolutions.y);
        cs.SetFloat("_StepX", positionStep.x);
        cs.SetFloat("_StepY", positionStep.y);
        cs.SetFloat("_StepT", timeStep);
        cs.SetFloat("_Velocity", velocity);
        cs.SetBuffer(id, "_CurrentDispBuffer", _currentDisplacement);
        cs.SetBuffer(id, "_PastDispBuffer", _pastDisplacement);
        //ComputeShaderを実行
        cs.Dispatch(id, threadGroupSize, 1, 1);
    }

    //ComputeShaderを明示的に破棄
    void ReleaseBuffer()
    {
        if(_currentDisplacement != null)
        {
            _currentDisplacement.Release();
            _currentDisplacement = null;
        }

        if(_pastDisplacement != null)
        {
            _pastDisplacement.Release();
            _pastDisplacement = null;
        }
    }
}
細かい説明は Unity Graphics Programming などに譲るとして、流れとしては、
- シミュレーションの解像度、空間・時間のステップ幅(δx,δy,δt)、波速(c)などのパラメーターを設定する。
- シミュレーションするブロックの数だけの長さの ComputeBuffer を用意し、初期値を入れてあげる。
- 使うパラメーターと一緒に ComputeShader に渡す。
といった感じになっています。
ComputeBuffer については、明示的に破棄する必要があるので、気を付けて下さい。
ComputeWave.compute
//カーネル関数を指定
# pragma kernel Compute

//スレッドグループのスレッドサイズ
# define SIMULATION_BLOCK_SIZE 256

//変位のバッファ
RWStructuredBuffer<float> _CurrentDispBuffer;
RWStructuredBuffer<float> _PastDispBuffer;

int _Res;
int _ResX;
int _ResY;
float _StepX;
float _StepY;
float _StepT;
float _Velocity;

[numthreads(SIMULATION_BLOCK_SIZE, 1, 1)]
void Compute
(
    // スレッド全体で固有のID
	uint3 DTid : SV_DispatchThreadID
)
{
    int index = DTid.x;
    //1次元の連番をx, yに直す
    int x = index % _ResX;
    int y = index / _ResX;
    //件の波動方程式の計算
    float result = _Velocity * _Velocity * _StepT * _StepT
        * ((_CurrentDispBuffer[clamp(x+1, 0, _ResX-1) + y * _ResX] - 2 * _CurrentDispBuffer[index] + _CurrentDispBuffer[clamp(x-1, 0, _ResX-1) + y * _ResX]) / (_StepX * _StepX)
        + (_CurrentDispBuffer[x + clamp(y+1, 0, _ResY-1) * _ResX] - 2 * _CurrentDispBuffer[index] + _CurrentDispBuffer[x + clamp(y-1, 0, _ResY-1) * _ResX]) / (_StepY * _StepY))
        - (_PastDispBuffer[index] - 2 * _CurrentDispBuffer[index]);
    //バッファの更新
    _PastDispBuffer[index] = _CurrentDispBuffer[index];
    _CurrentDispBuffer[index] = result;
}
ここでは実際に、離散化した波動方程式の計算をマスごとに行っています。
RenderWave.cs
using UnityEngine;

[RequireComponent(typeof(ComputeWave))]
public class RenderWave : MonoBehaviour
{
    //キューブの大きさ
    Vector3 objectScale;

    //シミュレーション結果を持ってるComputeWaveスクリプト
    [SerializeField] ComputeWave computeWave;

    //表示するメッシュ(キューブ)
    [SerializeField] Mesh instanceMesh;
    //表示に使うマテリアル
    [SerializeField] Material instanceRenderMaterial;

    //GPUInstancingのための引数
    uint[] args = new uint[5] { 0, 0, 0, 0, 0 };
    ComputeBuffer argsBuffer;

    void Start()
    {
        //表示するキューブの大きさを指定
        objectScale.x = computeWave.positionStep.x;
        objectScale.y = computeWave.positionStep.y;
        objectScale.z = computeWave.positionStep.y;

        argsBuffer = new ComputeBuffer(1, args.Length * sizeof(uint), ComputeBufferType.IndirectArguments);
    }

    void FixedUpdate()
    {
        RenderInstancedMesh();
    }

    private void OnDisable()
    {
        if (argsBuffer != null)
            argsBuffer.Release();
        argsBuffer = null;
    }

    //GPUInstancingのメソッド
    void RenderInstancedMesh()
    {
        if (instanceRenderMaterial == null || computeWave == null || !SystemInfo.supportsInstancing)
            return;


        uint numIndices = (instanceMesh != null) ? (uint)instanceMesh.GetIndexCount(0) : 0;
        args[0] = numIndices;
        args[1] = (uint)computeWave.simulationResolution;
        argsBuffer.SetData(args);

        instanceRenderMaterial.SetBuffer("_WaveBuffer", computeWave._currentDisplacement);
        instanceRenderMaterial.SetVector("_ObjectScale", objectScale);
        instanceRenderMaterial.SetInt("_ResolutionX", computeWave.simulationResolutions.x);
        instanceRenderMaterial.SetInt("_ResolutionZ", computeWave.simulationResolutions.y);
        instanceRenderMaterial.SetFloat("_StepX", computeWave.positionStep.x);
        instanceRenderMaterial.SetFloat("_StepZ", computeWave.positionStep.y);

        var bounds = new Bounds
        (
            computeWave.wallCenter,
            computeWave.wallSize
        );

        Graphics.DrawMeshInstancedIndirect
        (
            instanceMesh,
            0,
            instanceRenderMaterial,
            bounds,
            argsBuffer
        );
    }
}
ComputeWave.computeで計算した結果である、ComputeWave.csの_currentDisplacementを RenderWave.shaderに渡して、GPU Instancing をしています。
RenderWave.shader
Shader "Custom/RenderWave"
{
    Properties
    {
        _Color ("Color", Color) = (1,1,1,1)
        _MainTex ("Albedo (RGB)", 2D) = "white" {}
		_Glossiness("Smoothness", Range(0,1)) = 0.5
		_Metallic("Metallic", Range(0,1)) = 0.0
    }
    SubShader
    {
        Tags { "RenderType"="Opaque" }
        LOD 200

        CGPROGRAM
		#pragma surface surf Standard vertex:vert addshadow
		#pragma instancing_options procedural:setup

        struct Input
        {
            float2 uv_MainTex;
        };

		#ifdef UNITY_PROCEDURAL_INSTANCING_ENABLED
		// 変位の構造体バッファ
		StructuredBuffer<float> _WaveBuffer;
		#endif

		sampler2D _MainTex;
        half _Glossiness;
        half _Metallic;
        fixed4 _Color;

		float3 _ObjectScale;
		int _ResolutionX;
		int _ResolutionZ;
		float _StepX;
		float _StepZ;

		//IDから位置を計算する
		float3 CalcPos(int ID, float d)
		{
			return float3(
				_StepX * (ID % _ResolutionX - _ResolutionX / 2),
				d,
				_StepZ * (ID / _ResolutionX - _ResolutionZ / 2)
				);
		}

		void vert(inout appdata_full v)
		{
			#ifdef UNITY_PROCEDURAL_INSTANCING_ENABLED
			//場所ごとの変位を取り出す
			float disp = _WaveBuffer[unity_InstanceID];
			//場所の計算
			float3 pos = CalcPos(unity_InstanceID, disp);
			//スケールの取得
			float3 scl = _ObjectScale;
			// オブジェクト座標からワールド座標に変換する行列を定義
			float4x4 object2world = (float4x4)0;
			// スケール値を代入
			object2world._11_22_33_44 = float4(scl.xyz, 1.0);
			// 行列に位置(平行移動)を適用
			object2world._14_24_34 += pos.xyz;
			// 頂点を座標変換
			v.vertex = mul(object2world, v.vertex);
			// 法線を座標変換
			v.normal = normalize(mul(object2world, v.normal));
			#endif
		}

		void setup()
		{
		}

        void surf (Input IN, inout SurfaceOutputStandard o)
        {
			fixed4 c = tex2D(_MainTex, IN.uv_MainTex) * _Color;
            o.Albedo = c.rgb;
            o.Metallic = _Metallic;
            o.Smoothness = _Glossiness;
            o.Alpha = c.a;
        }
        ENDCG
    }
    FallBack "Diffuse"
}
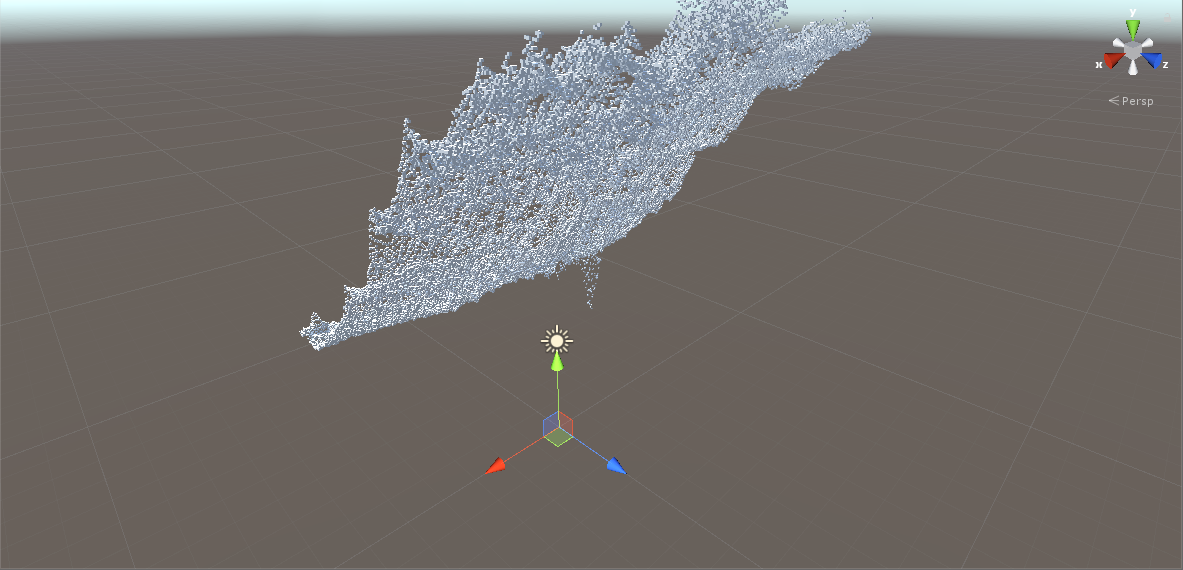
最終的に、ここにで計算結果を表示してあげます。シミュレーションの空間ステップから表示するキューブのscaleを求めて、変位とインデックスからpositionを計算して、ワールド座標に変換する行列を定義してあげます。それで各オブジェクトを変形してあげれば波の可視化ができます。
エディタ上での設定
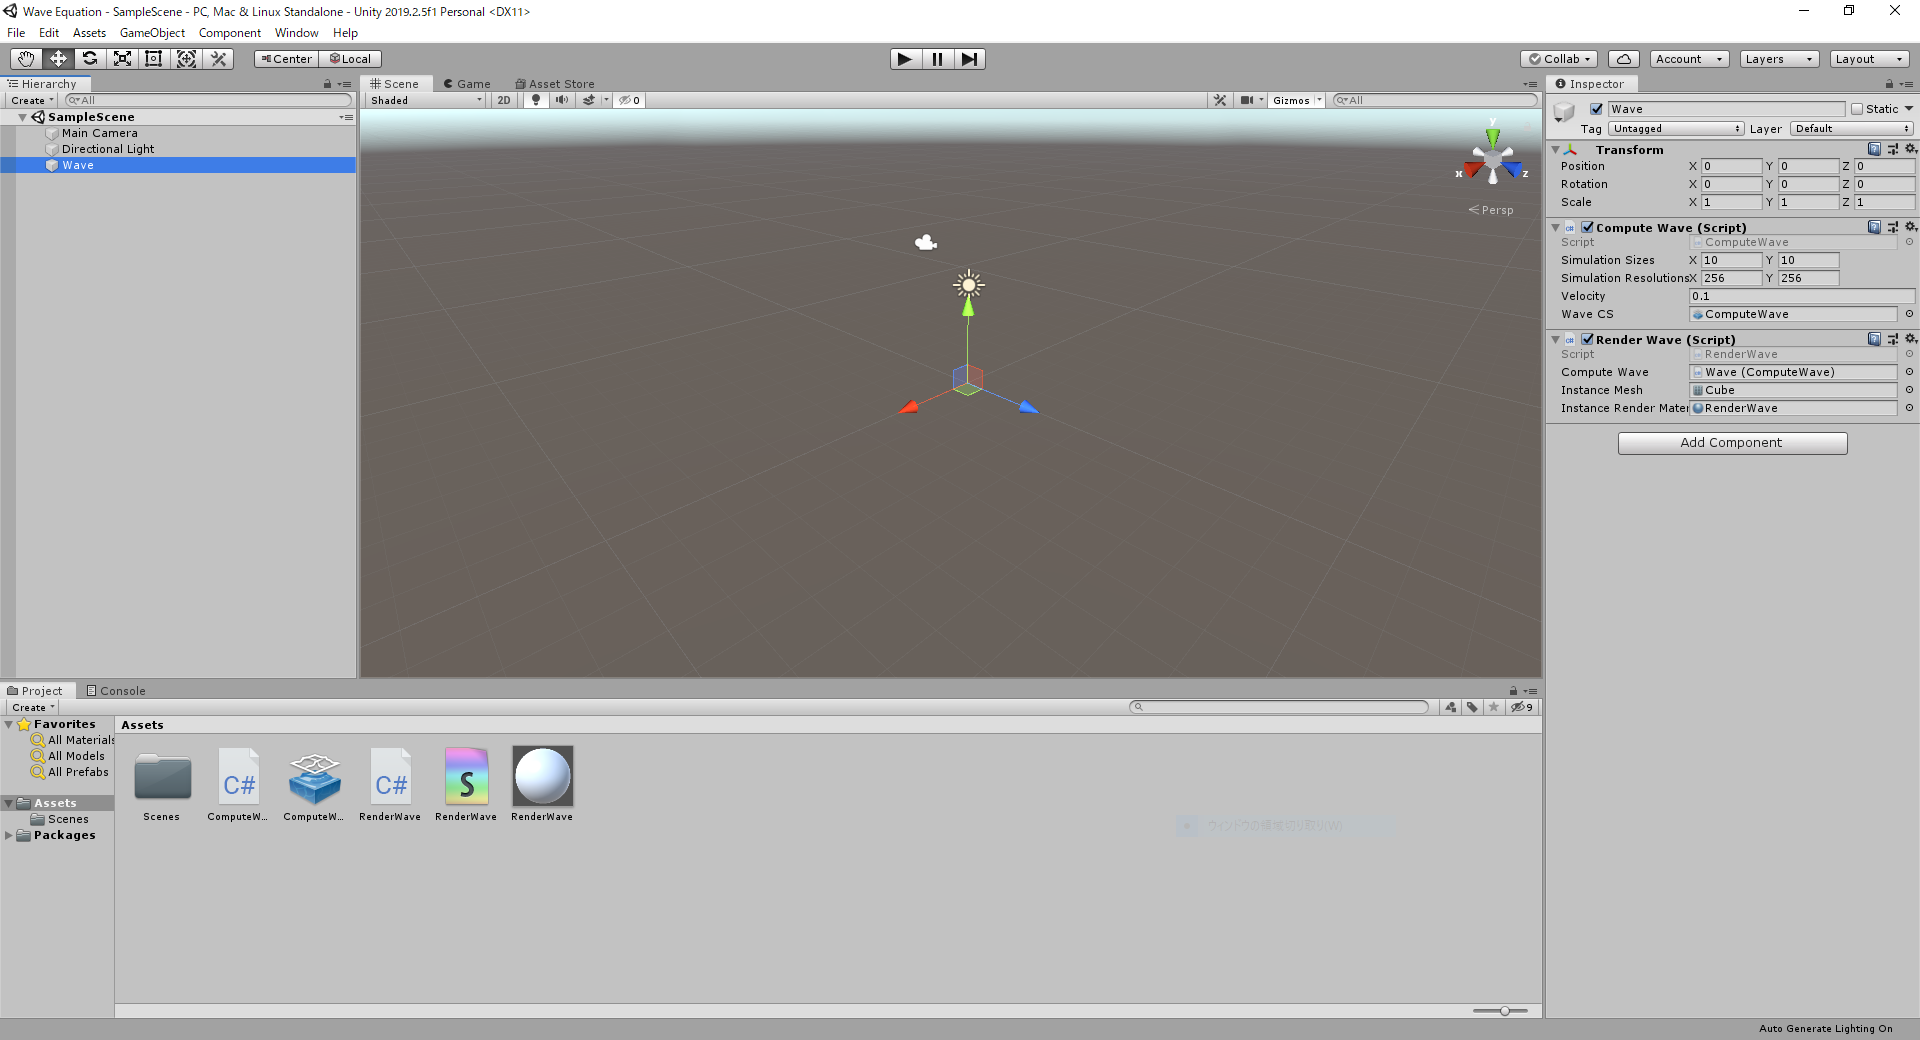
最後に、以上のスクリプトを上のように適当なオブジェクトにアタッチします。
この時、RenderWave.shaderを付けたマテリアルのEnable GPU Instancingをonにするのを忘れないようにします。
はい、完成です。 これが見たかったんです!離散波動方程式のシミュレーション on ComputeShader pic.twitter.com/CU5w2edPgV
— マサト (@1B_Co_blue) November 30, 2019
今後の課題
とはいえこいつ、油断すると発散するんですよね…。今度はちゃんとエネルギーの保存とかにも気を付けられるようにしたいですね。