Railsで作成したApplicationで、Mailをある条件で自動的に発行したかったので、その時の実装したことのメモです。
(※ 例. 誕生日におめでとうMailを自動的に送信する・・・等)
本番環境は、Herokuを利用してデプロイしました。
仮のサンプルアプリケーションを作成する要領でメモします。
環境
- Ruby 2.4.1
- Rails 5.0.6
- Heroku
- SendGrid(※ Mailを送信する為に使用したHerokuのadd-on)
- Heroku Scheduler(※ Herokuでrakeタスクを定期的に実行させる為にadd-on)
仮定
朝10:00にUserモデルに登録されているユーザー1人1人に
「Hello, user name!!]」
とMailを送ってくれるアプリをつくってみます。
1. Railsアプリケーションを作成
$ rails new sample_application
2. Modelをつくる
nameとemailというcolumnを持つModelを作成します。
$ rails g model user name:string email:string
db:migrateします。
$ rails db:migrate
こんな感じのschemaファイルになるかと思います。
# 省略
create_table "users", force: :cascade do |t|
  t.string 'name'
  t.string 'email',
end
# 省略
3. サンプルユーザーを作成
(※ 本題とはあまり関係のない内容になります。)
User Modelに登録が1名もいないとイメージが湧かないので3名くらい登録しようと思います。
FakerというGemを利用します。
group :development, :test do
  # 省略
  # 省略
  gem 'faker'
end
をGemfileに追加します。
※ 本番環境ではサンプルは必要無いかと思うのでgroupで制限をしています。
$ bundle install
bundle installしてgemを利用できるようにします。
3.times do
  User.create!(name: Faker::Name.name, email: Faker::Internet.email)
end
seeds.rbファイルに上記の感じで3名、ユーザーを作ります。
$ rails db:seed
これで開発環境で3名のサンプルユーザーが登録されたかと思います。
4. Mailerをつくる
定期配信するMailをActionMailerで実装します。今回の名前は、"UserMailer"にして*#say_hello*というメソッドでメールを送れるようにしようと思います。
rails g mailer UserMailer say_hello
上記、ジェネレーターで生成されたファイルを調整します。
class UserMailer < ApplicationMailer

  def say_hello(user)
    @user = user

    mail to: "#{@user.email}", subject: "Hello, #{@user.name}"
  end
end
<h1>Hello, <%= @user.name %>!!</h1>
Hello, <%= @user.name %>
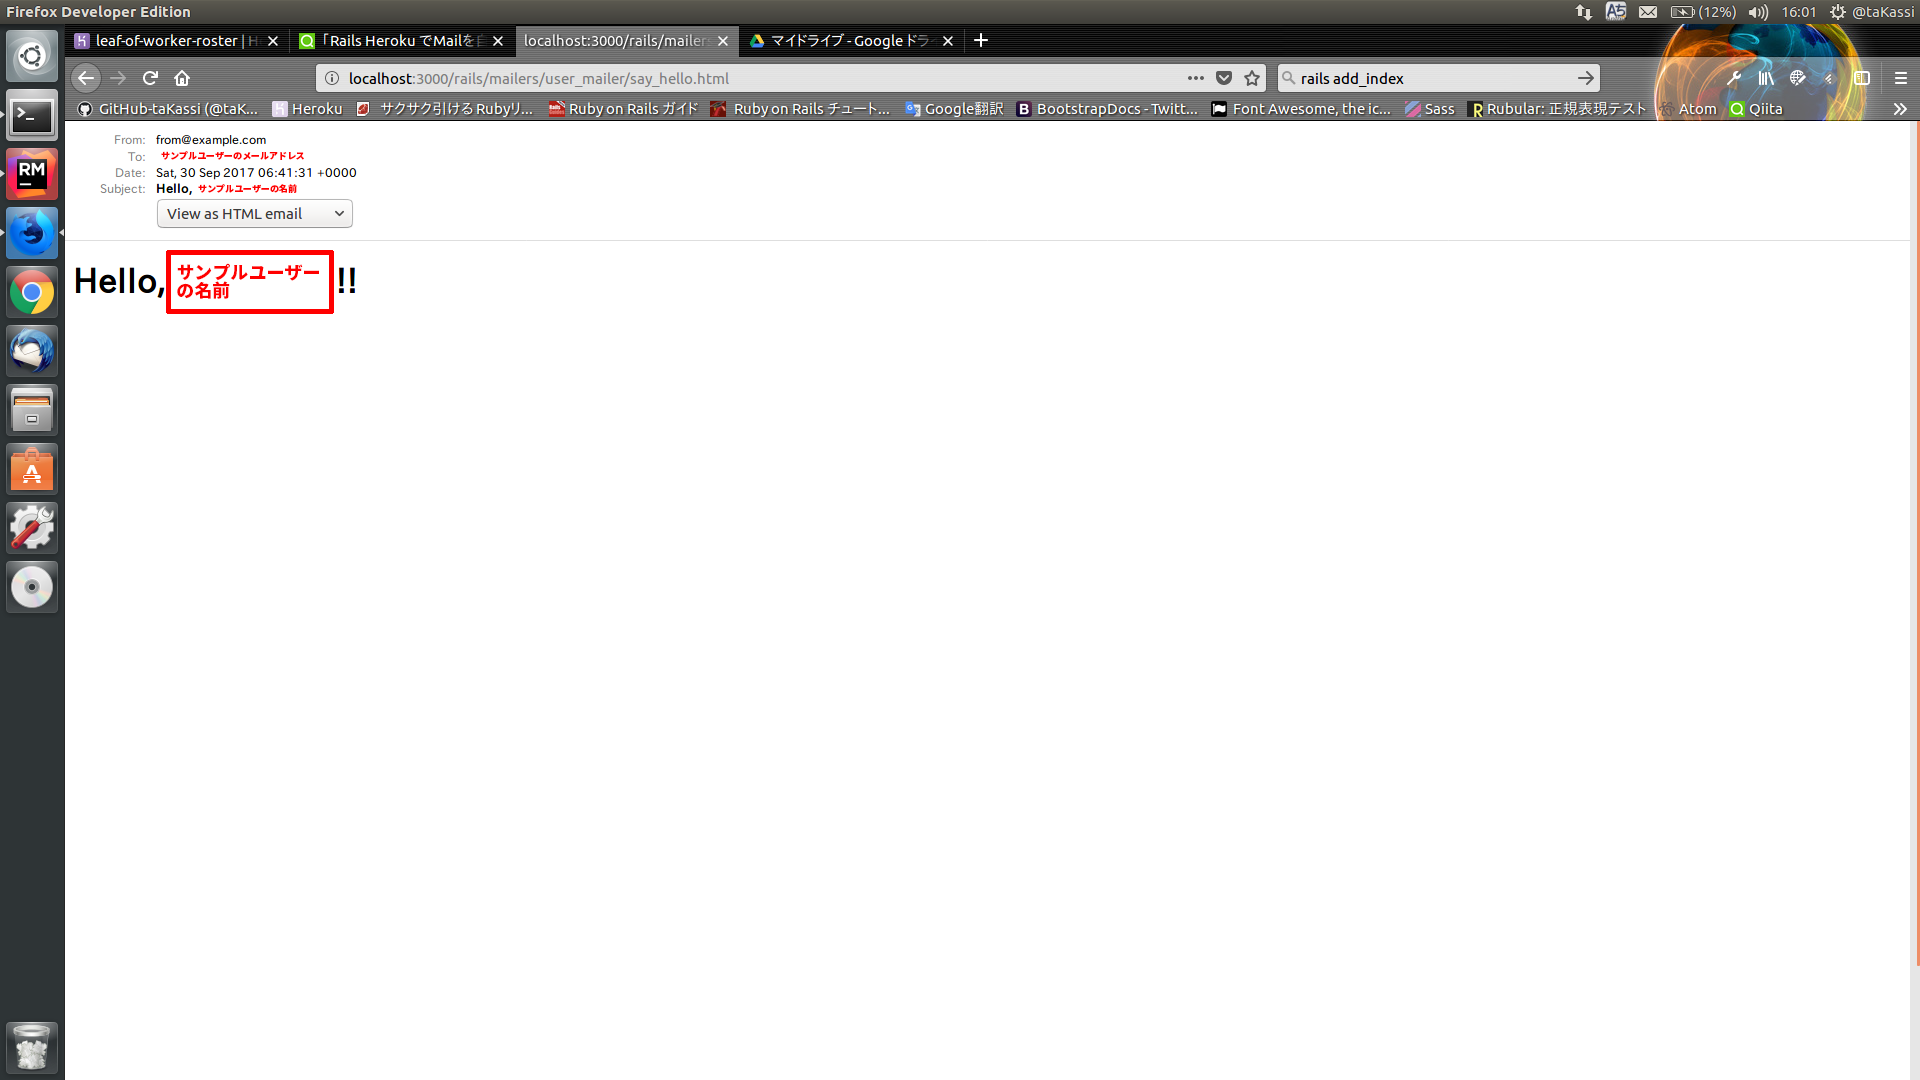
ジェネレーターで作成されているtest/mailers/previews/user_mailer_preview.rbファイルのコメントアウトされているURLをrails serverを起動し、ブラウザのアドレスバーに貼り付ければ送信するメール本文のプレビューが出来るのでおすすめです。
# Preview all emails at http://localhost:3000/rails/mailers/user_mailer
class UserMailerPreview < ActionMailer::Preview

  # Preview this email at http://localhost:3000/rails/mailers/user_mailer/say_hello
  def say_hello
    UserMailer.say_hello(User.first)
  end

end
5. Rakeタスクをつくる
Mailを送信する為のRakeタスクを作ります。
名前空間は、greetingにします。
$ rails g task greeting
上記、ジェネレーターで自動生成されたファイルにタスクを記述します。
namespace :greeting do
  desc '挨拶するメールを発行する。'
  task say_hello: :environment do
    users = User.all

    users.each do |user|
      UserMailer.say_hello(user).deliver
    end
  end
end
これで、後は、Herokuへデプロイし、Herokuのアドオンを利用して上記、rake taskを定期的に走らせればメールが自動的に定期配信されます。
6. Herokuへのデプロイ
Herokuへのデプロイする為にとりあえずGitを利用します。
$ git init
$ git add .
$ git commit -m 'sample application'
とりあえず、上記でGitのmasterブランチにコミットします。
Herokuでは、PostgreSQLを使用するので、本番環境にpg gemをインストールします。また、sqlite3 gemが本番環境に導入されないように気をつけます。
# 省略
group :development, :test do
  # 省略
  gem 'faker'
  gem 'sqlite3' # <- ここのgroup内に移動させたかたいです。
end

# 省略

group :production do
  gem 'pg'
end
# 省略
上記、Gemfileに追加したら*--without productionオプションをつけてbundle install*します。
本番用のgemをローカル環境にはインストールしないためです。
$ bundle install --without production
Gitを更新します。
$ git commit -a -m 'update Gemfile for Heroku'
Heroku createコマンドを事項してSample_applicationの実行場所を作成します。
※ HerokuのCLIのインストールは完了しているものとします。
$ heroku create
そして、デプロイします。
$ git push master
本番環境でのdb:migrateを実行します。
$ heroku run rails db:migrate
これで、Herokuへのデプロイ完了です。
7. HerokuのアドオンSendGridを追加
Herokuのアドオンのひとつ"SendGrid"を利用して本番環境でメールの送信をおこなえるようにします。
※SendGridの利用にはクレジットカードの登録が必要になりますが、メール数が一定数までは無料で利用できます。
$ heroku addons:create sendgrid:starter
Railsの本番用のconfigファイルに情報を記入します。
Rails.application.configure do
# 省略
config.action_mailer.raise_delivery_errors = true
↓↓↓↓↓↓↓ あなたの記事の内容
  config.action_mailer.delivery_method       = :smtp
───────
  config.action_mailer.delicery_method       = :smtp
↑↑↑↑↑↑↑ 編集リクエストの内容
  config.action_mailer.default_url_options   = { host: '<Herokuのアプリ名>.herokuapp.com' }
  ActionMailer::Base.smtp_settings           = {
      address:              'smtp.sendgrid.net',
      port:                 '587',
      authentication:       :plain,
      user_name:            ENV['SENDGRID_USERNAME'],
      password:             ENV['SENDGRID_PASSWORD'],
      domain:               'heroku.com',
      enable_starttls_auto: true
  }
# 省略
end
上記、設定が完了したらgit commitしてHerokuへpushします。
$ git commit -a -m 'Send Grid setting'
$ git push heroku master
以上で、SendGridを利用してメールを送信できるようにしました。
8. HerokuのアドオンHeroku Schedulerを追加してrakeタスクを実行させる
Herokuのアドオン"Heroku Scheduler"を利用すれば、設定した時間にrakeタスクを実行させることができます。
※ Schedulerの利用にもクレジットカードの登録が必要です。一定までは無料で利用できるようですが、Dyonsがworkerである必要があるようです。
HerokuにHeroku Schedulerを追加します。
$ heroku addons:create scheduler:standard
Schedulerに実行するrakeタスクと時間を設定します。
下記コマンドを実行することでブラウザで設定画面が立ち上がります。
$ heroku addons:open scheduler
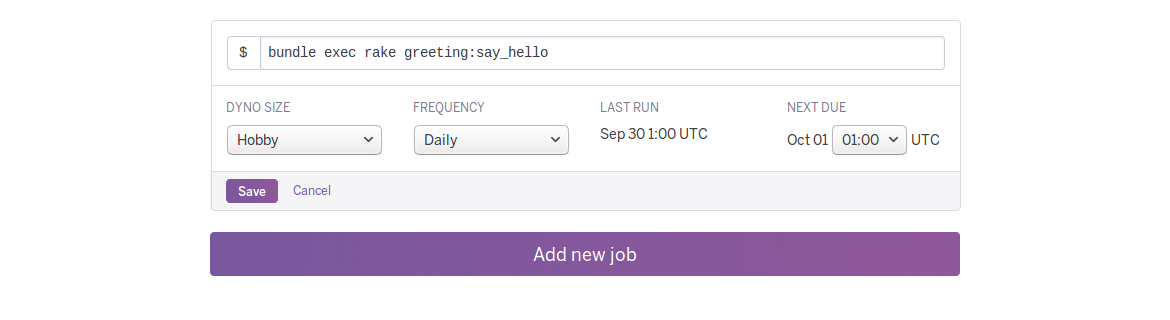
- 実行するコマンド: bundle exec rake greetig:say_hello
- FREQUENCY: Daily
- NEXT DUE: 1:00
※ Heroku Schedulerは、UTC「世界協定」の時間になります。日は、9時間早く進んでいる為、設定したい時間より9時間引いた時間をセットすることになります。
上記を設定して"Save"実行。
これで、rakeタスクが定期的に実行され毎朝メールを送信することができました。