背景・目的
BlazingText アルゴリズムを理解し、試してみようと思います。
概要
BlazingText アルゴリズム
Word2vec とテキスト分類アルゴリズムの高度に最適化された実装を提供しているとのこと。
Word2vec アルゴリズムは、以下のような多くの下流の自然言語処理 (NLP) タスクに役立つとのことです。
- 感情分析
- 名前付きエンティティ認識
- 機械翻訳など
Word2vecは、単語を高品質の分散ベクトルにマッピングします。結果として得られる単語のベクトル表現は、単語埋め込みと呼ばれ、意味的に類似している単語は、互いに接近しているベクトルに対応します。単語の埋め込みでは、そのような方法で単語間の意味関係をキャプチャします。
多くの自然言語処理 (NLP) アプリケーションは、ドキュメントの大規模なコレクションでトレーニングすることによって単語の埋め込みを学習します。これらのトレーニング済みベクトル表現は、セマンティクスおよび単語の分散に関する情報を提供します。通常、その後限られた量のデータでトレーニングされる他のモデルの一般化可能性が向上します。
Word2vec アルゴリズムのほとんどの実装は、マルチコアCPU アーキテクチャ向けに最適化されていません。
これにより、大規模なデータセットに対するスケーリングが困難になります。
BlazingText アルゴリズムを使用すると、大規模なデータセットに簡単に拡張できる。
- BlazingText アルゴリズムは並列化できません。
- SageMaker BlazingText アルゴリズムには以下の機能があります。
- 高度に最適化された CUDA カーネルを使用する
BlazingText は、最先端の深層学習テキスト分類アルゴリズムと同等のパフォーマンスを達成しながら、マルチコア CPU または GPU を使用して数分で 10 億以上の単語でモデルをトレーニングできます。
BlazingText は fastText テキスト分類子を拡張し、カスタム CUDA カーネルを使用して GPU アクセラレーションを活用します。
BlazingTextAlgorithmの入出力インターフェイス
- BlazingText アルゴリズムは、スペースで区切られたトークンを含む単一の前処理済みテキストファイルを想定しています。
- ファイルの各行には単一の文が含まれている必要があります。
- 複数のテキストファイルに対するトレーニングを行う必要がある場合は、それらを 1 つのファイルに連結して、それぞれのチャネルにファイルをアップロードします。
実装
Text Classification using SageMaker BlazingTextを元に試してみたいと思います。
Setup
- 以下によりIAMロール名が確認できます。
import sagemaker
from sagemaker import get_execution_role
import json
import boto3

sess = sagemaker.Session()

role = get_execution_role()
print(
    role
)  # This is the role that SageMaker would use to leverage AWS resources (S3, CloudWatch) on your behalf

bucket = sess.default_bucket()  # Replace with your own bucket name if needed
print(bucket)
prefix = "blazingtext/supervised"  # Replace with the prefix under which you want to store the data if needed
Data Preparation
-
Webからデータセット(dbpedia_csv.tar.gz)を取得します。
!wget https://github.com/saurabh3949/Text-Classification-Datasets/raw/master/dbpedia_csv.tar.gz -
解凍します。
!tar -xzvf dbpedia_csv.tar.gz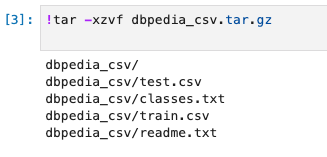
-
データセットを確認します。
- CSVには、3つのフィールド(ラベルインデクス、タイトル、要約)があります。
!head dbpedia_csv/train.csv -n 3
-
ラベルファイルを確認します。
!cat dbpedia_csv/classes.txt === Company EducationalInstitution Artist Athlete OfficeHolder MeanOfTransportation Building NaturalPlace Village Animal Plant Album Film WrittenWork -
整数インデックスからクラス ラベルへのマッピングを作成します
index_to_label = {}
with open("dbpedia_csv/classes.txt") as f:
    for i, label in enumerate(f.readlines()):
        index_to_label[str(i + 1)] = label.strip()
print(index_to_label)

===

{'1': 'Company', '2': 'EducationalInstitution', '3': 'Artist', '4': 'Athlete', '5': 'OfficeHolder', '6': 'MeanOfTransportation', '7': 'Building', '8': 'NaturalPlace', '9': 'Village', '10': 'Animal', '11': 'Plant', '12': 'Album', '13': 'Film', '14': 'WrittenWork'}
Data Preprocessing
トレーニング データを、BlazingText アルゴリズムで使用できる、スペースで区切られたトークン化されたテキスト形式に前処理する必要があります。
また、クラス ラベルの前に label を付け、元の文と同じ行に表示する必要があります。
-
nltk ライブラリを使用して、DBPedia データセットからの入力文をトークン化します。
from random import shuffle
import multiprocessing
from multiprocessing import Pool
import csv
import nltk

nltk.download("punkt")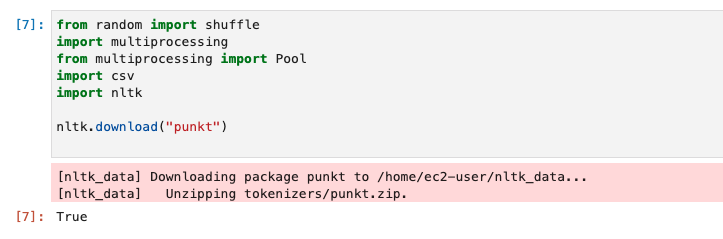
-
transform_instance は、Python のマルチプロセッシング モジュールを使用して、各データ インスタンスに並行して適用されます。
def transform_instance(row): cur_row = [] label = "__label__" + index_to_label[row[0]] # Prefix the index-ed label with __label__ cur_row.append(label) cur_row.extend(nltk.word_tokenize(row[1].lower())) cur_row.extend(nltk.word_tokenize(row[2].lower())) return cur_row -
preprocess関数を作成し前処理を行います。
def preprocess(input_file, output_file, keep=1): all_rows = [] with open(input_file, "r") as csvinfile: csv_reader = csv.reader(csvinfile, delimiter=",") for row in csv_reader: all_rows.append(row) shuffle(all_rows) all_rows = all_rows[: int(keep * len(all_rows))] pool = Pool(processes=multiprocessing.cpu_count()) transformed_rows = pool.map(transform_instance, all_rows) pool.close() pool.join() with open(output_file, "w") as csvoutfile: csv_writer = csv.writer(csvoutfile, delimiter=" ", lineterminator="\n") csv_writer.writerows(transformed_rows) -
実行します。
%%time

# Preparing the training dataset

# Since preprocessing the whole dataset might take a couple of mintutes,
# we keep 20% of the training dataset for this demo.
# Set keep to 1 if you want to use the complete dataset
preprocess("dbpedia_csv/train.csv", "dbpedia.train", keep=0.2)

# Preparing the validation dataset
preprocess("dbpedia_csv/test.csv", "dbpedia.validation")
-
前処理後のファイルをS3にアップロードし、SageMakerがトレーニングジョブを実行するために使用するようにする。
%%time

train_channel = prefix + "/train"
validation_channel = prefix + "/validation"

sess.upload_data(path="dbpedia.train", bucket=bucket, key_prefix=train_channel)
sess.upload_data(path="dbpedia.validation", bucket=bucket, key_prefix=validation_channel)

s3_train_data = "s3://{}/{}".format(bucket, train_channel)
s3_validation_data = "s3://{}/{}".format(bucket, validation_channel)
-
アルゴリズムのトレニーニングジョブの出力先を設定する。
s3_output_location = "s3://{}/{}/output".format(bucket, prefix)
Training
-
sageMaker.estimator.Estimator オブジェクトを作成します。
region_name = boto3.Session().region_namecontainer = sagemaker.amazon.amazon_estimator.get_image_uri(region_name, "blazingtext", "latest") print("Using SageMaker BlazingText container: {} ({})".format(container, region_name))
Training the BlazingText model for supervised text classification
Word2Vec の元の実装と同様に、SageMaker BlazingText は、CPU とさらに GPU で、ネガティブ サンプリングを使用して連続バッグオブワード (CBOW) とスキップグラム アーキテクチャの効率的な実装を提供します。
GPU 実装は、高度に最適化された CUDA カーネルを使用します。
スキップグラムと CBOW に加えて、SageMaker BlazingText は「バッチ スキップグラム」モードもサポートします。
これは、効率的なミニバッチ処理とマトリックス - マトリックス操作 (BLAS レベル 3 ルーチン) を使用します。
このモードでは、複数の CPU ノードに分散された word2vec トレーニングが可能になり、word2vec 計算をほぼ線形にスケールアップして、1 秒あたり数億語を処理できます。
BlazingText は、テキスト分類用の監視モードもサポートしています。
カスタム CUDA カーネルを使用して GPU アクセラレーションを活用するために、FastText テキスト分類子を拡張します。
このモデルは、最先端の深層学習テキスト分類アルゴリズムと同等のパフォーマンスを達成しながら、マルチコア CPU または GPU を使用して数分で 10 億以上の単語をトレーニングできます。
様々なタイプのインスタンスでBlazingTexthによって下記のモードがサポートされてる。

-
c4.4xlarge インスタンスで「監視対象」モードを使用して、DBPedia データセットでテキスト分類をトレーニングするためのリソース構成とハイパーパラメータを使用して SageMaker Estimator を定義する。
bt_model = sagemaker.estimator.Estimator( container, role, instance_count=1, instance_type="ml.c4.4xlarge", volume_size=30, max_run=360000, input_mode="File", output_path=s3_output_location, hyperparameters={ "mode": "supervised", "epochs": 1, "min_count": 2, "learning_rate": 0.05, "vector_dim": 10, "early_stopping": True, "patience": 4, "min_epochs": 5, "word_ngrams": 2, }, ) -
ハイパーパラメータが設定されたので、データチャネルとアルゴリズムの間のハンドシェイクを準備する。
- これを行うには、データ チャネルから sagemaker.session.s3_input オブジェクトを作成する必要がある。 これらのオブジェクトは、アルゴリズムが使用する単純な辞書に入れられます。
train_data = sagemaker.inputs.TrainingInput( s3_train_data, distribution="FullyReplicated", content_type="text/plain", s3_data_type="S3Prefix", ) validation_data = sagemaker.inputs.TrainingInput( s3_validation_data, distribution="FullyReplicated", content_type="text/plain", s3_data_type="S3Prefix", ) data_channels = {"train": train_data, "validation": validation_data} -
トレーニングします。
bt_model.fit(inputs=data_channels, logs=True)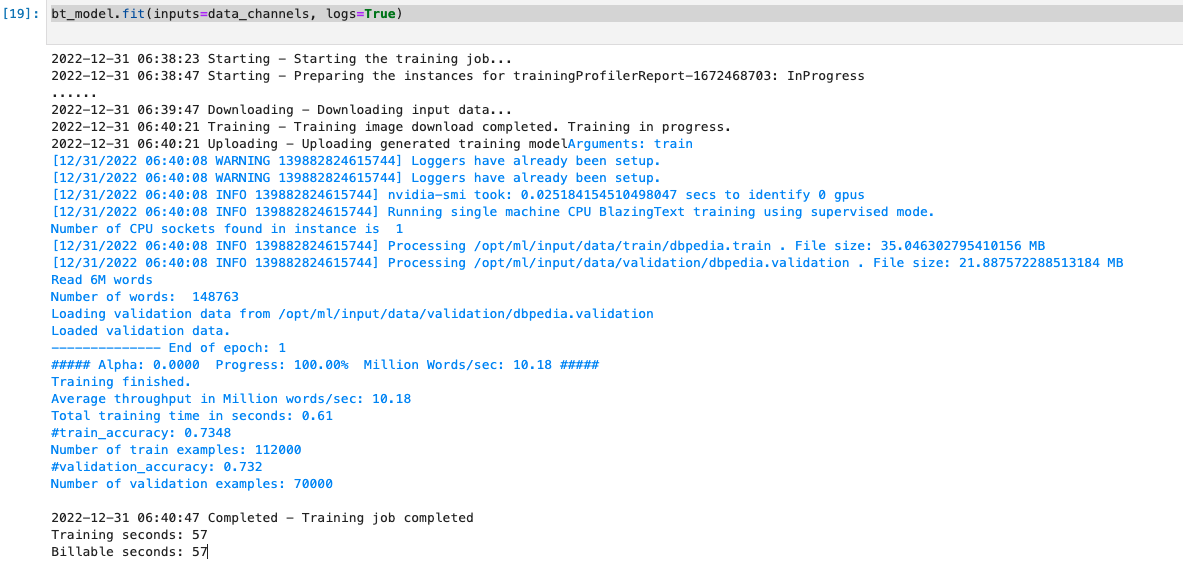
Hosting / Inference
トレーニングが完了したら、トレーニング済みのモデルを Amazon SageMaker リアルタイム ホスト エンドポイントとしてデプロイできる。
これにより、モデルから予測 (または推論) を行うことができます。
(トレーニングに使用したものと同じタイプのインスタンスでホストする必要はない。 インスタンス エンドポイントは長期間稼働するため、推論には安価なインスタンスを選択するほうがよい)
-
デプロイします。
from sagemaker.serializers import JSONSerializer text_classifier = bt_model.deploy( initial_instance_count=1, instance_type="ml.m4.xlarge", serializer=JSONSerializer() ) -
BlazingText は、推論のコンテンツ タイプとして application/json をサポートします。 ペイロードには、エンドポイントに渡される間、キーを「インスタンス」として含むセンテンスのリストが含まれている必要があります。
sentences = [ "Convair was an american aircraft manufacturing company which later expanded into rockets and spacecraft.", "Berwick secondary college is situated in the outer melbourne metropolitan suburb of berwick .", ] # using the same nltk tokenizer that we used during data preparation for training tokenized_sentences = [" ".join(nltk.word_tokenize(sent)) for sent in sentences] payload = {"instances": tokenized_sentences} response = text_classifier.predict(payload) predictions = json.loads(response) print(json.dumps(predictions, indent=2)) === [ { "label": [ "__label__Artist" ], "prob": [ 0.38422465324401855 ] }, { "label": [ "__label__EducationalInstitution" ], "prob": [ 0.5529852509498596 ] } ] -
デフォルトでは、モデルは 1 つの予測 (確率が最も高い予測) のみを返します。 上位k個の予測を取得するには、以下に示すように構成でkを設定できます。
payload = {"instances": tokenized_sentences, "configuration": {"k": 2}}

response = text_classifier.predict(payload)

predictions = json.loads(response)
print(json.dumps(predictions, indent=2))

===

[
  {
    "label": [
      "__label__Artist",
      "__label__MeanOfTransportation"
    ],
    "prob": [
      0.38422465324401855,
      0.15067324042320251
    ]
  },
  {
    "label": [
      "__label__EducationalInstitution",
      "__label__Building"
    ],
    "prob": [
      0.5529852509498596,
      0.16120246052742004
    ]
  }
]
Stop / Close the Endpoint (Optional)
- エンドポイントを削除します。
sess.delete_endpoint(text_classifier.endpoint)
参考