背景・目的
- 自分のPCにソフトウェアをインストールしたくないため、クラウドで環境を構築する。
内容
概要
Cloud9とは
- AWS上のIDE(統合開発環境)。
- 以下の機能を有する。
- リッチなコード編集エクスペリエンス
- 複数のプログラミング言語、ランタイムデバッガ、および組み込みターミナルをサポート
- クラウドでソフトウェアのコード作成、ビルド、実行、テスト、デバッグに使用するツールが含まれている。
- ウェブブラウザを通じてアクセスする。CLIでもアクセスできる
仕組み

- ブラウザからアクセス
- コンピュート(EC2 or 独自サーバ)に接続
- 作業内容はリポジトリ(CodeCommit or 独自リポジトリ)に保存
Cloud9でできること
- 複数のプログラミング言語と AWS Cloud Development Kit (CDK) でコードを使用する。
- 実行中の Docker コンテナでコードを使用する。
- オンラインコードリポジトリを使用する。
- リアルタイムで他のユーザーとコラボレーションする。
- さまざまなデータベースやウェブサイト技術とやり取りする。
- AWS Lambda、Amazon API Gateway、およびAWSサーバーレスアプリケーションをターゲットにする。
- Amazon Lightsail、AWS CodeStar、および AWS CodePipeline など他の AWS 製品を利用する。
チュートリアル
チュートリアル: Hello AWS Cloud9 (コンソール)を参考に、試す。
ステップ 1: 環境を作成する
1.Cloud9のトップページにアクセスし「Create environment」をクリック。

2.NameとDescriptionを入力して、「Next Step」をクリック。

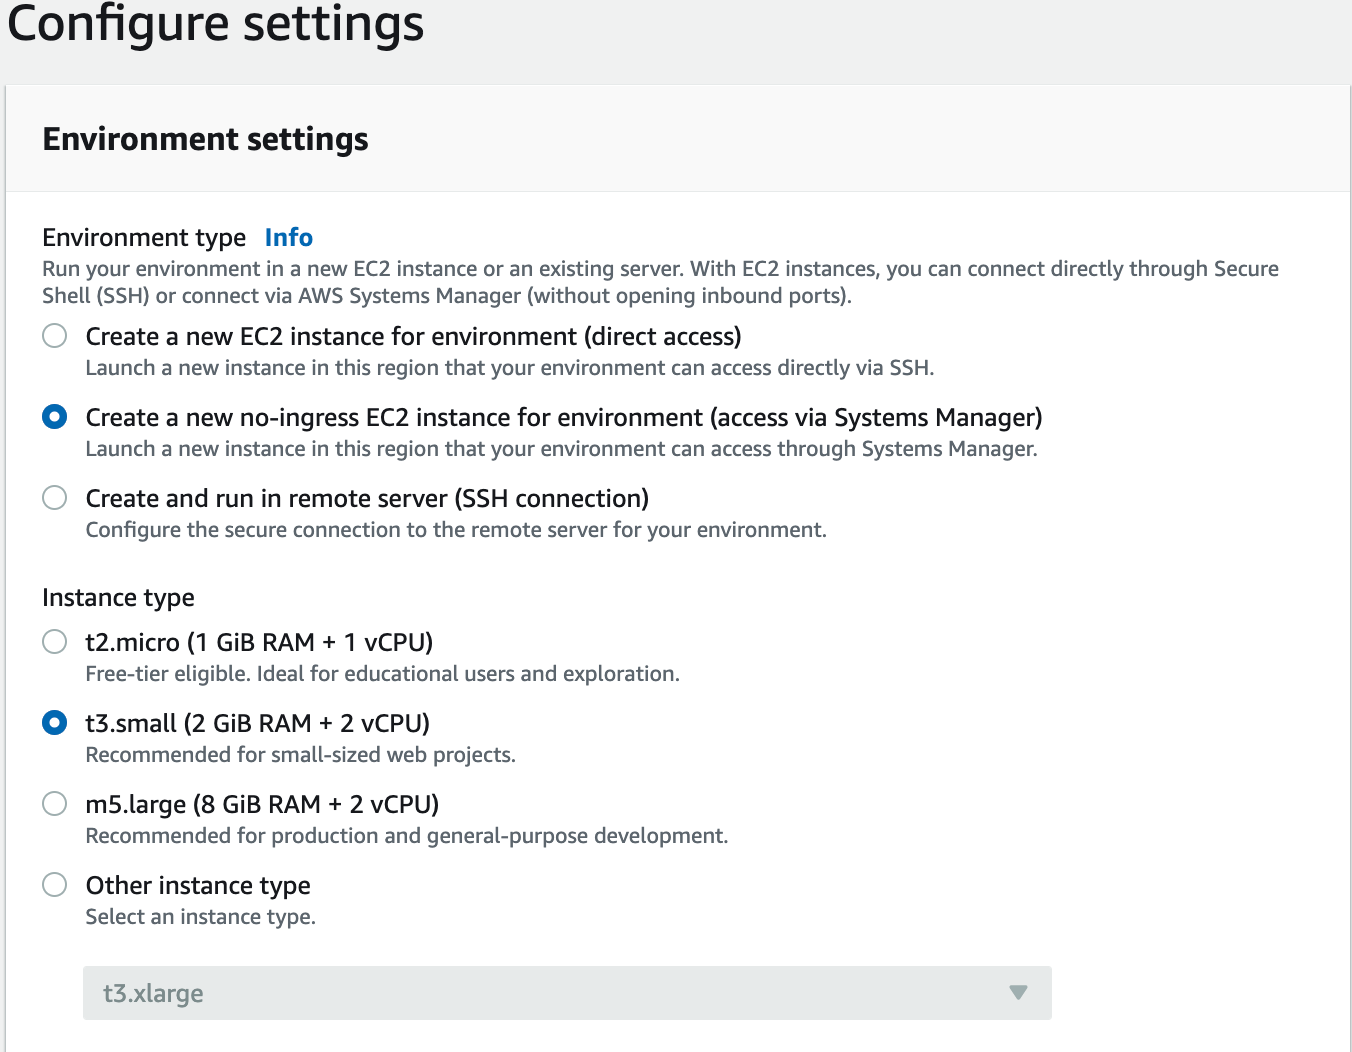
3.Environment type、Instance Type、PlatformとCost-saving settingを入力し、「Next Step」をクリック。
- 必要に応じてAdvancedでVPCとSubnetを設定する。


4.Review画面(キャプチャは省略)で「Create environment」をクリック。
5.作成まで1分程度かかる。


ステップ 2: IDE のベーシック演習
Node.jsパッケージをインストールする。
1.環境を準備する。
XXXX:~/environment $ npm install readline-sync

added 1 package, and audited 5 packages in 804ms

found 0 vulnerabilities
XXXX:~/environment $
3.以下のコードをコピーする。
var readline = require('readline-sync');
var i = 10;
var input;

console.log("Hello Cloud9!");
console.log("i is " + i);

do {
    input = readline.question("Enter a number (or 'q' to quit): ");
    if (input === 'q') {
        console.log('OK, exiting.')
    }
    else{
        i += Number(input);
        console.log("i is now " + i);
    }
} while (input != 'q');

console.log("Goodbye!");
5.Create folderをクリック後、フォルダ名、Filenameを入力してSaveをクリックする。

6.メニューバーのRun>Run Configurations>New Run Configurationをクリックする。

7.Commandに保存したコードを入力し、Runをクリックする。

Debugger listening on ws://xxx.xxx.xxx.xxx:xxxxx/xxxxxxxxxxx
For help, see: https://nodejs.org/en/docs/inspector
Debugger attached.
Hello Cloud9!
i is 10
Enter a number (or 'q' to quit): 5
i is now 15
Enter a number (or 'q' to quit): 10
i is now 25
Enter a number (or 'q' to quit): q
OK, exiting.
Goodbye!
Waiting for the debugger to disconnect...

Process exited with code: 0
※ コマンドラインで実行する場合は、以下の通り。
XXXX:~/environment/src/node $ node hello-cloud9.js
Hello Cloud9!
i is 10
Enter a number (or 'q' to quit): 5
i is now 15
Enter a number (or 'q' to quit): 10
i is now 25
Enter a number (or 'q' to quit): q
OK, exiting.
Goodbye!
XXXX:~/environment/src/node $
9.右側のデバックボタンをクリックし、Type an expression hereに10を入力する。


考察・結論
- もっさりとすると思っていたが、割とサクサクと動く。
- 今後、色々な機能を試してみたい。
参考


