目的
AWS Lambdaはコンソール画面からエディタを利用して編集ができます。ローカルファイルをアップロードするにはzip形式でファイルをアップロードする必要がある他、そもそもブラウザが使いづらいという問題点があります。今回はAWS Toolkit for VSCodeを利用してAWS SAMによるLambda開発を行ってみることを目的とします。
自らも初学者であり、他の記事で分からなかった点を補完しながら書いているため初学者向けだと思います。
AWS SAM
AWS(Serverless Application Model)はCloudFormationをサーバーレスアプリケーション用に変形したものらしく、裏ではCloudFormationが動きます。
基本的には公式ドキュメントに従えばHello Worldまでは可能です。
https://docs.aws.amazon.com/ja_jp/serverless-application-model/latest/developerguide/serverless-sam-cli-install-mac.html
流れ
awscliのインストール
awscliをインストールすることでawsコマンドが使えるようになります。
pip若しくはbrewでインストールしましょう。筆者はmacユーザかつpythonの管理が面倒だったのでbrewで入れました。サイトには「pipが最も簡単な方法」 と書いてありました。
aws-sam-cliのインストール
aws-sam-cliをインストールすることでsamコマンドが使えるようになります。
pip若しくはbrewでインストールしましょう。筆者はmacユーザかつpythonの管理が面倒だったのでbrewで入れました。brew tapは非公式のパッケージをbrew対象に追加するために利用します。
brew tap aws/tap
brew install aws-sam-cli
dockerのインストール
最初にbrewでdockerをインストールしたのですが、うまく動かず結局公式サイトからdmgをDLしてインストールしました。Lambdaの動作環境を用意するために使われます。AWS Toolkitを入れてVSCodeからLambda関数を実行するときに自動でdocker環境が立ち上がります。
Install Docker Desktop for Mac
VSCodeからAWSへの接続
EXTENSION追加
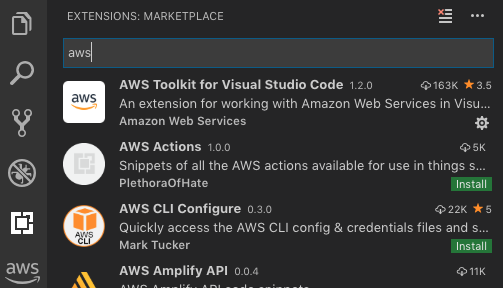
VSCodeの左側のタブからAWS Toolkit for Visual Studio Codeを追加します。これで左側のタブにAWSのアイコンが表示されます。

認証情報の設定
インストール後、cmd+shift+Pでawsコマンドウィンドウを表示し、Create Credentials Profileを実行します。エディタ若しくはコマンドウィンドウの指示に従い、AWSアカウントのACCESS KEYとSECRET ACCESS KEYを入力します。
このawsコマンドにより新たにAWSユーザを作成できます。これは.aws/配下にvimでcredentialsというファイルを作成または編集する操作と同じです。.aws/configファイルが存在する場合はそれと合わせて読み込まれます。

AWSへ接続
AWSのアイコン→Connect to AWSをクリックします。.aws/credentialsまたは.aws/configに定義されたユーザが自動で表示されるためその中から選択します。
アプリケーションの作成
Create new SAM Applicationを選択します。

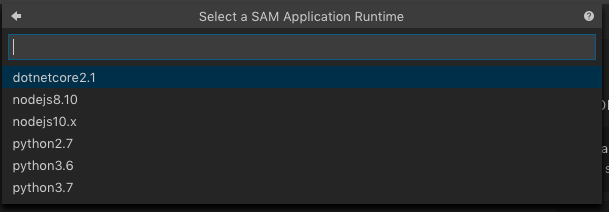
次に、Runtimeに使用する言語を選択します。筆者はPython3.7を選択しました。

ワークスペースとなるフォルダを選択し、アプリケーションの名前をつけます。すると自動的にtemplate.yamlが立ち上がります。
AWSTemplateFormatVersion: '2010-09-09'
Transform: AWS::Serverless-2016-10-31
Description: >
  test2

  Sample SAM Template for test2

# More info about Globals: https://github.com/awslabs/serverless-application-model/blob/master/docs/globals.rst
Globals:
  Function:
    Timeout: 3

Resources:
  HelloWorldFunction:
    Type: AWS::Serverless::Function # More info about Function Resource: https://github.com/awslabs/serverless-application-model/blob/master/versions/2016-10-31.md#awsserverlessfunction
    Properties:
      CodeUri: hello_world/
      Handler: app.lambda_handler
      Runtime: python3.7
      Events:
        HelloWorld:
          Type: Api # More info about API Event Source: https://github.com/awslabs/serverless-application-model/blob/master/versions/2016-10-31.md#api
          Properties:
            Path: /hello
            Method: get

Outputs:
  # ServerlessRestApi is an implicit API created out of Events key under Serverless::Function
  # Find out more about other implicit resources you can reference within SAM
  # https://github.com/awslabs/serverless-application-model/blob/master/docs/internals/generated_resources.rst#api
  HelloWorldApi:
    Description: "API Gateway endpoint URL for Prod stage for Hello World function"
    Value: !Sub "https://${ServerlessRestApi}.execute-api.${AWS::Region}.amazonaws.com/Prod/hello/"
  HelloWorldFunction:
    Description: "Hello World Lambda Function ARN"
    Value: !GetAtt HelloWorldFunction.Arn
  HelloWorldFunctionIamRole:
    Description: "Implicit IAM Role created for Hello World function"
    Value: !GetAtt HelloWorldFunctionRole.Arn
以下のようなファイル群が生成されています。
$ tree myapp
myapp
├── README.md
├── events
│   └── event.json
├── hello_world
│   ├── __init__.py
│   ├── app.py
│   └── requirements.txt
├── template.yaml
└── tests
    └── unit
        ├── __init__.py
        └── test_handler.py
この中でhandlerはapp.pyに記載されています。requirements.txtに必要なパッケージを記載しておけばデプロイ時に自動で追加されます。
VSCodeでLambdaをローカルテスト
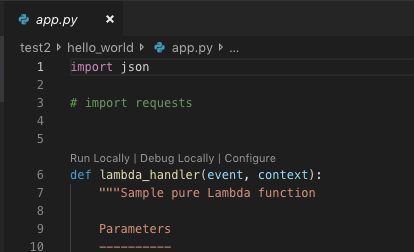
app.pyのハンドラ上部にRun Locally | Debug Locally | Configureの選択肢が表示されます。Run Locallyを選択すると必要なdocker環境が立ち上がり、ローカルで関数が走ります。何かの不具合があればここでエラーが表示されるため、落ち着いて対応しましょう。

Preparing to run app.lambda_handler locally...
Building SAM Application...
Build complete.
Starting the SAM Application locally (see Terminal for output)
Running command: sam local invoke awsToolkitSamLocalResource --template /tmp/aws-toolkit-vscode/vsctkvGlUHf/output/template.yaml --event /tmp/aws-toolkit-vscode/vsctkvGlUHf/event.json --env-vars /tmp/aws-toolkit-vscode/vsctkvGlUHf/env-vars.json
Invoking app.lambda_handler (python3.7)
2019-11-08 17:19:07 Found credentials in shared credentials file: ~/.aws/credentials

Fetching lambci/lambda:python3.7 Docker container image......
Mounting /tmp/aws-toolkit-vscode/vsctkvGlUHf/output/awsToolkitSamLocalResource as /var/task:ro,delegated inside runtime container
START RequestId: df0da3ce-bd4d-1e44-3c27-8ac942c1a17e Version: $LATEST
END RequestId: df0da3ce-bd4d-1e44-3c27-8ac942c1a17e
REPORT RequestId: df0da3ce-bd4d-1e44-3c27-8ac942c1a17e	Duration: 5.88 ms	Billed Duration: 100 ms	Memory Size: 128 MB	Max Memory Used: 23 MB
{"statusCode":200,"body":"{\"message\": \"hello world\"}"}
Local invoke of SAM Application has ended.
このように出力されればOKです。なお、テストイベントにbodyを追加したい場合は、CodeLensのConfigureをクリックすると一向上の階層の.aws/templates.jsonが開き、eventが空なので要素を追加すれば渡されます。
{
    "templates": {
        "test1/template.yaml": {
            "handlers": {
                "app.lambda_handler": {
                    "event": {
                       "bodyとか":"ここに要素を追加"
                    },
                    "environmentVariables": {}
                }
            }
        }
    }
}
VSCodeからのデプロイ
デプロイするにはS3バケットが必要になります。これは、パッケージ化した一連のコード群を配置するためです(多分)。デプロイ後にS3を覗いてもらえば何かのオブジェクトが保存されていることを確認できます。

今まで同様cmd+shift+Pでウィンドウを開き、Deploy SAM Applicationを選択します。
template.yamlとリージョン、S3バケット名、Stack名を聞かれるので入力します。Stack名とは、CloudFormationにおけるリソースグループ名のようなものです。Stack名は新規の名前を入力すれ新規Stackが作成され、既存の名前を入力するとアップデートされます。
CloudFormationがリソースの作成を含むため、Create権限を持ったRoleで実行する必要があります。変更が必要な場合は、.aws/configで定義します。
Starting SAM Application deployment...
Building SAM Application...
Packaging SAM Application to S3 Bucket: {バケット名} with profile: {プロファイル名}
Deploying SAM Application to CloudFormation Stack: localDeployTest2 with profile: {プロファイル名}
Successfully deployed SAM Application to CloudFormation Stack: localDeployTest2 with profile: {プロファイル名}
このように出力されれば完了です。CloudFormation,Lambda関数,API gatewayが作成されます。ブラウザを開いてコンソールから確認してみましょう。
CloudFormationのStackを消去すると関連するリソースを全て削除することができます。便利ですね。
あとは、実際にコードを変更したらデプロイする、を繰り返せば良さそうですね。ここまでできればHello Worldできたと言ってもいいでしょう。