Slack Applicationの作成と説明、ついでにIncoming Web hookをためす
Table of Contents
- Slack とは
- Slack の代表的な機能
- Slack Application の作成
- Incoming Webhooksを利用したアプリケーションの設定
1. Slack とは

メールに代わるビジネスコラボレーション「Slack」
と書かれているようにグループのチャットツールです。
類似サービスにchatworkやMicrosoft Teamsがあります。
多分qiitaを見てる人なら誰でもしってそう。。。
2. Slackの代表的な機能
Slackの代表的な機能としては、6つです
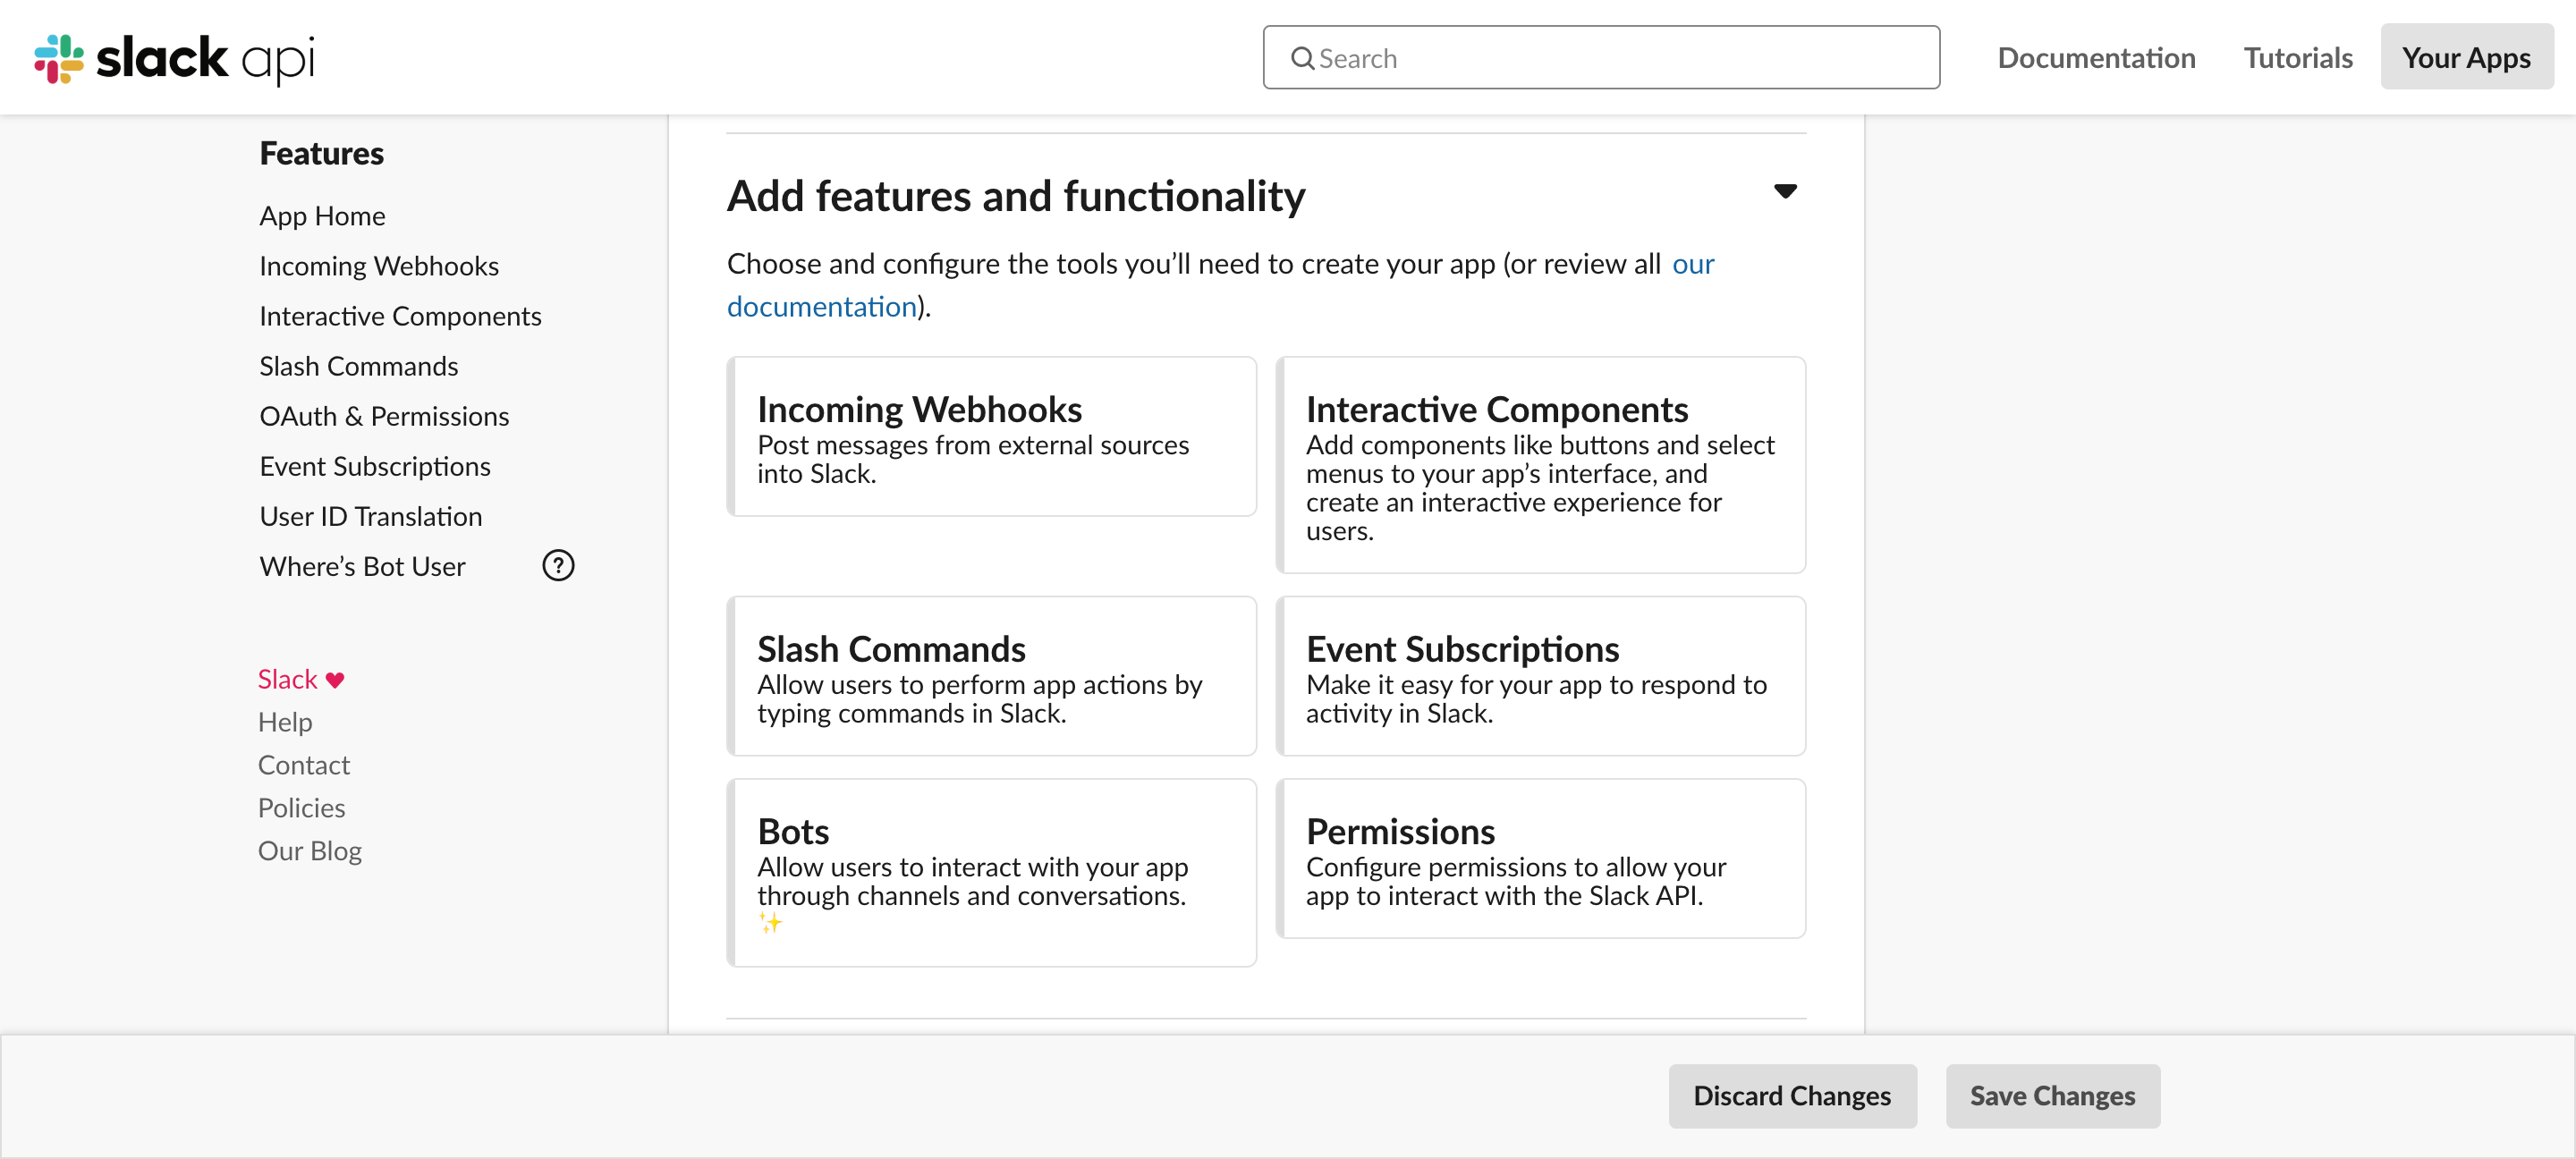
ざっくり書くと
| name | description |
|---|---|
| Incoming Webhooks | Slackにメッセージを投稿する機能です。 |
| Intractive Components | Slackのメッセージにダイアログやボタン、選択メニューなどのコンポーネントを追加し、ユーザーにインタラクティブな体験を提供する機能です。 |
| Slash Commands | Slack内でユーザーがコマンドを入力してアプリのアクションを実行できるようにする機能です。/のショートカットを利用します |
| Event Subscription | Slackで行われたアクションをフックして何かをする機能です。 |
| Bots | ユーザーがチャネルと通信を通じてアプリを操作できるようにします |
| Permission | Slack APIと対話できるようにアクセス許可を構成する |
です。Slack内である程度のフックは可能なので覚えて置くと色々楽に仕事をこなせるアプリケーションを作成できます。
3. Slack Application の作成
slackのアプリケーションの作成(非公開)は、
- Slack Apiにいき Your Apps をクリック
- Slack Api Application にいき Create An App を押下
- 表示されたdialogに アプリケーションの名前 と 設定するWork Spaceを選択し Create App を押下
でアプリケーションの雛形は作成されます(ちなみに選択されたWork Spaceにのみアプリケーションが有効化されています)。
以下は画像つきで作成方法を設定していきます。
1. Slack Apiにいき Your Apps をクリック

2. Slack Api Application にいき Create An App を押下

3. 表示されたdialogに アプリケーションの名前 と 設定するWork Spaceを選択し Create App を押下
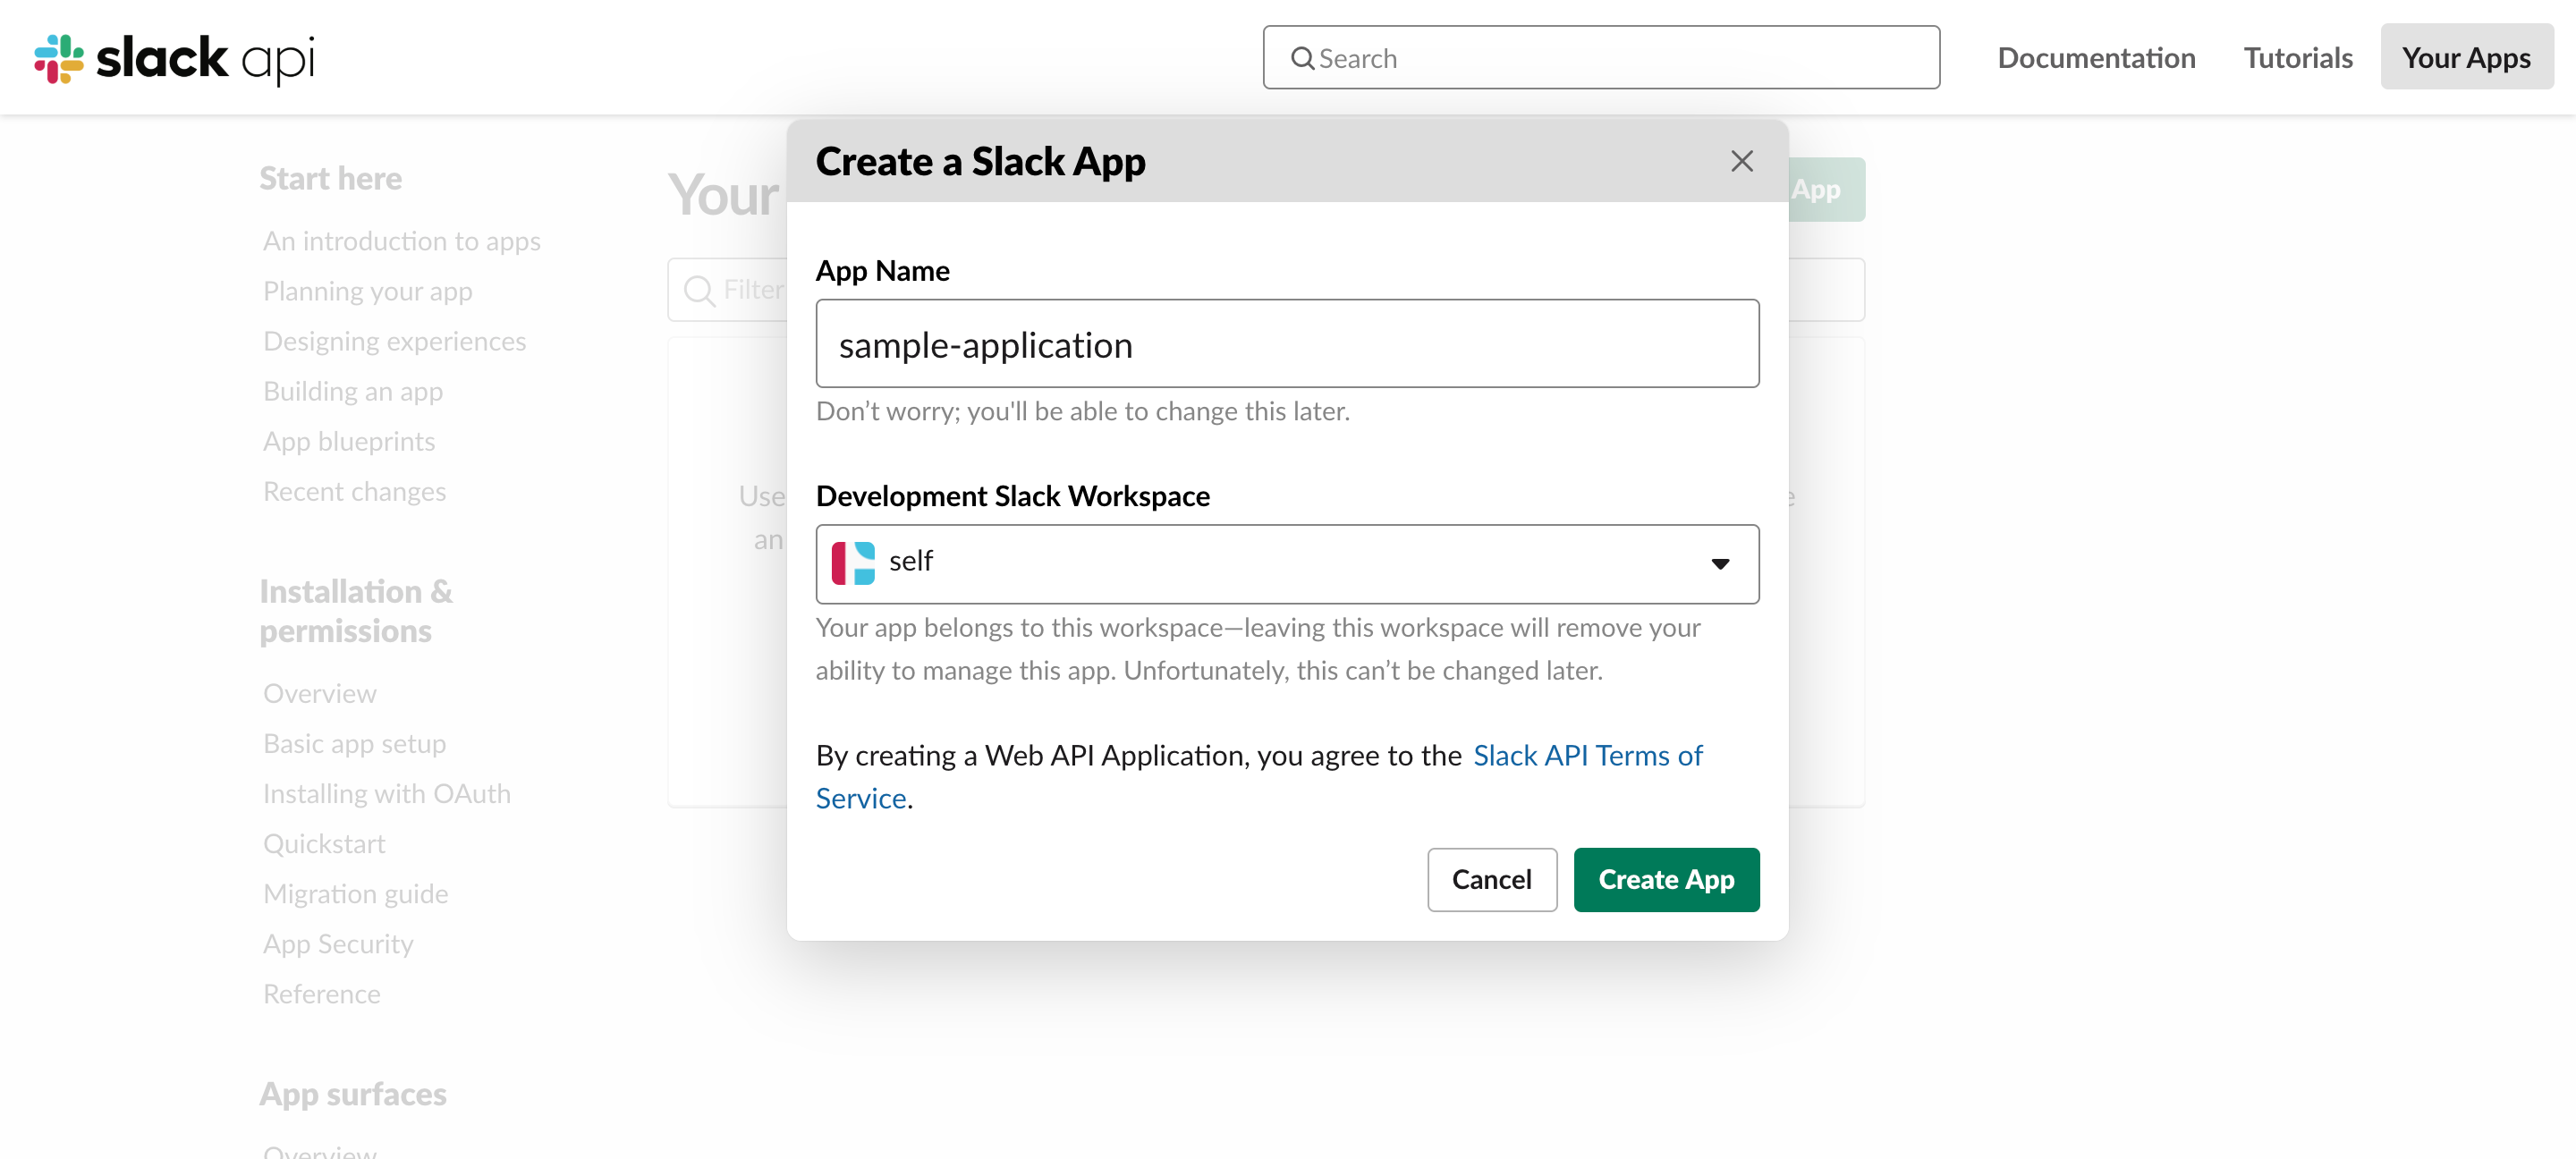
さらっと作成されます。www

4. Incoming Webhooksを利用したアプリケーションの設定
Incomingを利用するまでのステップは、
- Slack Applicationにいき、Incoming Webhook URLのCardをクリック
- ToggleをOnに変更する
- Add New Webhook to Workspaceをおして有効化します
- Incoming Web Hookを利用するチャンネルを選択してAllowをクリック
以上でweb hook urlの利用は開始することができます。
1. Slack Applicationにいき、Incoming Webhook URLのCardをクリック

2. ToggleをOnに変更する

3. Add New Webhook to Workspaceをおして有効化します

4. Incoming Web Hookを利用するチャンネルを選択してAllowをクリック

以上で完了です。4つのステップが完了すると下のようにURLが発行されます。
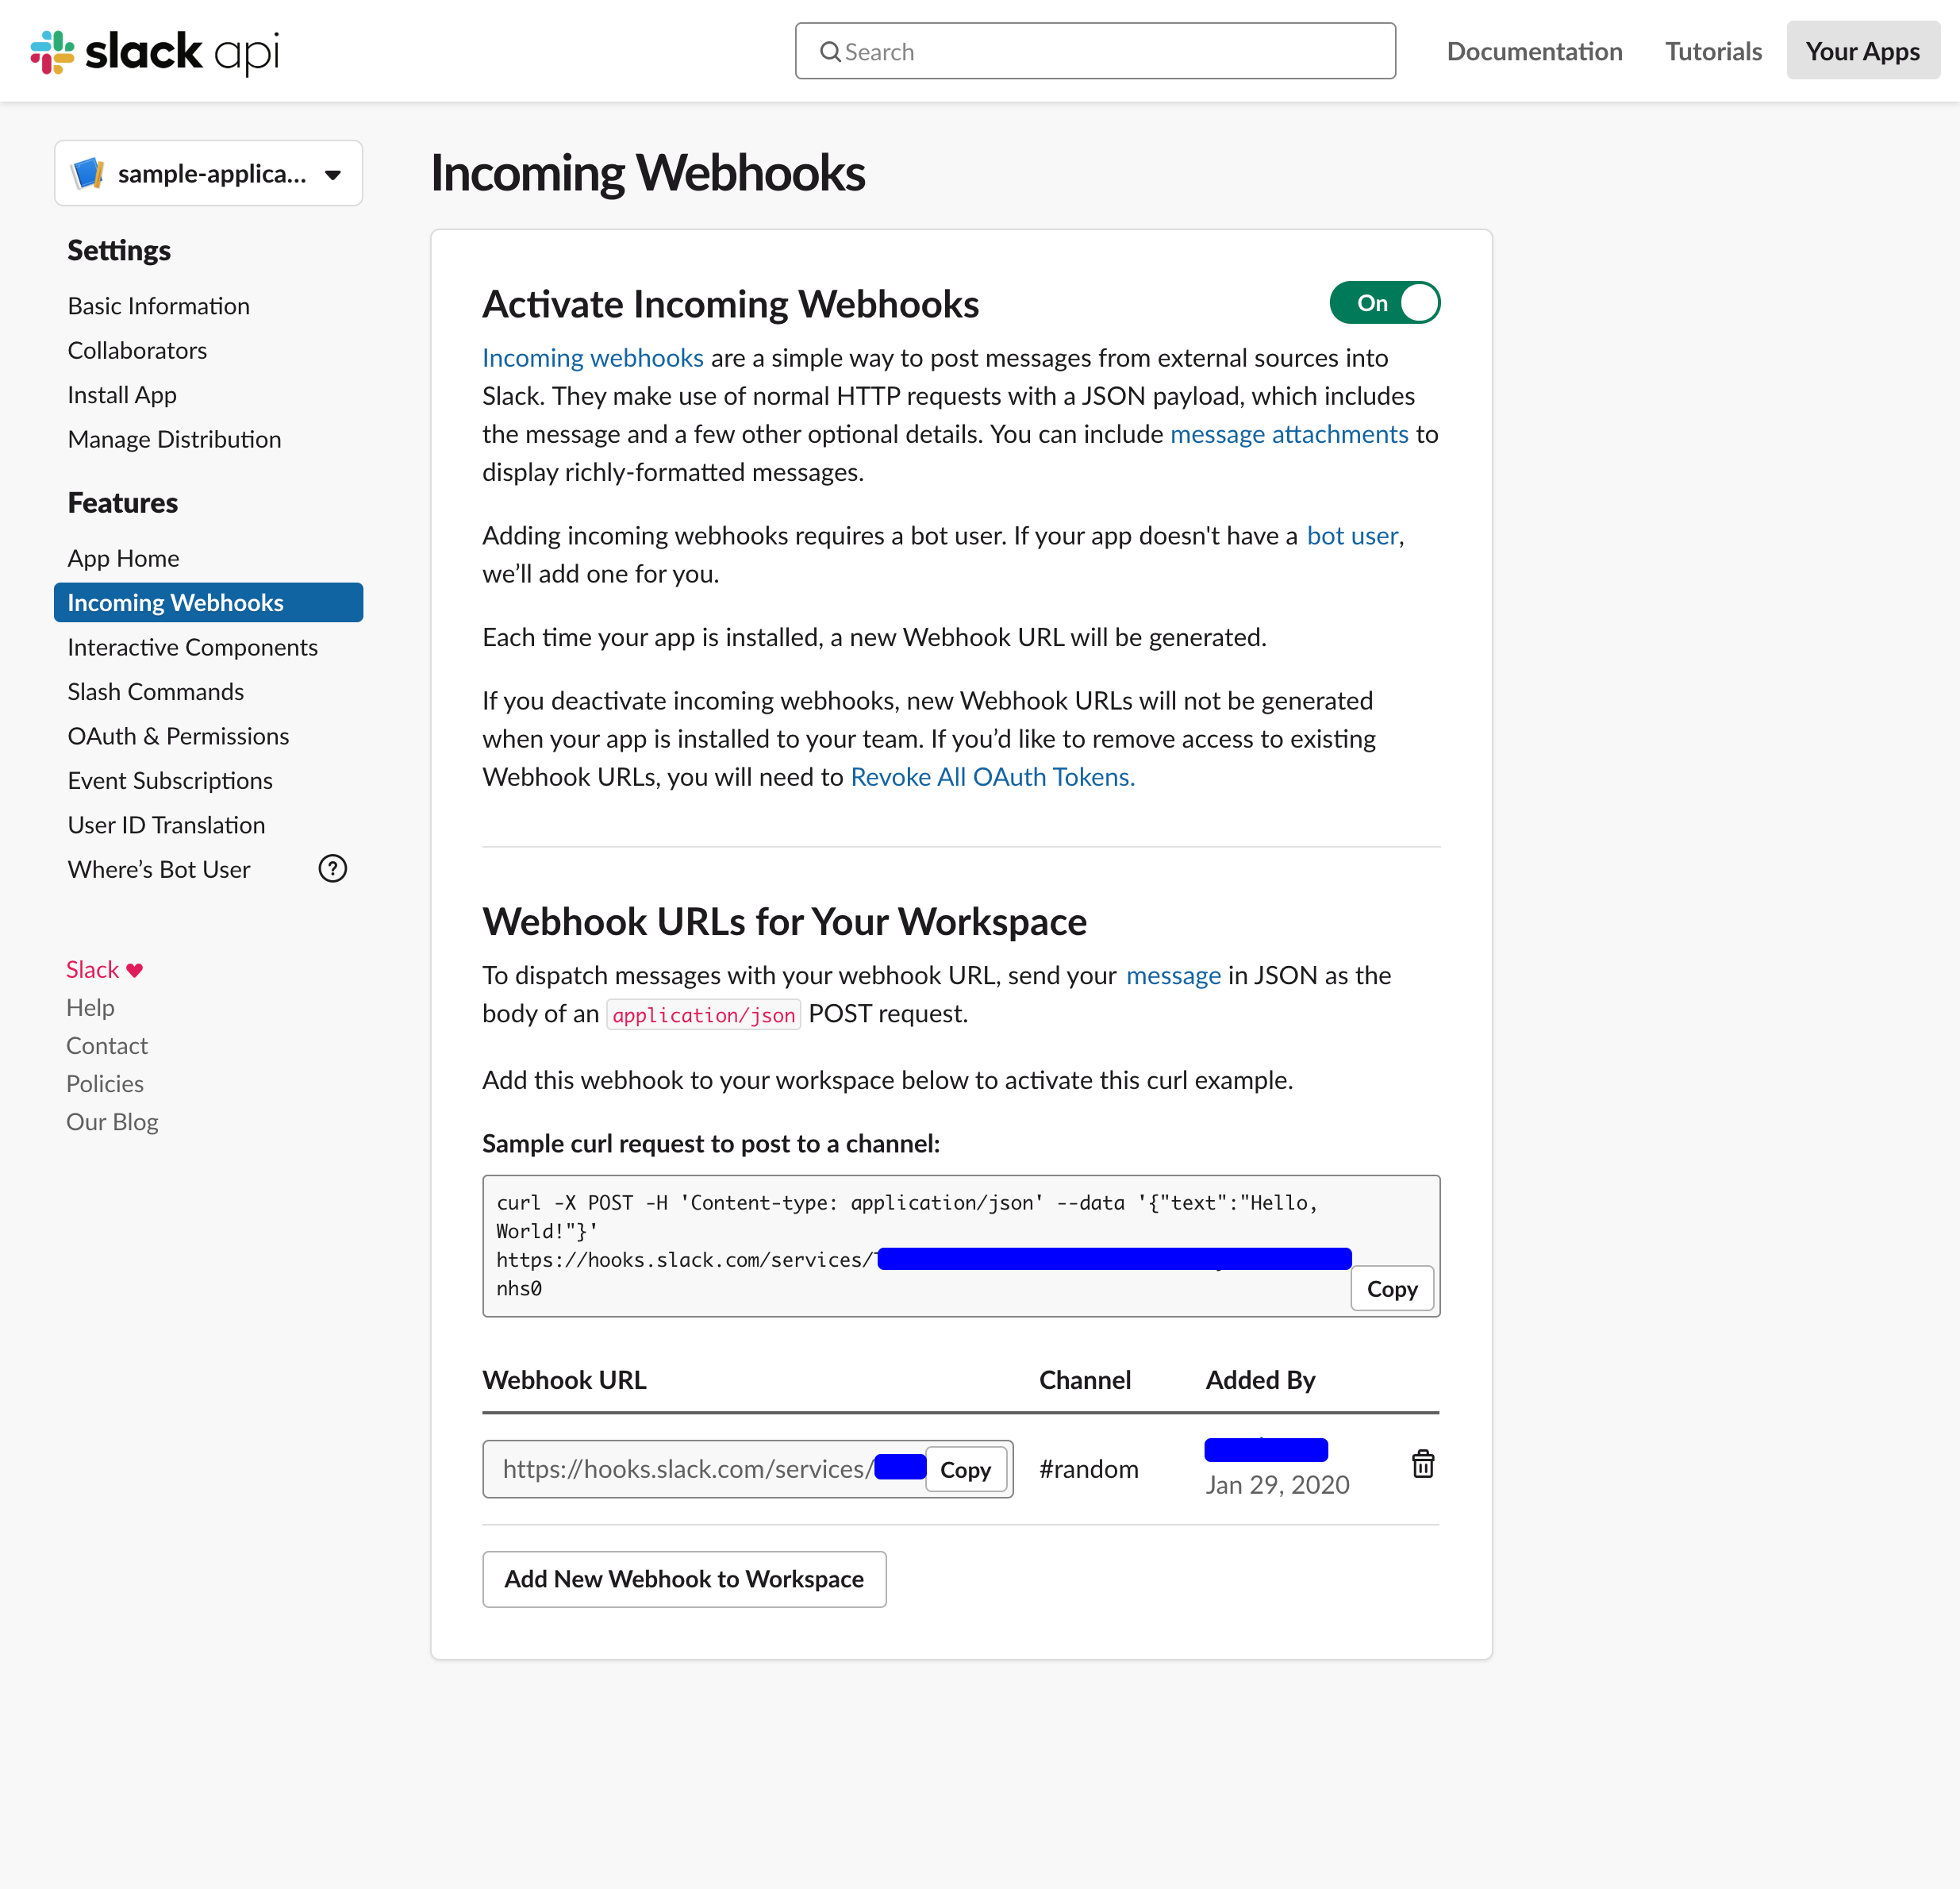
次にIncoming Web Hookを叩いてメッセージを送信します。
作成されたcurlコマンドをコピーして、ターミナルにはってためしてみます

$ curl -X POST -H 'Content-type: application/json' --data '{"text":"Hello, World!"}' https://hooks.slack.com/services/XXX/YYY/ZZZ
こんな感じで設定したwork spaceにメッセージが作成されます。
