Docker cooperates with github Action to achieve continuous deployment of AspNet Core
flow:
- prepare a .NET Core Demo
- create a Azure Container Registry
- make .NET Core docker image and push it to Azure Container Registry
- push image to Azure Container Registry by GitHub Actions
- deploy container by webhook provided by webapp
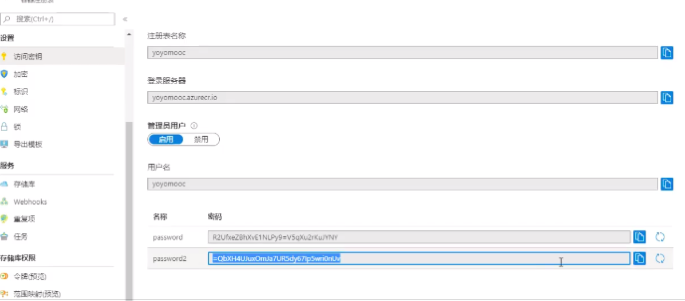
1.login to Azure, create a container registry to deposit docker images

create access key
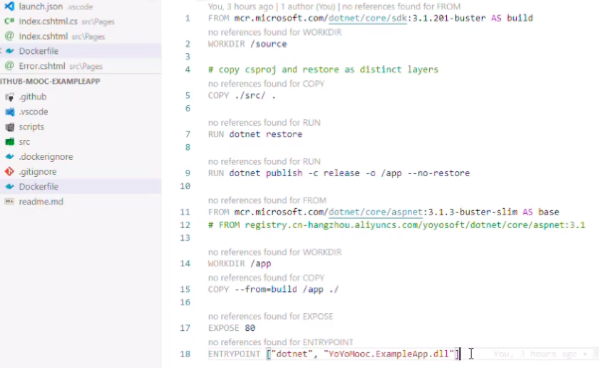
2.download project to local, create a Dockerfile
compile image, docker commands are written in readme.md
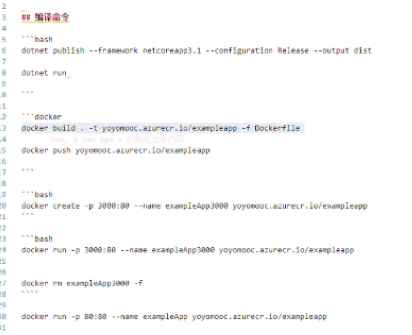
first login to the newly created container registry of Azure, then push images to it
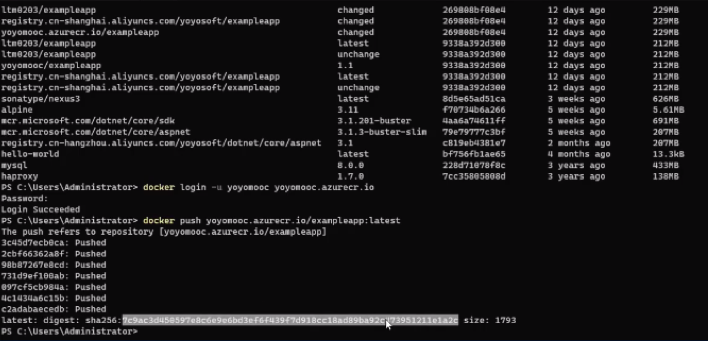
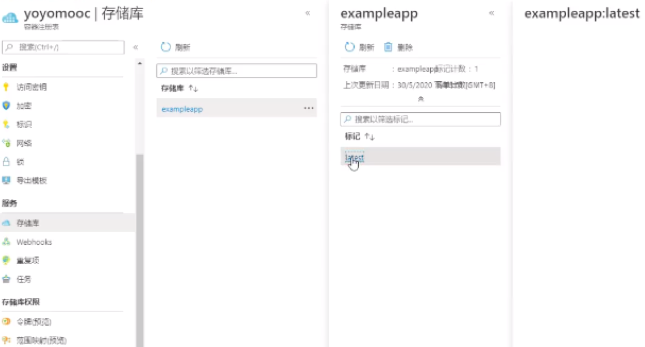
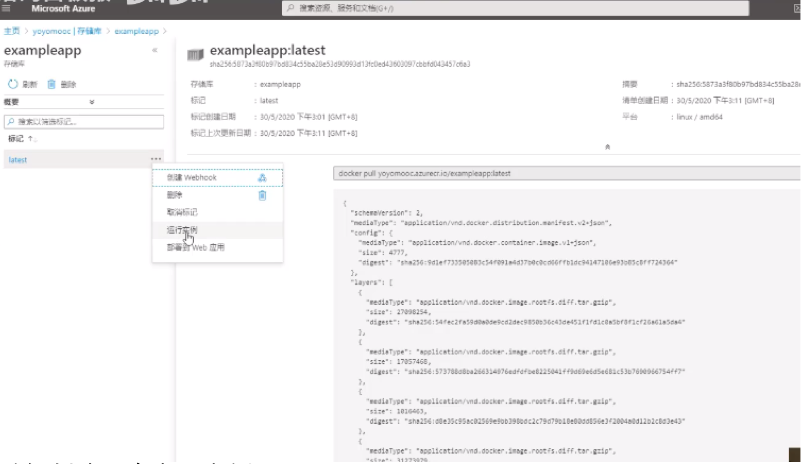
3.back to azure container registory, image is already there
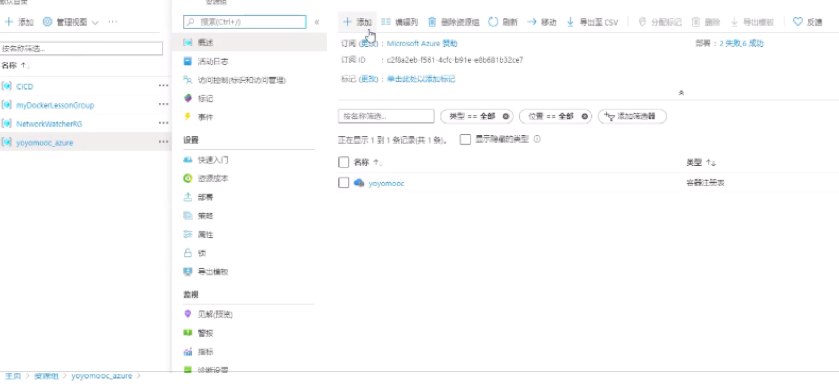
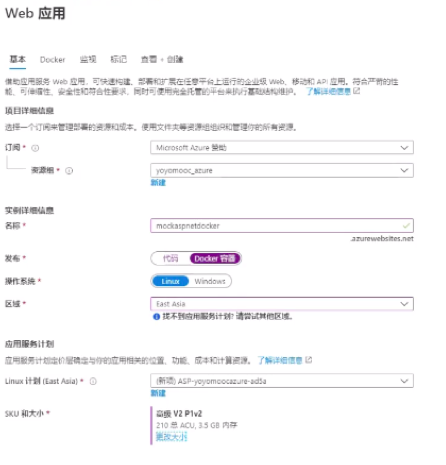
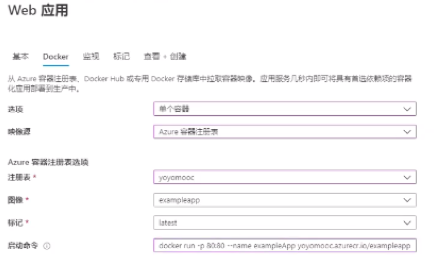
back to resource group, add a webapp

4.After modifying the web page locally, save it, generate a new image, and then push the image to the docker container registory (you may need to push several times because of network reasons), and then the azure container registry is automatically updated.
To verify, create and run an instance
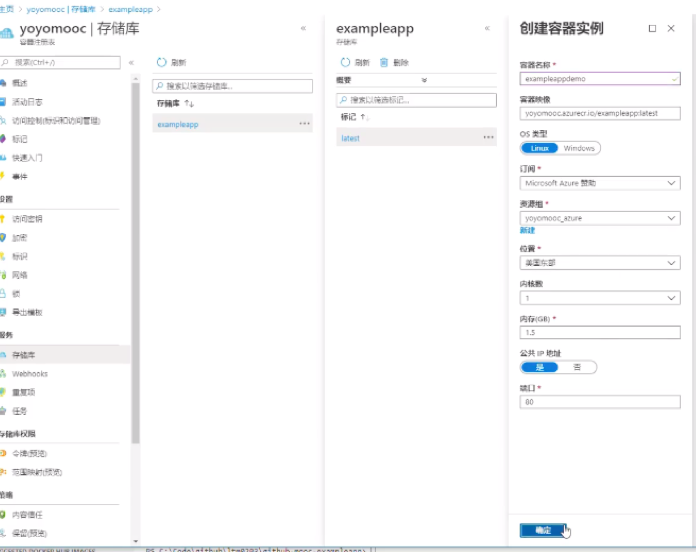
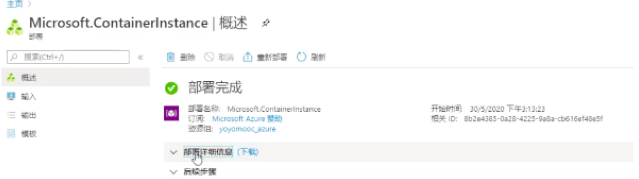
back to the resource group, you can see the container instance,
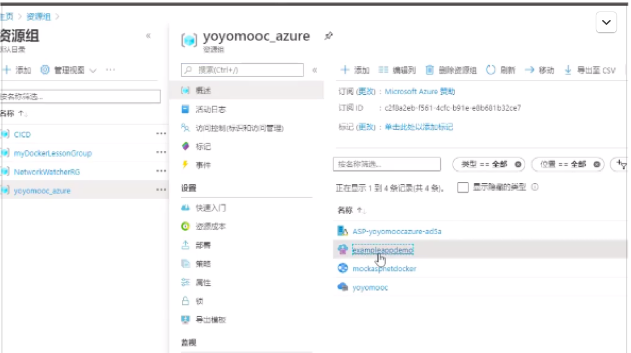
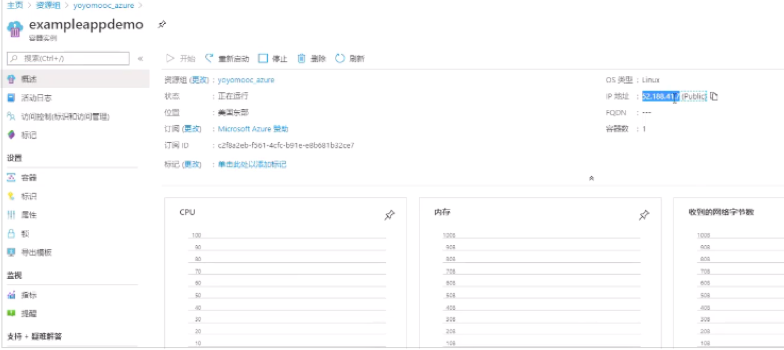
click the IP address allocated to this instance, you will find the local modification has been deployed to the container registry
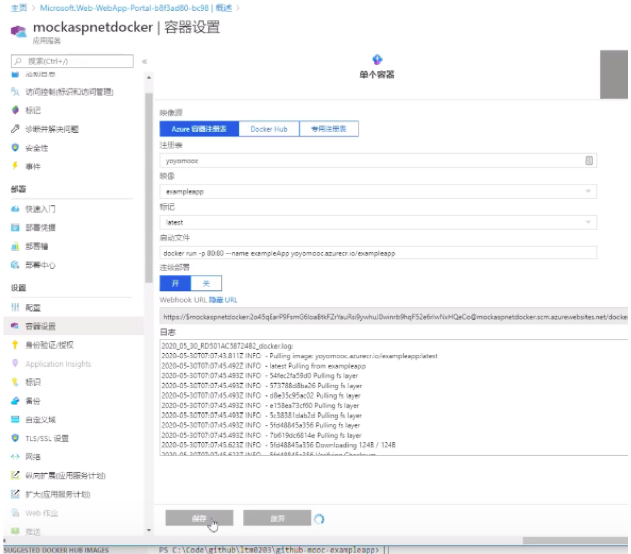
5.However, in fact, the current web app is not activated. How to make the web app automatically check our docker container, every time we push a new docker image, so that our website can be refreshed automatically.
This requires webhook
Back to webapp. Select the container settings, turn on the continuous deployment, you can see the webhook url, which means that the webapp provides us with a webhook. Set this function to true and save it.
The instance created just now is for demonstration and verification. It was created in the virtual machine and does not have the function of webhook, so it can be deleted.
So far, we only need to modify the code locally, compile the code, ensure that there are no errors while debugging, and then push it to the docker container registry through commands, and then our webapp will automatically detect the changes in the docker container table and then deploy to our website.
You can improve it by using github to automately push the code to container registry
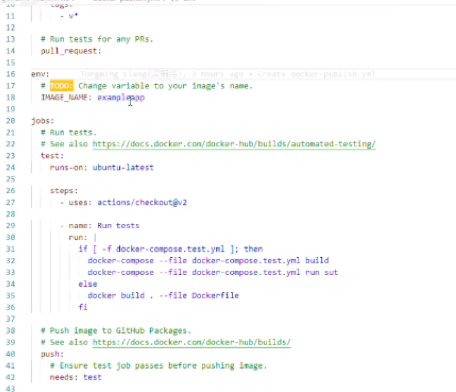
6.get into github, write yml files
actions/checkou@v2, this step is to detect the toolset that will be used in next steps (npm, lodgs, docker, etc.). In fact, this yml file is to check some hidden dangers before CICD.

write a new yml to run commands of pushing docker images, use secretes to manage the key
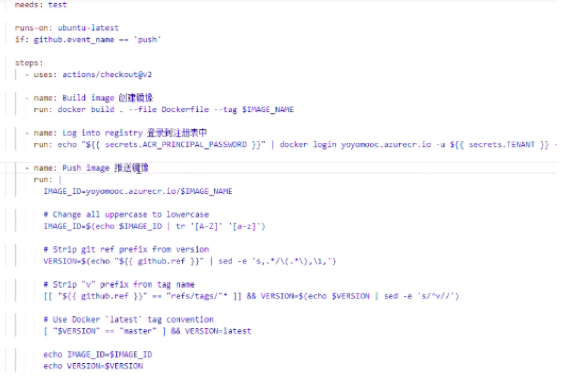
After that, when the code is pushed to the remote github repository, it cit can trigger a series of operations.
Use Github to achieve CI
Github: create a repository
Azure:
1.find Deployment options
2.choose source, select GitHub
3.authorization, click authorize
4.choose the repository you build
Use GitHubActions to build and deploy applications on Azure:
1.CI/CD uses label a lot.For example, use conditions to control execution. Usually, the workflow is executed only when certain conditions are true. The github workflow provides if conditions for this plot.
if: contains(github.event.pull_request.labels.*.name,'stage')
on:
  pull_request:
    types: [labeled]
2.Use GitHub secretes to storage password
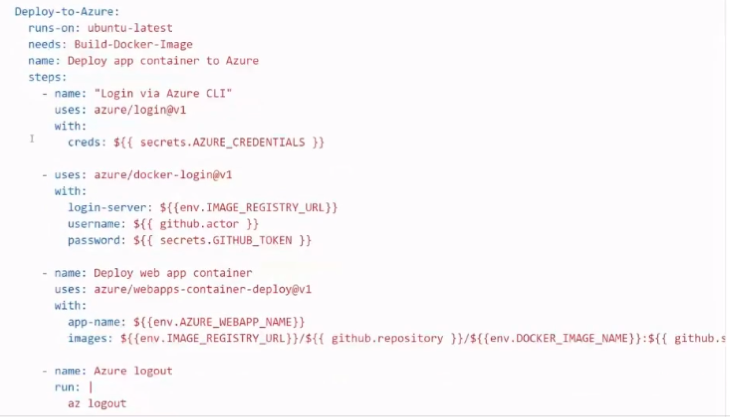
steps:
  - name: ”Login via Azure CLI”
    uses: azure/login@v1
    with:
      crews: ${{ secrets.AZURE_CREDENTIALS }}
3.Use Azure webapp to deploy application
4.Use GitHubActions to create and delete Azure resources
4.1 Create staging workflow
.github/workflow/xxx.yml
4.2 Trigger a job on specific labels
//If there is a label named stage, excute the next step
name: Stage the app
on:
  pull_request:
    types: [labeled]
env:
  DOCKER_IMAGE_NAME: reactorwarren-azure-ttt
  IMAGE_REGISTRY_URL: docker.pkg.github.com
  ###############################################
  ### USER PROVIDED VALUES ARE REQUIRED BELOW ###
  ###############################################
  ###############################################
  ### REPLACE USERNAME WITH GH USERNAME ###
  AZURE_WEBAPP_NAME: reactorwarren-ttt-app
  ###############################################
jobs:
  build:
    run-on: ubuntu-latest
    if: contains(github.event.pull_request.labels.*.name,'stage')
5.Set up the environment for your app
Open Azure, start Azure CLI
Make your storage account
az login
az account list
copy the list information

az ad sp create-for-rbac --name "GitHub-Actions" --role contributor --scopes /subscriptions/<id from account list> --sdk-auth

copy the information, it is the permission of contributor to this subscription

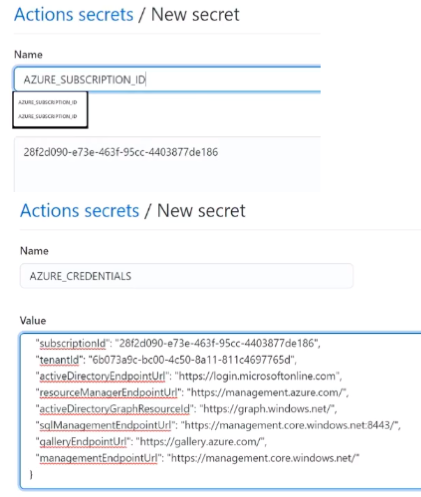
add subscriptionID and azure credentials to GitHub secretes
6.Spin up, configure, and destroy azure resources
you should write these in a new yml file
7.Test the GitHub actions workflows
8.Write the production deployment trigger
you should write these in a new yml file
GitHubActions:
All about yml file.
projectname/.github/workflows/xxx.yml (Indentation is important).
example1:
name: MYNAME
on:
  push:
    branches:
    - master  //master branch
    paths:
    - src/*   //Triggered when the file under src changes
// you can only choose trigger or schedule in one yml file
on:
  schedule
    - cron:“*/15 * * * *”  //minute,hour,date,month.This means that the current process is submitted and executed every 15 minutes

jobs:
  job1:
    runs-on:ubuntu-latest //general
    strategy:
      matrix:
         node-version: [8.x,19.x,12.x]
    steps:
    - uses:actions/checkout@v1
//Copy code. You can use clone, but if it is a private repository, it will be troublesome, and you need to 'cd' into the directory to run after clone, so actions/checkout@v1 is better.
//There is an official account on github called actions, there is a checkout repository, and the process is written in it to download the code
    - name:Use Node.js ${{ matrix.node-version }}
      uses: actions/setup-node@v1
      with:
         node-version: ${{ matrix.node-version }}
    - name: nom install, build, and test
      run:
         npm install
		 npm run build - -if-present
         npm test
      env:
         CI: true
    - run:echo hello
//It means executing echo hello in the shell under the latest version of ubuntu. But you need to install the environment of the relevant language, go to the action to find the yml of the corresponding default language

  job2:
    needs: job1 // Execute job1 before job2 is executed

//No download commands in actions.yml, but you can find that ubuntu-latest has a multi-language environment installed by default, and you can choose version by the uses.
//Uses can refer to actions in other repositories, and after @, you can assign the version by the commit number, version number, or branch name.
//you can also use uses to run a docker
jobs:
  job1:
    steps:
    - names:my first step
      uses:docker://alpine:3.6
//Note that this is just to run docker in ubuntu, it does not affect the scripts that will be run later. it is not to run this command in docker

//if you want to run code in a docker:
jobs:
  job1:
    container:
      image:node:10.16-jessie
      env:
         NODE_ENV:development
      ports:
         - 80
      volumes:
         - my_docker_volumn:/volume_mout
      options:- -cpus 1
    steps:
    - names:my first step
    ...

//about services,you should write service before you write steps, use niginx as an example
services:
  nginx:
    image:nginx
    ports:
      - 8080:80 //Map port 8080 to port 80
    env:
      NGINX_PORT:80
steps:
    - uses: actions/checkout@v1
    - run:
         node -v
         curl localhost:8080//After running, you can see that the nginx environment has been started

//If passwords or sensitive information are involved, you need to add secrets on github
steps:
    - uses: actions/checkout@v1
    - run:
         echo ${{ secrets. MySecrete }}
//So the final result of the operation is ***, no specific information is displayed
example2:
name: MyProject(Go)
on:
	push:
		branches: [ master ]
	pull_request:
		branches: [ master ]
jobs:
	myci:
		runs-on:ubuntu-latest //Operating environment
		steps:
		- uses: actions/checkout@v2 //clone from github

		- name: Set up Go //environment of Go
		  uses: actions/setup-go@v2 //Go Environmental installation tools

          with:
				go-version: 1.16

		- name: Build // compiling
		  run: go build -v ./…  // run commands
//These tools can be run after installing locally
		- name: golangci-lint // Code style test(copy-paste)
		  users: golangci/golangci-lint-action@v2
		  with:
			 version: v1.29

		- name: Run Gosei Security Scanner //security test(copy-paste)
		  run:
			export PATH=$PATH:$(go env GOPATH)/bin
			go get github.com/securego/gosec/cmd/gosec
			gosec ./…

		- name: Test // test
		  run: go test -v ./…