Oauth2のClient Credentials Grantという認証方法があります
サーバー間の通信を行い、また認証したい場合に基本的にUIがないので、
Client Credentials Grant方式で認証を行うケースが多いです。
例えばリソースサーバーと認証サーバーが分離している場合に、
リソースサーバーは認証サーバーに問い合わせ、トークンの有効性を確認する必要があります。
今回はこのトークンの有効性を確認するという行為をどうやって実現できるかについて紹介します。
1 RFC7662
実は、トークンの有効性を確認するの規定はすでにRFC7662で定義されています。
有効性をチェックするときのエンドポイントは/introspectになります。
いくつかの概念について紹介します
1.1 introspect request
リソースサーバーが認証サーバーにイントロスぺクトする際に必要な情報。
| 項目 | 値 |
|---|---|
| HTTPメソッド | POST |
| Content-Type | application/x-www-form-urlencoded |
| Authorization | リソースサーバー自身の身分(BearerやBasicなど) |
| Request Body | token=xxx, token_type_hint=yyy |
イントロスぺクトしたいトークンはリクエストボディに入れます。
1.2 introspect response
認証サーバーはリクエストを受け付け、確認結果を返します。
1.2.1 response body
レスポンスボディの各項目について軽く説明します。
| 項目 | 説明 |
|---|---|
| active | 必須。もしトークンが有効の場合にtrue |
| scope | トークンが利用できるスコープ。https://tools.ietf.org/pdf/rfc6749.pdfのSection 3.3を参照 |
| client_id | クライアントIDがある場合のみ |
| username | 人間が読める名前 |
| token_type | トークンの種類。https://tools.ietf.org/pdf/rfc6749.pdfのSection 7.1を参照 |
| exp | トークンのエクスパイアの日時 |
| iat | トークンの発行の日時 |
| nbf | トークンがこの時間前に利用できない |
| sub | トークンの利用目的 |
| aud | トークンの利用対象 |
| iss | トークンの発行者 |
| jti | トークンのユニークID |
基本的にJWT自体の定義が多いので、
もっと知りたい方はIDトークンが分かれば OpenID Connect が分かるを読んでください。
1.2.2 エラー処理
もしリソースサーバー自身が提供している認証情報が不正の場合に401を返します。
イントロスぺクト対象のトークンが不正の場合には401ではなく、レスポンスボディのactiveをfalseに設定するのでご注意ください。
2 oktaでAuthサーバーを使ってみる
Spring-bootで認証サーバーを実装したいですが、
Spring-bootの認証サーバープロジェクトは非推奨になったので今回は紹介しません。
また、Springチームは新しい認証サーバーのプロジェクトを実装しているので、
まだ実験プロジェクトとしてインキュベート中です。
興味ある方はご確認ください。
今回は自分で実装する代わりにoktaを利用して認証サーバーを立ち上げます。
まず事前準備としてoktaのアカウントを自分で登録してください。
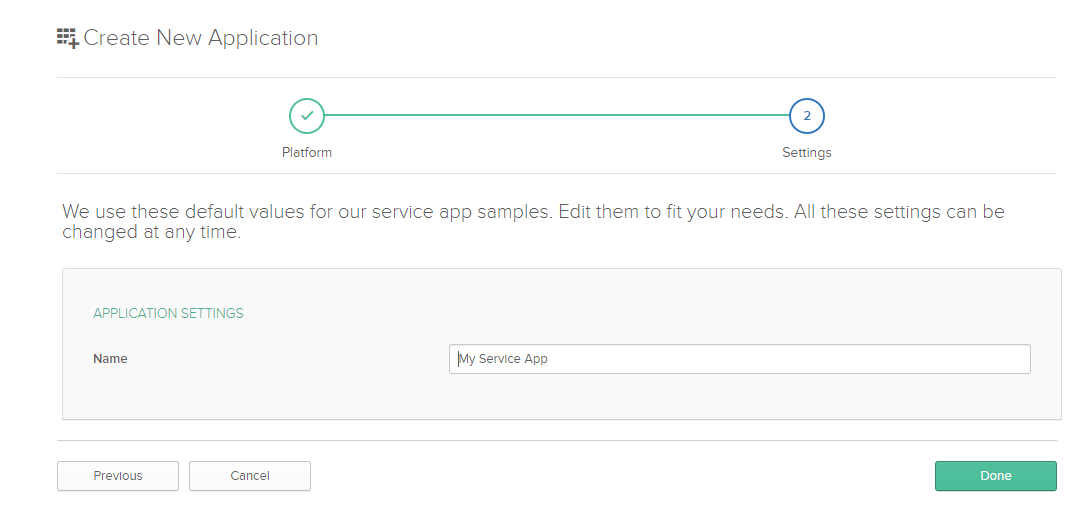
2.1 Application作成
アカウント登録後ログインします。

Add Applicationで新しいアプリケーションを作成します。

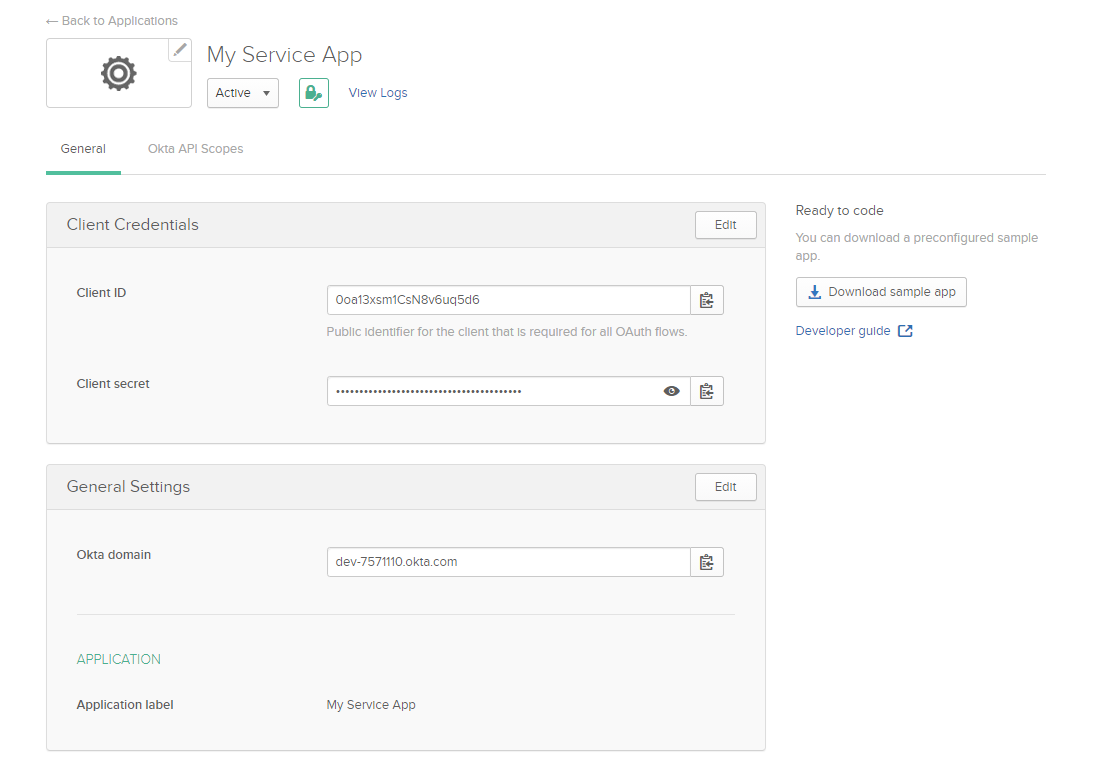
作成後にClient IDとClient secretを確認できます。後でこれらを使います。
2.2 APIの設定
ヘッダーのAPI > Authorization Serversをクリックします。今回はdefaultを使います。
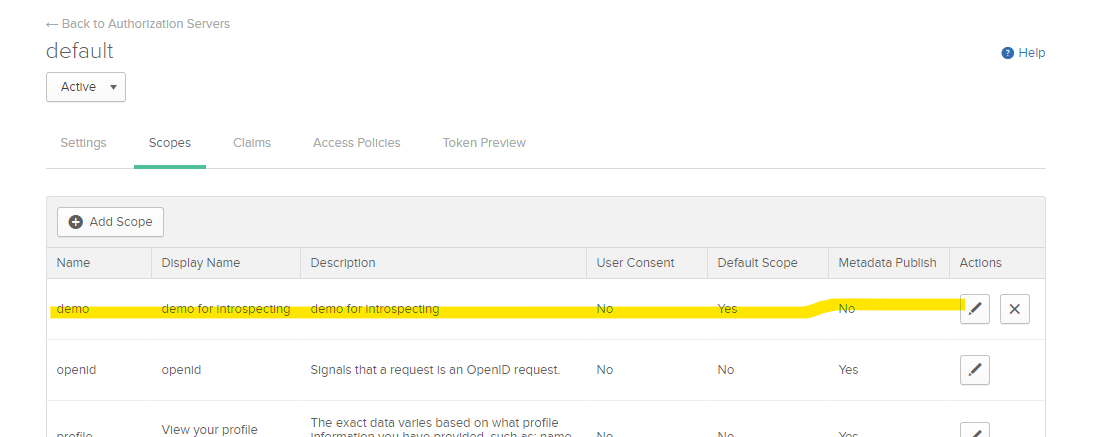
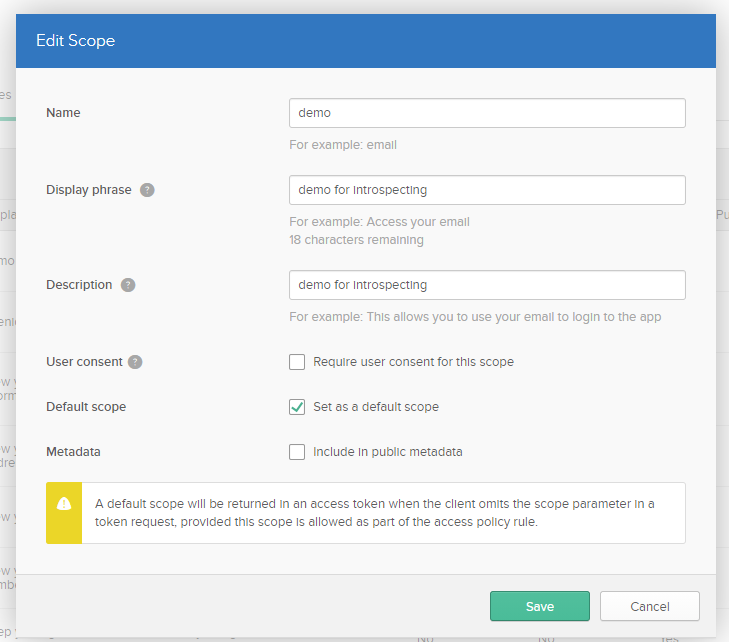
スコープタブで新しいスコープを作成します。任意で大丈夫です。
2.3 tokenを発行します
ここまでは準備作業が終わったので、実際にトークンを発行してみます。私はpostmanを使っています。
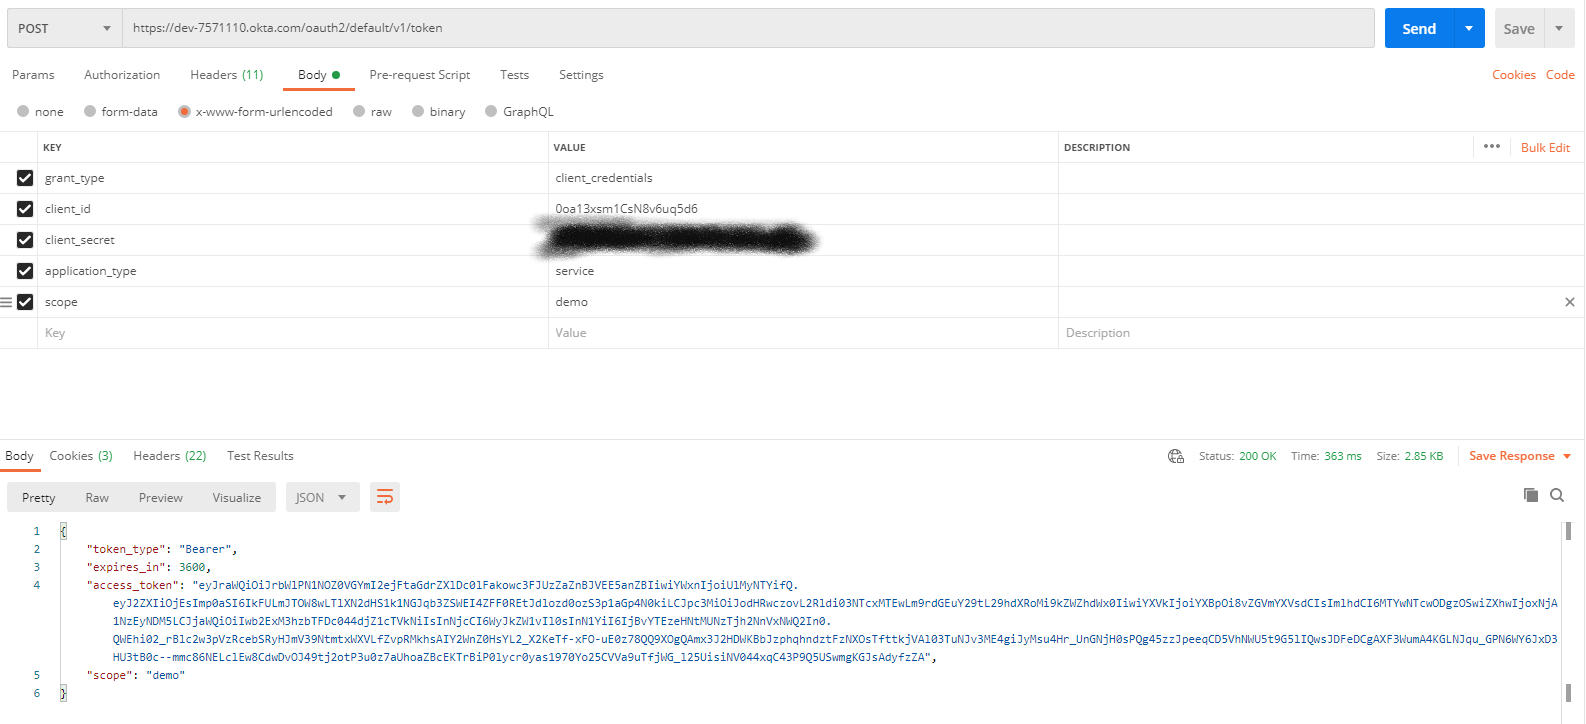
↑は利用例です。各項目について説明します。
| 項目 | 説明 |
|---|---|
| URL | Authorization ServersタブでIssuer URIを確認できると思います。 ${Issuer URI}/v1/tokenは今回利用するURLです |
| grant_type | アプリケーション作成時にマシンツーマシンを選択したので、ここはclient_credentialsになります |
| client_id | アプリケーションのGeneralタブで確認できます |
| client_secret | アプリケーションのGeneralタブで確認できます |
| application_type | service |
| scope | スコープタブで追加したスコープ |
レスポンスボディのaccess_tokenは発行されたトークンになります。
これからこのトークンをイントロスぺクトします。
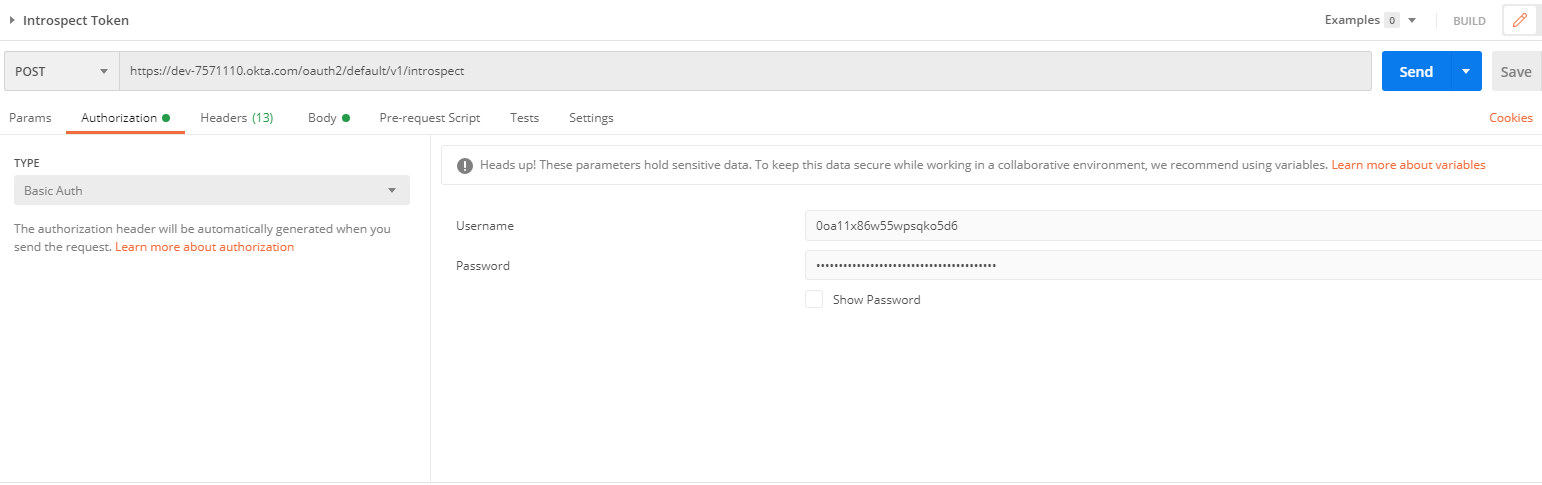
2.4 introspectを検証
後でSpringを実装してintrospectを検証しますが、とりあえずpostmanで軽く検証します。
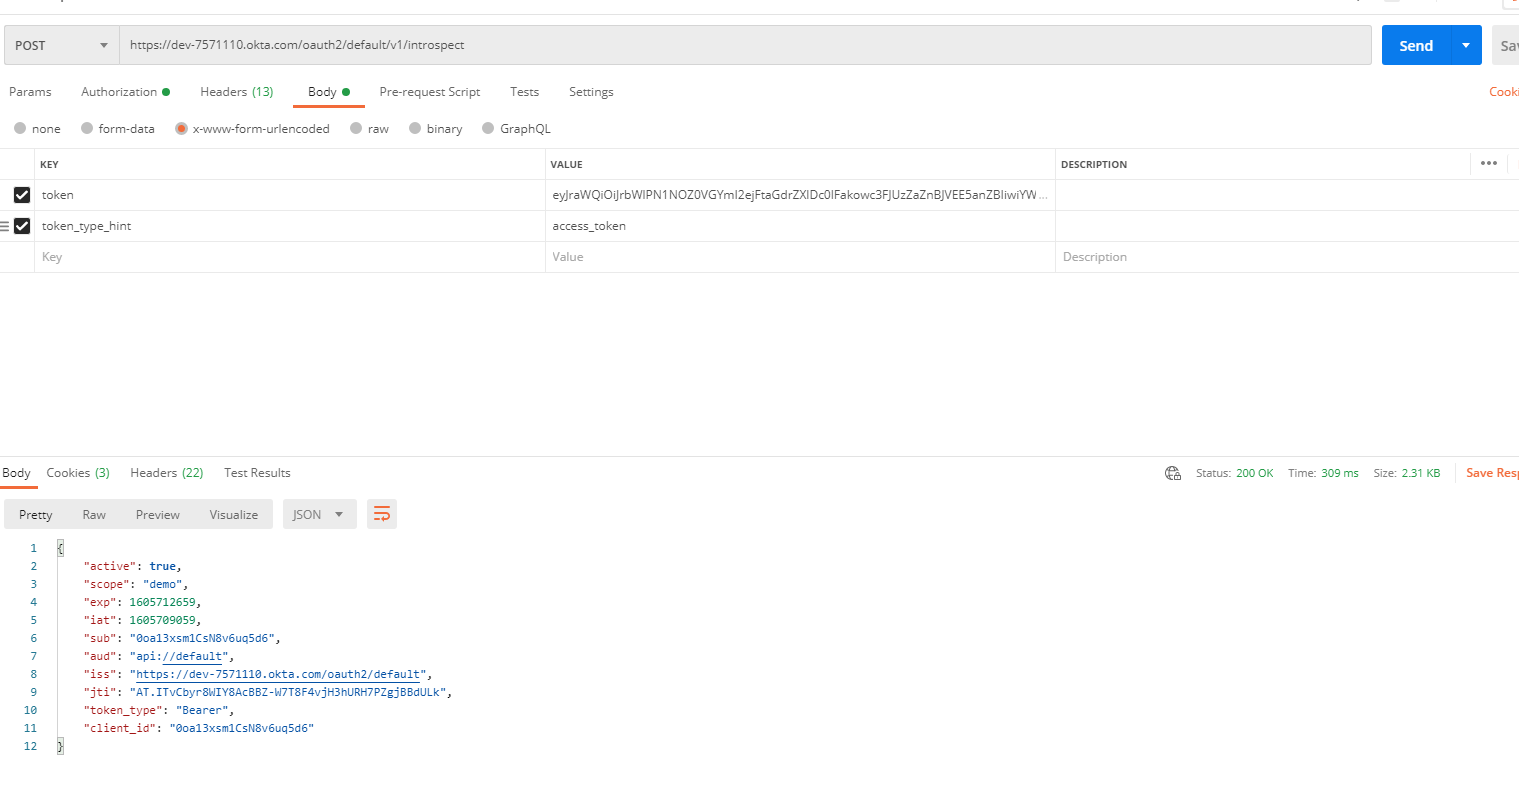
これで先ほど発行されたトークンは有効であることを確認できました。
3 Springで実装する
本題に入りますが、https://start.spring.io/にて新しいプロジェクトをダウンロードします。
3.1 初期化する
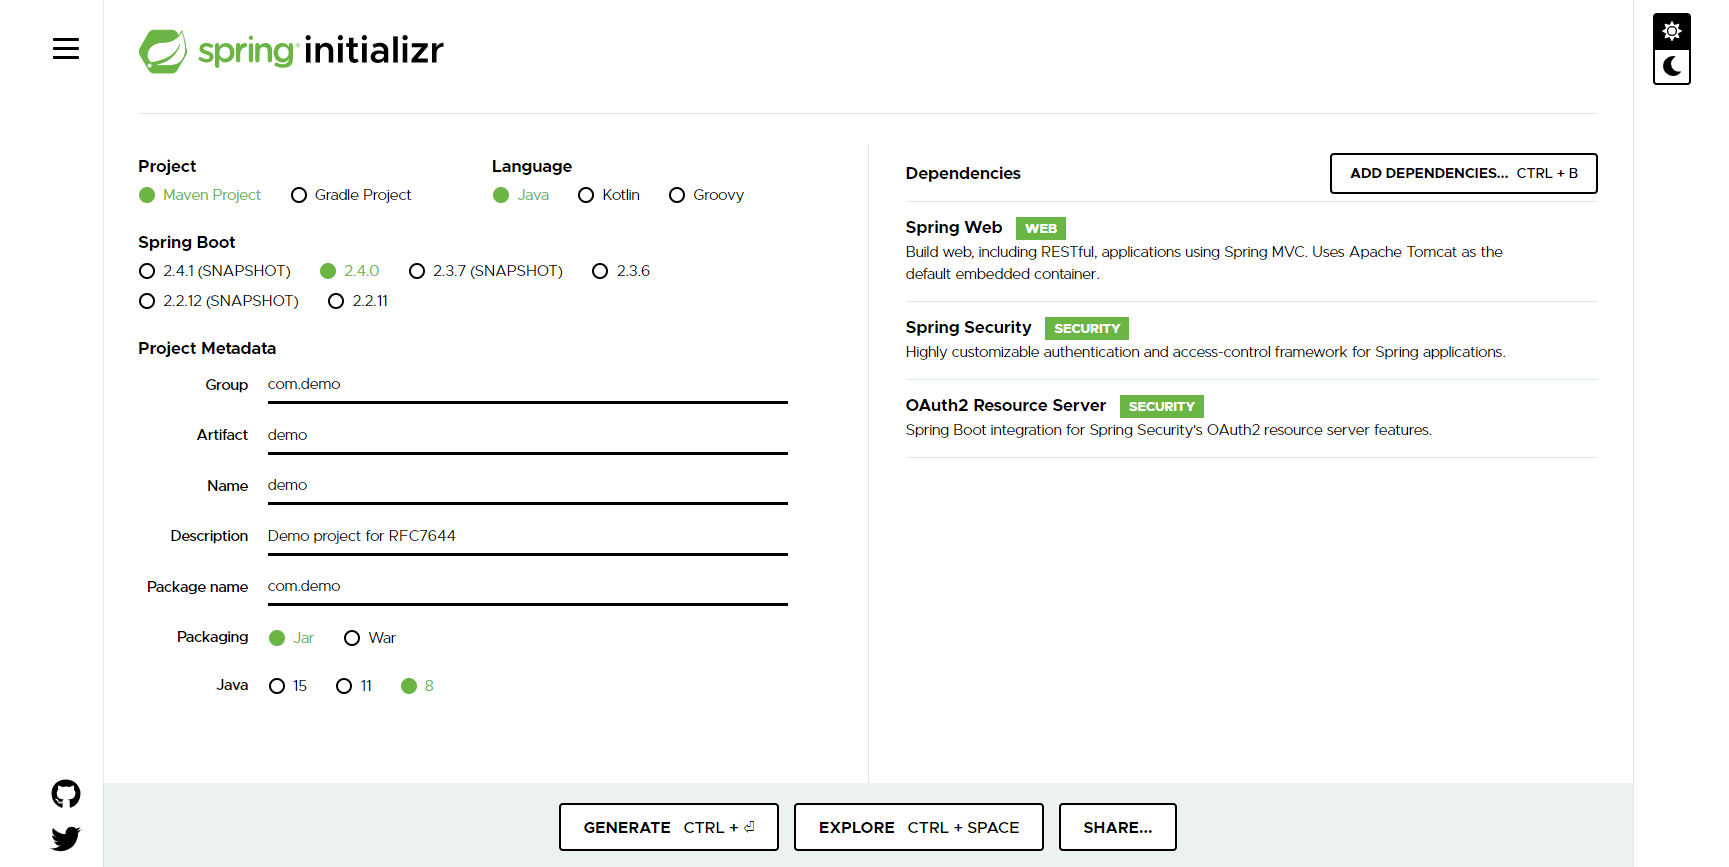
必要なdependencyを追加します。
- Spring Web
- Spring Security
- Oauth2 Resource Server
3.2 Authに関する設定
package com.demo.security.config;

import org.springframework.security.config.annotation.web.builders.HttpSecurity;
import org.springframework.security.config.annotation.web.configuration.EnableWebSecurity;
import org.springframework.security.config.annotation.web.configuration.WebSecurityConfigurerAdapter;
import org.springframework.security.config.annotation.web.configurers.oauth2.server.resource.OAuth2ResourceServerConfigurer;

@EnableWebSecurity
public class AuthConfig extends WebSecurityConfigurerAdapter {

    @Override
    protected void configure(HttpSecurity http) throws Exception {
        http.authorizeRequests(
                ar -> ar.antMatchers("/hello").authenticated())
            .oauth2ResourceServer(OAuth2ResourceServerConfigurer::opaqueToken);
    }
}
3.3 シンプルなコントローラ―
package com.demo.controller;

import org.springframework.web.bind.annotation.GetMapping;
import org.springframework.web.bind.annotation.RestController;

@RestController
public class HelloController {
    @GetMapping("/hello")
    public String hello() {
        return "Hello World";
    }
}
3.4 application.yml
spring:
  security:
    oauth2:
      resourceserver:
        opaquetoken:
          introspection-uri: https://dev-7571110.okta.com/oauth2/default/v1/introspect
          client-id: 0oa13xsm1CsN8v6uq5d6
          client-secret: ****************************
3.5 pom.xml
下記のdependencyを追加します。
<dependency>
    <groupId>com.nimbusds</groupId>
    <artifactId>oauth2-oidc-sdk</artifactId>
</dependency>
3.6 検証
まずSpring-bootを起動します。
$ mvn spring-boot:run
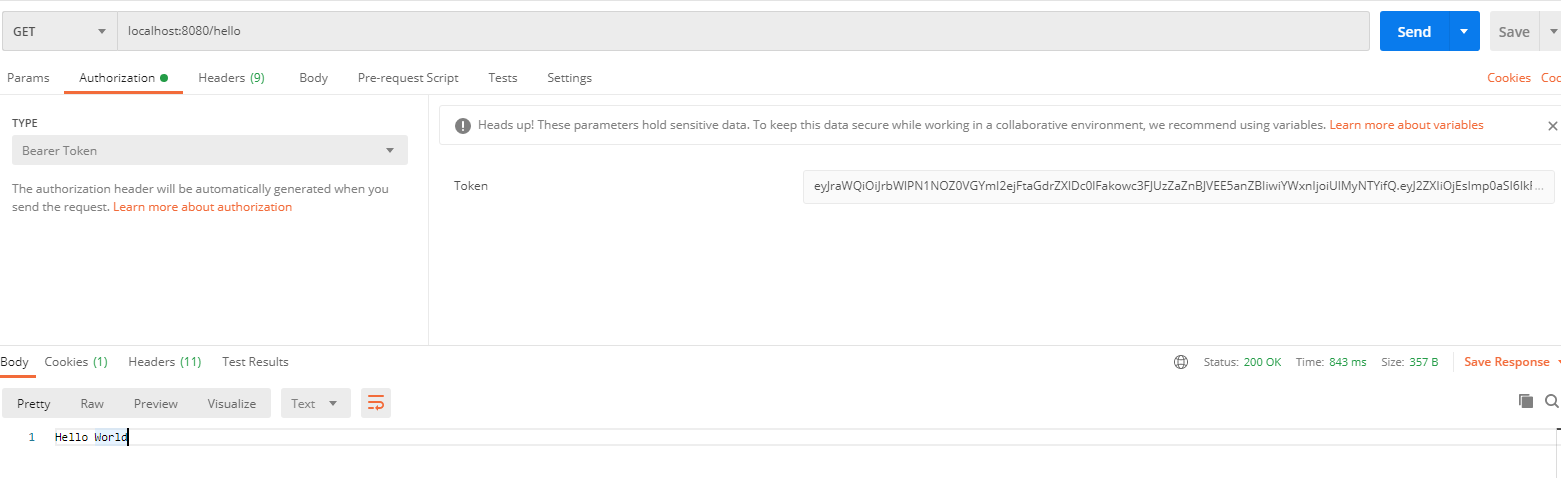
正しくトークンを指定する場合にアクセスできます。
また、トークンが不正の場合に401を返します。
参考
https://developer.okta.com/
https://github.com/spring-projects/spring-security
https://tools.ietf.org/html/rfc7662
https://oauth.net/2/grant-types/client-credentials/
https://qiita.com/TakahikoKawasaki/items/8f0e422c7edd2d220e06