概要
USB温度センサTEMPer1の温度データを元にMunin用のプラグインを作成します。
前提として、USB温度センサのデータをtemperコマンドで取得できるようにしておく必要があります(詳細)。なお、本環境は Pydora 2014 R3 (Fedora20相当)を使用しています。
詳細
仕組み
温度を出力するtemperコマンドの実行結果は、日時データと温度データであり、2つのデータはカンマ(,)で区切られています。
[root@pidora temper]# temper
06-Dec-2014 11:16,20.945581
Muninに渡したいデータは温度部分だけなので、出力結果をcutコマンドで整形します。
[root@pidora temper]# /usr/bin/temper | cut -f2 -d','
21.009874
あとは、Muninプラグインの中で、このコマンドを都度実行するようにします。
プラグインの設置
エディタを使い、vi /etc/munin/plugins/temp 等で編集します。
# !/bin/bash

if [ "$1" = "autoconf" ]; then
        echo yes
        exit 0
fi

if [ "$1" = "config" ]; then

        echo 'graph_title Room Temperature'
        echo 'graph_args --base 1000 -l 0'
        echo 'graph_vlabel Celsius'

        echo 'graph_scale no'
        echo 'graph_category RasPi'

        echo 'temp.label Room1'
        print_warning temp
        print_critical temp

        echo 'graph_info Room Temperature'
        echo 'temp.info /usr/bin/temper'

        # Last, if run with the "config"-parameter, quit here (don't
        # display any data)
        exit 0
fi


echo -n "temp.value "
/usr/bin/temper | cut -f2 -d','
ファイルの作成後はパーミッションを変えます。
# chmod 755 /etc/munin/plugins/temp
次に、temperコマンドはroot権限で実行させる必要があります。そのため、muninのプラグイン設定用ファイルを置き、実行時のユーザがrootになるように明示します。これをしないと Permission denied のエラーが出ます。
# cat << EOF > /etc/munin/plugin-conf.d/temp
[temp]
user root
EOF
動作テストのためにmunin-runコマンドを実行します。次のように温度情報が表示されれば問題ありません。
# /usr/sbin/munin-run temp
temp.value 20.945581
最後に munin-node の再起動をかけます。
# systemctl restart munin-node
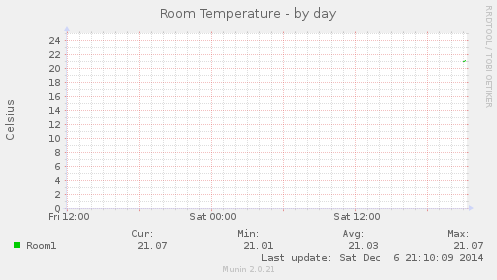
あとは、自動的にグラフが生成されます。
