本記事はエーピーコミュニケーションズ Advent Calendar 2021 25日目の記事です。
■はじめに
2021年12月2日、Ansible Automation Platform 2.1がリリースされました。
それに伴い、Ansible Automation Platform Controllerも4.1.0にバージョンアップされました。
そのほか多くのアップデートがありましたが、
なかでも、新機能"Automation mesh"が追加されたことは大きな変化のように思いました。
AnsibleコントローラーとAnsible実行ノードが分離され、それらがまさに"メッシュ"のようにつながることで、世界中へのさらなる自動化の展開を可能にするようです。
世界中にIT資産を持つ企業は特に要注目といったところでしょうか。
本記事が、
Ansible Automation Platform 2.1において、自動化コントローラー機能を司る、
Ansible Automation Platform Controller 4.1.0の理解に役立てば幸いです。
■そもそもAutomation Platfrom Controllerって?
Automation Platfrom Controllerを含めた全体外観を整理しておきましょう。
まず、Ansible Automation Platform というのは、自動化プラットフォームとして、
各コンポーネントを取りまとめる広い概念で、今回解説するAnsible Automation Platform Controller はその中の1つのツールというイメージです。
で、それぞれAnsible Automation Platformは2.1に、Ansible Automation Platform Controllerは4.1.0にバージョンが上がったんですね。
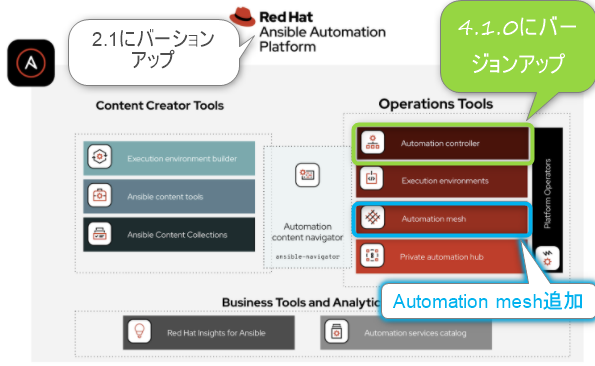
Ansible Automation Platform Controller はどういうものかというと、Ansible Automation Platform用のWebUIとAPI機能を担当するコンポーネントです。(ちなみに以前はAnsibleTowerと呼ばれていました。)
基本的にはこのAnsible Automation Platform Controllerにログインして、組織的に自動化を管理する、
管制塔のようなものと考えていただければイメージしやすいかと思います。管制「塔」だから以前はAnsible「Tower」って呼ばれていたのかなと思ったりします。
(画像引用Introducing Red Hat Ansible Automation Platform 2.1
https://www.ansible.com/blog/introducing-red-hat-ansible-automation-platform-2.1)
■ハンズオン
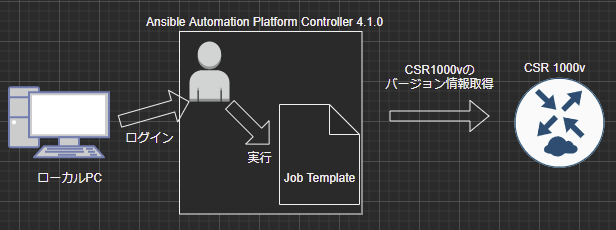
さて、今回は、Ansible Automation Platform Controller 4.1.0 の入門として
『Ansible Automation Platform Controller 4.1.0からNW機器の情報取得をするジョブテンプレートを実行する。』
ということをやってみましょう。
Ansible初心者の方でも取り掛かれるように、実行するplaybook自体は簡単なサンプル程度にしており、
**「環境準備」~「ジョブテンプレートを実行するまで」**の一連の流れを体験することに主眼を置き、
全体像をできるだけ可視化しています。
今回のハンズオンはローカルPCとAWS環境があれば完結できます。
■ハンズオンの全手順
下記が今回のハンズオンの全手順です。
①~⑦まで順番に進めていきましょう。
想定時間2~3時間
① 実行対象のネットワーク機器を用意する。
② Automation Platform Controller 4.1.0用のインスタンス(RHEL8.4以降、m5.large以上のサイズ)を立てる。
③ ②で立てたインスタンスにAnsible Automation Platform 2.1をインストールする。
④ Ansible-builderでコンテナ実行環境を構築した後、playbookをつくる。
⑤ Automation Platform Controller 4.1.0にログインし、ジョブテンプレートを実行するための各種設定をする。
⑥ ジョブテンプレートを実行する。
⑦ ネットワーク機器の情報取得が成功することを確認する。
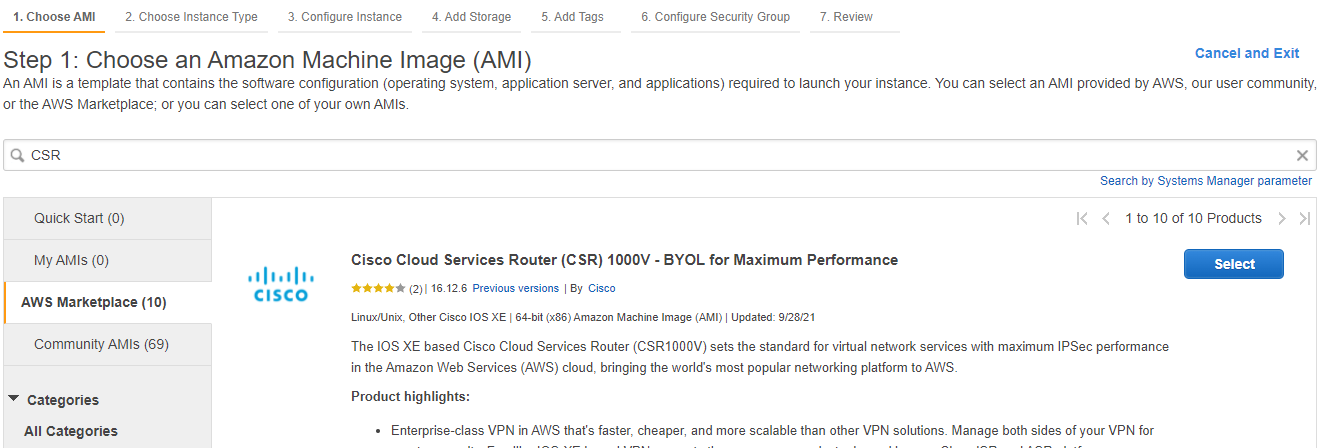
① 実行対象のネットワーク機器を用意する。
まず、実行対象のネットワーク機器を用意します。
AWS上の仮想アプライアンスを使います。
ios系のルーターであれば何でもよいのですが、
ここでは「Cisco Cloud Services Router (CSR) 1000V - BYOL for Maximum Performance」を使うことにします。
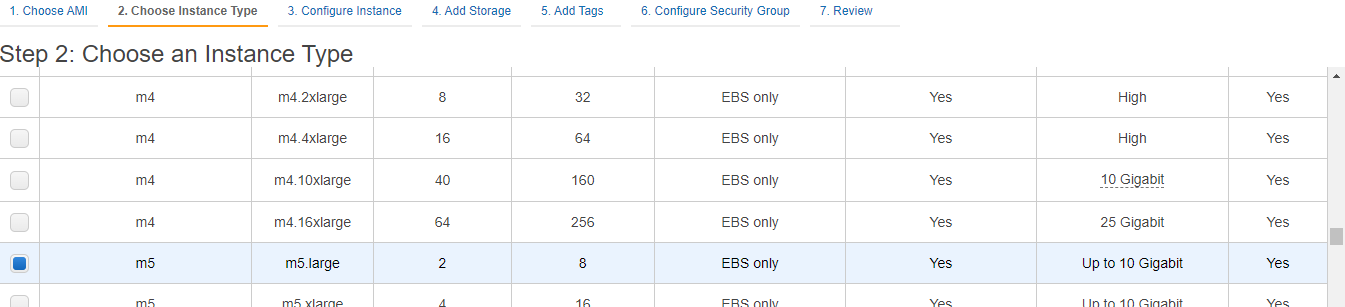
インスタンスタイプは適当にt2.mediumを選び、起動します。
セキュリティグループのインバウンドルールは、最低限、SSHは許可してください。
作成したCisco Cloud Services Router (CSR) 1000V にTeraterm等を使って、
SSHでログインし、Automation Platform Controller 4.1.0で接続する際に使用するユーザーとパスワードを設定します。
Router#conf t
Enter configuration commands, one per line.  End with CNTL/Z.
Router(config)#username ansible password passw0rd
ここでは
ユーザー: ansible
パスワード: passw0rdを設定しました。
これでネットワーク機器側の準備はOKです。
② Automation Platform Controller 4.1.0用のインスタンス(RHEL8.4以降、m5.large以上のサイズ)を立てる。
Automation Platform Controller 4.1.0を構築していきます。
まず、RHEL8.4以降のAMIを使用して、インスタンスを立てます。
ここでは「RHEL-8.4.0_HVM-20210504-x86_64-2-Hourly2-GP2」を選んでみます。

インスタンスタイプは公式ドキュメントにm5.large以上が必要と書いてあるので、
これを遵守し、m5.largeを選びます。
セキュリティグループのインバウンドルールで、SSHとHTTPSは最低限許可してください。
インスタンスを作成、起動します。
③ ②で立てたインスタンスにAnsible Automation Platform 2.1をインストールする。
まずはAnsible Automation Platform 2.1インストーラを取得します。
https://access.redhat.com/downloads/content/480 に移動します。
今回はbundle版のインストーラを使うことにします。(依存するrpmファイルがインストーラに含まれており、便利です。)
Ansible Automation Platform Setup Bundle の 「今すぐダウンロードする」 をクリックします。
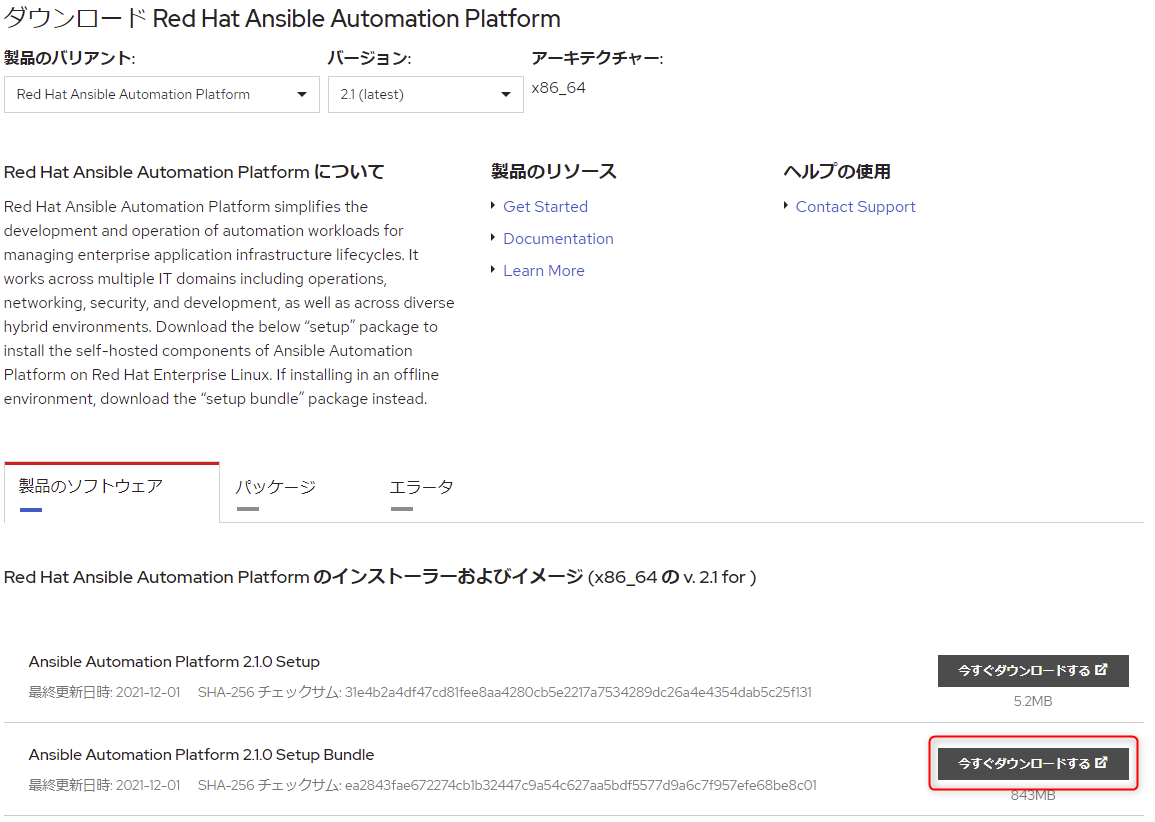
すぐにローカルPCにダウンロードされますので、
ローカルPCにダウンロードしたansible-automation-platform-setup-bundle-2.1.0-1.tar.gzを
リモートインスタンスの/home/ec2-user配下にSCPなどを用いて送信し、配置します。
/home/ec2-user配下にansible-automation-platform-setup-bundle-2.1.0-1.tar.gzがあることを確認します。
[ec2-user]$ pwd
/home/ec2-user
[ec2-user]$ ls
ansible-automation-platform-setup-bundle-2.1.0-1.tar.gz
tarで展開します。
[ec2-user]$ tar xvzf ansible-automation-platform-setup-bundle-2.1.0-1.tar.gz
[ec2-user]$ ls
ansible-automation-platform-setup-bundle-2.1.0-1  ansible-automation-platform-setup-bundle-2.1.0-1.tar.gz
展開すると、ansible-automation-platform-setup-bundle-2.1.0-1ディレクトリが生成されるので、
遷移し、そのディレクトリ配下にあるファイルをlsで確認します。
[ec2-user]$ cd ansible-automation-platform-setup-bundle-2.1.0-1
[ec2-user]$ ls
bundle  collections  group_vars  images  inventory  licenses  README.md  setup.sh
inventoryファイルをviで編集します。
[ec2-user]$ vi inventory
viエディタが起動すると、以下のような画面になります。
# Automation Controller Nodes
# There are two valid node_types that can be assigned for this group.
# A node_type=control implies that the node will only be able to run
# project and inventory updates, but not regular jobs.
# A node_type=hybrid will have the ability to run everything.
# If you do not define the node_type, it defaults to hybrid.
#
# control.example node_type=control
# hybrid.example  node_type=hybrid
# hybrid2.example <- this will default to hybrid
[automationcontroller]
localhost ansible_connection=local

(中略)

[all:vars]
admin_password='passw0rd'

pg_host=''
pg_port=''

pg_database='awx'
pg_username='awx'
pg_password='passw0rd'
pg_sslmode='prefer'  # set to 'verify-full' for client-side enforced SSL

# Execution Environment Configuration
# Credentials for container registry to pull execution environment images from,
# registry_username and registry_password are required for registry.redhat.io
registry_url='registry.redhat.io'
registry_username='アカウント名'
registry_password='パスワード'

(後略)
このinventoryファイルにautomationmeshの構成や、automationhubの設定、EEのリポジトリ設定などを記述することで、
様々なシステム構成をすることができるのですが、
今回は自動化コントローラーとして、今ログインしている単一ノードのみを使用しますので、
admin_password='passw0rd'
pg_password='passw0rd'
registry_username='アカウント名' # Red Hatアカウント
registry_password='パスワード' # Red Hatアカウントのパスワード
の4か所のみの編集でOKです。更新を保存し、setup.shをsudo権限で実行します。
[ec2-user]$ sudo ./setup.sh
(略)

PLAY RECAP *********************************************************************
localhost                  : ok=272  changed=138  unreachable=0    failed=0    skipped=147  rescued=0    ignored=6

The setup process completed successfully.
Setup log saved to /var/log/tower/setup-2021-xx-xx-xx:xx:xx.log.
[ec2-user]$
しばらく待って、
最終的にfailed=0となり、全て成功すると、Ansible Automation Platform Controller 4.1.0のセットアップは完了です。
ブラウザでログインして、確認してみます。
※12/25現在、ブラウザは英語化推奨です。ブラウザの設定言語が日本語だとプロジェクト設定をする時に、一部表示がバグになるようです。
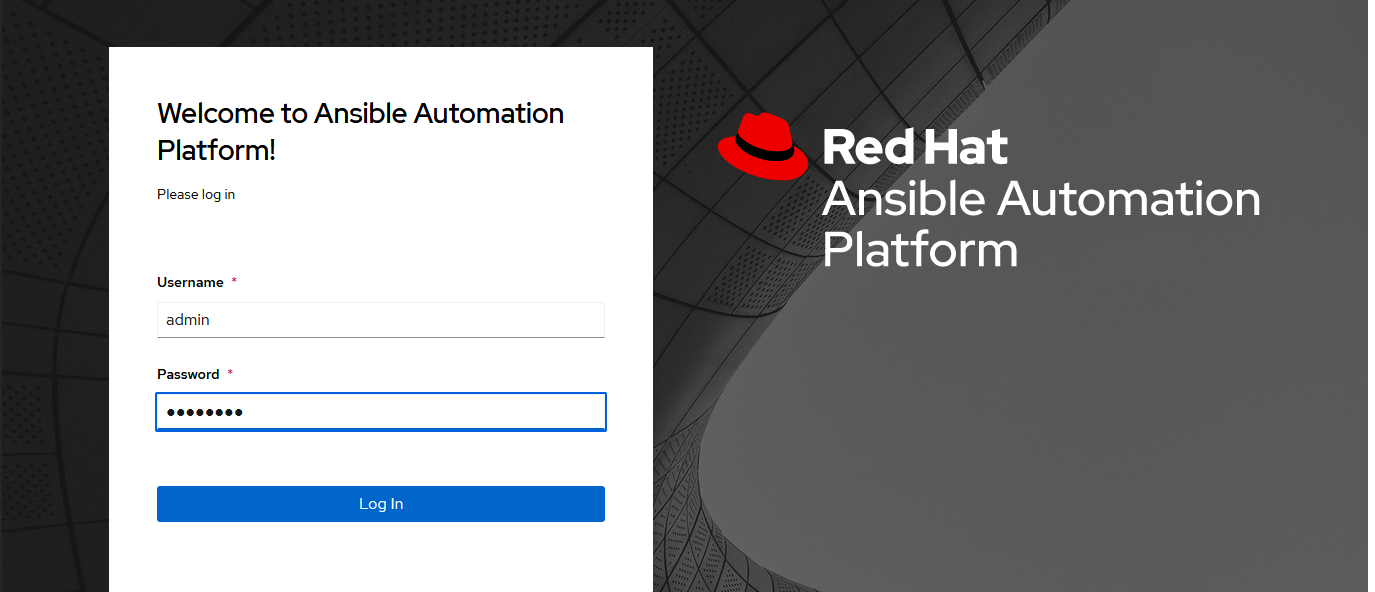
ユーザー名admin、
パスワード(inventoryファイルでadmin_passwordに設定したもの)を入力して、ログインすると、
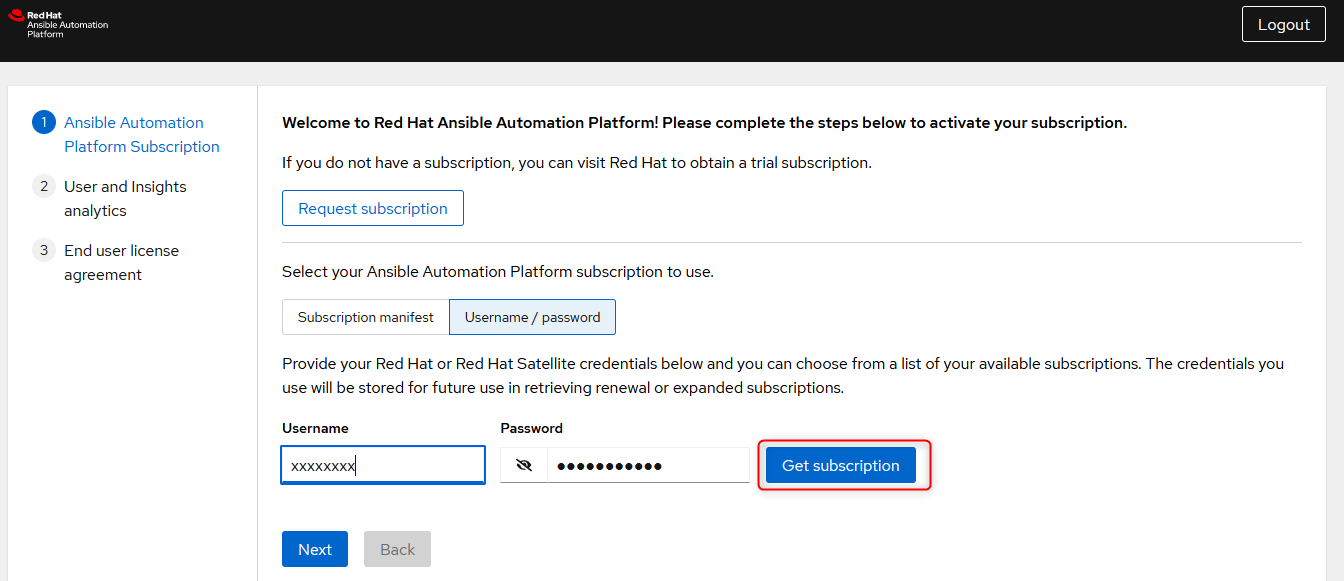
以下のようなサブスクリプション登録画面に遷移します。
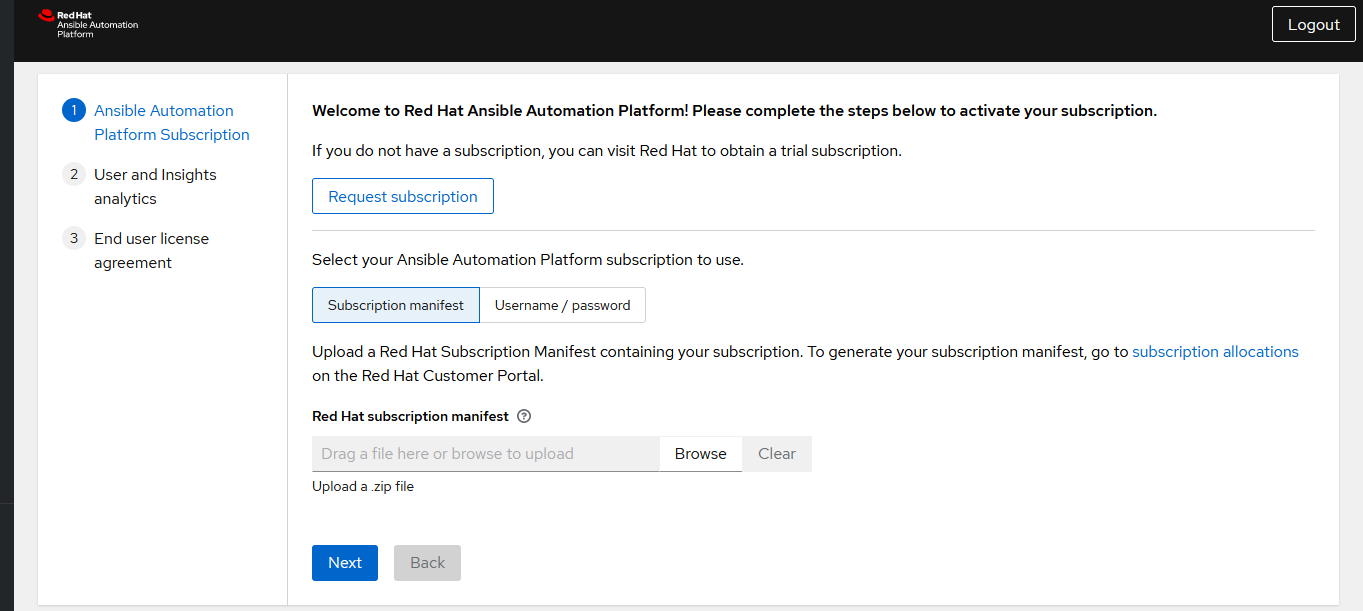
ここでサブスクリプションが求められるので、Red Hatアカウントの情報を入力し Get subscription をクリックします。
※サブスクリプションをお持ちでない場合、
無料で60日間使用できる評価版ライセンス(60 Day Product Trial of Red Hat Ansible Automation Platform, Self-Supported 100 Managed Nodes https://www.redhat.com/ja/technologies/management/ansible/try-it)
がありますので、そちらをアカウントに紐づけてから、本手順に戻ってください。
サブスクリプション登録後、2 User and Insights analyticsに同意し、3 End User License Agreementを送信すると、
Ansible Automation Platform Controller 4.1.0のダッシュボードに遷移します。
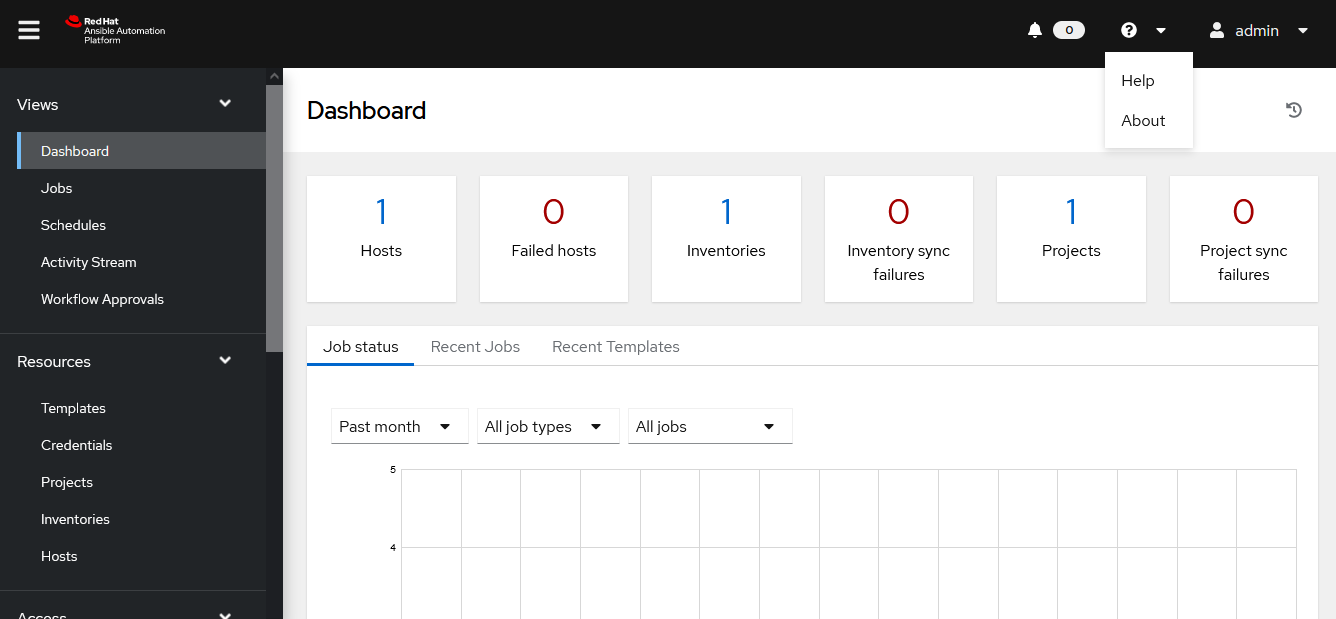
右上のタブにあるAboutをクリックしてみると、Ansible Automation Platform Controller 4.1.0であることを確認できます。
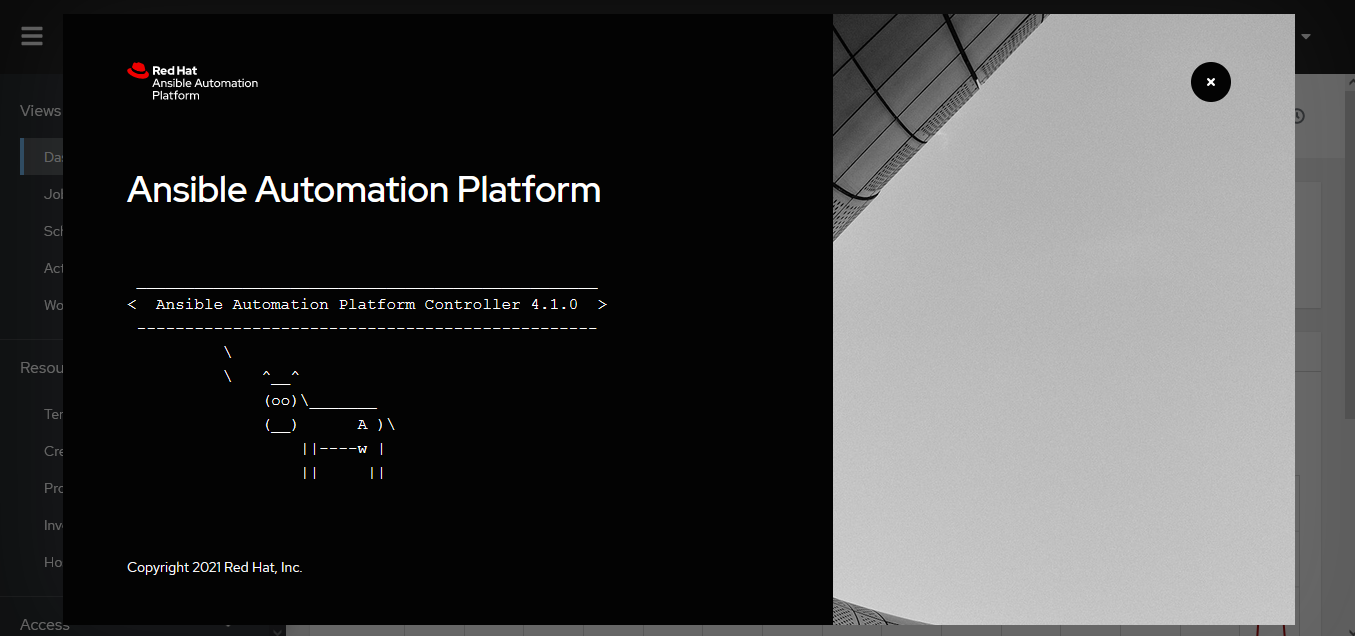
これで、Ansible Automation Platform Controller 4.1.0のセットアップは完了しました。
④ Ansible-builderでコンテナ実行環境を構築した後、playbookをつくる。
ここからは、CLIで実行環境などを整備していきます。
Ansible Automation Platform Controller 4.1.0という「箱」はできたのですが、その中身(実行環境とかplaybookとか)がまだなので、作っていきます。
まず、②で立てたRHEL8.4インスタンスにec2-userでSSHログインします。
さて、ここから色んなライブラリやパッケージをyumやpipでインストールして・・という必要はなく、
実は、Ansible Automation Platform 2.1インストール時に、
ansible-core、ansible-runner、podman
等の多くのパッケージやライブラリが標準でインストールされています。
試しにAnsibleのバージョンとpipパッケージ等を確認してみましょう。
[ec2-user]$ ansible --version
ansible [core 2.12.0]
  config file = /etc/ansible/ansible.cfg
  configured module search path = ['/var/lib/awx/.ansible/plugins/modules', '/usr/share/ansible/plugins/modules']
  ansible python module location = /usr/lib/python3.8/site-packages/ansible
  ansible collection location = /var/lib/awx/.ansible/collections:/usr/share/ansible/collections
  executable location = /usr/bin/ansible
  python version = 3.8.6 (default, Jan 22 2021, 11:41:28) [GCC 8.4.1 20200928 (Red Hat 8.4.1-1)]
  jinja version = 2.10.3
  libyaml = True
[ec2-user]$ pip3 freeze
ansible-core==2.12.0
ansible-runner==2.1.1
asn1crypto==1.2.0
Babel==2.7.0
cffi==1.13.2
click==7.1.2
cryptography==2.8
docutils==0.14
idna==2.8
Jinja2==2.10.3
lockfile==0.11.0
MarkupSafe==1.1.1
pexpect==4.6.0
ply==3.11
ptyprocess==0.5.2
pycparser==2.19
python-daemon==2.1.2
python-dateutil==2.6.1
pytz==2019.3
PyYAML==5.4.1
receptorctl==1.1.1
resolvelib==0.5.4
six==1.12.0

[ec2-user]$ podman --version
podman version 3.3.1
ansible-core==2.12.0
ansible-runner==2.1.1
python version = 3.8.6
podman version 3.3.1
等がすでにインストールされていることが確認できます。
本検証で必要となるものとしては、唯一、ansible-builderのみ入っていないので、
ansible-builderをインストールします。
なお、podmanは標準でインストールされていますが、dockerは標準ではインストールされないので、
どうしてもdockerを使いたい場合は追加でインストールしてください。
[ec2-user]$ sudo pip3 install ansible-builder
Successfully installed Parsley-1.3 ansible-builder-1.0.1 bindep-2.10.1 distro-1.6.0 packaging-21.3 pbr-5.8.0 pyparsing-3.0.6 requirements-parser-0.2.0
ansible-builderをインストールできました。
これで今回の検証で必要なパッケージはすべてそろいました。
さて、ここが重要なのですが、この先はawxユーザーに切り替えて、作業をしていきます。
Ansible Automation Platform Controller 4.1.0はawxユーザーでローカルのAnsible環境にアクセスするためです。
というのも、例えば、rootやec2-userでローカルに実行環境コンテナーをつくると、
awxユーザーではローカルにあるその実行環境コンテナーにアクセスできないのです。
今回はローカルで完結させるので、awxユーザーで作業します。
[ec2-user]$ sudo su - awx
[awx]$
awxユーザーに遷移できました、以下の作業をします。
[awx]$ pwd
/var/lib/awx   #作業ディレクトリは/var/lib/awx
[awx]$ ls
job_status  projects  public  rsyslog  uwsgi.stats  venv
[awx]$
[awx]$ mkdir builder   #/var/lib/awx配下に「builder」ディレクトリを作成
[awx]$ cd builder
[awx]$ vi requirements.yml   #/var/lib/awx/builder/配下にrequirements.ymlを作成
requirements.ymlを作成します。
このファイルではコンテナ実行環境の中にインストールしておきたいansible collectionを定義します。
今回はcisco.iosをインストールしたいので、以下のように書きます。
---
collections:
  - name: cisco.ios
続いて、ansibleの設定ファイルansible.cfgを作ります。
[awx]$ vi ansible.cfg
[defaults]
host_key_checking = False
最後に、requirements.yml、ansible.cfgなどを取りまとめて、
コンテナ実行環境を作り上げるexecution-environment.ymlを作成します。
[awx]$ vi execution-environment.yml
---
version: 1

build_arg_defaults:
  EE_BASE_IMAGE: 'quay.io/ansible/ansible-runner:stable-2.12-devel' #ベースイメージを定義

dependencies:
  galaxy: requirements.yml

additional_build_steps: # ビルド手順の前(prepend)または後(appendに追加コマンドを指定できる。今回は特に必要ないので、サンプルと同じ。適当。
  prepend: |
    RUN whoami
    RUN cat /etc/os-release
  append:
    - RUN echo This is a post-install command!
    - RUN ls -la /etc
ここまで作業したら、コンテナ実行環境をビルドする準備は整いました。
ansible-builderでビルドします。
[awx]$ ansible-builder build
Running command:
  podman build -f context/Containerfile -t ansible-execution-env:latest context
Complete! The build context can be found at: /var/lib/awx/builder/context

[awx]$ podman images
REPOSITORY                       TAG                IMAGE ID      CREATED             SIZE
localhost/ansible-execution-env  latest             36f9480d7fbb  About a minute ago  820 MB
<none>                           <none>             a6b09c838ade  2 minutes ago       836 MB
<none>                           <none>             69eabd503cc3  3 minutes ago       777 MB
quay.io/ansible/ansible-runner   stable-2.12-devel  cf3335b25a2a  8 hours ago         763 MB
quay.io/ansible/ansible-builder  latest             0ca8b4e5d250  8 hours ago         655 MB
ビルド実行完了まで少し待ちます。
Complete!と表示され、localhost/ansible-execution-env:latestというコンテナ実行環境のイメージができました。
(ちょっとここで余談的な内部動作の話ですが、
このlocalhost/ansible-execution-env:latestイメージを元にして、ansible-runnerでplaybookを実行するごとに、実行環境コンテナが作られ、playbookの実行が終わると自動的にコンテナ自体は削除されます。そしてまた、playbookを実行すると、localhost/ansible-execution-env:latestイメージを元にして実行環境コンテナが作られ・・・ということを繰り返していきます。)
続いて、実行するplaybookを配置していきます。
/var/lib/awx/projects/配下にiosディレクトリ(ディレクトリ名は任意)を作って、その中にplaybookを配置します。
/var/lib/awx/projects/配下に直接playbookを配置すると認識されないことに注意してください。
[awx]$ cd projects/
[awx]$ mkdir ios
[awx]$ cd ios
[awx]$ vi show_version.yml
ネットワーク機器のバージョン収集をして、標準出力するplaybookを作ります。
---
- hosts: ios
  gather_facts: no

  tasks:
    - name: show test
      ios_command:
        commands:
          - show version
      register: result

    - name: debug test
      debug:
        msg: "{{ result }}"
これで、CLIで準備することは全て完了しました。
⑤ Automation Platform Controller 4.1.0にログインし、ジョブテンプレートを実行するための各種設定をする。
まずは、Execution Environmentを新規作成します。
Execution Environment > Add をクリックします。
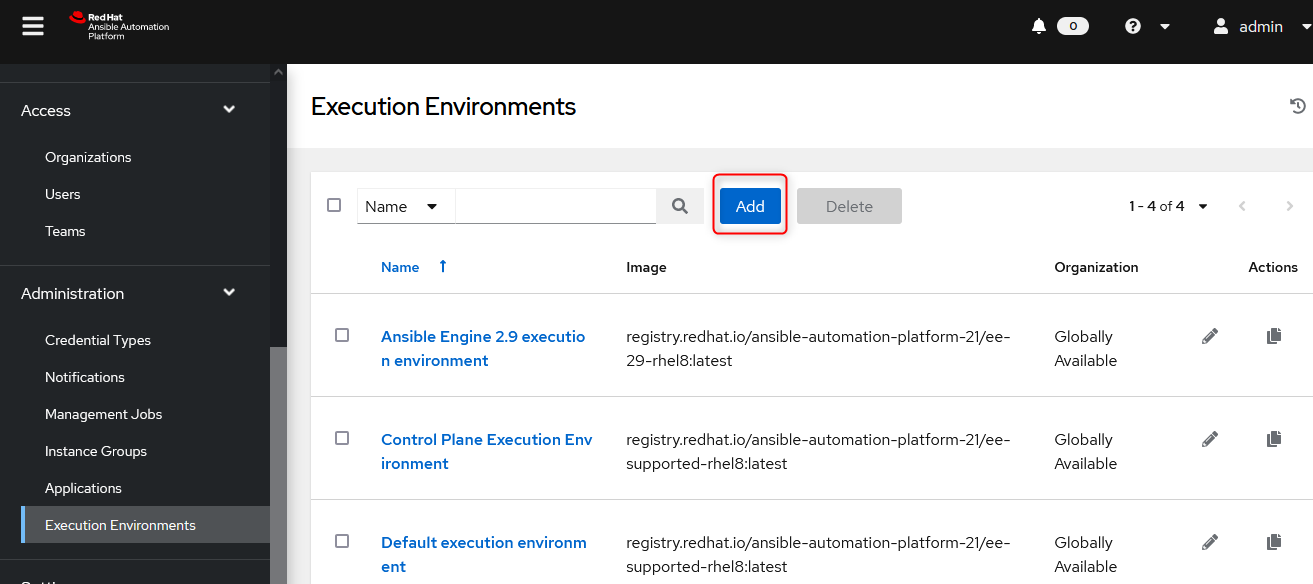
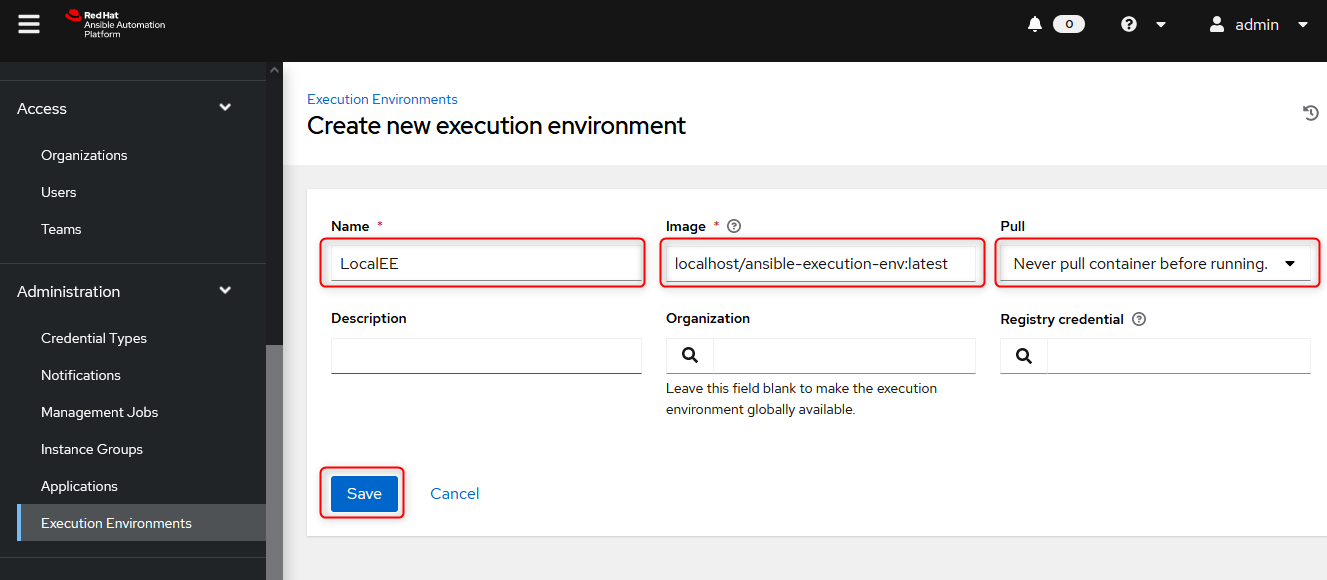
Create new execution environmentで下記のように入力、選択します。
Name欄は任意のExecution Environment名を入力します。
Image欄には④の手順で作った、localhost/ansible-execution-env:latestコンテナイメージを登録しています。
入力、選択後、「Save」します。
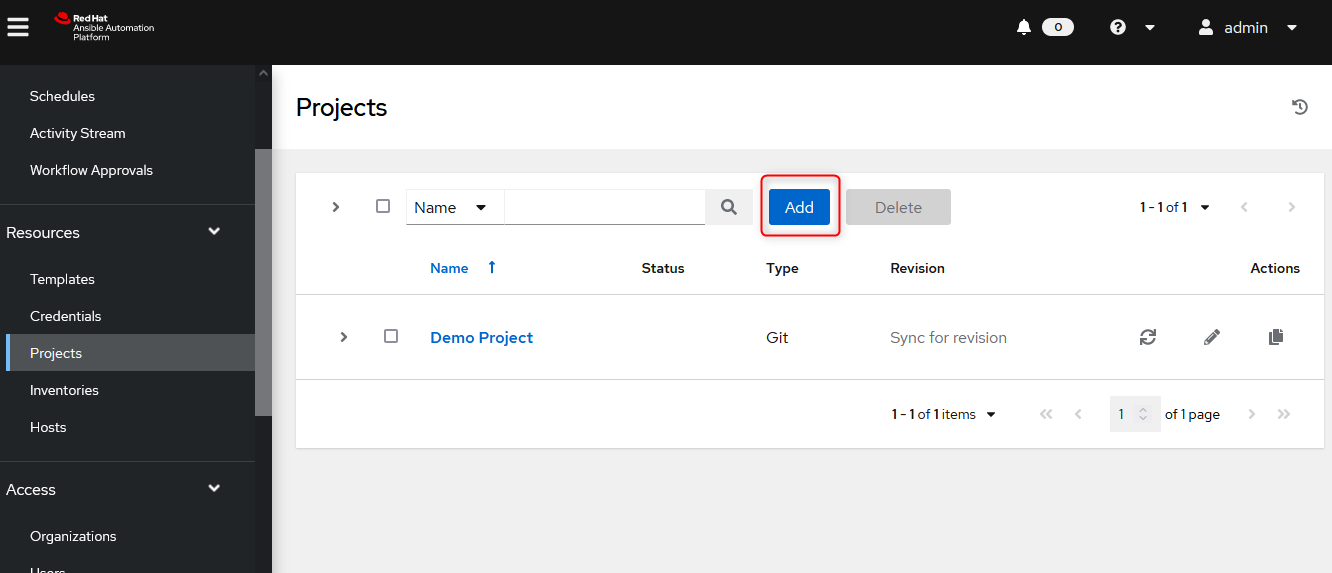
続いて、プロジェクト設定をします。
Project > Addをクリックします。
下記のように入力、選択します。
Name欄は任意のProject名を入力します。
Execution Environment欄はさきほど作った「LocalEE」を選択。
Source Control Credential Type欄で「Manual」を選択し、
Playbook Directory欄は④で作った/var/lib/awx/projects/ios ディレクトリを選択します。

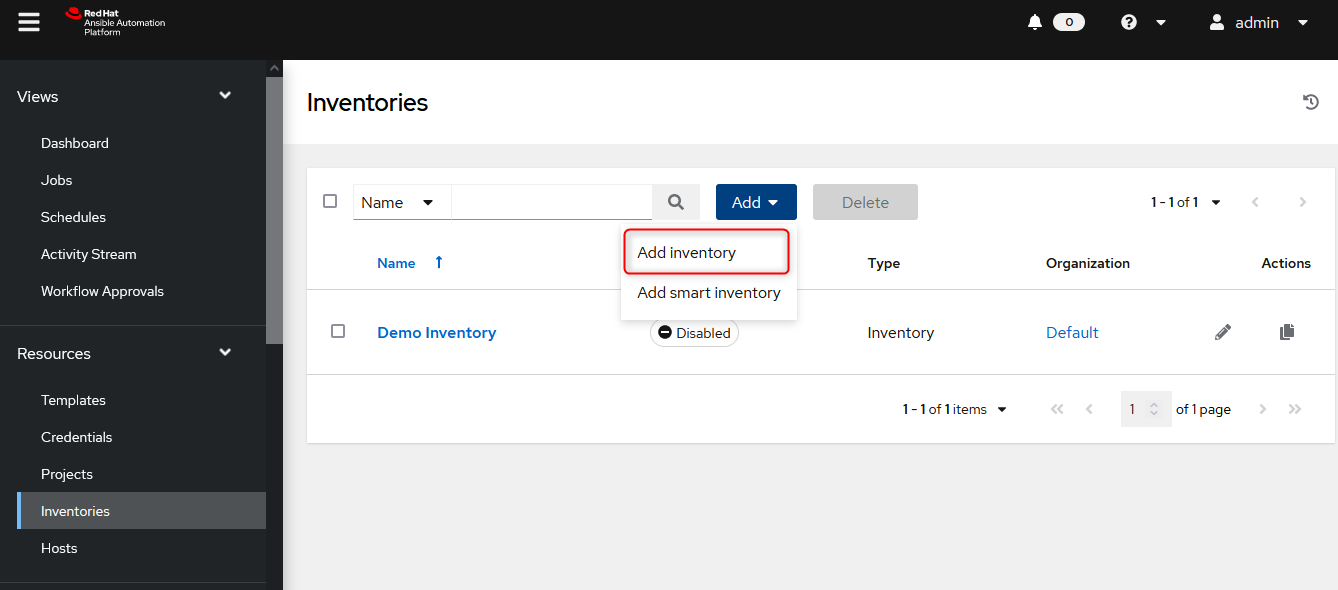
続いて、インベントリー設定をします。
Inventory > Add > Add Inventory をクリックします。
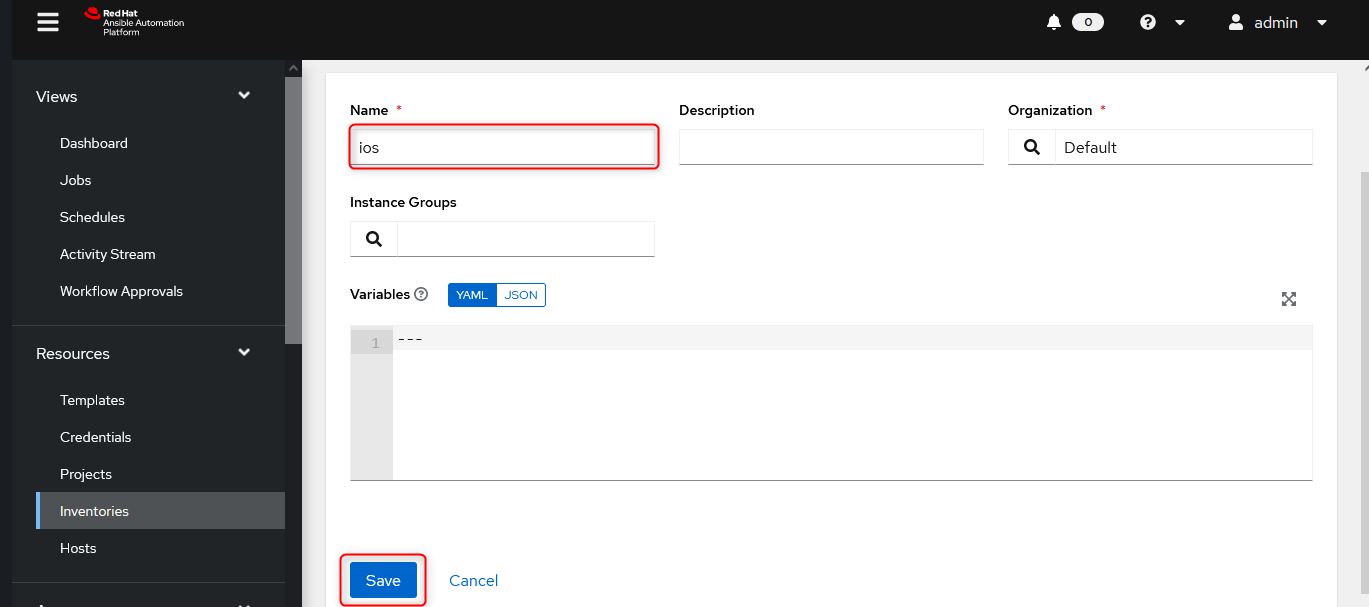
インベントリー名は任意です。ここでは「ios」とします。
入力後、「Save」します。
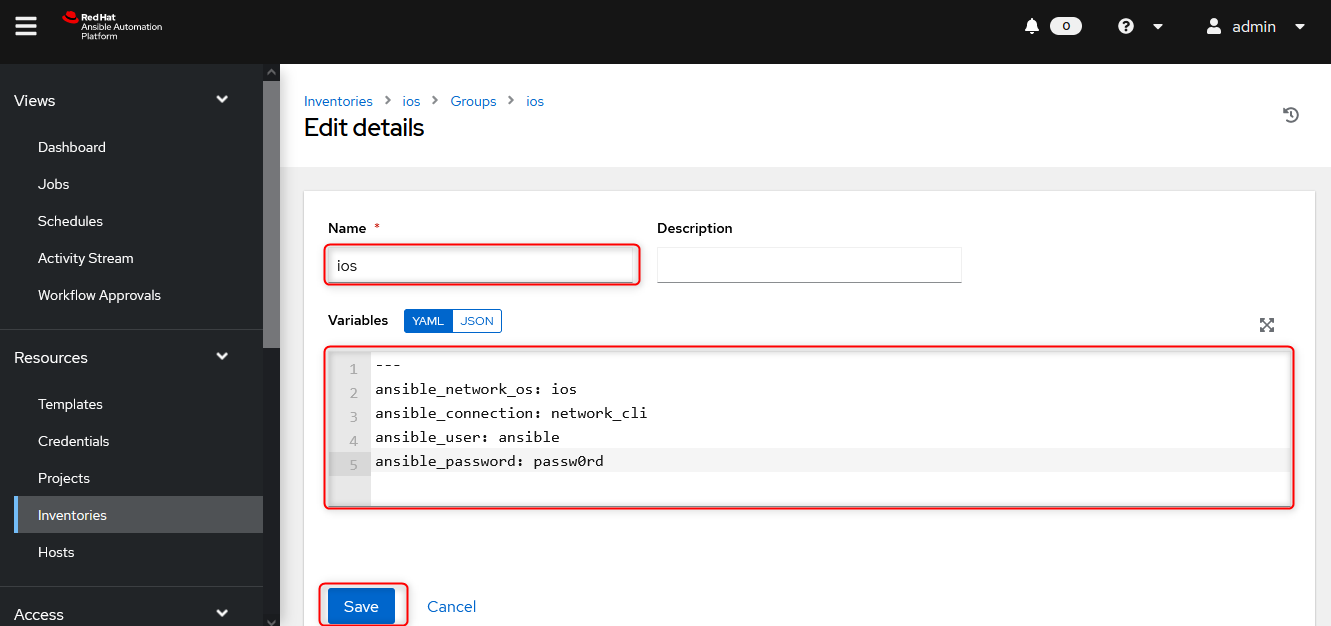
インベントリーに所属するグループ設定をします。
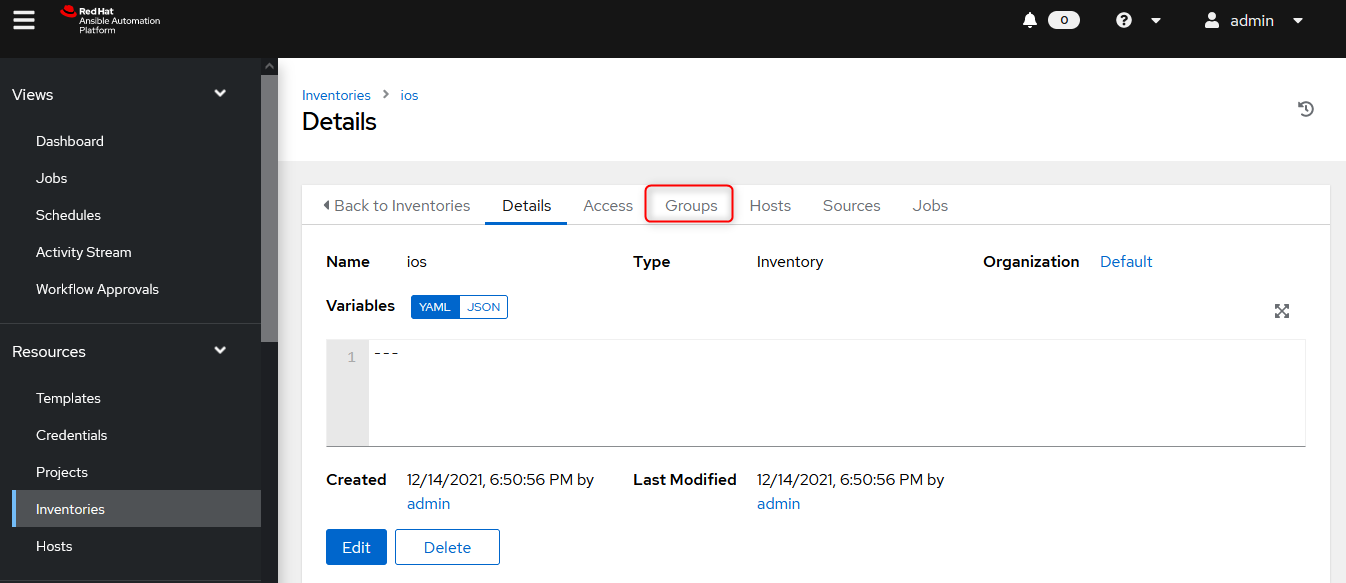
グループ名は任意です。ここでは「ios」とし、iosグループの変数を設定します。
下記画像のようにネットワーク機器への接続に必要な4つの変数と値を設定します。
入力完了後、「Save」します。
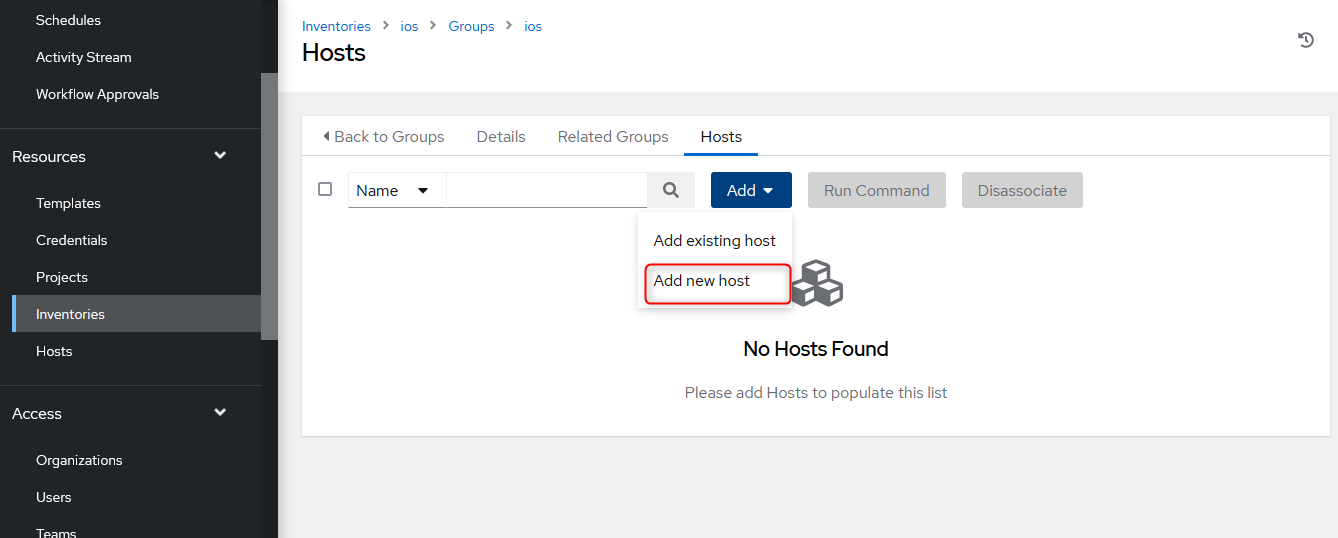
続いて、「ios」グループに所属するホストの設定をします。
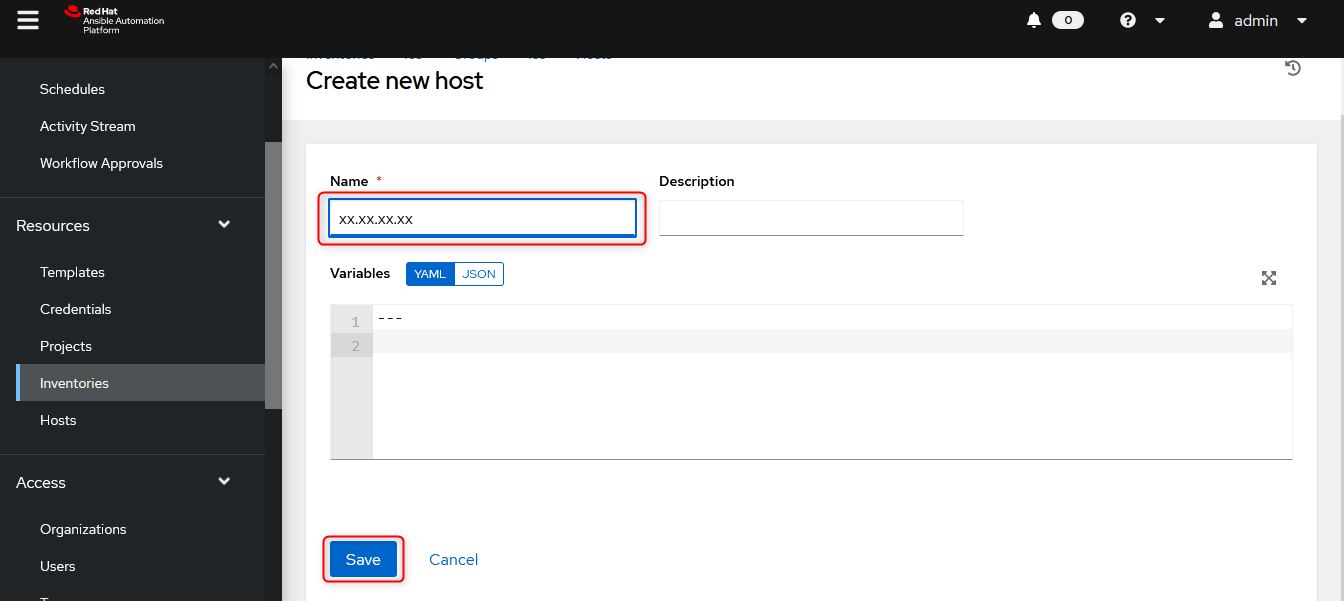
Add > Add new host をクリックします。
Name欄に①で作成したネットワーク機器のホスト名(IPアドレスか、名前解決のできるホスト名)を入力し、「Save」します。
続いて、ジョブテンプレートを設定します。
Templates > Add > Add job templateをクリックします。
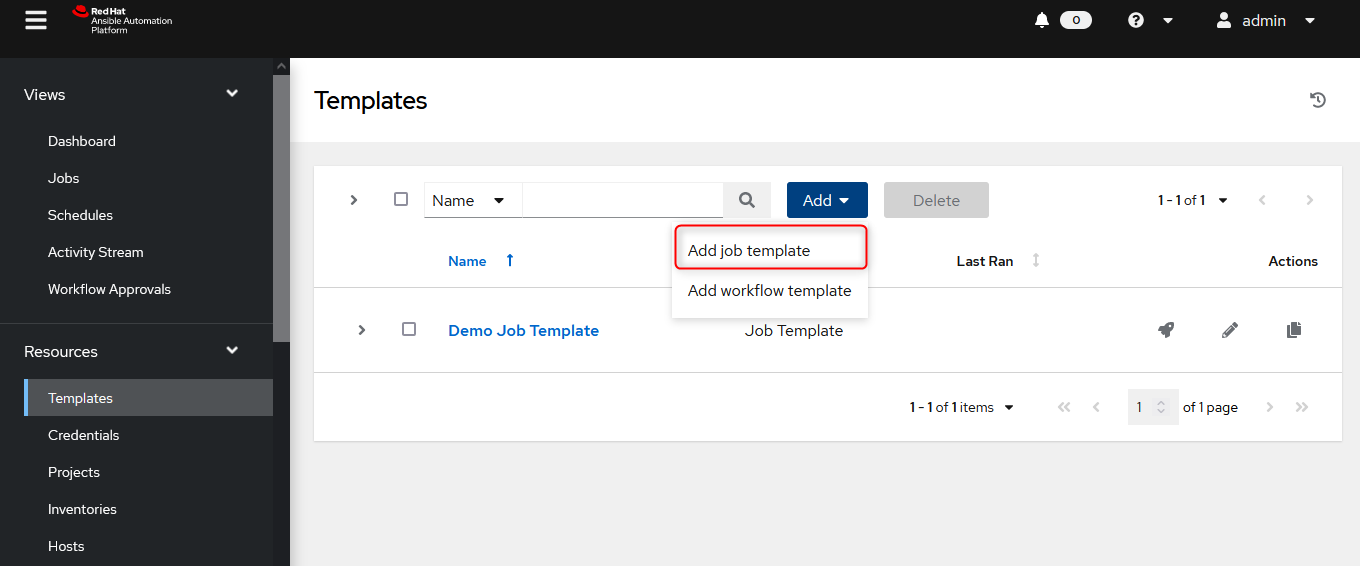
Create New Job Templatで以下のように入力、選択します。
Name欄は任意のJT名です。ここでは「show_version_JT」とします。
Job Type欄は「Run」を選択します。
Inventory欄は「ios」を選択します。
Project欄は「Ze0 Project」を選択します。
playbook欄は「show_version.yml」を選択します。
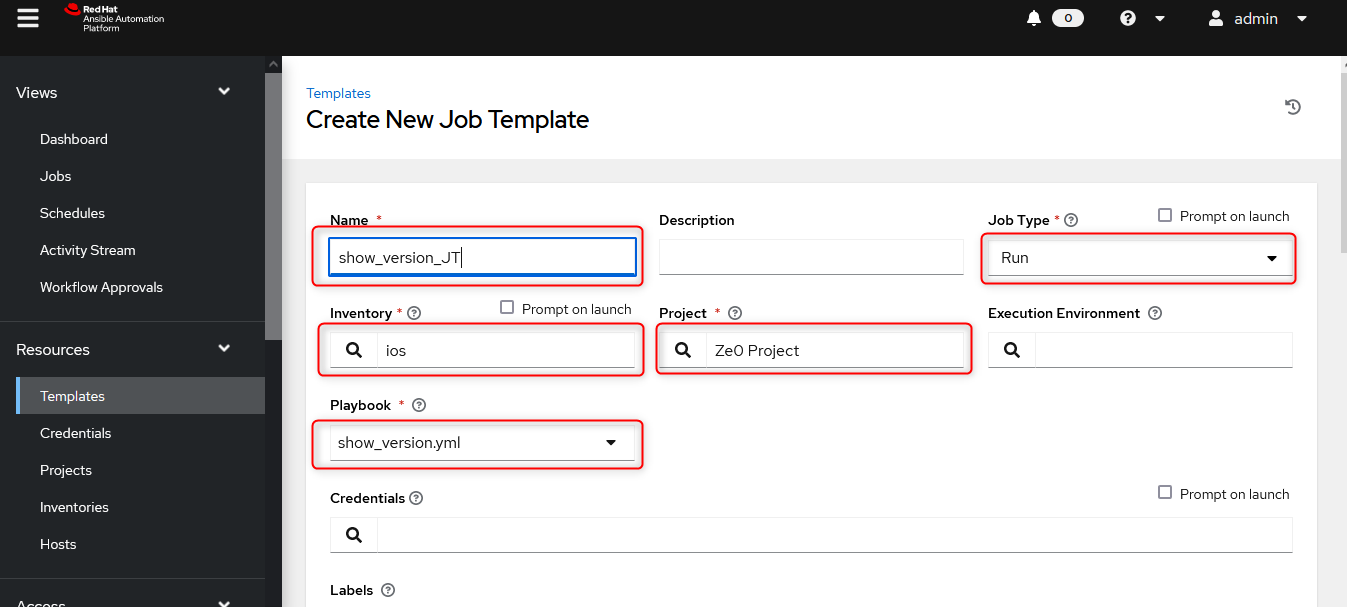
画面下部にスクロールし、「Save」します。
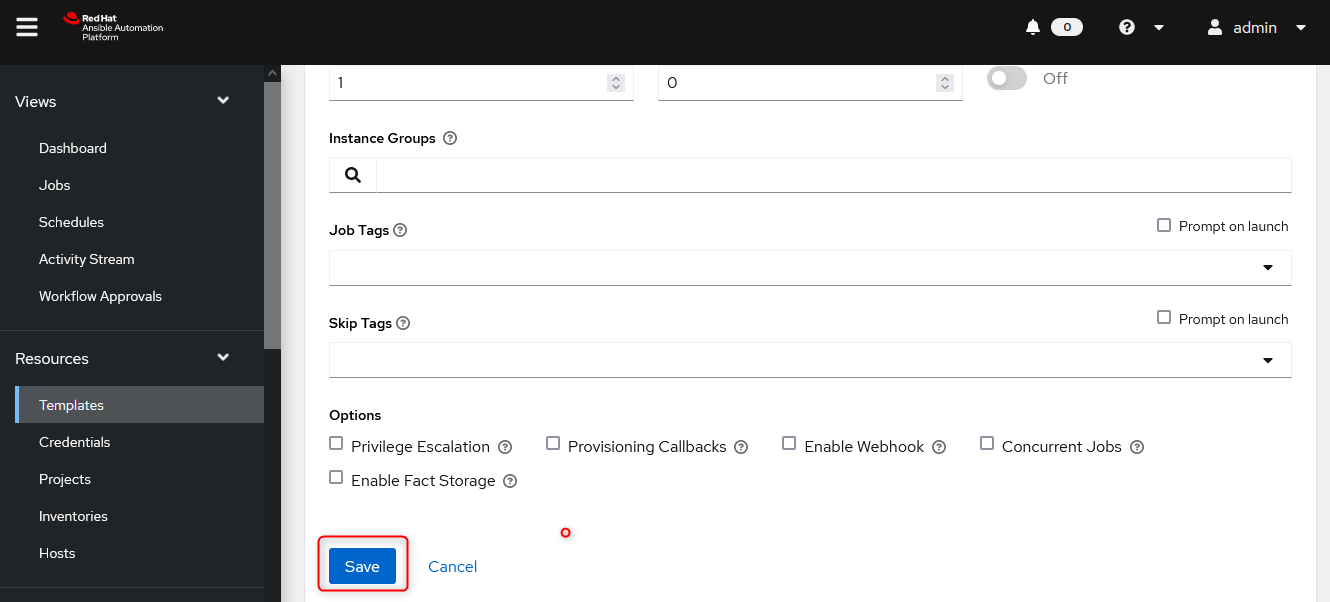
これで、すべての準備が整いました。
あとは、ジョブテンプレートを実行するのみです。
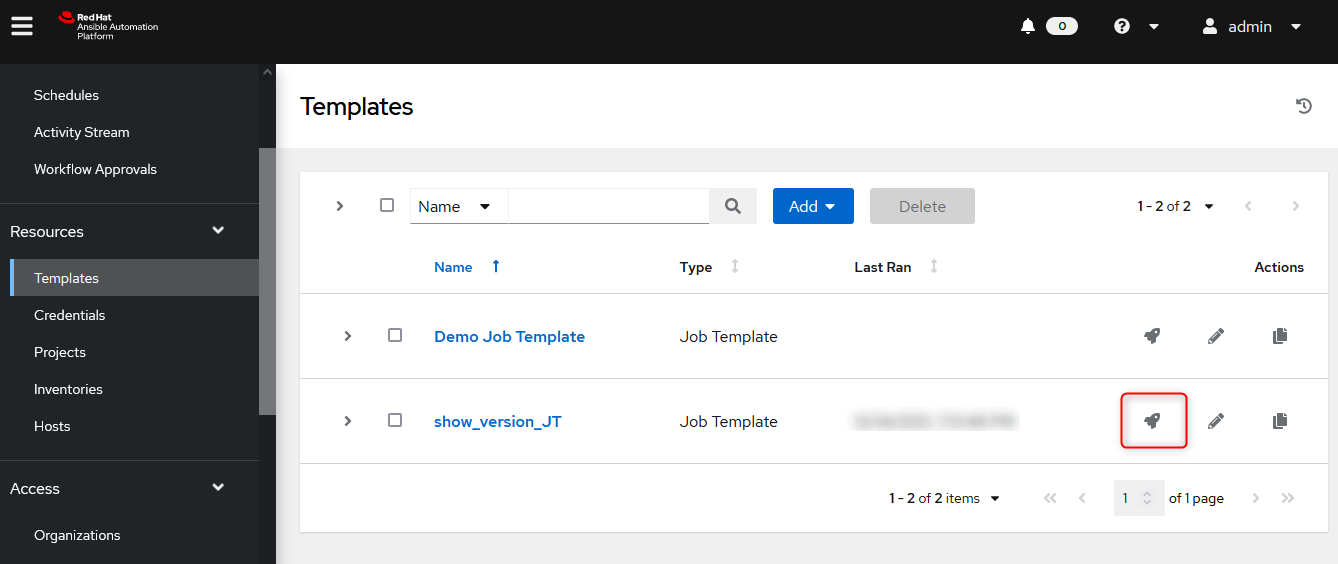
⑥ ジョブテンプレートを実行する。
Templates >「show_version_JT」のロケットマークをクリックすると、ジョブテンプレートが起動します。
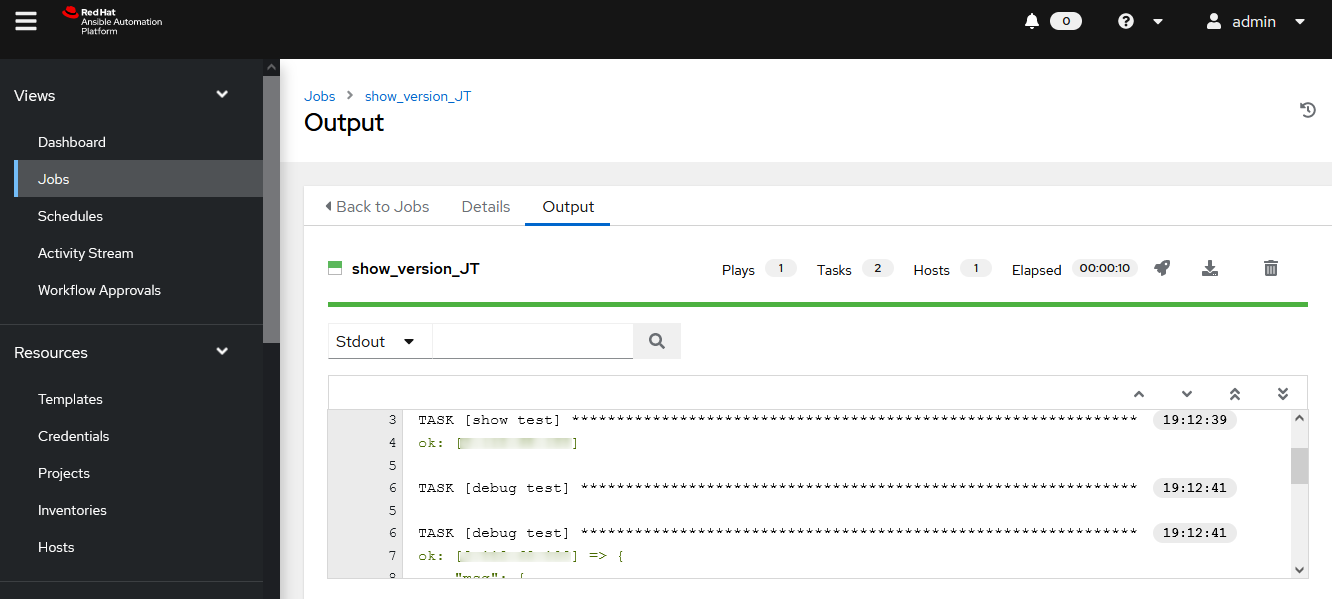
⑦ ネットワーク機器の情報取得が成功することを確認する。
ジョブテンプレートの実行が成功すると、下のように緑色に点灯し、
ネットワーク機器「Cisco Cloud Services Router (CSR) 1000V」のバージョン情報を取得することができます。
■まとめ
本記事では、
Ansible Automation Platform 2.1のインストールをして、Ansible Automation Platform Controller 4.1.0を構築し、
NW機器の情報取得をするジョブテンプレートを実行するまでの一連の流れをご紹介いたしました。
今回はあくまで単一ノード構成であり、
Ansible Automation Platform Controller 4.1.0 はもっと複雑なノード構成をとることもできます。
次回以降は"Automation mesh"を題材にした分散複数ノード構成の検証について、まとまれば、記事にしたく思います。
お読みいただき、ありがとうございました。
よいクリスマスをお過ごしください。![]()
![]()
![]()
■ 参考
Product Documentation for Red Hat Ansible Automation Platform 2.1
https://access.redhat.com/documentation/en-us/red_hat_ansible_automation_platform/2.1
Red Hat Ansible Automation Platform 2.1 installation guide
https://access.redhat.com/documentation/en-us/red_hat_ansible_automation_platform/2.1/html/red_hat_ansible_automation_platform_installation_guide/index
Automation Controller User Guide v4.1.0
https://docs.ansible.com/automation-controller/latest/html/userguide/index.html
Introducing Red Hat Ansible Automation Platform 2.1
https://www.ansible.com/blog/introducing-red-hat-ansible-automation-platform-2.1