今までRaspberry PiなどのディバイスからIoTHub経由でAzure上にメッセージを送信することは多々あったのですが、逆を試みたことはなく、今回Azure上にデプロイしたIoTHubから、Raspberry Piにメッセージを送信してみました。
準備したもの
・Raspberry Pi3 Model B
・AzureIoTHub(Freeプラン)
参考にしたMSのドキュメント
https://docs.microsoft.com/ja-jp/azure/iot-hub/iot-hub-python-python-c2d
●手順
とりあえずさらのラズパイでPythonを使えるように準備するまでの手順は省略
1.Raspberry Piに必要なパッケージをインストールする。
pip install azure-iothub-device-client
pip install azure-iothub-service-client
2.IoTHubをAzure上にデプロイする。
3.IoTHubにディバイスを登録し、接続文字列を生成しておく。
4.メッセージを受けるようのプログラムを用意
※CONNECTION_STRINGの中身は3.で生成した接続文字列に書き換える。
import threading
import time
from azure.iot.device import IoTHubDeviceClient

RECEIVED_MESSAGES = 0
CONNECTION_STRING = "{CONNECTION_STRING}"

def message_listener(client):
    global RECEIVED_MESSAGES
    while True:
        message = client.receive_message()
        RECEIVED_MESSAGES += 1
        print("Message received")
        print( "    Data: <<{}>>".format(message.data) )
        print( "    Properties: {}".format(message.custom_properties))
        print( "    Total calls received: {}".format(RECEIVED_MESSAGES))

def iothub_client_sample_run():
    try:
        client = iothub_client_init()

        message_listener_thread = threading.Thread(target=message_listener, args=(client,))
        message_listener_thread.daemon = True
        message_listener_thread.start()

        while True:
            time.sleep(1000)

    except KeyboardInterrupt:
        print ( "IoTHubDeviceClient sample stopped" )

def iothub_client_init():
    # Create an IoT Hub client
    client = IoTHubDeviceClient.create_from_connection_string(CONNECTION_STRING)
    return client

if __name__ == '__main__':
    print ( "Starting the IoT Hub Python sample..." )
    print ( "IoTHubDeviceClient waiting for commands, press Ctrl-C to exit" )

    iothub_client_sample_run()
5.test.pyという名前でRaspberry Piの適当な場所に保存
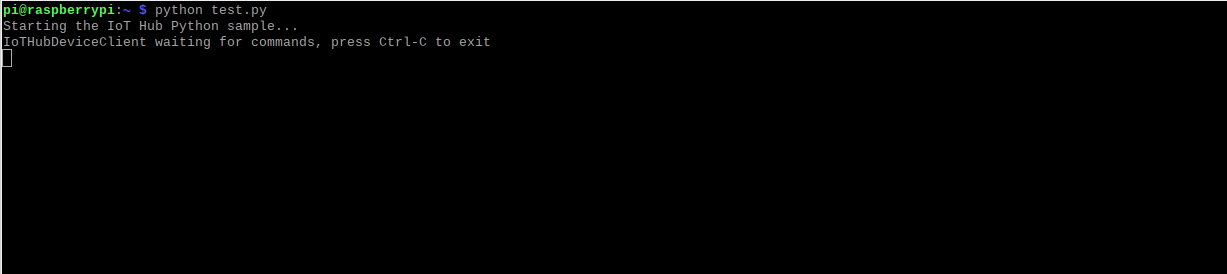
6.Raspberry Piでtest.pyを実行
画像のような待ち受け状態になってればOK。
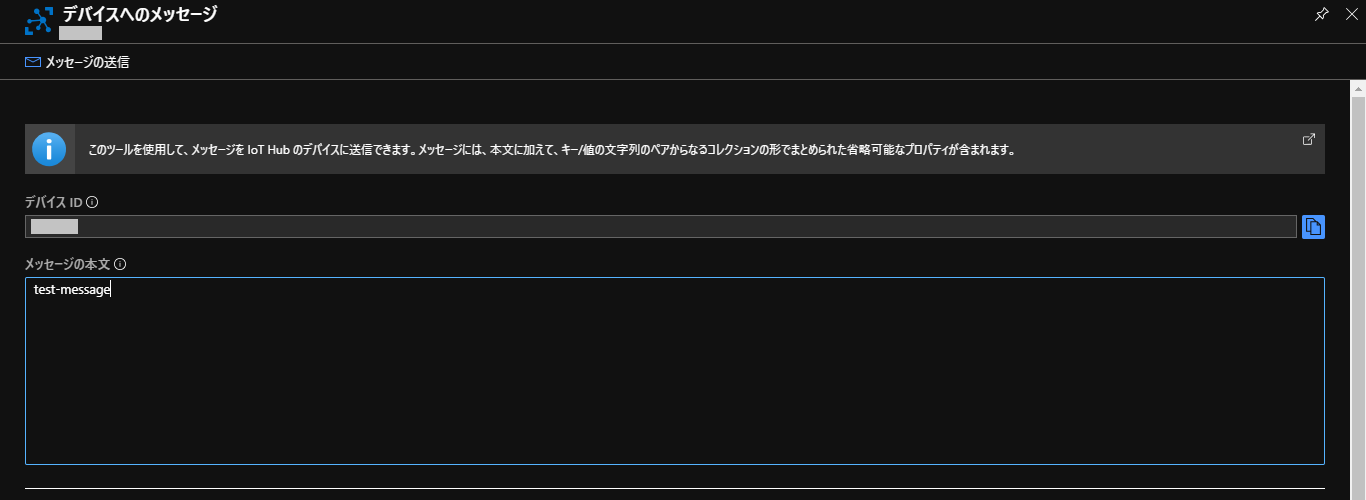
5.Azureポータル上で登録したディバイスへのメッセージを送信
今回はtest-messageと送っています。
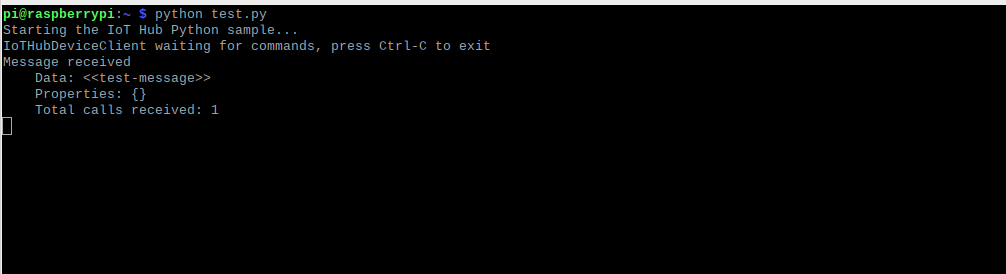
6.Raspberry Piで受け取れているかを確認
受け取れていれば画面のように受け取ったメッセージが表示される。
上記のようにIoTHubからディバイスへのメッセージ送信を試してみることが出来ました。
特筆すべき点は試す費用が比較的安価なところ!(IoTHubはFreeプランでもディバイスへのメッセージ送信をサポートしています。)
今からIoTをやってみようという方も気軽に試せる感じとなっております。