Photoshop やペイントツールにある定番の機能「塗りつぶし」を実装してみたくなったので、なんとなく JavaScript で実装してみました。ついでに塗りつぶされる過程を可視化したかったのでアニメーション風にしてみたのと、canvas で実際に絵を描いて塗りつぶす実装をやってみました。
flood fill アルゴリズム
塗りつぶしには flood fill ( seed fill とも呼ぶ ) というアルゴリズムが使われるようです。高速化などいろんな改善されたアルゴリズムがあるので、最速の塗りつぶしアルゴリズムを探求するのも面白いかもしれません。今回は単純なアルゴリズムと、少し高速なアルゴリズムを実装してみました。
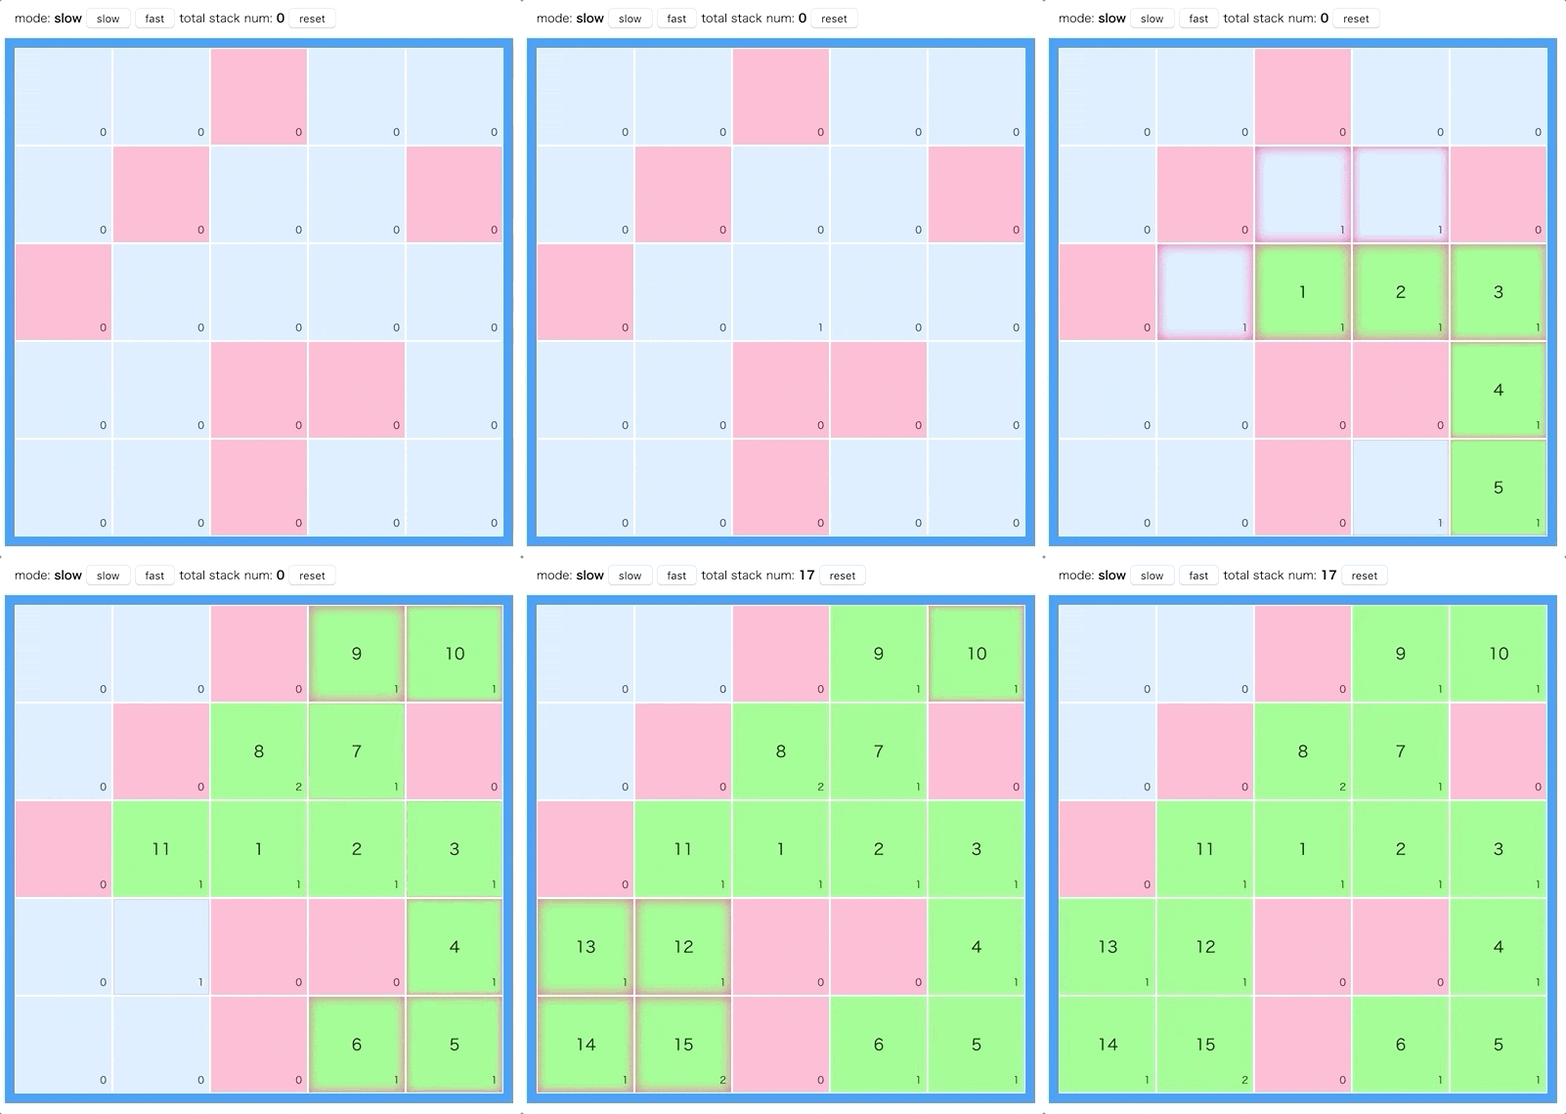
動作イメージ
枠が赤く光っているところがスタックに積んでいる探索対象のセルです。
原始的な実装
非常に原始的な実装です。起点となる場所を塗ったら、上下左右をスタックに積んで塗りつぶし可能なら塗りつぶして繰り返すというものです。非常に多くのスタックを積むので環境や条件によってはスタックオバーフローで死にます。でもシンプルですね。
動作デモの「slow」モードです。
const width = 15
const height = 15

// 塗りつぶし用の配列を作成
// 0 で塗りつぶしているというデータ
const table = []
for (let w = 0; w < width; w++) {
  for (let h = 0; h < height; h++) {
    if (!table[w]) {
      table[w] = []
    }
    table[w][h] = 0
  }
}

// 3で塗りつぶす
const replaceColor = 3

// 起点
const point = { x: 7, y: 7 }
const targetColor = table[point.y][point.x]
const buffer = []
buffer.push(point)
while (buffer.length > 0) {
  const target = buffer.pop()
  // 領域外はスキップ
  if (target.x < 0 || target.x >= width || target.y < 0 || target.y >= height) {
    continue
  }
  // 違う要素にぶつかったらスキップ
  if (table[target.x][target.y] === replaceColor) {
    continue
  }
  if (table[target.x][target.y] === targetColor) {
    table[target.x][target.y] = replaceColor
    // 自身の上下左右をスタックへ
    buffer.push({ x: target.x - 1, y: target.y })
    buffer.push({ x: target.x + 1, y: target.y })
    buffer.push({ x: target.x, y: target.y - 1 })
    buffer.push({ x: target.x, y: target.y + 1 })
  }
}
探索数を減らす
探索する数を少しだけ減らしました。左右で行けるところまで塗りつぶしながら、上下に分岐可能なものを全てスタックに積んでいます。
動作デモの「fast」モードです。
const checkRange = (x, y) => {
  return x >= 0 && x < width && y >= 0 && y < height
}

const valid = (x, y) => {
  return checkRange(x, y) && table[y][x] === targetColor
}

while (buffer.length > 0) {
  count++
  const target = buffer.pop()
  if (!checkRange(target.x, target.y, width, height)) {
    continue
  }
  if (table[target.y][target.x] === replaceColor) {
    continue
  }
  if (table[target.y][target.x] !== targetColor) {
    continue
  }

  table[target.y][target.x] = replaceColor

  // 左端まで行く
  let rightX = target.x + 1
  while (rightX < width && table[target.y][rightX] === targetColor) {
    table[target.y][rightX] = replaceColor
    if (valid(rightX, target.y - 1)) {
      buffer.push({ x: rightX, y: target.y - 1 })
    }
    if (valid(rightX, target.y + 1, width, height)) {
      buffer.push({x: rightX, y: target.y + 1})
    }
    rightX++
  }

  // 左端まで行く
  let leftX = target.x - 1
  while (leftX >= 0 && table[target.y][leftX] === targetColor) {
    table[target.y][leftX] = replaceColor
    if (valid(leftX, target.y - 1, width, height)) {
      buffer.push({ x: leftX, y: target.y - 1 })
    }
    if (valid(leftX, target.y + 1, width, height)) {
      buffer.push({x: leftX, y: target.y + 1})
    }
    leftX--
  }
  if (valid(target.x, target.y - 1, width, height)) {
    buffer.push({ x: target.x, y: target.y - 1 })
  }
  if (valid(target.x, target.y + 1, width, height)) {
    buffer.push({x: target.x, y: target.y + 1})
  }
}
1次元配列にする
アルゴリズムというわけではないですが、今まではわかりやすさのために2次元配列で x, y を表現してましたが、実際には1次元配列の方が処理は高速です。ちょっとした計算が手間ですが2倍ほど高速になりました。配列のインデックス直視指定にすると length も大きくなってからの要素が入ってしまうのが微妙ですが…。
const buffer = []

const add = (i) => {
  buffer[i] = i
}

const checkRange = (i) => {
  return i >= 0 && i < list.length
}

const chunk = (arr, n) => {
  const len = Math.round(arr.length / n)
  const ret = []
  for (let i = 0; i < len; i++) {
    ret.push(arr.slice( i * n, i * n + n))
  }
  return ret
}

const valid = (i) => {
  return checkRange(i) && list[i] === targetColor && buffer[i] === undefined
}

const point = { x: 7, y: 7 }
const index = point.y * width + point.x

const list = [].concat(...table)
const targetColor = list[index]

add(index)
while (buffer.length > 0) {
  const index = buffer.pop()
  if (!checkRange(index)) {
    continue
  }
  if (list[index] === replaceColor) {
    continue
  }

  if (list[index] !== targetColor) {
    continue
  }

  list[index] = replaceColor
  const start = Math.ceil(index / width) * width
  const end = Math.ceil(index / width) * width + width - 1

  // 右端まで行く
  if (index + 1 <= end) {
    let rightX = index + 1
    while (rightX < end && list[rightX] === targetColor) {
      list[rightX] = replaceColor
      const up = rightX - width
      const down = rightX + width
      if (valid(up)) {
        add(up)
      }
      if (valid(down)) {
        add(down)
      }
      rightX++
    }
  }

  // 左端まで行く
  if (index - 1 >= start) {
    let leftX = index - 1
    while (leftX >= start && list[leftX] === targetColor) {
      list[leftX] = replaceColor
      const up = leftX - width
      const down = leftX + width
      if (valid(up)) {
        add(up)
      }
      if (valid(down)) {
        add(down)
      }
      leftX--
    }
  }

  const up = index - width
  const down = index + width
  if (valid(up)) {
    add(up)
  }
  if (valid(down)) {
    add(down)
  }
}
chunk(list, width)
canvas で塗りつぶし
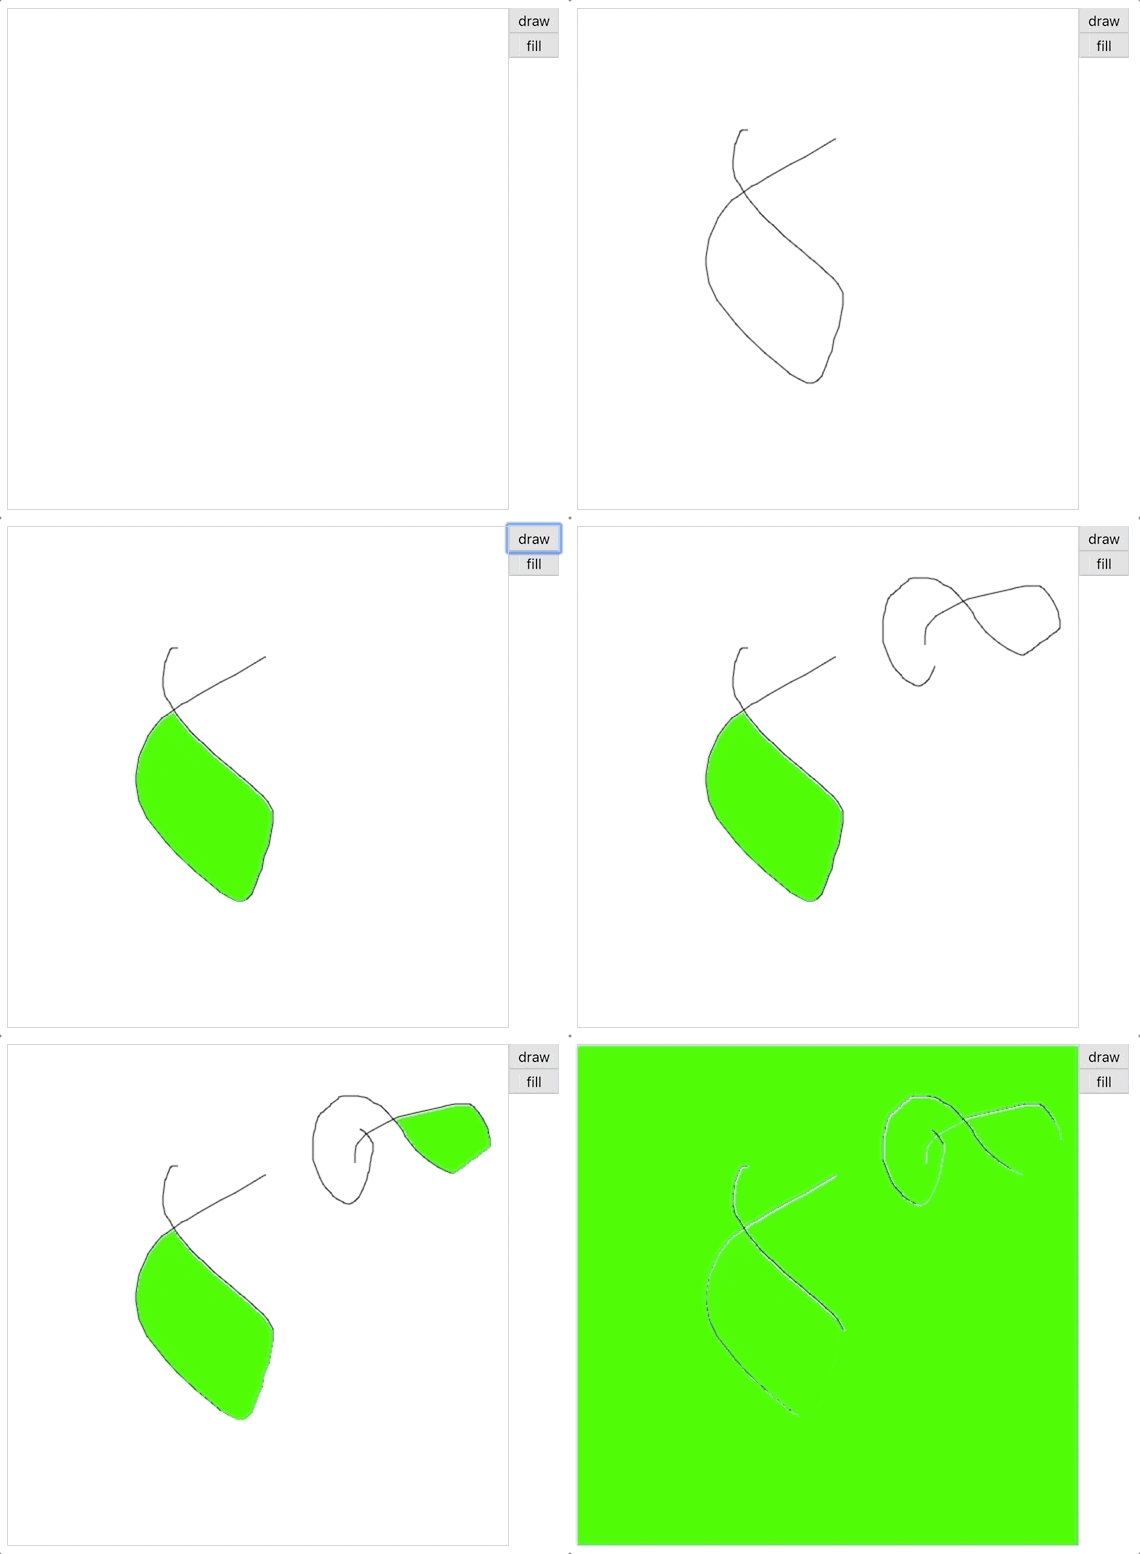
せっかくなので canvas で線を描いて塗りつぶす動作を実装してみます。
アルゴリズム的には特に違いはありません。canvas で高速化するところ行ったら描画を一気にするために context.getImageData でデータを取得後、塗りつぶすピクセルの色を直接変更して最後に context.putImageData するくらいです。
const imageData = context.getImageData(0, 0, maxWidth, maxHeight)
table.forEach((row, y) => {
  row.forEach((col, x) => {
    const pos = floodFillCanvas.startPosition(x, y)
    if (table[y][x] === '0,255,0,255') {
      imageData.data[pos] = 0
      imageData.data[pos + 1] = 255
      imageData.data[pos + 2] = 0
      imageData.data[pos + 3] = 255
  }
  })
})
context.putImageData(imageData, 0, 0)
頭の中ではこうなってるんだろうなーと想像するようなアルゴリズムでも、実際に実装をしてみると意外とハマりどころがあったりして面白かったです。

