- MySQL Workbench 6.3
- Vagrant
- CentOS6
- MySQL5
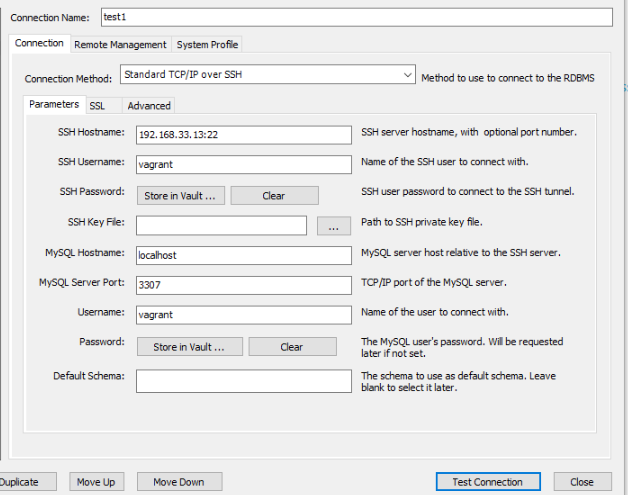
Host(Windows)からvagrant内のMySQLに接続できるよう設定をしていきます
Vagrantfile
※ WindowsにMySQLをインストールしている場合、ポートが競合してしまうので「3307」にする
Vagrant.configure("2") do |config|

.
.

  config.vm.network "private_network", ip: "192.168.33.13"
  config.vm.network :forwarded_port, guest: 3307, host: 3307

.
.

end
MySQLの設定
3307ポートで接続できるように設定
vi /etc/my.cnf
[mysqld]
port=3307
確認
service mysqld restart
netstat -ant
tcp 0 0 :::3307 :::* LISTEN
Hostから接続できるように設定
下記でアクセス可能にする
ユーザ: vagrant
パスワード: vagrant
mysql -u root

CREATE USER vagrant;
# TCP/IPからログインできるように
GRANT ALL ON *.* TO vagrant@'%' IDENTIFIED BY 'vagrant';
# hostname localhostでログインできるように
GRANT ALL ON *.* TO vagrant@'localhost' IDENTIFIED BY 'vagrant';

FLUSH PRIVILEGES;
vagrant reload
※ 下記の組み合わせだとうまくいかなかった
- MySQL Workbench 8.0
- Vagrant
- CentOS6
- MySQL5