Djangoを触る機会があったので、ver2.1の公式ドキュメントのチュートリアル通りにお試ししてみた作業ログ。
タイトルは盛り過ぎました。pipのインストールとアクセス制限のところで時間喰って45分くらいかかりました![]()
Ubuntuサーバを用意
Vagrantのubuntu/bionic64を使って構築しました。
vagrant@django-serv:~$ cat /etc/lsb-release
DISTRIB_ID=Ubuntu
DISTRIB_RELEASE=18.04
DISTRIB_CODENAME=bionic
DISTRIB_DESCRIPTION="Ubuntu 18.04.2 LTS"
vagrant@django-serv:~$
Python環境は
vagrant@django-serv:~$ python3 --version
Python 3.6.7
vagrant@django-serv:~$ python3
Python 3.6.7 (default, Oct 22 2018, 11:32:17)
[GCC 8.2.0] on linux
Type "help", "copyright", "credits" or "license" for more information.
>>> import django
Traceback (most recent call last):
  File "<stdin>", line 1, in <module>
ModuleNotFoundError: No module named 'django'
>>>
vagrant@django-serv:~$
Djangoはまだ入っていない。
さっそく始めましょう。
Django ドキュメント | Django ドキュメント | Django
以下、VMのIPアドレスは192.168.244.201とします。
Djangoのインストール
クイックインストールガイド | Django ドキュメント | Django
ここからInstall the Django codeを参照。
vagrant@django-serv:~$ pip install Django==2.1

Command 'pip' not found, but can be installed with:

apt install python-pip
Please ask your administrator.

vagrant@django-serv:~$
oh...
pipのインストール
vagrant@django-serv:~$ sudo apt install python-pip
Reading package lists... Done
Building dependency tree
Reading state information... Done
:
:
大量にパッケージインストールされるけどこれは2.7版だった。
正解はpython3-pipだった。
vagrant@django-serv:~$ sudo apt install python3-pip
Reading package lists... Done
Building dependency tree
Reading state information... Done
The following additional packages will be installed:
  dh-python libpython3-dev libpython3.6-dev python3-crypto python3-dev
  python3-distutils python3-keyring python3-keyrings.alt python3-lib2to3
  python3-secretstorage python3-setuptools python3-wheel python3-xdg
  python3.6-dev
Suggested packages:
  python-crypto-doc gnome-keyring libkf5wallet-bin gir1.2-gnomekeyring-1.0
  python-secretstorage-doc python-setuptools-doc
The following NEW packages will be installed:
  dh-python libpython3-dev libpython3.6-dev python3-crypto python3-dev
  python3-distutils python3-keyring python3-keyrings.alt python3-lib2to3
  python3-pip python3-secretstorage python3-setuptools python3-wheel
  python3-xdg python3.6-dev
vagrant@django-serv:~$ ll /usr/bin/pip*
-rwxr-xr-x 1 root root 292 May 16  2018 /usr/bin/pip*
-rwxr-xr-x 1 root root 292 May 16  2018 /usr/bin/pip2*
-rwxr-xr-x 1 root root 293 May 16  2018 /usr/bin/pip3*
んー。。
Djangoインストール
vagrant@django-serv:~$ pip3 install Django==2.1
Collecting Django==2.1
  Downloading https://files.pythonhosted.org/packages/51/1a/e0ac7886c7123a03814178d7517dc822af0fe51a72e1a6bff26153103322/Django-2.1-py3-none-any.whl (7.3MB)
    100% |████████████████████████████████| 512kB 1.8MB/s
Installing collected packages: pytz, Django
Successfully installed Django-2.1 pytz-2019.1
vagrant@django-serv:~$ python3
Python 3.6.7 (default, Oct 22 2018, 11:32:17)
[GCC 8.2.0] on linux
Type "help", "copyright", "credits" or "license" for more information.
>>> import django
>>> print(django.get_version())
2.1
>>>
vagrant@django-serv:~$ python -m django --version
/usr/bin/python: No module named django
vagrant@django-serv:~$ python3 -m django --version
2.1
vagrant@django-serv:~$ python --version
Python 2.7.15rc1
vagrant@django-serv:~$
あぁ、python2が入ったばかりに面倒なことに。
あとでやりなおそう。
アプリケーションの作成
プロジェクト作成
vagrant@django-serv:~src$ which django-admin
vagrant@django-serv:~src$
ん?
vagrant@django-serv:~src$ django-admin startproject mysite

Command 'django-admin' not found, but can be installed with:

apt install python-django-common
Please ask your administrator.

vagrant@django-serv:~src$
あれ?
探してみたら、こんなところにあった
vagrant@django-serv:~src$ ls ~/.local/bin/
__pycache__  django-admin  django-admin.py
vagrant@django-serv:~src$ export PATH=$PATH:~/.local/bin
vagrant@django-serv:~src$ which django-admin
/home/vagrant/.local/bin/django-admin
vagrant@django-serv:~src$
vagrant@django-serv:~src$ django-admin startproject mysite
vagrant@django-serv:~src$ ls
mysite
vagrant@django-serv:~src$
vagrant@django-serv:~/src$ tree
.
└── mysite
    ├── manage.py
    └── mysite
        ├── __init__.py
        ├── settings.py
        ├── urls.py
        └── wsgi.py

2 directories, 5 files
vagrant@django-serv:~/src$
開発用サーバ起動
プロジェクトに移動してpython3 manage.py runserverを実行
vagrant@django-serv:~/src$ cd mysite/
vagrant@django-serv:~/src/mysite$ python3 manage.py runserver
Performing system checks...

System check identified no issues (0 silenced).

You have 15 unapplied migration(s). Your project may not work properly until you apply the migrations for app(s): admin, auth, contenttypes, sessions.
Run 'python manage.py migrate' to apply them.

May 21, 2019 - 11:58:13
Django version 2.1, using settings 'mysite.settings'
Starting development server at http://127.0.0.1:8000/
Quit the server with CONTROL-C.
これでlocalhostからのみアクセスするサーバが起動する。
VMで動かしてるのでlocalhostからcurlするしかないね。
もう一つシェルを起動し、curlすると以下のようにアクセスログが表示される。
May 21, 2019 - 11:58:13
Django version 2.1, using settings 'mysite.settings'
Starting development server at http://127.0.0.1:8000/
Quit the server with CONTROL-C.
[21/May/2019 12:00:38] "GET / HTTP/1.1" 200 16348
これだとわかりづらいので、一度Ctrl-cで停止し、0.0.0.0でlistenするように起動しなおす。
vagrant@django-serv:~/src/mysite$ python3 manage.py runserver 0:8000
Performing system checks...

System check identified no issues (0 silenced).

You have 15 unapplied migration(s). Your project may not work properly until you apply the migrations for app(s): admin, auth, contenttypes, sessions.
Run 'python manage.py migrate' to apply them.

May 21, 2019 - 12:03:09
Django version 2.1, using settings 'mysite.settings'
Starting development server at http://0:8000/
Quit the server with CONTROL-C.
ブラウザからアクセス。
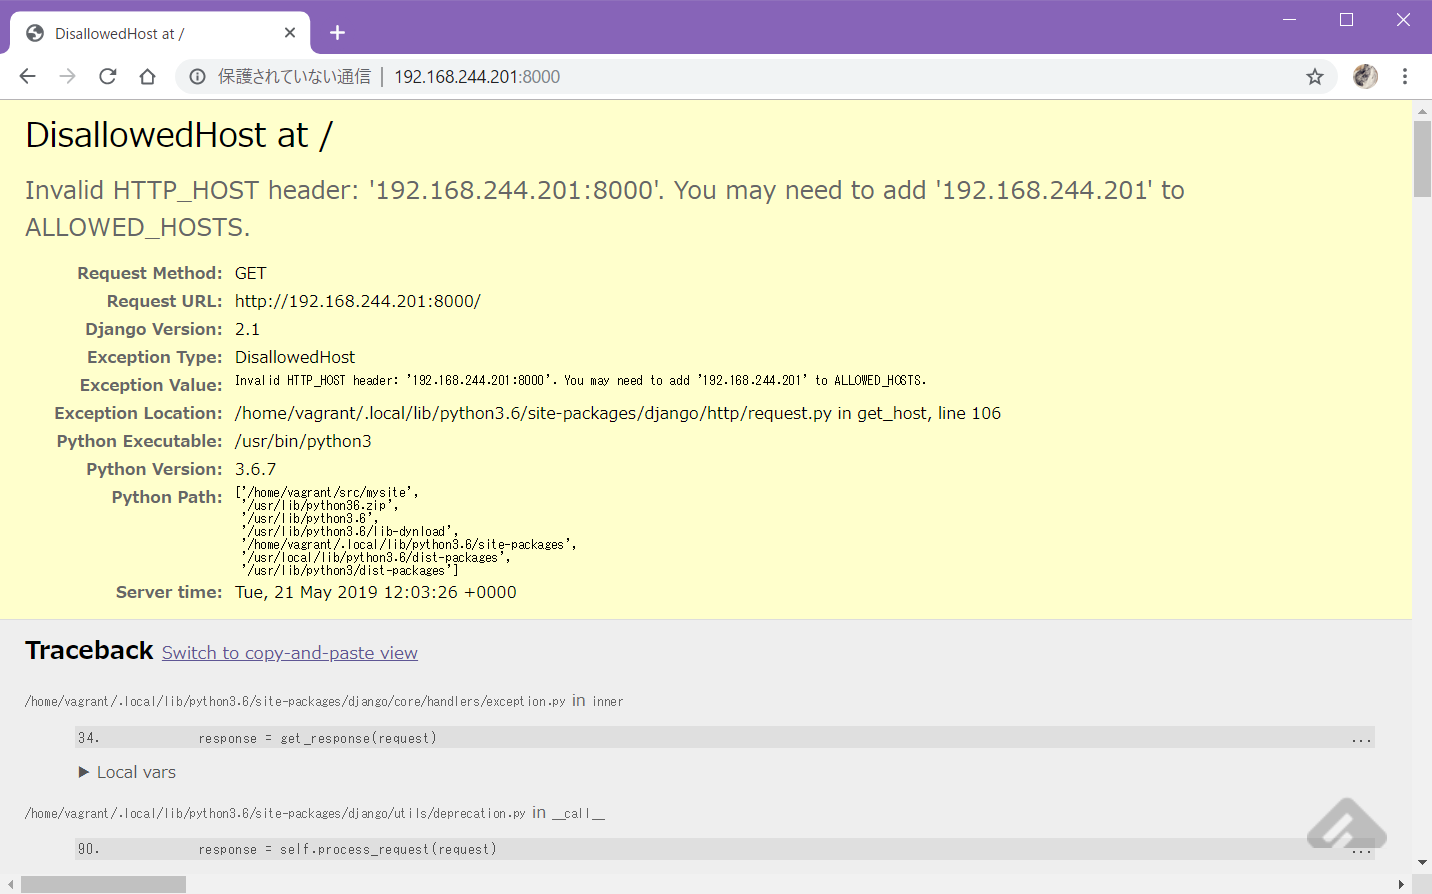
ぐぬぬ…
デフォルトでアクセス制限してるのか。
Django version 2.1, using settings 'mysite.settings'
Starting development server at http://0:8000/
Quit the server with CONTROL-C.
Invalid HTTP_HOST header: '192.168.244.201:8000'. You may need to add '192.168.244.201' to ALLOWED_HOSTS.
Bad Request: /
[21/May/2019 12:03:26] "GET / HTTP/1.1" 400 59658
Invalid HTTP_HOST header: '192.168.244.201:8000'. You may need to add '192.168.244.201' to ALLOWED_HOSTS.
Bad Request: /favicon.ico
[21/May/2019 12:03:27] "GET /favicon.ico HTTP/1.1" 400 59574
--- mysite/settings.py.org      2019-05-21 11:53:40.067134637 +0000
+++ mysite/settings.py  2019-05-21 12:12:18.185914636 +0000
@@ -27,3 +27,3 @@

-ALLOWED_HOSTS = []
+ALLOWED_HOSTS = ["192.168.244.201"]
ALLOWED_HOSTSの内容はローカルのVMなどで外部アクセス制御を考えなくてもよければ["*"]でも良い。
Django 1.5以降ではALLOWED_HOSTSの設定が必要 – ymyzk’s blog
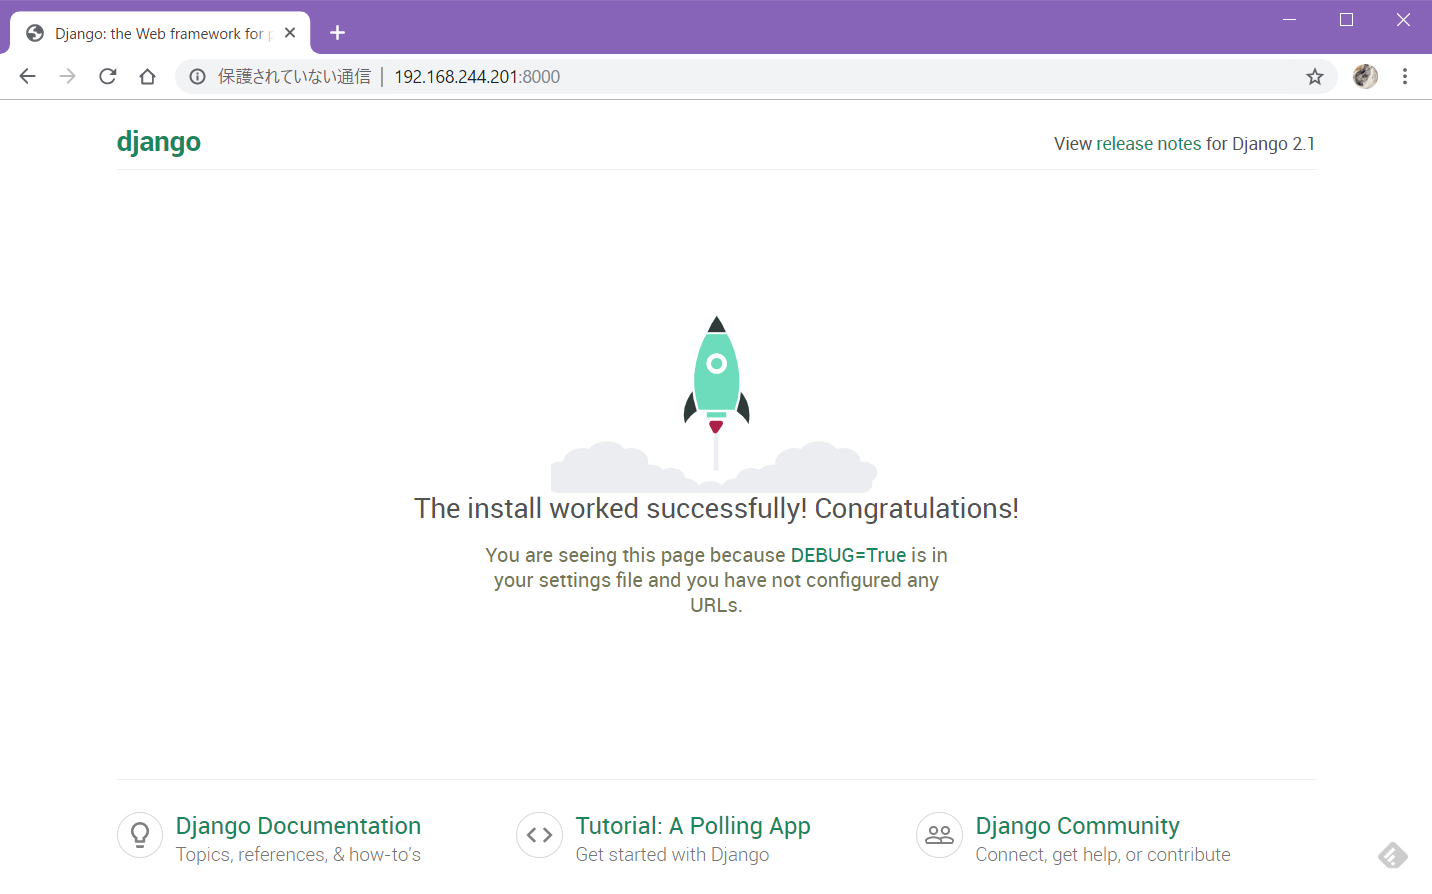
気を取り直して再実行。
vagrant@django-serv:~/src/mysite$ python3 manage.py runserver 0:8000
Performing system checks...

System check identified no issues (0 silenced).

You have 15 unapplied migration(s). Your project may not work properly until you apply the migrations for app(s): admin, auth, contenttypes, sessions.
Run 'python manage.py migrate' to apply them.

May 21, 2019 - 12:12:48
Django version 2.1, using settings 'mysite.settings'
Starting development server at http://0:8000/
Quit the server with CONTROL-C.
[21/May/2019 12:12:49] "GET / HTTP/1.1" 200 16348
[21/May/2019 12:12:49] "GET /static/admin/css/fonts.css HTTP/1.1" 200 423
[21/May/2019 12:12:49] "GET /static/admin/fonts/Roboto-Bold-webfont.woff HTTP/1.1" 200 82564
[21/May/2019 12:12:49] "GET /static/admin/fonts/Roboto-Regular-webfont.woff HTTP/1.1" 200 80304
[21/May/2019 12:12:49] "GET /static/admin/fonts/Roboto-Light-webfont.woff HTTP/1.1" 200 81348
アプリケーションの作成
チュートリアル通り、「Pollsアプリ」を作成する。
実行するコマンドはpython3 manage.py startapp polls
mysite配下じゃないのねーと思いつつ、チュートリアル通りmanage.pyと同じ階層に作成
vagrant@django-serv:~/src/mysite$ ls
db.sqlite3  manage.py  mysite
vagrant@django-serv:~/src/mysite$ ls mysite/
__init__.py  __pycache__  settings.py  settings.py.org  urls.py  wsgi.py
vagrant@django-serv:~/src/mysite$ python3 manage.py startapp polls
vagrant@django-serv:~/src/mysite$ ls
db.sqlite3  manage.py  mysite  polls
vagrant@django-serv:~/src/mysite$ tree
.
├── db.sqlite3
├── manage.py
├── mysite
│   ├── __init__.py
│   ├── __pycache__
│   │   ├── __init__.cpython-36.pyc
│   │   ├── settings.cpython-36.pyc
│   │   ├── urls.cpython-36.pyc
│   │   └── wsgi.cpython-36.pyc
│   ├── settings.py
│   ├── settings.py.org
│   ├── urls.py
│   └── wsgi.py
└── polls
    ├── __init__.py
    ├── admin.py
    ├── apps.py
    ├── migrations
    │   └── __init__.py
    ├── models.py
    ├── tests.py
    └── views.py

4 directories, 18 files
vagrant@django-serv:~/src/mysite$
Viewの作成
polls/views.pyを開く。中身は何もないので、チュートリアル通りのコードを実装する。
テンプレートとして作成された最初の状態とimportが変わってるので注意。
from django.http import HttpResponse

# Create your views here.
def index(request):
    return HttpResponse("カレーは粉でできてるのでカロリーゼロ. You're at the polls index.")
URLconfの作成
唐突にURLconfという単語が出てきたけど、作成したViewを呼び出すためのURLを設定するもの、という感じかな?
polls/urls.pyを作成する。
from django.urls import path

from . import views

urlpatterns = [
    path('', views.index, name='index'),
]
path()の引数については、チュートリアル1ページ目の末尾に載っているのでご参考。
次にmysite/urls.pyに、上記polls/urls.pyの内容を取り込む。
--- mysite/urls.py.org  2019-05-21 11:53:40.067134637 +0000
+++ mysite/urls.py      2019-05-21 12:26:52.223474670 +0000
@@ -16,5 +16,6 @@
 from django.contrib import admin
-from django.urls import path
+from django.urls import include, path

 urlpatterns = [
+    path('polls/', include('polls.urls')),
     path('admin/', admin.site.urls),
これで再度python3 manage.py runserver 0:8000でテスト実行し、ブラウザで/polls/へアクセス。
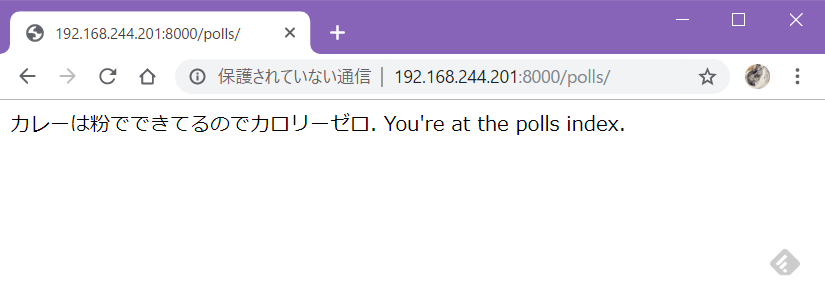
うごいた(・∀・)