Firebase(特にHosting)ではStagingとProduction環境を比較的簡単に切り分けられます。が、レベルによって難易度いろいろなので私の知ってる範囲でまとめてみます。
難易度レベル
私の勝手な印象では環境の切り分け難易度は以下の感じに分類できるかなと。
- 静的コンテツが1プロジェクトに1サイトのみ
- 静的コンテツが1プロジェクトに2サイト以上
- 動的コンテンツ(というかFirestoreやstorage等、コンフィグ情報の利用)を含む場合
1はすごい簡単。firebase use コマンドでプロジェクトを切り替えてdeployするだけ。
2は1に比べたらちょっとやること増えるけど慣れれば1と変わらない。
3は環境によるけど、.envやらwebpackやらの使い方に慣れてれば、一度設定してしまえば簡単(たぶん)。
では、それぞれ見てみましょう(3. は別記事にします)。
前提
いちおう前提としては下記な感じ。
- Staging用のプロジェクトが1つ。Production用のプロジェクトが1つ存在していて各種機能が使える状態。
- firebase-tools(CLI)のインストールが完了していて、動く状態
静的コンテンツがプロジェクトに1つの場合
では作業を始めます。ひとまず作業場所を作ります。
mkdir switch-test
cd switch-test
とりあえずstagingサイトにdeployしてみる
とりあえずstagingサイトに簡単なHTMLをdeployしてみます。
firebase initで初期化処理を行います。
Hostingを選択。
firebase init

? Which Firebase CLI features do you want to set up for this folder? Press Space
 to select features, then Enter to confirm your choices.
 ◯ Database: Deploy Firebase Realtime Database Rules
 ◯ Firestore: Deploy rules and create indexes for Firestore
 ◯ Functions: Configure and deploy Cloud Functions
❯◉ Hosting: Configure and deploy Firebase Hosting sites
 ◯ Storage: Deploy Cloud Storage security rules
 ◯ Emulators: Set up local emulators for Firebase features
存在しているプロジェクトを選びます。新規でも別に問題ないです。
? Please select an option: (Use arrow keys)
❯ Use an existing project
  Create a new project
  Add Firebase to an existing Google Cloud Platform project
  Don't set up a default project
staging用に作ったプロジェクトを選択します。
? Select a default Firebase project for this directory:
  production-55bb0(production)
❯ staging-28e5b (staging)
とりあえずpublicを利用。
? What do you want to use as your public directory? (public)
SPAでなくても、どちらでも。とりあえずそのまま。
? Configure as a single-page app (rewrite all urls to /index.html)? (y/N)
デフォルトのままでもいいのですが、区別がつくようpublic内のindex.htmlをいちおう編集しておきます。
<!DOCTYPE html>
<html lang="ja">
  <head>
    <meta charset="utf-8">
    <title>test</title>
  </head>
  <body>
    <p>test site content.</p>
  </body>
</html>
編集が終わったらdeployしてみます。
firebase deploy
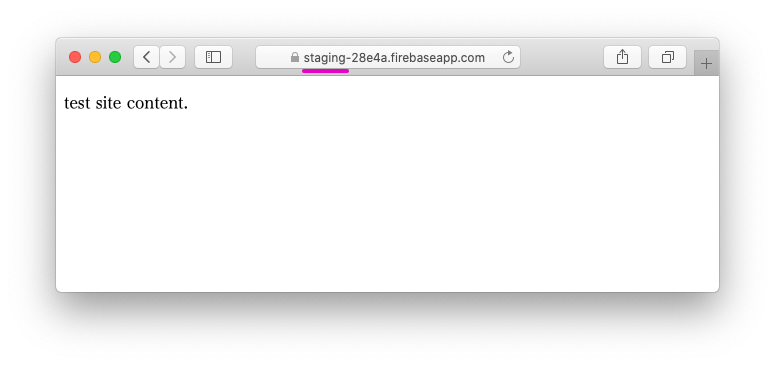
deployが完了するとURLが出力されるので見てみます。
✔  Deploy complete!

Project Console: https://console.firebase.google.com/project/staging-28e5b/overview
Hosting URL: https://staging-28e5b.firebaseapp.com
どうやら無事にdeployされたようです。
Currentプロジェクトと変更
なぜstagingプロジェクトにdeployされたかというと、それがcurrentプロジェクト(現在のプロジェクト)に設定されているからです。firebase initのウィザードに答えるなかでそう設定されたのです。
下記のコマンドを打ってみます。
firebase list
すると、ログイン中のアカウントで作成しているプロジェクトのリストが表示され、currentプロジェクトが表示されます。
┌───────────────────┬───────────────────────┬─────────────┐
│ Name              │ Project ID / Instance │ Permissions │
├───────────────────┼───────────────────────┼─────────────┤
│ production        │ production-55bb0      │ Owner       │
├───────────────────┼───────────────────────┼─────────────┤
│ staging (current) │ staging-28e5b         │ Owner       │
├───────────────────┼───────────────────────┼─────────────┤
│ test1             │ test1-xxxxx           │ Owner       │
├───────────────────┼───────────────────────┼─────────────┤
│ test2             │ test2-xxxxx           │ Owner       │
└───────────────────┴───────────────────────┴─────────────┘
currentプロジェクトは下記のコマンドで変更可能です。
firebase use production-55ba9
そして、firebase listを再度実行してみると、productionがcurrentになっていると思います。
┌──────────────────────┬───────────────────────┬─────────────┐
│ Name                 │ Project ID / Instance │ Permissions │
├──────────────────────┼───────────────────────┼─────────────┤
│ production (current) │ production-55bb0      │ Owner       │
├──────────────────────┼───────────────────────┼─────────────┤
│ staging              │ staging-28e5b         │ Owner       │
├──────────────────────┼───────────────────────┼─────────────┤
│ test1                │ test1-xxxxx           │ Owner       │
└──────────────────────┴───────────────────────┴─────────────┘
では、この状態でdeployしてみましょう。
firebase deply
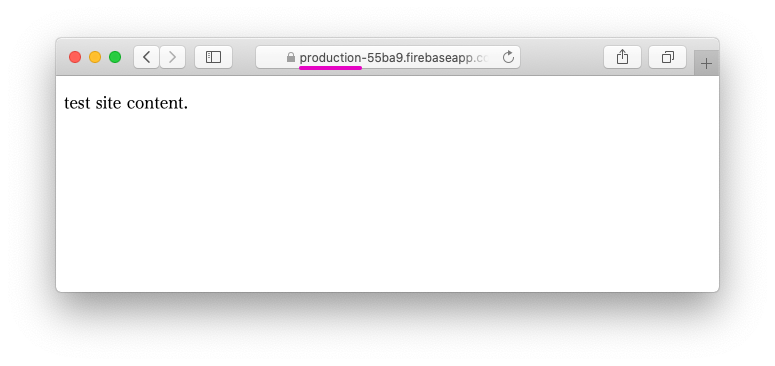
表示されるURLを確認してみるとproductionにdeployされたのがわかるかと思います。
✔  Deploy complete!

Project Console: https://console.firebase.google.com/project/production-55ba9/overview
Hosting URL: https://production-55ba9.firebaseapp.com
表示を確認してみるとstagingと同じコンテンツがproductionに展開されています。
基本的な切り替えの方法がわかりました。
Firebaseでのdeploy先の切り替えはCurrentプロジェクトの切り替えが基本となります(なるようです)。
プロジェクトに静的サイトが2つ以上ある場合
実運用を想定した場合、user用サイト、admin用等、サイトが分かれることは多いと思います。ここでは、静的サイトを切り替える場合を見てみます。切り替えにはtargetを利用します。
まず、Currentをstagingに戻す
作業を始める前にCurrentプロジェクトをstating用に戻しておきましょう。
firebase use staging-28e5b
firebase listでCurrentを確認してみましょう。
サイトを追加する
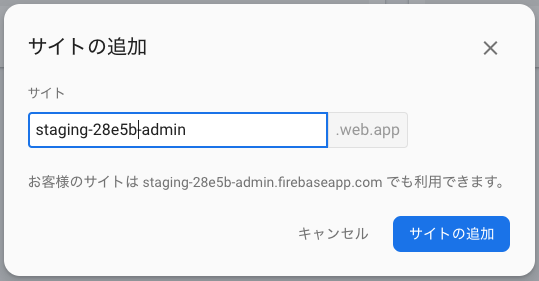
サイトはHostingページの下の方に「別のサイトを追加」のボタンがあり、それをクリックします。
既にあるサイトをユーザー向けのサイト、追加するサイトをAdmin向けのサイトという想定で、追加のサイト名は[既存サイト名]-adminという名前にしてみます。
targetを設定する
サイトをうまく管理するためにサイト名に別名(target名)を設定し、targetを利用して制御することでプロジェクト間の差異を吸収してCurrentプロジェクトの切り替えによるスムーズなdeployを実現します。
targetの設定は、
firebase target:apply hosting [target_name] [site_name]
という書式で行います。
ユーザー向けサイトにuser-site、Admin向けサイトにadmin-siteとtarget名をつけます。
firebase target:apply hosting user-site staging-28e5b
firebase target:apply hosting admin-site staging-28e5b-admin
コマンドを実行すると.firebasercにtargetが追加されます。
{
  "projects": {
    "default": "staging-28e5b"
  },
  "targets": {
    "staging-28e5b": {
      "hosting": {
        "user-site": [
          "staging-28e5b"
        ],
        "admin-site": [
          "staging-28e5b-admin"
        ]
      }
    }
  }
}
firebase.jsonを設定する
復数サイトに対応するためには"hosting"を配列として記述します。
{
  "hosting": [
    {
      "target": "user-site",
      "public": "public",
      "ignore": [
        "firebase.json",
        "**/.*",
        "**/node_modules/**"
      ]
    },
    {
      "target": "admin-site",
      "public": "public-admin",
      "ignore": [
        "firebase.json",
        "**/.*",
        "**/node_modules/**"
      ]
    }
  ]
}
admin-site用のコンテンツを準備する
上記firebase.jsonではadmin-site用にpublic-adminを設定しているので、それを作成してコンテンツを準備します。
mkdir public-admin
cd public-admin
touch index.html
<!DOCTYPE html>
<html lang="ja">
  <head>
    <meta charset="utf-8">
    <title>test</title>
  </head>
  <body>
    <p>test admin site content.</p>
  </body>
</html>
(stagingに)deployする
準備ができたらdeployします。
firebase deploy
deployが完了したら各URLのコンテンツを確認してみてください。
✔  Deploy complete!

Project Console: https://console.firebase.google.com/project/staging-28e5b/overview
Hosting URL: https://staging-28e5b.firebaseapp.com
Hosting URL: https://staging-28e5b-admin.firebaseapp.com
Currentをproductionに変更する
ではstagingのコンテンツをproductionに展開してみます。
まずはCurrentプロジェクトをproduction用にします。
firebase use production-55ba9
直ぐにでもdeployしたいところですが、このままではうまくできません。productionにおいてもtargetの設定をします。
target名を設定する
stagingと同様にユーザー用サイトにuser-site、Admin用にadmin-siteというtarget名を付けます。
site名が異なっても、target名を同じにすることで、firebase.json等で設定した内容がプロジェクトが変わっても利用できます。
firebase target:apply hosting user-site production-55ba9
firebase target:apply hosting admin-site production-55ba9-admin
上記コマンドを実行しても下記のようになります。
targetはプロジェクト毎に設定され、Currentプロジェクトが変更すると自動的にマッピングも変更されるようです。便利。
{
  "projects": {
    "default": "staging-28e5b"
  },
  "targets": {
    "staging-28e5b": {
      "hosting": {
        "user-site": [
          "staging-28e5b"
        ],
        "admin-site": [
          "staging-28e5b-admin"
        ]
      }
    },
    "production-55ba9": {
      "hosting": {
        "user-site": [
          "production-55ba9"
        ],
        "admin-site": [
          "production-55ba9-admin"
        ]
      }
    }
  }
}
(Productioに)deployする
firebase deploy
✔  Deploy complete!

Project Console: https://console.firebase.google.com/project/production-55ba9/overview
Hosting URL: https://production-55ba9.firebaseapp.com
Hosting URL: https://production-55ba9-admin.firebaseapp.com
うまくpuroduction用サイトにデプロイできたみたいです。
scriptsを設定する
package.jsonのscriptsにコマンドを設定することで少し操作を楽にしてみます。
まず、package.jsonを生成します。
npm init -f
scriptsを下記のようにします。
{
  "name": "switch-test",
  "version": "1.0.0",
  "description": "",
  "main": "index.js",
  "scripts": {
    "deploy-stg": "firebase use staging-28e5b; firebase deploy",
    "deploy-pro": "firebase use production-55ba9; firebase deploy; firebase use staging-28e5b"
  },
  "keywords": [],
  "author": "",
  "license": "ISC"
}
実行してみます。まずstagingへのデプロイ。
npm run deploy-stg
productionへのデプロイ。
npm run deploy-pro
無事にdeployできてるか確認してみてください。
動的サイト(プロジェクトのConfig情報を含むサイト)の場合
これまでの方法だとコンテンツは切り替わりますが、コンテンツ内でfirestore等を利用してた場合、接続先は切り替わらず、productionサイトでもDBの情報はstagingのままか、また、その逆という感じになります。Currentプロジェクトが変わったらConfig情報も変わってほしいです。
が、その方法は利用してる言語やフレームワークにある程度依存し、「これ」という汎用的な方法は現状ないようです。
ただ、firebase-toolsをライブラリとしてコマンドやプログラムから利用することでCoinfig情報を取得できるので利用してみます。
長くなるので、別記事にしました。そちらを見て下さい。


